
Introduction
Thank you for purchasing the GIAS Lift Top End Table with Charging Station. This manual provides important information regarding the assembly, operation, maintenance, and safety of your new end table. Please read it thoroughly before assembly and use, and retain it for future reference.
Safety Information
Always use caution when lifting the tabletop and keep fingers away from the hinge area. Ensure the table is stable and properly anchored before use, especially when using the lift-top feature or moving the table with the wheels. Do not overload the table or shelves. Keep liquids away from the charging station to prevent electrical hazards. This product is intended for adult use.
Package Contents
Before beginning assembly, verify that all parts listed below are present and undamaged. If any parts are missing or damaged, please contact customer support.
- Tabletop with Lift Mechanism
- Side Panels (2)
- Bottom Shelf
- Middle Shelf
- Metal Frame Supports
- Charging Station Unit (pre-installed or separate)
- Wheels (4) or Floor Mats (4)
- Assembly Hardware (screws, cam locks, dowels, etc.)
- Assembly Tool (e.g., Allen wrench)

Image: Exploded view illustrating the main components of the table, including the MDF board, metal frame, and internal structure.
Assembly Instructions
Follow these steps carefully for proper assembly. It is recommended to assemble the table on a soft, clean surface to prevent scratches.
- Step 1: Attach Frame Supports. Secure the metal frame supports to the side panels using the provided screws. Ensure all connections are tight.
- Step 2: Install Shelves. Slide and secure the bottom and middle shelves into the designated slots on the frame. Use cam locks or screws as indicated in the hardware kit.
- Step 3: Mount Wheels or Floor Mats. Decide whether to use the wheels for mobility or the stationary floor mats. Attach them to the bottom of the table frame. If using wheels, ensure they are securely fastened.
- Step 4: Attach Tabletop with Lift Mechanism. Carefully align the pre-assembled lift-top mechanism with the top of the table frame. Secure it using the provided screws. Ensure the mechanism operates smoothly before proceeding.
- Step 5: Connect Charging Station. If the charging station is not pre-installed, carefully insert it into the designated cutout on the tabletop or side panel and secure it. Route the power cord as needed.
- Step 6: Final Check. Verify all screws are tightened and the table is stable. Test the lift-top mechanism for smooth operation.

Image: Detailed view of key features, including the spring hinge for the lift-top, the integrated charging station, an omni-directional wheel, and the cable management slot.
Operating Instructions
Lift-Top Function
To raise the tabletop, gently pull it upwards and forwards. The spring-assisted mechanism will help lift it into position. To lower, gently push the tabletop down and back until it rests flush with the table frame. Always ensure hands and fingers are clear of the mechanism during operation.

Image: Close-up of the spring hinge mechanism that facilitates the lift-top function.
Charging Station
The integrated charging station features 2 standard AC outlets (120V/12A) and 2 USB ports (5V/2A). Plug the table's 6.5ft power cord into a wall outlet. You can then connect your devices to the AC outlets or USB ports for charging. Use the cable management slot to keep cords tidy.
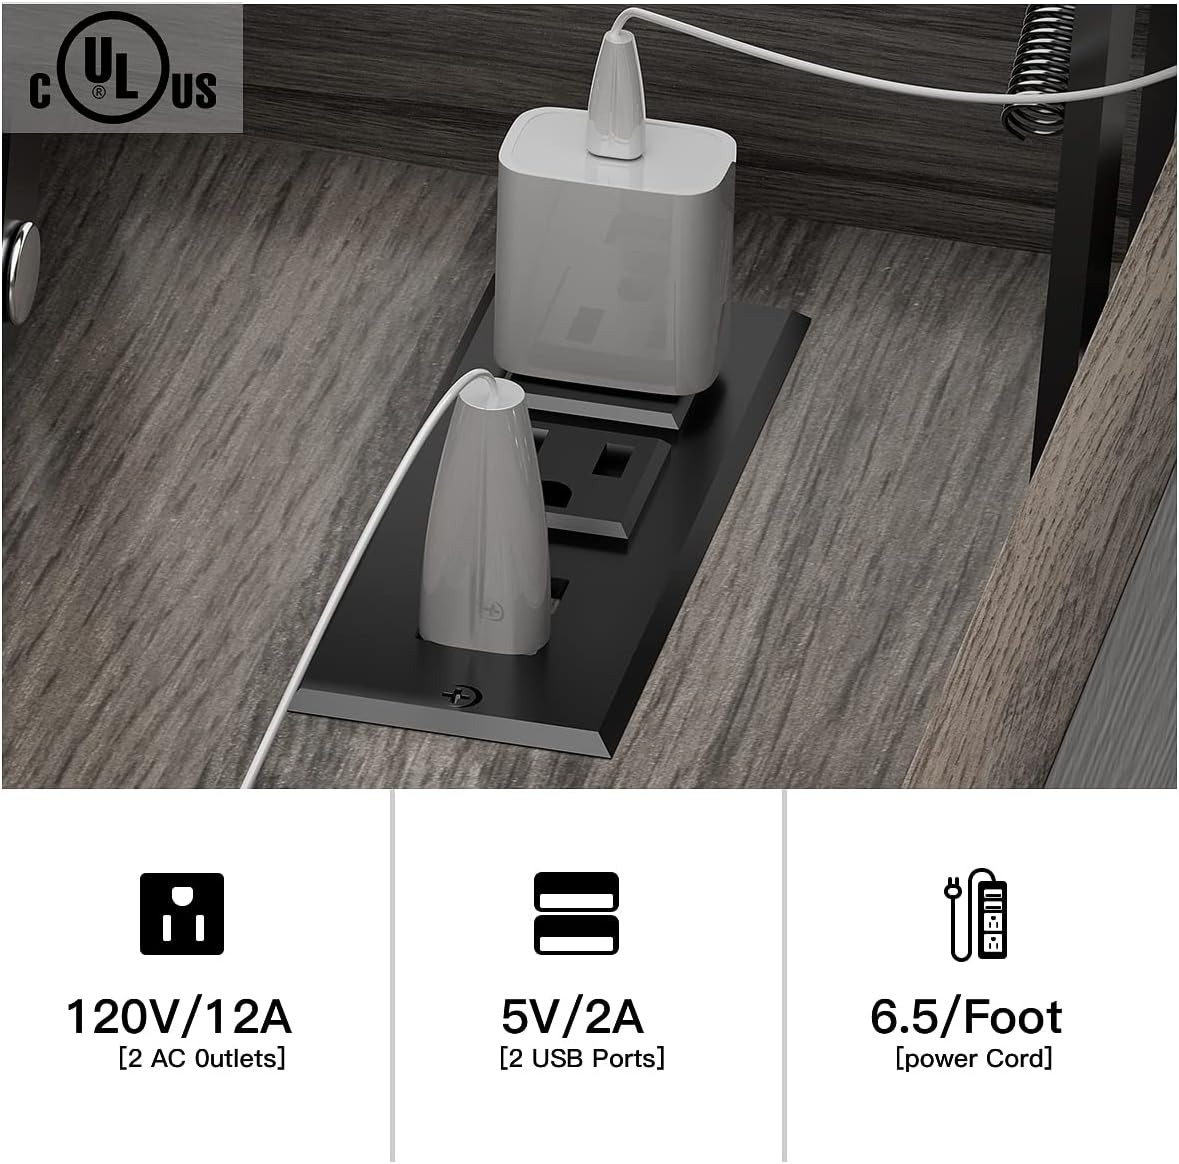
Image: Detailed view of the charging station, showing two AC power outlets and two USB charging ports.
Storage
The table includes two open shelves for books, decorations, or other items. A hidden storage compartment is located beneath the lift-top surface, ideal for personal belongings or items you wish to keep out of sight.
Mobility (Optional Wheels)
If you chose to install the omni-directional wheels, the table can be easily moved. For stability, ensure the wheels are locked if the table is to remain stationary for extended periods, especially when the lift-top is in use.

Image: Close-up of an omni-directional wheel, highlighting its design for easy movement.
Maintenance
- Cleaning: Wipe surfaces with a soft, damp cloth. Avoid harsh chemicals or abrasive cleaners, which can damage the finish.
- Spills: Clean up spills immediately to prevent staining or damage to the wood and electrical components.
- Hardware: Periodically check and tighten all screws and fasteners to ensure the table remains stable.
- Electrical: Ensure the power cord is not pinched or damaged. Do not attempt to repair the charging station yourself.
Troubleshooting
| Problem | Possible Cause | Solution |
|---|---|---|
| Table is wobbly after assembly. | Loose fasteners. Uneven floor. | Check and tighten all screws. Adjust floor mats or use shims if necessary. |
| Lift-top mechanism is stiff or not moving smoothly. | Mechanism not properly aligned or lubricated. Obstruction. | Ensure no objects are obstructing the mechanism. Apply a small amount of silicone lubricant to moving parts if needed. |
| Charging station not working. | Power cord unplugged. Outlet issue. Device issue. | Ensure the table's power cord is securely plugged into a working wall outlet. Test the outlet with another device. Try a different device with the charging station. |
| Parts missing during assembly. | Packaging error. | Review the package contents list. Contact customer support with the specific missing part number. |
Specifications
| Feature | Detail |
|---|---|
| Brand | GIAS |
| Model Number | B09VSG7GX1 |
| Dimensions (D x W x H) | 11.8"D x 23.6"W x 25.5"H |
| Material | MDF Board, Stainless Steel Frame |
| Color | Dark Grey |
| Charging Station | 2 AC Outlets (120V/12A), 2 USB Ports (5V/2A) |
| Power Cord Length | 6.5 ft |
| Storage | 2-tier open shelves, hidden compartment |
| Mobility | Optional Omni-directional Wheels or Floor Mats |

Image: Dimensional diagram of the end table, indicating height, width, and depth measurements.
Warranty and Support
GIAS products are manufactured with quality and care. For warranty information, product support, or to order replacement parts, please contact our customer service department. Please have your model number (B09VSG7GX1) and purchase date available when contacting support.
Contact Information: Please refer to your purchase documentation or the retailer's website for the most current customer support contact details.