Mcage 11028
Mcage Extra Large Heavy Duty Stacker Breeding Breeder Parrot Aviary Bird Rolling Cage User Manual
Model: 11028 | Brand: Mcage
Introduction
Thank you for choosing the Mcage Extra Large Heavy Duty Stacker Breeding Breeder Parrot Aviary Bird Rolling Cage. This manual provides detailed instructions for assembly, operation, maintenance, and troubleshooting to ensure the safe and effective use of your new bird cage. Please read this manual thoroughly before assembly and retain it for future reference.
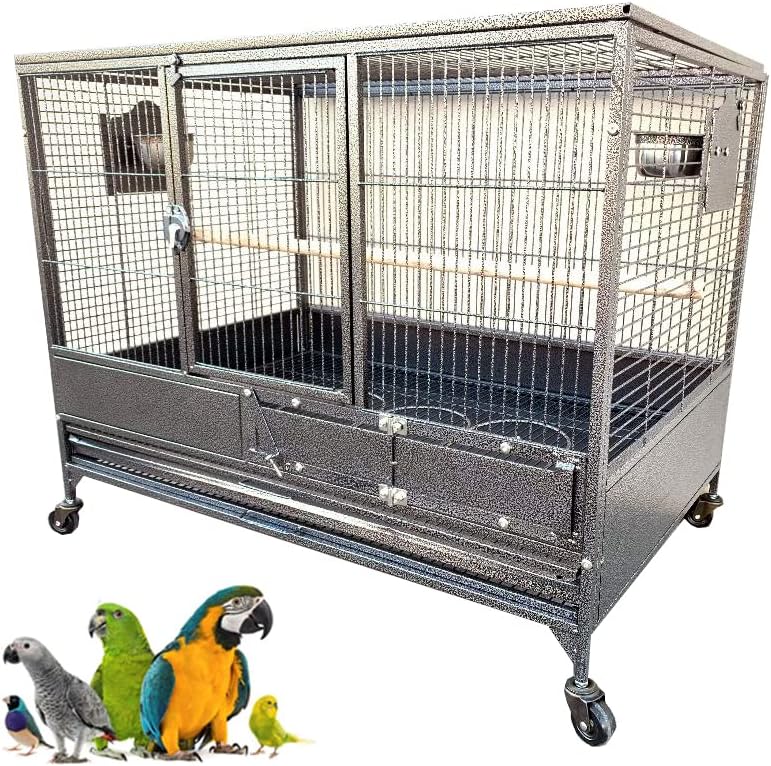
Image: The Mcage Extra Large Heavy Duty Stacker Breeding Breeder Parrot Aviary Bird Rolling Cage, showcasing its spacious design and black vein finish.
Safety Information
Always prioritize safety during assembly and use. Failure to follow these instructions may result in injury or damage to the product.
- Keep all small parts and packaging materials away from children and pets during assembly.
- Ensure all connections are securely fastened before placing birds inside the cage.
- Regularly inspect the cage for any loose parts, sharp edges, or damage. Repair or replace damaged components immediately.
- Do not overload the cage with excessive weight or birds beyond its recommended capacity.
- Use caution when moving the cage, especially on uneven surfaces, to prevent tipping.
Package Contents
Before beginning assembly, please verify that all components listed below are present and undamaged. If any parts are missing or damaged, please contact Mcage customer support.
- Cage Panels (Front, Back, Sides, Top, Bottom)
- Base Frame with Caster Sockets
- 4 x Heavy Duty Rolling Casters
- 1 x Slide-Out Metal Tray
- 1 x Slide-Out Metal Grate
- 3 x Large (6") Stainless Steel Feeder Cups (for main feeder door)
- 2 x (4") Stainless Steel Feeder Cups (for side doors)
- 1 x Wooden Stand Perch
- Assembly Hardware (various screws, nuts, washers, bolts, latches)
Assembly Instructions
Assembly is best performed by two people. Clear a spacious area and lay out all components before starting. Refer to the diagrams for visual guidance.
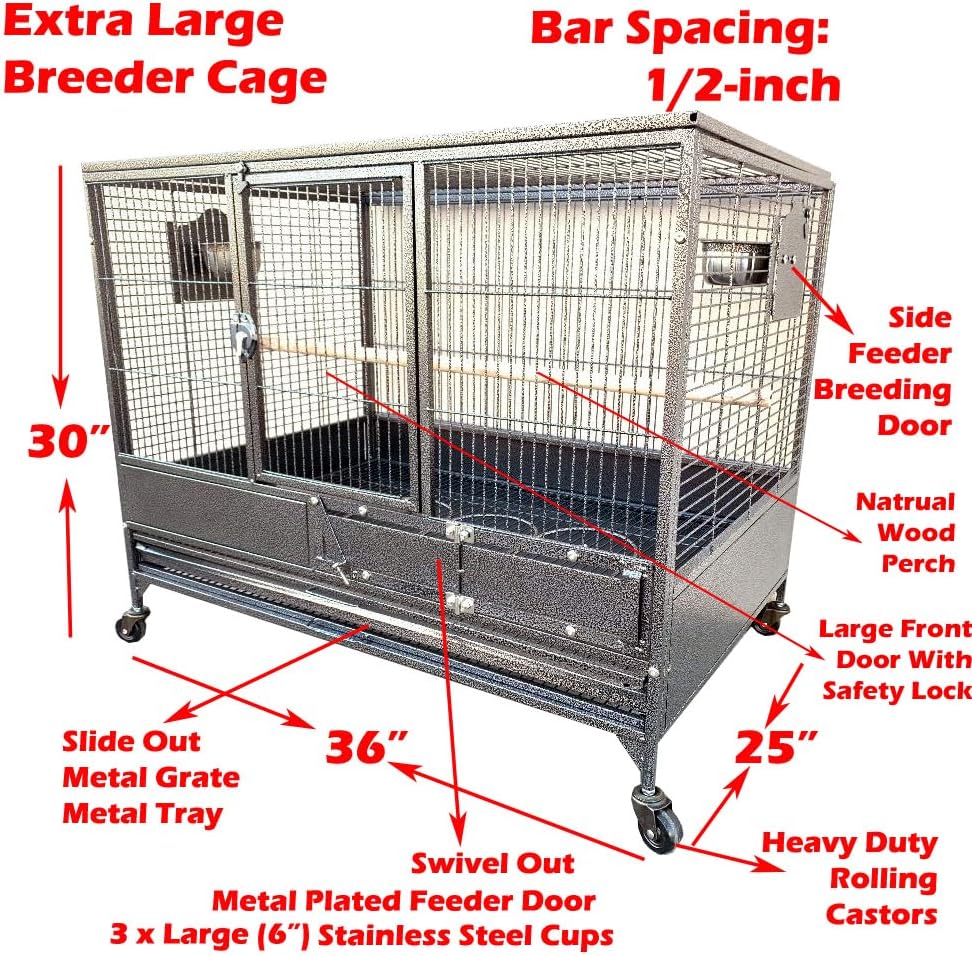
Image: An annotated diagram highlighting key features and dimensions (36"W x 24"D x 30"H) of the cage, including bar spacing, feeder doors, and rolling casters.
- Attach Casters: Insert the four heavy-duty rolling casters into the designated sockets on the bottom of the cage base frame. Ensure they are firmly seated.
- Assemble Base: Connect the bottom cage panel to the base frame using the provided hardware. Ensure the slide-out tray and grate channels are correctly aligned.
- Attach Side Panels: Secure the two side panels to the assembled base using the appropriate screws and nuts. Pay attention to the orientation of the side breeding/feeding doors.
- Attach Back Panel: Connect the back panel to the side panels and base, ensuring all alignment tabs and holes match.
- Attach Front Panel: Secure the front panel, which includes the large main swing-out door and the swivel-out metal plated feeder door, to the side panels and base. Ensure the safety locks align correctly.
- Install Internal Components: Slide the metal grate into the upper channel and the metal tray into the lower channel at the bottom of the cage.
- Install Perch: Place the wooden stand perch through the designated holes in the cage bars.
- Install Feeder Cups: Insert the three large (6") stainless steel feeder cups into the swivel-out feeder door. Insert the two smaller (4") stainless steel feeder cups into the side feeder doors.
- Final Check: Double-check all screws, nuts, and latches to ensure they are tightened and secure. Ensure all doors open and close smoothly and that safety locks engage properly.

Image: A close-up view of a secure connection point on the cage, showing the nuts and bolts used for assembly.
Operating Instructions
Main Swing Out Door
The large main door provides easy access for placing or removing birds, and for larger cleaning tasks. It features a safety lock to prevent accidental escapes. To open, disengage the safety lock and swing the door outwards. To close, swing the door shut and engage the safety lock.
Swivel Out Metal Plated Feeder Door
This convenient door allows you to access the three large stainless steel feeder cups without opening the main cage door, minimizing the risk of birds escaping. Simply swivel the door outwards to access the cups for refilling food and water. Swivel it back into place to secure.

Image: The swivel-out metal plated feeder door, shown with three large stainless steel cups for food and water.
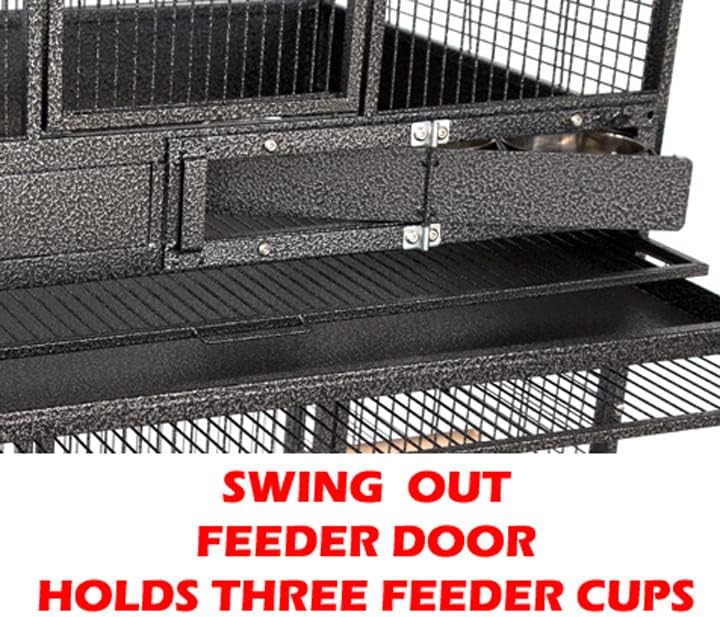
Image: The swing-out feeder door in an open position, demonstrating how it holds the three feeder cups.
Side Breeding/Feeding Doors
The cage includes two side doors that can be used for breeding box attachment or as additional feeding access points for smaller cups. To open, unlatch and swing the door outwards. To close, swing the door shut and secure the latch.
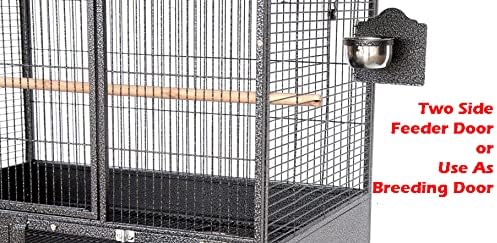
Image: A close-up of one of the two side doors, which can function as a feeder door or a breeding door.
Rolling Casters
The heavy-duty rolling casters allow for easy movement of the cage for cleaning or repositioning. Ensure the cage is empty of birds and heavy accessories before moving. Lock the casters when the cage is in its desired position to prevent accidental movement.
Maintenance
Cleaning
Regular cleaning is essential for maintaining a healthy environment for your birds. The slide-out metal tray and grate make cleaning convenient.

Image: The pull-out metal tray and grate, designed for easy removal and cleaning of bird waste.
- Daily: Remove and clean the slide-out metal tray and grate. Wipe down feeder cups and perches.
- Weekly: Thoroughly clean all cage surfaces with a bird-safe disinfectant. Rinse thoroughly and allow to dry completely before returning birds.
- Monthly/As Needed: Deep clean all accessories, including toys and perches.
Regular Checks
Periodically inspect the cage for any signs of wear or damage. Check for:
- Loose screws or connections.
- Bent or broken bars.
- Rust or corrosion.
- Damage to feeder doors or locks.
- Caster functionality.
Address any issues promptly to ensure the safety and integrity of the cage.
Troubleshooting
This section addresses common issues you might encounter with your Mcage bird cage.
| Problem | Possible Cause | Solution |
|---|---|---|
| Cage feels wobbly after assembly. | Screws or connections are not fully tightened. | Go back through all assembly steps and ensure every screw and nut is securely tightened. |
| Feeder doors do not swivel smoothly. | Debris in the swivel mechanism or misalignment. | Clean the swivel area. Check for any bent parts that might obstruct movement. |
| Casters are difficult to roll or break off. | Overloading the cage, uneven surfaces, or manufacturing defect. | Avoid moving the cage with excessive weight. Ensure casters are locked when stationary. If casters break, contact customer support for replacement parts. |
| Bent cage bars or panels upon arrival. | Shipping damage. | Do not attempt to force bent parts. Contact Mcage customer support immediately for assistance or replacement parts. |
Specifications
| Feature | Detail |
|---|---|
| Model Number | 11028 |
| Dimensions (L x W x H) | 36" x 24" x 30" inches |
| Bar Spacing | 1/2-inch (approx. 1.27 cm) |
| Bar Thickness | 4mm |
| Material | Wrought Iron (Black Vein finish) |
| Feeder Cups | 3 x Large (6") Stainless Steel, 2 x (4") Stainless Steel |
| Mobility | 4 x Heavy Duty Rolling Casters |
| Recommended Use | Breeding and housing small to large size parrots and birds (e.g., African Greys, Cockatoos, Amazons) |
Warranty and Support
Mcage is committed to providing high-quality products. While specific warranty details may vary, we encourage you to contact our customer support team for any questions, concerns, or assistance with your product.
For support, please visit the official Mcage store or contact the seller directly through your purchase platform. Please have your model number (11028) and ASIN (B09VS3GZVD) ready when contacting support.
Ask a question about this manual
Ask about setup, troubleshooting, compatibility, parts, safety, or missing instructions. Manuals+ will review the question and use this page’s manual context to help answer it.