1. Introduction
This manual provides essential information for the safe and efficient operation of your Cayin MT-45MK2 Plus Vacuum Tube Integrated Amplifier. Please read this manual thoroughly before using the amplifier to ensure proper setup, operation, and maintenance. Retain this manual for future reference.
2. Safety Instructions
To prevent fire, electric shock, and injury, always observe the following safety precautions:
- Power Source: Connect the amplifier only to an AC power source of the specified voltage. Ensure the power cord is securely plugged into both the amplifier and the wall outlet.
- Ventilation: Ensure adequate ventilation around the amplifier. Do not block ventilation openings. Maintain at least 10 cm (4 inches) of clear space around the unit.
- Heat: The vacuum tubes generate significant heat during operation. Do not touch the tubes when the amplifier is on or immediately after turning it off. Allow sufficient cooling time.
- Moisture: Do not expose the amplifier to rain, moisture, or excessive humidity. Do not place objects filled with liquids, such as vases, on the amplifier.
- Foreign Objects: Do not insert any objects into the amplifier's openings. If a foreign object enters the unit, disconnect the power cord immediately and contact qualified service personnel.
- Servicing: Do not attempt to service the amplifier yourself. Refer all servicing to qualified service personnel. Opening the amplifier may expose you to dangerous voltages.
- Cleaning: Disconnect the power cord before cleaning. Use a soft, dry cloth. Do not use liquid or aerosol cleaners.
- Tube Handling: When handling vacuum tubes, ensure the amplifier is off and cooled down. Handle tubes carefully by their base to avoid damage.
3. Product Overview
The Cayin MT-45MK2 Plus is a high-fidelity vacuum tube integrated amplifier designed to deliver rich, warm, and detailed audio. It features a push-pull AB1 design and offers switchable operation between EL34 and KT88 vacuum tubes, allowing for different sonic characteristics and power outputs.

Figure 3.1: Front view of the Cayin MT-45MK2 Plus amplifier. This image displays the front panel with the power switch, volume knob, input selector, and the visible vacuum tubes glowing during operation. The design emphasizes the classic aesthetic of tube amplifiers.
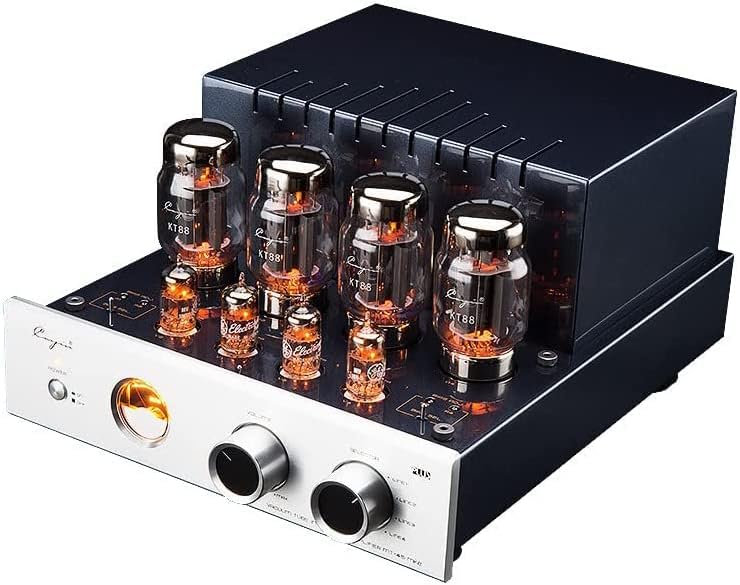
Figure 3.2: Angled view of the Cayin MT-45MK2 Plus amplifier. This perspective highlights the arrangement of the vacuum tubes on top of the chassis, providing a clear view of the KT88 tubes and the overall robust construction of the unit.

Figure 3.3: Overview of the MT-45MK2 Plus, highlighting its design. This image showcases the amplifier's sleek front panel and the prominent vacuum tubes, emphasizing its aesthetic appeal as a high-quality audio component.
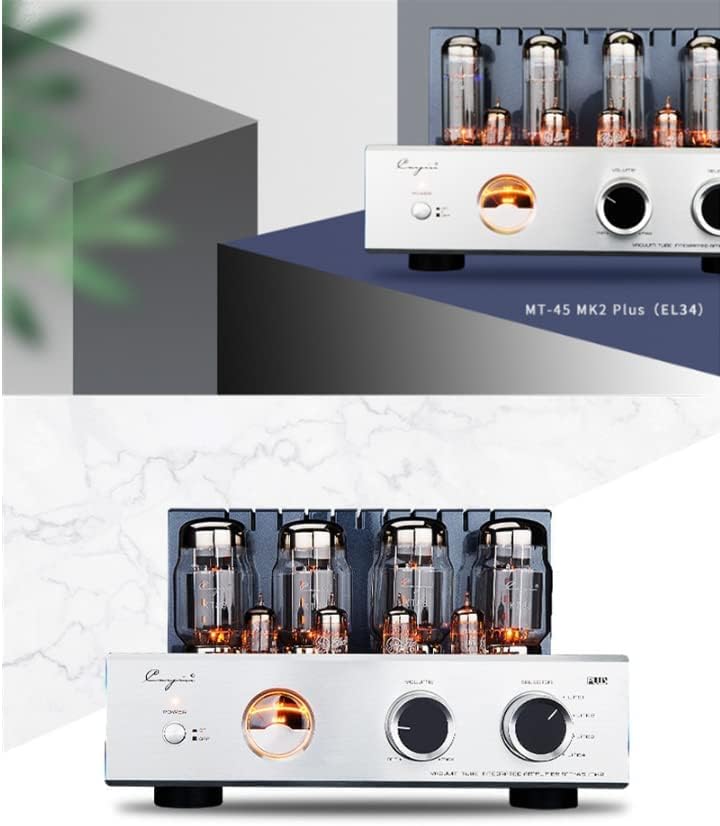
Figure 3.4: The MT-45MK2 Plus configured with EL34 tubes. This image illustrates the amplifier's versatility, showing it with a different set of power tubes (EL34) compared to the KT88, which can be swapped by the user.
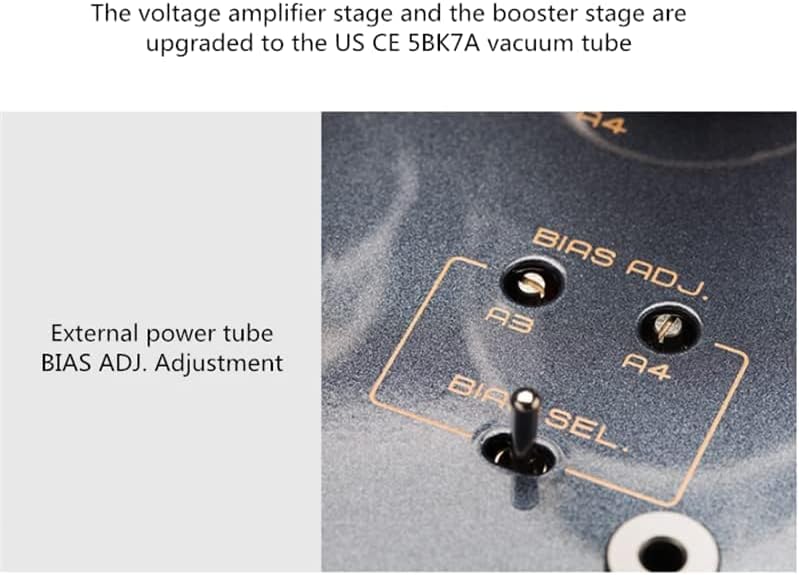
Figure 3.5: Detail of the external power tube BIAS ADJ. adjustment. This close-up shows the bias adjustment points (A3, A4) and the bias selection switch, which are crucial for fine-tuning the amplifier's performance after tube replacement.
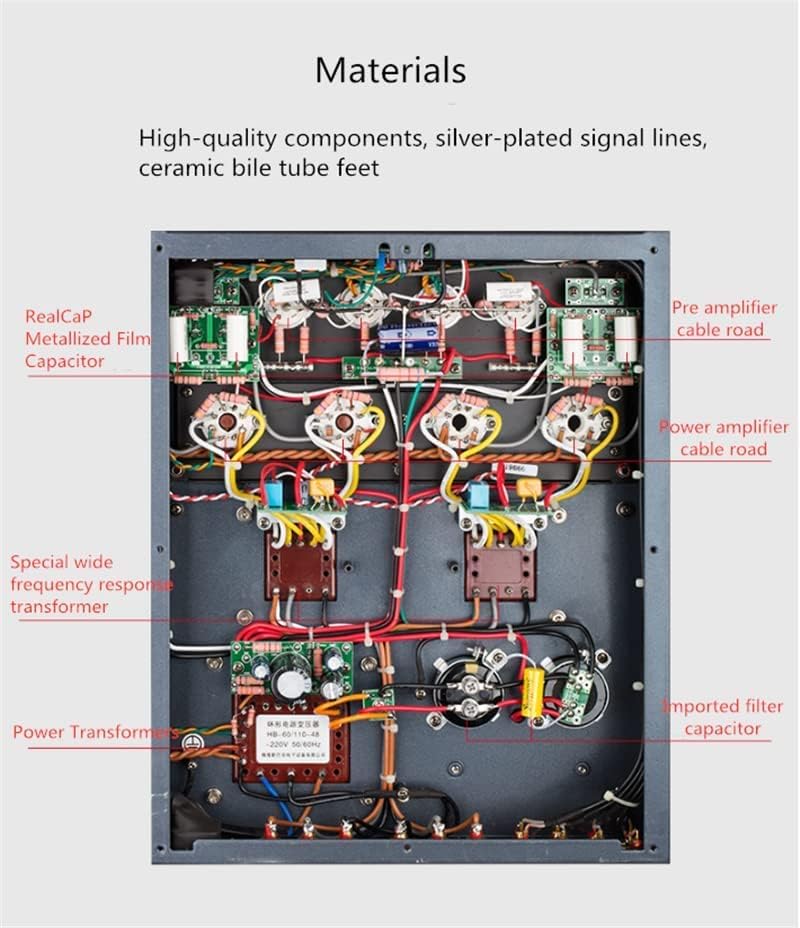
Figure 3.6: Internal view of the amplifier, showcasing its high-quality components. This image provides a detailed look at the internal wiring, capacitors (RealCap Metallized Film Capacitor, imported filter capacitor), transformers (Special wide frequency response transformer, Power Transformer), and the overall meticulous construction, including pre-amplifier and power amplifier sections.
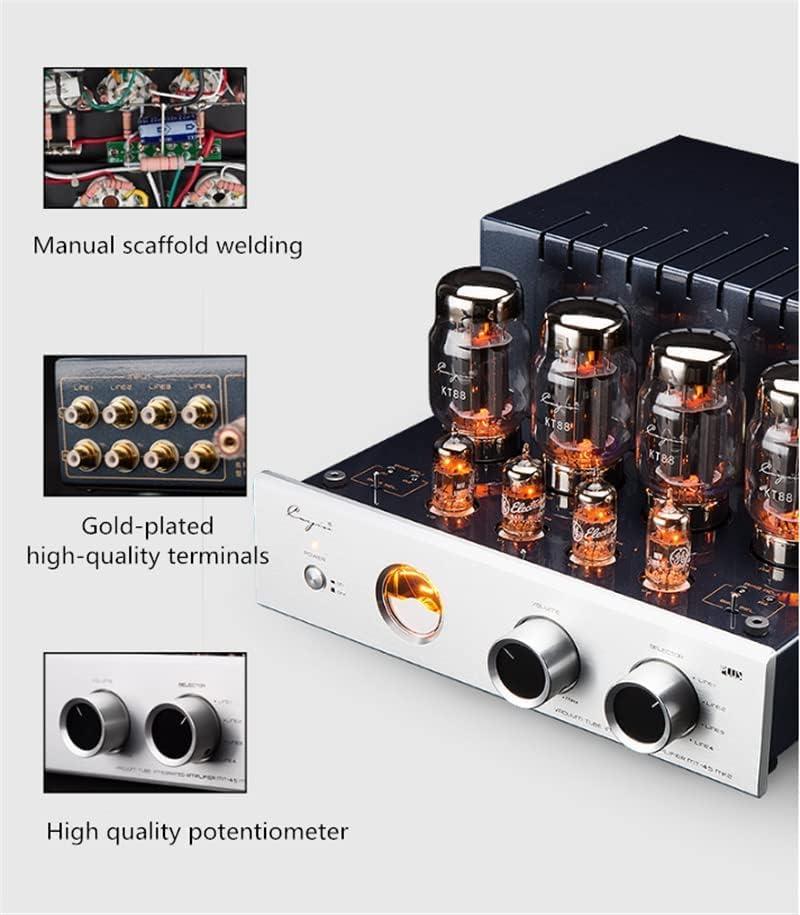
Figure 3.7: Details of the amplifier's construction, including gold-plated high-quality terminals and a high-quality potentiometer. The image also shows a small inset of the manual scaffold welding, indicating the craftsmanship involved in the amplifier's assembly.

Figure 3.8: The amplifier's aesthetic design, featuring a CNC precision polished aluminum alloy brushed panel. This image emphasizes the premium finish and build quality of the front panel, contributing to the amplifier's sophisticated appearance.

Figure 3.9: Dimensional drawing of the Cayin MT-45MK2 Plus amplifier. This diagram provides the length (295mm), width (395mm), and height (185mm) of the unit, useful for planning placement.
4. Setup
4.1 Unpacking
- Carefully remove the amplifier and all accessories from the packaging.
- Retain the original packaging for future transport or storage.
- Inspect the amplifier for any signs of damage. If damage is found, contact your dealer immediately.
4.2 Tube Installation (if tubes are not pre-installed)
The MT-45MK2 Plus uses 5BK7A (pre-amp) and either KT88 or EL34 (power) vacuum tubes. Ensure the amplifier is powered off and unplugged before handling tubes.
- Identify the correct sockets for each tube type. Sockets are typically labeled.
- Carefully align the pins of each tube with the corresponding holes in the socket. The pins are keyed to ensure correct orientation.
- Gently push the tube straight down into the socket until it is firmly seated. Do not force the tube.
- Repeat for all tubes.
4.3 Connecting Speakers
The amplifier provides 4Ω and 8Ω speaker output terminals. Connect your speakers to the terminals that match your speaker's impedance for optimal performance.
- Ensure the amplifier is off and unplugged.
- Connect the positive (+) terminal of your left speaker to the corresponding positive terminal (4Ω or 8Ω) for the left channel on the amplifier.
- Connect the negative (-) terminal of your left speaker to the corresponding negative terminal for the left channel on the amplifier.
- Repeat for the right speaker.
- Ensure all connections are secure to prevent short circuits.
4.4 Connecting Audio Sources
The amplifier features multiple line-level inputs (LINE1, LINE2, LINE3, LINE4). Use high-quality RCA cables for connections.
- Connect your audio source (e.g., CD player, streamer, phono pre-amp) to one of the available LINE inputs on the rear panel.
- Ensure the left and right channels are connected correctly.
4.5 Power Connection
- Before plugging in the power cord, ensure all other connections (speakers, sources) are made and secure.
- Plug the supplied power cord into the AC inlet on the amplifier's rear panel, then into a suitable wall outlet.
5. Operating Instructions
5.1 Powering On/Off
- To turn on: Press the "POWER" switch on the front panel. The tubes will begin to glow, and the amplifier will undergo a warm-up period (typically 30-60 seconds) before sound is produced.
- To turn off: Press the "POWER" switch again. The tubes will gradually dim.
- Note: Avoid frequent power cycling. Allow at least 30 seconds between turning off and on to prolong tube life.
5.2 Input Selection
Use the "SELECTOR" knob on the front panel to choose the desired audio input (LINE1, LINE2, LINE3, LINE4) corresponding to your connected source.
5.3 Volume Control
Rotate the "VOLUME" knob clockwise to increase the output volume and counter-clockwise to decrease it. Start with the volume at a low level before playing audio.
5.4 TR/UL (Triode/Ultralinear) Switch
The MT-45MK2 Plus features a switch to select between Triode (TR) and Ultralinear (UL) operating modes. This switch changes the amplifier's output characteristics:
- Triode Mode (TR): Offers a warmer, more liquid sound with slightly less power output. Ideal for critical listening and sensitive speakers.
- Ultralinear Mode (UL): Provides higher power output and a more dynamic, impactful sound. Suitable for less sensitive speakers or when more headroom is desired.
- Note: It is recommended to switch modes only when the amplifier is playing at a low volume or muted to avoid potential pops or clicks.
5.5 Bias Adjustment (for advanced users/tube replacement)
The amplifier allows for external bias adjustment for the power tubes (KT88/EL34). This is typically done when replacing power tubes to ensure optimal performance and tube longevity. Refer to Figure 3.5 for the location of the bias adjustment points.
- Tools Required: A small flat-head screwdriver and a multimeter with a DC millivolt (mV) range.
- Procedure:
- Ensure the amplifier has warmed up for at least 15-20 minutes.
- Set the bias selection switch to the tube you wish to adjust (e.g., A3 or A4).
- Connect the multimeter's positive probe to the corresponding bias test point and the negative probe to the ground point (usually a nearby chassis screw).
- Adjust the bias screw until the multimeter reads the recommended bias voltage (refer to the specific tube's datasheet or manufacturer's recommendation, typically around 40-50mV for KT88/EL34 in push-pull AB1).
- Repeat for all power tubes.
- Caution: Incorrect bias adjustment can damage tubes or the amplifier. If unsure, consult a qualified technician.
6. Maintenance
6.1 Cleaning
- Always unplug the amplifier before cleaning.
- Use a soft, dry, lint-free cloth to wipe the chassis and tubes.
- For stubborn marks, slightly dampen the cloth with water. Avoid harsh chemicals or abrasive cleaners.
- Regularly dust the ventilation openings to ensure proper airflow.
6.2 Tube Replacement
Vacuum tubes have a finite lifespan and will eventually need replacement. Signs of worn tubes include reduced sound quality, hum, noise, or uneven channel output.
- Ensure the amplifier is off and completely cooled down.
- Gently grasp the tube by its base and pull it straight out of the socket. Avoid twisting.
- Insert the new tube, aligning the pins with the socket holes, and gently push it in.
- After replacing power tubes (KT88/EL34), it is crucial to adjust the bias as described in Section 5.5.
- It is recommended to replace power tubes in matched sets for optimal performance.
7. Troubleshooting
| Problem | Possible Cause | Solution |
|---|---|---|
| No sound |
|
|
| Distorted or weak sound |
|
|
| Hum or noise |
|
|
8. Specifications
The following specifications are for the Cayin MT-45MK2 Plus amplifier:
8.1 KT88 Tube Configuration
| Parameter | Value |
|---|---|
| Rated Output Power (RMS Triode) | 20W + 20W |
| Rated Output Power (RMS Super Linear) | 40W + 40W |
| Frequency Response | 8Hz - 50kHz (-3dB) |
| Harmonic Distortion | ≤1% (1kHz) |
| Signal to Noise Ratio | 90dB |
| Input Sensitivity | 300mV |
| Vacuum Tubes Used | 5BK7A x 4, KT88 x 4 |
| Input Impedance | 100kΩ |
| Output Impedance | 4Ω, 8Ω |
| Whole Machine Power Consumption | 280W |
| Dimensions (L×W×H) | 295 × 395 × 185 mm |
| Net Weight | 16.5 kg |
8.2 EL34 Tube Configuration
| Parameter | Value |
|---|---|
| Rated Output Power (RMS Triode) | 18W + 18W |
| Rated Output Power (RMS Super Linear) | 35W + 35W |
| Frequency Response | 8Hz - 50kHz (-3dB) |
| Harmonic Distortion | ≤1% (1kHz) |
| Signal to Noise Ratio | 90dB |
| Input Sensitivity | 300mV |
| Vacuum Tubes Used | 5BK7A x 4, EL34 x 4 |
| Input Impedance | 100kΩ |
| Output Impedance | 4Ω, 8Ω |
| Whole Machine Power Consumption | 280W |
| Dimensions (L×W×H) | 295 × 395 × 185 mm |
| Net Weight | 16.5 kg |
8.3 General Specifications
- Brand: AVPLAY
- Manufacturer: AVPLAY
- Part Number: MT-45MK2 Plus
- Product Dimensions: 29.5 x 29.5 x 18.5 cm
- Product Weight: 20.5 kg (Shipping weight, net weight 16.5kg)
- ASIN: B09VGW52BB
- Date First Available: March 14, 2022
9. Warranty and Support
Specific warranty terms and conditions for the Cayin MT-45MK2 Plus amplifier are typically provided by the retailer or manufacturer at the time of purchase. Please refer to your purchase documentation for detailed warranty information.
For technical support, service, or inquiries regarding replacement parts (such as vacuum tubes), please contact your authorized dealer or the manufacturer, AVPLAY. Keep your purchase receipt as proof of purchase for any warranty claims.
Note: Unauthorized modifications or repairs will void the warranty.