1. Introduction
Thank you for choosing the Generic Electric Snow Thrower. This manual provides essential information for the safe and efficient operation, assembly, and maintenance of your snow thrower. Please read this manual thoroughly before using the product and retain it for future reference.
This electric snow thrower is designed to efficiently clear snow from driveways, walkways, sidewalks, patios, and decks. It features a powerful 15Amp motor, an 18-inch clearing width, and a 180-degree rotating chute for directional snow discharge.
2. Important Safety Information
WARNING: Failure to follow these safety instructions can result in serious injury or death.
- Always keep hands and other body parts away from the auger while operating.
- Never operate the snow thrower without the safety button engaged.
- Always unplug the snow thrower before performing any maintenance or cleaning.
- Wear appropriate protective clothing, including eye protection, gloves, and non-slip footwear.
- Ensure the area to be cleared is free of debris, rocks, or other objects that could be thrown by the auger.
- Do not operate the snow thrower on steep slopes.
- Keep children and pets away from the operating area.
- Do not operate in wet conditions or rain.
3. Product Overview
The Generic Electric Snow Thrower is designed for efficient and convenient snow removal. Key components include the main housing, auger, chute, handle assembly, and wheels.
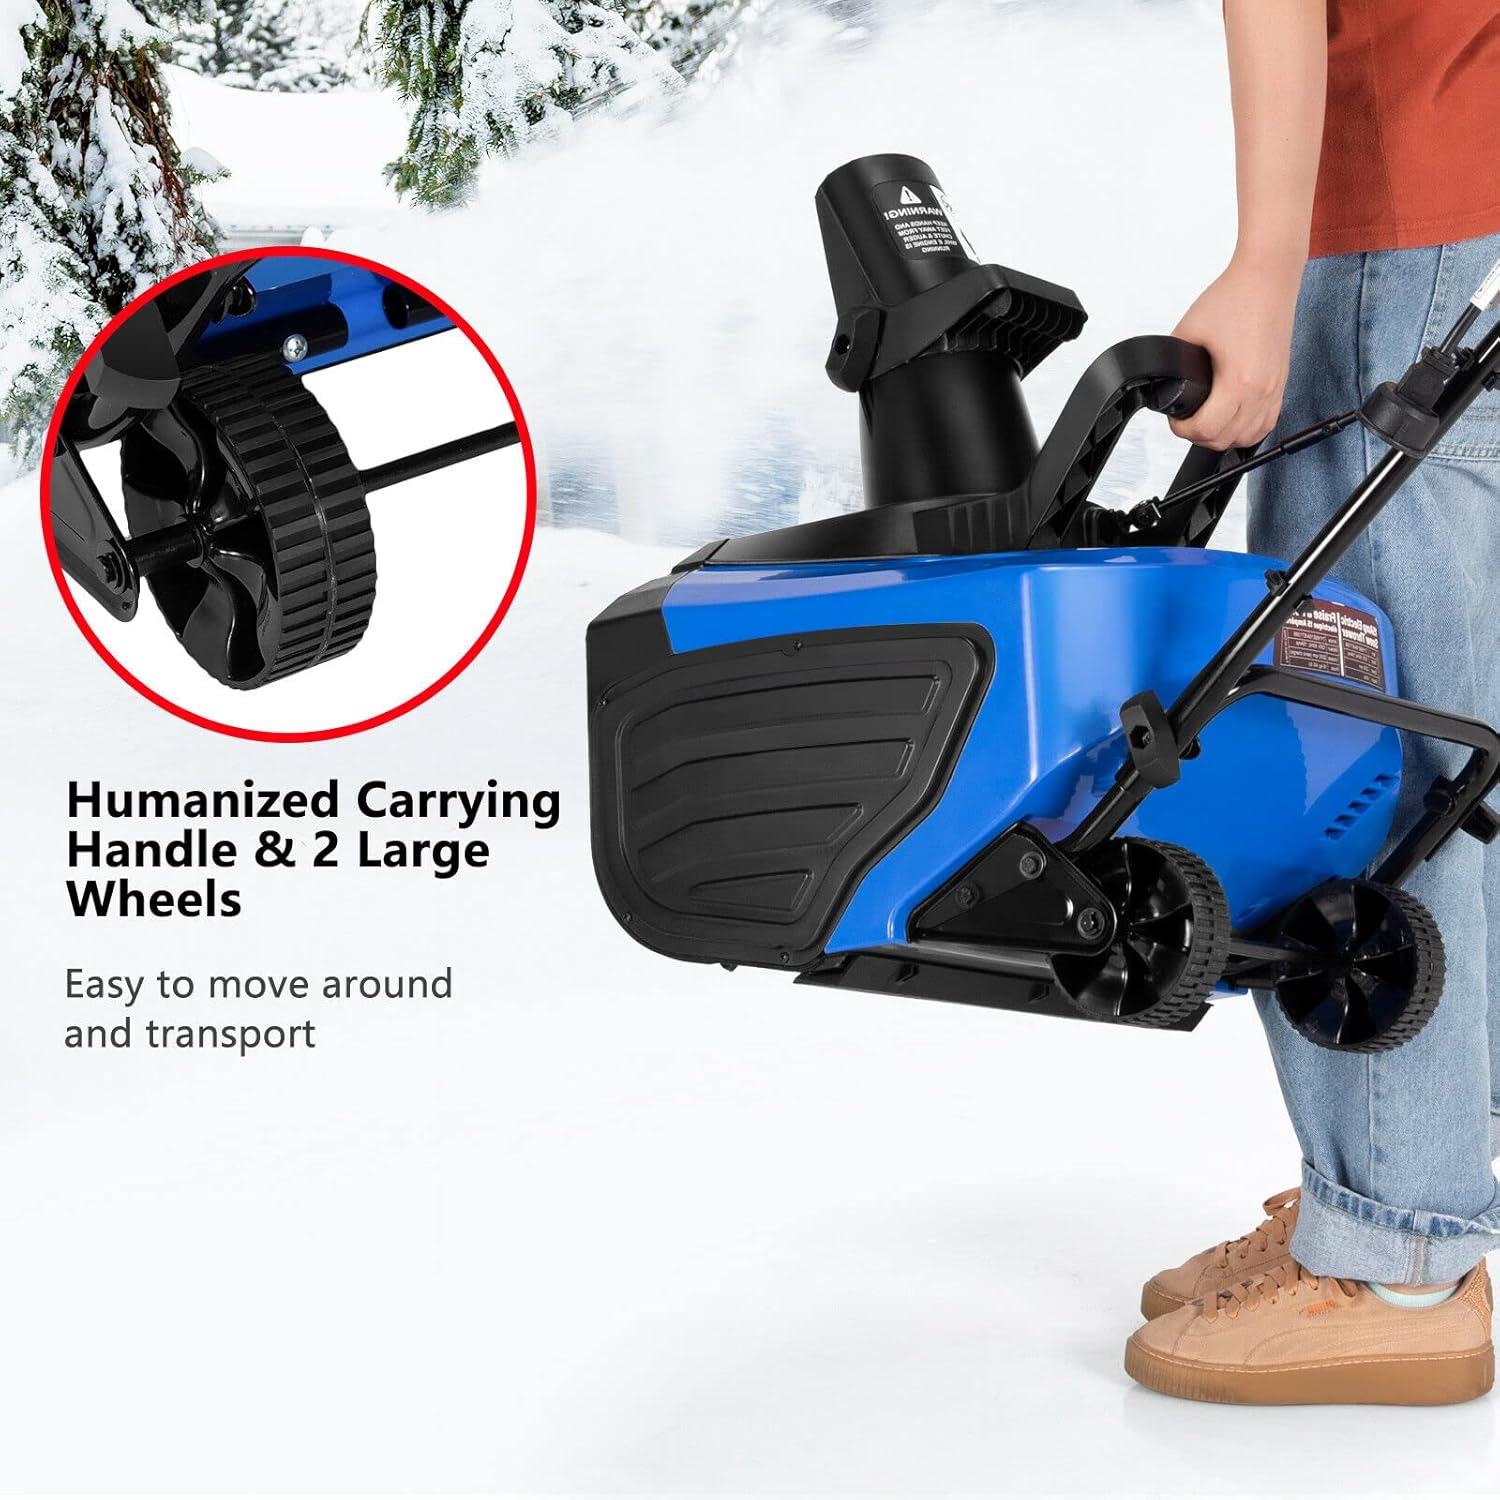
Figure 3.1: Overall view of the Electric Snow Thrower. This image displays the complete snow thrower unit, highlighting its compact design and main components.
Key Features:
- Powerful Motor: 120V, 60Hz, 15Amp motor for effective snow clearing.
- Efficient Clearing: Removes snow up to 18 inches wide and 10 inches deep per pass.
- Adjustable Chute: 180-degree rotating chute to direct snow up to 26 feet.
- Durable Construction: High-quality PP material and sturdy steel plates for long-lasting use.
- Easy Mobility: Equipped with two 5-inch wheels and a built-in handle for easy movement and transport.
- Safety Features: Includes a safety switch for secure operation.
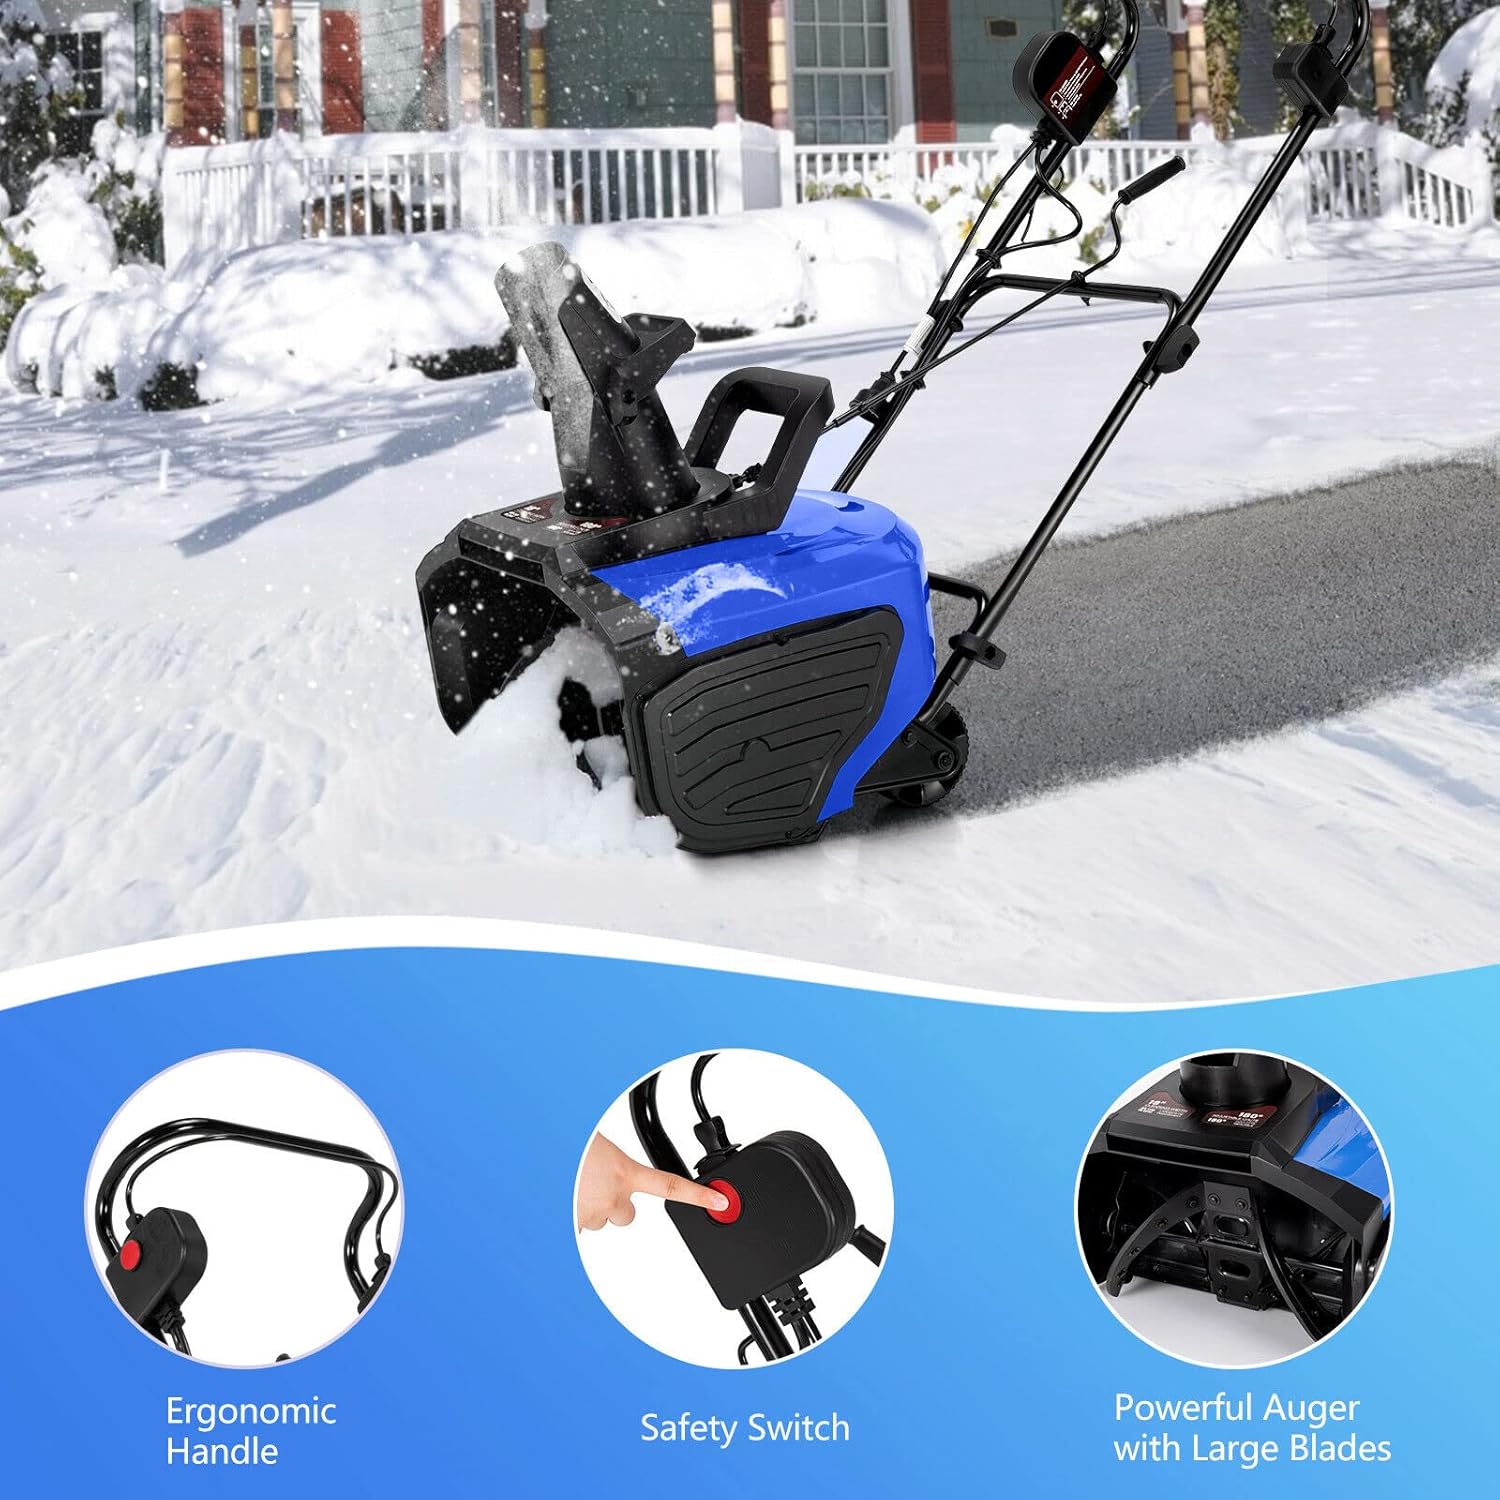
Figure 3.2: Close-up view of the ergonomic handle, safety switch, and powerful auger. This image details the user interface and the snow-clearing mechanism.

Figure 3.3: Detail of the carrying handle and large wheels. This image illustrates the design features that facilitate easy movement and transport of the snow thrower.
4. Setup and Assembly
The snow thrower requires minimal assembly. Follow these steps to prepare your unit for operation.
- Unpack Components: Carefully remove all parts from the packaging. Ensure all components listed in the package contents (refer to the specifications section) are present.
- Handle Assembly: Attach the upper handle to the lower handle using the provided hardware. Ensure all bolts are securely tightened.
- Chute Assembly: Secure the discharge chute to the main unit. Ensure it rotates freely and locks into desired positions.
- Cable Management: Use the integrated cable clip to organize the power cord and prevent tangling during operation.
- Power Connection: Connect the snow thrower's power cord to a suitable outdoor-rated extension cord. Ensure the extension cord is rated for outdoor use and can handle the 15Amp load. The waterproof power plug ensures safer use.
For detailed visual instructions, refer to the assembly diagrams provided in the original packaging.
5. Operating Instructions
Before each use, inspect the snow thrower for any loose parts, damage, or obstructions. Ensure the power cord and extension cord are in good condition.
5.1 Starting the Snow Thrower
- Connect Power: Plug the snow thrower into a grounded 120V AC outlet using an appropriate outdoor extension cord.
- Engage Safety Switch: Press and hold the safety button.
- Start Motor: While holding the safety button, squeeze the operating lever to start the motor. Release the safety button once the motor starts.
5.2 Clearing Snow
- Directional Control: Use the 180-degree rotating chute to direct the snow stream away from cleared areas, buildings, or people. The chute can throw snow up to 10-26 feet.
- Snow Stream Height: Adjust the chute deflector to control the height of the snow stream.
- Clearing Technique: Push the snow thrower forward at a steady pace. Do not force the unit into heavy snow. For deep snow, clear in narrower passes or make multiple passes.
- Overlap Passes: Overlap each pass slightly to ensure complete snow removal.

Figure 5.1: An individual operating the electric snow thrower to clear a snowy path. This image demonstrates the snow thrower in active use, showing its effectiveness in clearing snow.
5.3 Stopping the Snow Thrower
To stop the snow thrower, release the operating lever. The motor will stop automatically. Always unplug the unit from the power source after use and before leaving it unattended.
6. Maintenance and Storage
Regular maintenance ensures the longevity and safe operation of your snow thrower. Always unplug the unit before performing any maintenance.
6.1 After Each Use
- Clean Unit: Remove any snow, ice, or debris from the auger, chute, and housing. Use a non-abrasive tool to clear any blockages.
- Inspect Cord: Check the power cord and extension cord for any cuts, fraying, or damage.
- Check Fasteners: Ensure all bolts, nuts, and screws are tight.
6.2 Seasonal Maintenance
- Auger Inspection: Inspect the auger blades for wear or damage. Replace if necessary.
- Lubrication: Apply a light coat of silicone spray to the chute rotation mechanism to ensure smooth operation.
6.3 Storage
- Clean Thoroughly: Ensure the unit is completely clean and dry before storing.
- Store in Dry Place: Store the snow thrower in a dry, protected area, away from direct sunlight and moisture.
- Secure Cord: Wrap the power cord neatly and secure it to prevent damage.
7. Troubleshooting
This section addresses common issues you might encounter with your snow thrower.
| Problem | Possible Cause | Solution |
|---|---|---|
| Snow thrower does not start. |
|
|
| Snow discharge is weak or clogged. |
|
|
| Unit vibrates excessively. |
|
|
If you encounter issues not covered here, or if the problem persists after attempting the solutions, contact customer support or a qualified service technician.
8. Specifications
| Feature | Detail |
|---|---|
| Model | B09VGFZ6TH |
| Brand | Generic |
| Motor | 120V, 60Hz, 15Amp |
| No-Load Speed | 2200 RPM |
| Clearing Width | 18 inches |
| Clearing Height | 10 inches |
| Chute Rotation | 180 degrees |
| Throwing Distance | 10-26 feet |
| Wheel Size | 5 inches |
| Weight | 40 lbs |
| Dimensions (L x W x H) | 16" x 40" x 38" |
| Material | Steel and PP |
| UPC | 688969018061 |
9. Warranty and Customer Support
For warranty information, please refer to the documentation included with your purchase or contact the retailer from whom you purchased the product. Warranty terms and conditions may vary.
If you require technical assistance, have questions about operation, or need to order replacement parts, please contact the retailer or manufacturer directly. Their contact information can typically be found on the product packaging or purchase receipt.