1. Introduction
This manual provides essential information for the safe and efficient operation of your Fresh 65L Electric Oven. Please read all instructions carefully before using the appliance and retain this manual for future reference.
1.1 Safety Information
- Ensure the oven is placed on a stable, heat-resistant surface.
- Do not operate the oven near flammable materials.
- Always use oven mitts when handling hot items or surfaces.
- Keep children away from the appliance during operation.
- Unplug the oven from the power outlet when not in use or before cleaning.
- Do not immerse the appliance, cord, or plug in water or other liquids.
2. Product Overview
Familiarize yourself with the components of your Fresh 65L Electric Oven.
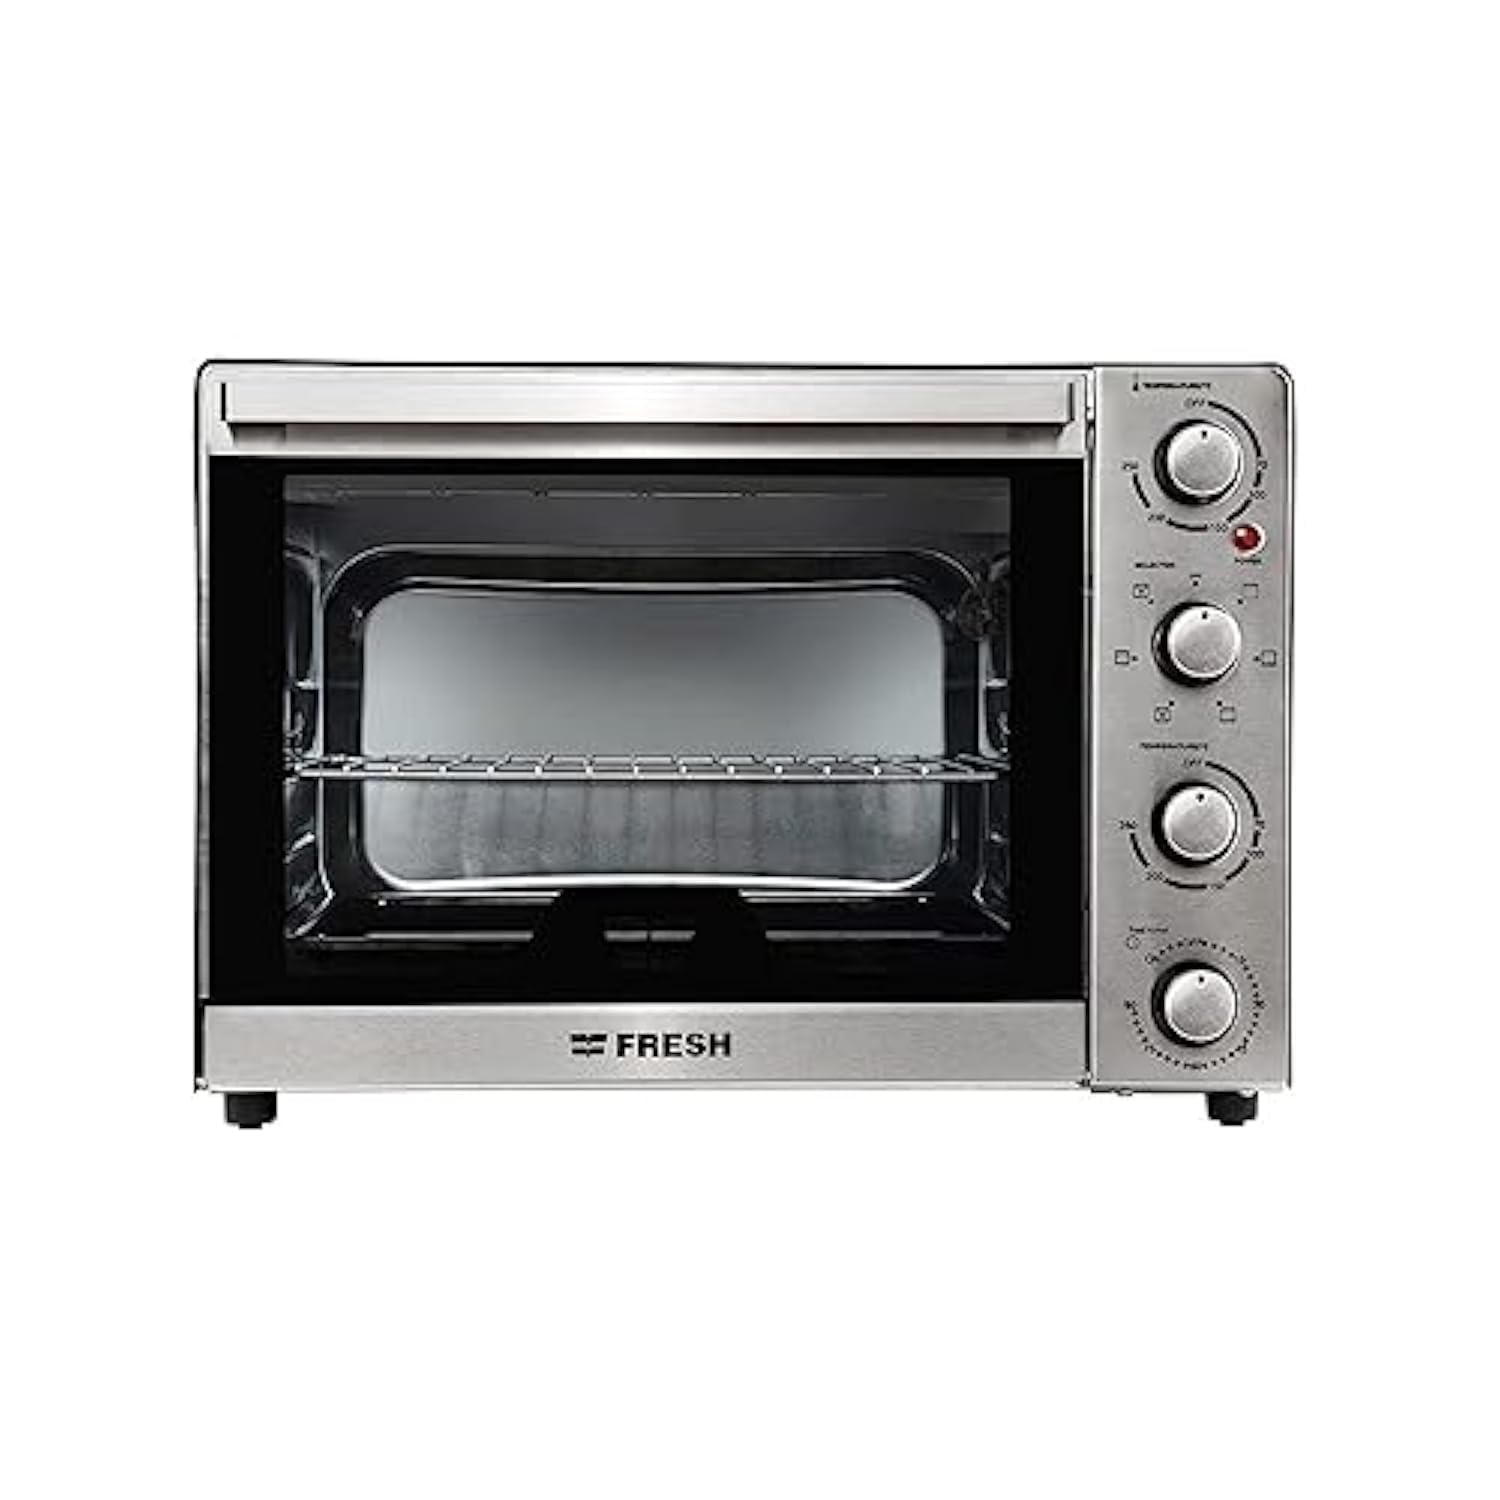
Figure 1: Front view of the Fresh 65L Electric Oven, showcasing its silver finish and compact design.
2.1 Control Panel
Figure 2: Detail of the control panel, featuring temperature, function, and timer knobs.
- Temperature Control Knob: Adjusts the cooking temperature from 100°C to 250°C.
- Function Selector Knob: Selects heating elements (top, bottom, both), grill, or fan convection.
- Timer Knob: Sets the cooking time up to 90 minutes. An alarm bell rings when the time expires.
- Indicator Light: Illuminates when the oven is heating and turns off when the set temperature is reached.
2.2 Included Components
- Rectangular Tray
- Stainless Steel Shelf
- Grill Fork
Figure 3: Standard accessories provided with the oven.
3. Setup
3.1 Unboxing and Placement
- Carefully remove the oven and all packaging materials.
- Place the oven on a flat, stable, and heat-resistant surface. Ensure there is adequate clearance (at least 10 cm) on all sides for proper ventilation.
- Do not place the oven directly against a wall or under cabinets that are not heat-resistant.
3.2 Initial Use
Before first use, perform the following steps to remove any manufacturing residues:
- Wash the rectangular tray, stainless steel shelf, and grill fork with warm, soapy water, then rinse and dry thoroughly.
- Plug the oven into a grounded electrical outlet.
- Set the temperature control to 250°C and the function selector to both top and bottom heating elements.
- Set the timer for 15 minutes. A slight odor or smoke may be observed during this initial heating; this is normal.
- After 15 minutes, turn off the oven and allow it to cool completely.
4. Operating Instructions
4.1 Basic Operation
- Place food on the rectangular tray or stainless steel shelf.
- Close the oven door.
- Set the desired temperature using the Temperature Control Knob.
- Select the desired cooking function (e.g., top heat, bottom heat, both, grill, fan) using the Function Selector Knob.
- Set the cooking time using the Timer Knob. The oven will begin heating.
- The indicator light will turn off once the set temperature is reached. It will cycle on and off during cooking to maintain temperature.
- When the timer expires, an alarm bell will ring, and the oven will turn off automatically.
4.2 Using the Grill Function
To use the grill function, select the grill setting on the Function Selector Knob. The top heating elements will activate. This is suitable for browning or toasting.
4.3 Using the Fan (Convection) Function
The fan function (convection) circulates hot air inside the oven, ensuring more even cooking and faster results. Select the fan setting on the Function Selector Knob. This can be used in conjunction with other heating elements.
5. Maintenance and Cleaning
Regular cleaning ensures optimal performance and extends the life of your oven.
5.1 Exterior Cleaning
- Ensure the oven is unplugged and completely cool.
- Wipe the exterior surfaces with a soft, damp cloth. Do not use abrasive cleaners or scouring pads.
5.2 Interior Cleaning
- Ensure the oven is unplugged and completely cool.
- Remove the rectangular tray, stainless steel shelf, and grill fork. Wash them in warm, soapy water.
- Wipe the interior walls with a damp cloth and mild detergent. For stubborn stains, a non-abrasive oven cleaner designed for conventional ovens can be used, following the product instructions.
- Do not spray cleaning solutions directly onto heating elements or the interior light.
- Wipe dry with a clean cloth.
6. Troubleshooting
| Problem | Possible Cause | Solution |
|---|---|---|
| Oven does not heat | Not plugged in; power outage; timer not set; temperature not set. | Check power connection; verify power supply; set timer and temperature. |
| Food cooks unevenly | Incorrect rack position; oven overloaded; fan not activated. | Adjust rack position; avoid overcrowding; use fan function for even cooking. |
| Excessive smoke during cooking | Food residue inside oven; fatty foods splattering. | Clean oven interior thoroughly; use a drip tray for fatty foods. |
| Timer bell does not ring | Timer knob not set correctly. | Ensure timer is wound past 10 minutes and then set to desired time. |
7. Specifications
| Feature | Specification |
|---|---|
| Model Number | FR6503RCL |
| Capacity | 65 Liters |
| Wattage | 2200 Watts |
| Temperature Control | 100°C - 250°C |
| Timer | Up to 90 Minutes with Alarm Bell |
| Heating Elements | 4 Stainless Steel |
| Special Features | Grill, Fan (Convection), Interior Light, Indicator Light |
| Material | Stainless Steel |
| Control Type | Knob |
| Door Style | Dropdown Door |
| Approximate Dimensions (Package) | 121 x 121 x 121 cm |
| Item Weight | 12.25 kg |
8. Warranty and Support
This Fresh Electric Oven is covered by a manufacturer's warranty. Please refer to the warranty card included with your purchase for specific terms, conditions, and duration. For technical support, service, or spare parts, please contact Fresh customer service through the details provided on your warranty documentation or the official Fresh website.
Do not attempt to repair the appliance yourself. Unauthorized repairs may void the warranty and pose safety risks.