Introduction
This user manual provides detailed instructions for the operation and maintenance of your Telituny Digital Wireless Indoor-Outdoor Thermometer Hygrometer, model EN8822D. This device is designed to provide accurate temperature and humidity readings for both indoor and outdoor environments, making it suitable for various applications such as homes, greenhouses, warehouses, and baby rooms.
Please read this manual thoroughly before using the product to ensure proper function and longevity.
What's in the Box
Upon opening the package, please verify that all components are present and in good condition:
- 1 x Digital Thermometer (Main Unit)
- 1 x Wireless Outdoor Sensor (Type 1) or 3 x Wireless Outdoor Sensors (Type 2)
- 1 x User Manual

Image: The main digital thermometer unit and three wireless outdoor sensors, as typically included in the package.
Product Features
- Accurate Readings: Provides fast response, high sensitivity, and updated, accurate measurements for temperature and humidity.
- Multiple Installation Methods: Features a desktop design, wall-mount option, and magnetic back for easy placement in various rooms.
- Memory Function: Stores the highest and lowest temperature and humidity readings, allowing you to view historical data.
- Easy-to-Read LCD Display: Large LCD screen with backlight and touch screen functionality for clear data visibility, even in the dark.
- Simple Installation: The outdoor sensor is equipped with hanging holes for easy placement on walls or trees.
- Wireless Range: Up to 60 meters (200 feet) wireless reception range for outdoor sensors.

Image: Visual representation of the main unit highlighting key features such as the °C/°F switcher, touch screen, backlight, large display, trend indicator, and 24-hour data display.
Setup
1. Battery Installation
Both the main unit and the wireless sensors require AAA batteries (not included). Ensure correct polarity when inserting batteries.
- Open the battery compartment cover on the back of the main unit and each sensor.
- Insert the required AAA batteries according to the polarity markings (+/-).
- Close the battery compartment cover securely.
2. Placement of Main Unit and Sensors
The main unit can be placed on a desktop, mounted on a wall, or attached to a magnetic surface. The sensors are designed for outdoor use and should be placed in a location that provides accurate readings and is within the wireless range of the main unit.
- Main Unit:
- For desktop use, extend the integrated stand on the back of the unit.
- For wall mounting, use the hanging hole on the back.
- For magnetic attachment, utilize the magnets on the back to secure it to a metal surface like a refrigerator.
- Outdoor Sensors:
- Place sensors in a shaded, dry location outdoors, away from direct sunlight or rain, to ensure accurate temperature and humidity readings.
- Utilize the hanging hole to mount the sensor on a wall, fence, or tree.
- Ensure the sensor is within the 60m (200ft) wireless range of the main unit.

Image: Demonstrates the versatile installation options for the main unit, including tabletop stand, wall mount, and magnetic back.
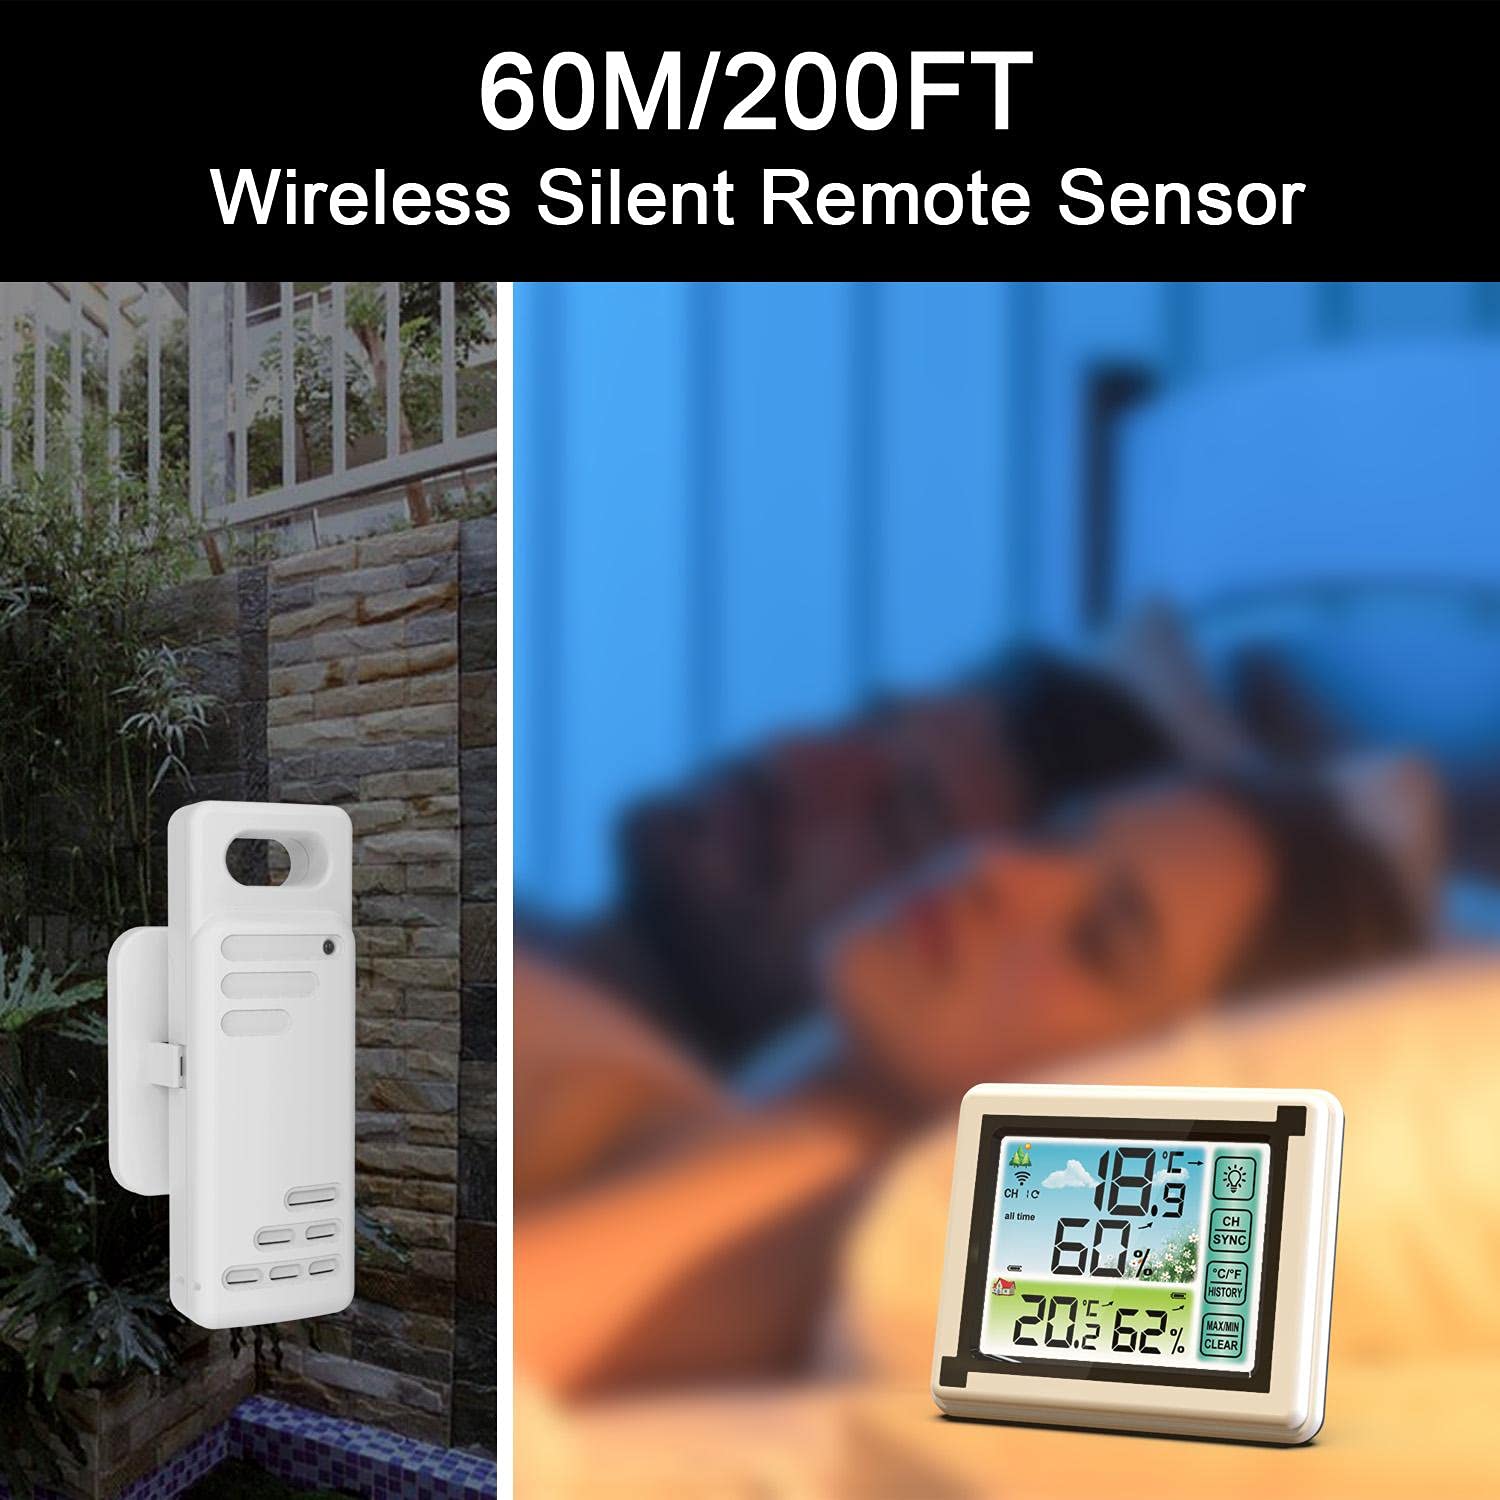
Image: Illustrates the wireless outdoor sensor and its effective range of up to 60 meters (200 feet) from the main unit.
3. Synchronization
The main unit should automatically connect with the sensors once batteries are installed. If connection is not established, follow these steps:
- Ensure both the main unit and sensors have fresh batteries.
- Press the "CH SYNC" button on the main unit to initiate a search for sensors.
- On each sensor, there might be a small "TX" or "RESET" button. Press it to send a signal to the main unit.
- Allow a few moments for the main unit to receive signals and display readings from all connected sensors.
Operating Instructions
1. Reading the Display
The large LCD display shows indoor temperature and humidity, as well as outdoor temperature and humidity from the connected sensors. The display also indicates comfort levels (dry, comfortable, humid) and temperature trends.

Image: Close-up of the main unit's LCD display, showing temperature and humidity readings, and the touch-sensitive buttons for backlight, channel selection, unit switching, and min/max records.
2. Switching Temperature Units (°C/°F)
To switch between Celsius (°C) and Fahrenheit (°F), touch the "°C/°F" button on the front of the main unit's display.
3. Accessing Min/Max Records
The device records the highest and lowest temperature and humidity readings over a period. To view these records:
- Touch the "MAX/MIN" button once to display the maximum recorded values.
- Touch the "MAX/MIN" button again to display the minimum recorded values.
- To clear the records, touch and hold the "CLEAR" button (often combined with MAX/MIN) for a few seconds until the values reset.
4. Backlight Operation
The display features a backlight for improved visibility in low-light conditions. Touch the "Light Bulb" icon button on the display to turn the backlight on or off.
5. Channel Selection (for multiple sensors)
If you are using multiple outdoor sensors, touch the "CH SYNC" button to cycle through the readings from each connected sensor (Channel 1, Channel 2, Channel 3, or All Channels display).
Maintenance
1. Cleaning
To maintain the accuracy and appearance of your thermometer:
- Wipe the main unit and sensors with a soft, damp cloth.
- Do not use abrasive cleaners, solvents, or harsh chemicals, as these may damage the plastic components or the display.
- Ensure the devices are completely dry before re-inserting batteries or placing them back in operation.
2. Battery Replacement
When the display becomes dim or readings become inconsistent, it is time to replace the batteries. Follow the battery installation steps outlined in the "Setup" section.
Dispose of used batteries responsibly according to local regulations.
Troubleshooting
| Problem | Possible Cause | Solution |
|---|---|---|
| No display on main unit. | Batteries are dead or incorrectly inserted. | Replace batteries, ensuring correct polarity. |
| Outdoor temperature/humidity not displayed or incorrect. | Sensor out of range, low sensor battery, or interference. |
|
| Inaccurate readings. | Sensor exposed to direct sunlight, rain, or extreme conditions. | Relocate sensor to a shaded, protected area. Ensure proper ventilation around the sensor. |
| Backlight not working. | Backlight function is off or low battery. | Press the "Light Bulb" icon button. Replace main unit batteries if necessary. |
Specifications
| Feature | Specification |
|---|---|
| Material | ABS Plastic |
| Indoor Temperature Range | -20°C to 70°C (-4°F to 158°F) |
| Outdoor Temperature Range | -40°C to 70°C (-40°F to 158°F) |
| Humidity Range | 20% to 95% RH |
| Temperature Resolution | 0.1°C / °F |
| Humidity Resolution | 1% |
| Temperature Error | ±1°C |
| Humidity Error | ±5% |
| Refresh Rate | 10 seconds |
| Wireless Frequency | 433 MHz |
| Wireless Range | 60 meters (200 feet) |
| Power Source | AAA Battery (not included) |
| Main Unit Dimensions (L x W x H) | 114 x 96 x 24 mm (4.4 x 3.7 x 0.9 inches) |
| Sensor Dimensions (L x W x H) | 100 x 35 x 20 mm (3.9 x 1.4 x 0.8 inches) |
| Display Type | LCD |
| Waterproof Sender | IPX4 |

Image: Detailed diagram showing the dimensions of both the main thermometer unit and the wireless outdoor sensor.
Warranty and Support
Telituny products are manufactured to high-quality standards. For any issues or support inquiries, please refer to the contact information provided with your purchase or visit the official Telituny website. Please retain your proof of purchase for warranty claims.
For further assistance, please contact Telituny customer service.