
Introduction
This manual provides detailed instructions for the assembly, operation, and maintenance of your Dancing Wings Hobby 600mm RC Savage Bobber Airplane Kit, Model E3205-154E. This product is a kit and requires assembly. Please read all instructions carefully before beginning assembly or operation to ensure safe and correct usage.
Product Overview
The Dancing Wings Hobby 600mm RC Savage Bobber is a micro radio-controlled airplane kit designed for enthusiasts. It features a lightweight construction and is intended for assembly by the user. The E3205-154E variant includes specific electronic components to get you started.
- 600mm RC Micro Airplane Savage Bobber with cockpit
- Fuselage is made of 0.5mm fiberglass
- Wing is made of balsawood and PP foam
- Requires assembly as per the supplied manual

Image: The assembled 600mm RC Savage Bobber airplane, highlighting its compact size and design, with an overlay of key specifications such as wingspan, length, flying weight, and power system details.
Kit Contents (E3205-154E)
The E3205-154E kit includes the following components:
- E32 Savage Bobber KIT (airframe components)
- Motor: MC1108 4000KV
- Propeller: 5030 (5-inch)
- Servos: 2.0g *4pcs
- Receiver: RX154E (DSXM/2 compatible with built-in 7A/2S Brushless ESC)
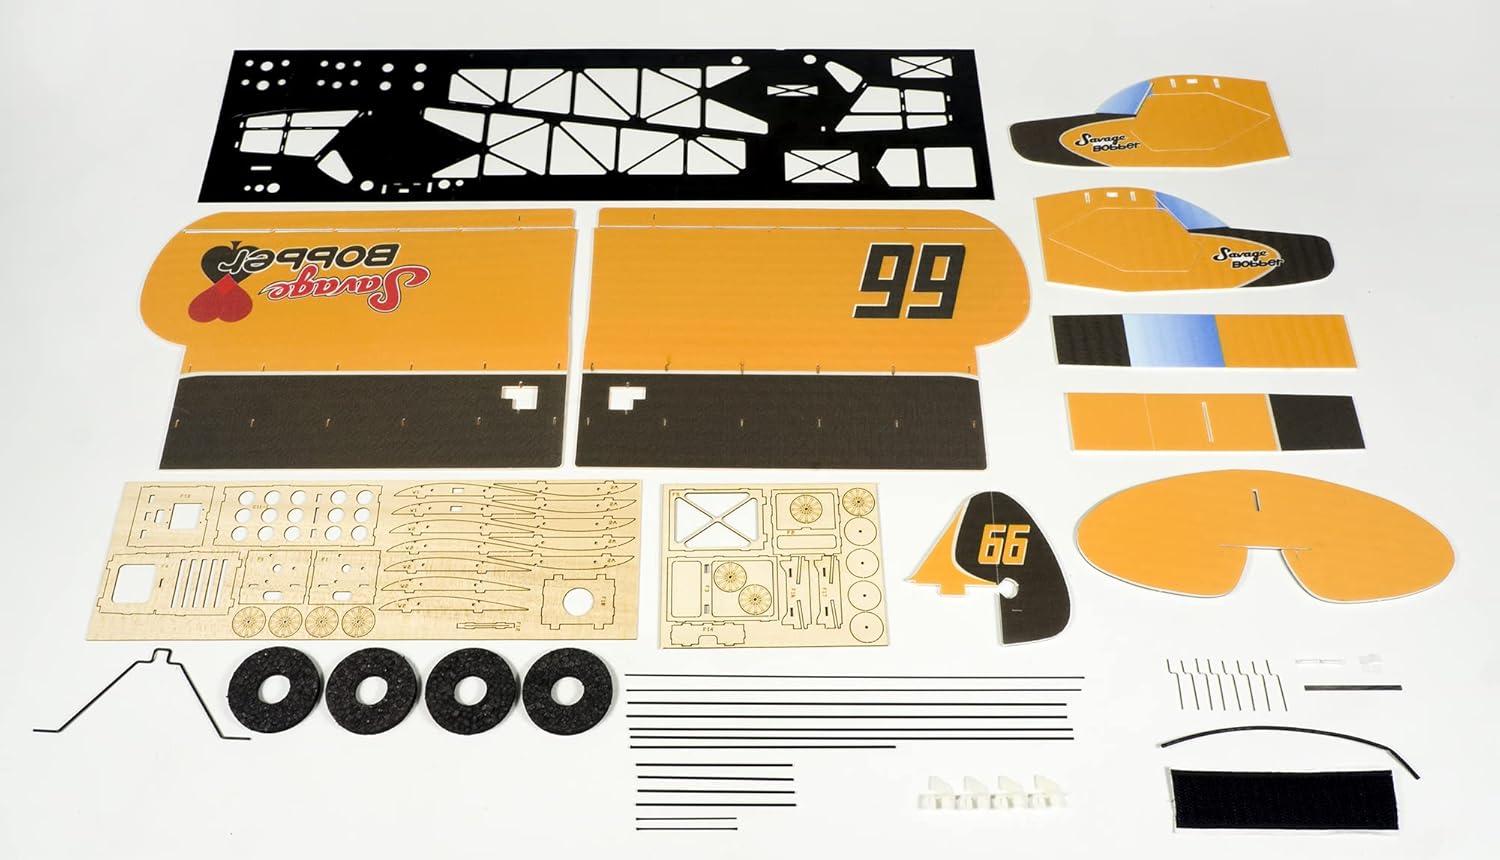
Image: Various laser-cut balsa and foam parts, fiberglass fuselage components, and small hardware laid out, representing the complete kit contents.

Image: The kit components, including laser-cut parts and electronics, neatly packaged within the product box.
Assembly Instructions (Setup)
The Savage Bobber is a kit that requires careful assembly. Refer to the detailed manual included in your kit for step-by-step instructions. The general assembly process involves:
- Fuselage Assembly: Construct the fuselage using the provided 0.5mm fiberglass parts.
- Wing Assembly: Assemble the wing sections, which are made from balsawood and PP foam. Ensure all control surfaces (ailerons) are properly hinged and move freely.
- Tail Section: Attach the horizontal and vertical stabilizers, ensuring correct alignment.
- Landing Gear: Install the landing gear components.
- Electronics Installation: Install the motor, servos, and receiver/ESC unit.
- Control Linkages: Connect the servos to the control surfaces using the appropriate linkages. Ensure smooth and unrestricted movement.
Important Note on Servo Compatibility:
It has been reported that the included servos may not be directly compatible with the receiver motherboard (RX154E) due to connector size differences. Verify the servo connector type against the receiver ports before assembly. If connectors do not fit, modifications or alternative servos/receivers may be required. Consult the manufacturer's support if you encounter this issue.
Power System and Electronics
The E3205-154E kit comes with a pre-selected power system and electronics. Proper installation and connection are crucial for flight performance and safety.
- Motor: MC1108 4000KV brushless motor. Ensure it is securely mounted to the motor mount.
- Propeller: 5030 (5-inch) propeller. Attach it correctly to the motor shaft, ensuring it is balanced.
- Servos: Four 2.0g servos for control surfaces (ailerons, elevator, rudder). Connect them to the appropriate channels on the receiver.
- Receiver/ESC: RX154E (DSXM/2 compatible) with a built-in 7A/2S brushless Electronic Speed Controller (ESC). This unit manages motor speed and receives control signals from your transmitter. Ensure it is securely placed within the fuselage and connected to the motor and servos.
- Battery (Not Included): A 2S 150-200mAh LiPo battery is suggested. Ensure the battery is fully charged before flight and properly secured within the aircraft to maintain the correct center of gravity.

Image: The MC1108 4000KV brushless motor, a 5030 propeller, and four 2.0g servos, which are key components of the aircraft's power and control system.

Image: The RX154E mini receiver board, which integrates the receiver functionality with a 7A/2S brushless ESC, showing its compact design and various connection points.
Pre-Flight Checks
Before each flight, perform the following checks:
- Battery Check: Ensure the flight battery is fully charged and securely installed.
- Control Surface Check: Verify that all control surfaces (ailerons, elevator, rudder) move freely and in the correct direction in response to transmitter inputs.
- Propeller Security: Confirm the propeller is tightly secured and free from damage.
- Center of Gravity (CG): Check the aircraft's center of gravity as specified in the kit manual. An incorrect CG can lead to unstable flight.
- Radio Link: Ensure a strong and stable radio link between your transmitter and the aircraft's receiver.
- Visual Inspection: Inspect the entire aircraft for any loose parts, damage, or obstructions.
Operating Instructions
Operating an RC airplane requires practice and a suitable flying environment. Always fly in open areas, away from people, buildings, and obstacles. Follow local regulations for RC aircraft operation.
- Takeoff: Place the aircraft on a flat surface or hand-launch it, gradually increasing throttle and applying gentle elevator input to gain altitude.
- Flight Control: Use the transmitter sticks to control the aircraft. The left stick typically controls throttle and rudder, while the right stick controls ailerons and elevator.
- Landing: Reduce throttle and approach the landing area. Maintain control with elevator and ailerons, gradually decreasing altitude until the aircraft touches down smoothly.
- Post-Flight: Disconnect the battery immediately after landing to prevent accidental motor activation. Inspect the aircraft for any damage.

Image: The fully assembled Savage Bobber RC airplane, with its orange and black livery, resting on an asphalt surface, ready for flight.
Video: A demonstration of the 600mm micro Savage Bobber RC airplane in flight, showcasing its maneuverability and stability during takeoff, aerial maneuvers, and landing.
Maintenance
Regular maintenance will extend the life of your RC Savage Bobber:
- Cleanliness: Keep the aircraft clean from dirt, dust, and debris.
- Hinge and Linkage Inspection: Periodically check all hinges and control linkages for wear or looseness. Replace any worn parts.
- Motor and Propeller: Inspect the motor for smooth operation and the propeller for cracks or damage. Replace damaged propellers immediately.
- Battery Care: Follow proper LiPo battery charging, discharging, and storage guidelines to ensure safety and longevity.
- Structural Integrity: Regularly check the fuselage, wings, and tail for any cracks or damage. Repair as needed using appropriate adhesives.
Troubleshooting
Here are some common issues and their potential solutions:
| Problem | Possible Cause | Solution |
|---|---|---|
| Aircraft does not respond to controls | Loose connections, uncharged battery, radio interference, binding issue | Check all wiring, charge battery, re-bind transmitter/receiver, ensure no interference. |
| Motor not spinning | ESC not armed, motor/ESC connection issue, damaged motor/ESC | Ensure throttle is at zero when connecting battery, check motor/ESC wiring, inspect for damage. |
| Unstable flight | Incorrect Center of Gravity (CG), control surface trim, damaged airframe | Adjust battery position for correct CG, adjust trims on transmitter, inspect airframe for damage. |
| Servos not fitting receiver | Incompatible connector sizes | Verify connector types. If incompatible, consider replacing servos with correct connectors or modifying existing ones (advanced users only). Contact manufacturer for guidance. |
Specifications
| Feature | Detail |
|---|---|
| Wingspan | 600mm (23.6") |
| Length | 418mm (16.5") |
| Flying Weight | 98g |
| Motor | MC1108 4000KV |
| ESC | 7A 2S (integrated into RX154E) |
| Servos | 2.0g *4pcs |
| Propeller | 5030 (5-inch) |
| Receiver | RX154E (DSXM/2 compatible) |
| Suggested Battery | 2S 150-200mAh LiPo |
| Fuselage Material | 0.5mm fiberglass |
| Wing Material | Balsawood and PP foam |
| Manufacturer Recommended Age | 16 years and up |
Warranty and Support
For warranty information or technical support, please refer to the documentation provided with your purchase or contact Dancing Wings Hobby directly. Ensure you retain your proof of purchase for any warranty claims.
Manufacturer: DW Hobby