Important Safety Information
Please read all instructions carefully before beginning installation and use. Failure to follow these instructions could result in personal injury or product damage.
- Always wear safety glasses during installation.
- Handle glass panels with extreme care. Tempered glass, while strong, can shatter if struck at the edges or corners.
- Ensure the installation surface (walls, bathtub rim) is structurally sound and level.
- Use appropriate tools and hardware for your specific wall type.
- Keep children and pets away from the installation area.
- If you are unsure about any step, consult a qualified professional.
Product Overview
The Sunrosa Tub Shower Door is designed to enhance your bathroom with a minimalist, frameless aesthetic. It features double sliding doors for efficient space utilization and ease of access.
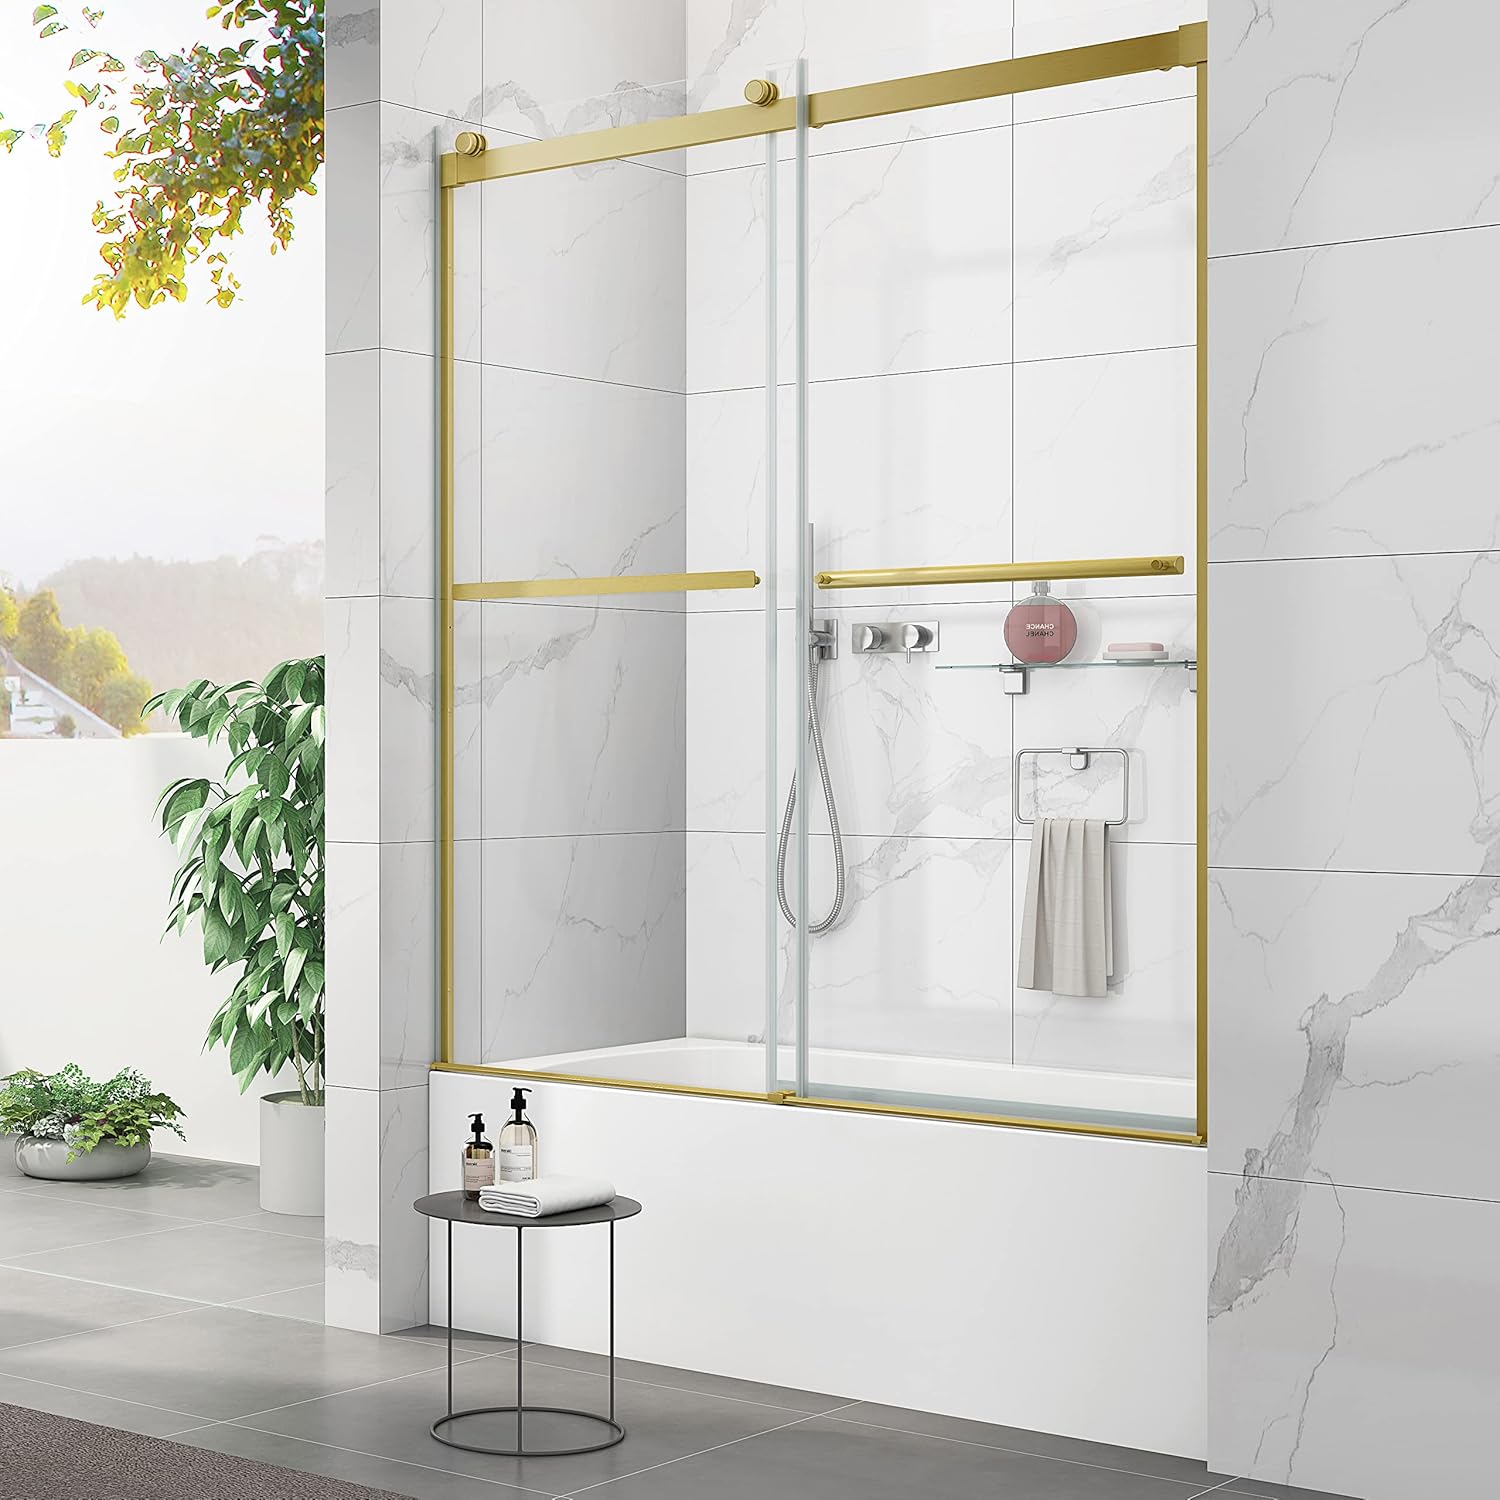
Figure 1: Sunrosa Tub Shower Door, Brushed Gold finish, installed over a bathtub.
Key Features:
- Frameless Design: Provides a contemporary and open feel to your bathroom.
- Double Sliding Doors: Allows for flexible entry and exit, optimizing space.
- ANSI-Certified Tempered Glass: 5/16-inch (8mm) thick clear glass for safety and durability.
- Water Protection: Equipped with premium waterproof strips to minimize water leakage.
- Reversible Installation: Can be configured for left or right-hand opening.

Figure 2: Detail of the 5/16-inch (8mm) ANSI-certified tempered glass, highlighting its clarity and easy-to-clean surface.

Figure 3: The shower door is available in multiple finishes, including Matte Black, Brushed Gold, and Chrome.
Pre-Installation Checklist
Required Tools (Not Included):
- Measuring Tape
- Level
- Drill
- Drill Bits (appropriate for wall material)
- Caulk Gun and Silicone Sealant (mildew-resistant)
- Pencil
- Screwdrivers (Phillips and Flathead)
- Utility Knife
- Safety Glasses
- Gloves
Dimensions and Measurement:
Before starting installation, accurately measure your wall and bathtub dimensions to ensure compatibility. The adjustable width of this model is 54 7/8" - 58 7/8", and the height is 60".
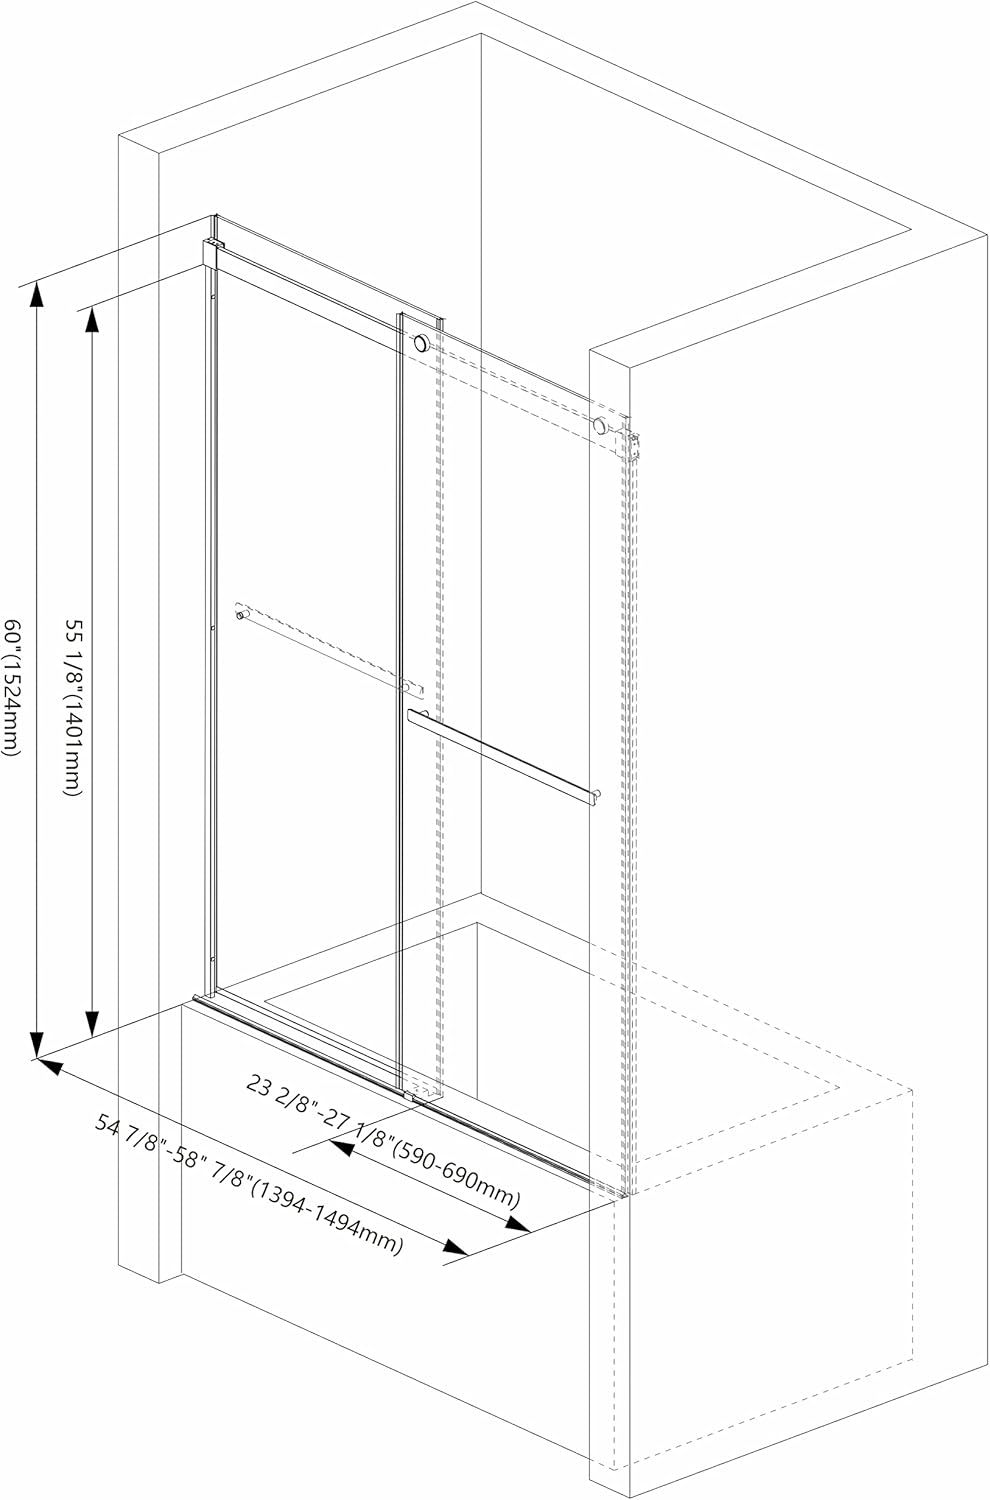
Figure 4: Dimensional drawing of the shower door, indicating adjustable width and height. Ensure your space accommodates these measurements.
Installation Guide
This section provides a general guide for installation. Refer to the detailed instructions provided with your product packaging for specific steps and diagrams. Professional installation is recommended.
- Prepare the Area: Clear the bathtub and surrounding area. Ensure the walls and bathtub rim are clean, dry, and level.
- Install Wall Profiles: Mark and drill holes for the wall profiles according to the product's specific measurements. Secure the profiles to the wall using appropriate fasteners.
- Assemble Top and Bottom Tracks: Attach the top and bottom tracks to the wall profiles. Ensure they are perfectly level.
- Install Fixed Glass Panel: Carefully place the fixed glass panel into the tracks and secure it.
- Install Sliding Glass Panels: Mount the rollers onto the sliding glass panels. Carefully lift and place the sliding panels onto the top track, then guide them into the bottom track.
- Attach Handles and Hardware: Secure the handles to the glass panels. Install any remaining hardware, such as guide blocks or anti-jump features.
- Seal with Silicone: Apply a continuous bead of mildew-resistant silicone sealant along the exterior joints where the wall profiles meet the wall and where the bottom track meets the bathtub rim. Allow adequate drying time before use.
Reversible Installation:
The Sunrosa Tub Shower Door is designed for reversible installation, allowing you to customize the opening and closing direction to best suit your bathroom layout.

Figure 5: This diagram shows how the shower door can be installed to open from either the left or right side, providing flexibility for your bathroom design.
Component Details:

Figure 6: Ergonomic handle design for comfortable operation.

Figure 7: Smooth-gliding rollers ensure effortless opening and closing of the doors.

Figure 8: The bottom track and integrated waterproof strips are designed to effectively reduce water escape.
Operating Instructions
The Sunrosa Tub Shower Door features a double sliding mechanism for convenient access. To open or close the door, gently slide the desired glass panel along the top and bottom tracks using the handle. Ensure the door moves freely and smoothly.
The design allows for seamless operation, providing a wide entry point when both doors are open.
Maintenance and Care
Regular cleaning and maintenance will ensure the longevity and pristine appearance of your Sunrosa shower door.
- Glass Cleaning: For daily cleaning, wipe the glass panels with a soft cloth or squeegee after each use to prevent water spots and soap scum buildup. For deeper cleaning, use a non-abrasive glass cleaner. Avoid harsh chemicals or abrasive pads that can scratch the glass or damage the finish.
- Hardware Cleaning: Clean metal components (tracks, handles, frames) with a soft, damp cloth and mild soap. Dry thoroughly to prevent water spots. Do not use abrasive cleaners, steel wool, or strong chemicals, as these can damage the finish.
- Seals and Strips: Periodically inspect the waterproof strips and seals for wear or damage. Clean them gently to remove any mold or mildew. Replace if necessary to maintain water-tightness.
- Track Maintenance: Keep the top and bottom tracks free of debris, hair, and soap residue to ensure smooth sliding operation.
Troubleshooting
This section addresses common issues you might encounter with your shower door.
| Problem | Possible Cause | Solution |
|---|---|---|
| Doors do not slide smoothly. | Debris in tracks, misaligned rollers, or worn rollers. | Clean tracks thoroughly. Check rollers for proper alignment and wear; adjust or replace if needed. |
| Water leakage from door edges. | Damaged or improperly installed waterproof strips/seals, insufficient silicone sealant. | Inspect and clean seals. Re-apply silicone sealant where necessary, ensuring a continuous bead. Replace worn strips. |
| Door does not close securely. | Misaligned panels, issue with closure mechanism. | Check panel alignment and adjust if possible. Inspect the closure point for any obstructions or damage. |
| Frosted appearance on glass (if applicable). | Hard water stains or residue buildup. | Use a specialized glass cleaner for hard water stains. Regular cleaning after each use can prevent this. |
If you encounter issues not listed here or if the suggested solutions do not resolve the problem, please contact Sunrosa customer support for assistance.
Specifications
| Attribute | Detail |
|---|---|
| Brand | Sunrosa |
| Model Number | 6060G1 |
| Color | Brushed Gold (as per current product variant) |
| Material | Aluminum, Glass |
| Style | Classic, Minimalist |
| Item Weight | 107.6 Pounds |
| Product Dimensions | 0.31 x 58.82 x 60 inches |
| Adjustable Width | 54 7/8" - 58 7/8" |
| Height | 60" |
| Glass Thickness | 5/16-inch (8mm) Tempered Glass |
| Assembly Required | Yes |
Warranty and Support
Sunrosa stands behind the quality of its shower doors. If you are not completely satisfied or receive a defective product, please contact us for prompt resolution.
For customer support, please reach out to the seller, Sunrosa Store, through the platform where you purchased the product. You may also refer to the contact information provided in your product packaging.
This product typically includes a 30-day easy return policy. Please check your purchase details for specific return conditions.