1. Introduction
This manual provides detailed instructions for the installation and operation of your JOYEAUTO Wireless CarPlay Android Auto Retrofit Kit. This kit is designed to integrate advanced smartphone connectivity features into your Maserati Quattroporte or Ghibli (2014-2016) OEM screen, enhancing your driving experience with modern infotainment capabilities.

Image 1.1: JOYEAUTO Wireless CarPlay & Android Auto Retrofit Kit installed in a Maserati dashboard.
2. Product Features
- Wireless/Wired CarPlay: Supports full-screen CarPlay functionality for Apple Maps, navigation, phone calls, and Spotify. Includes a built-in microphone for Siri and Bluetooth calls.
- Wired Android Auto: Connect via USB cable to use Android Auto for maps, navigation, phone calls, and online music.
- Camera & Wired Mirror Link: Supports aftermarket and original cameras, including front, rear, and 360-degree views with dynamic guidelines. Automatic camera activation when reversing. AirPlay for iPhone and Mirror Link for Android allow streaming YouTube, photos, and HD videos.
- Original System Integration: Seamlessly connects with the original vehicle system. Utilize Siri, steering wheel buttons, and the roller button to navigate CarPlay applications.
- Dual-System Switching: Easily switch between the original OEM system and the CarPlay/Android Auto interface.
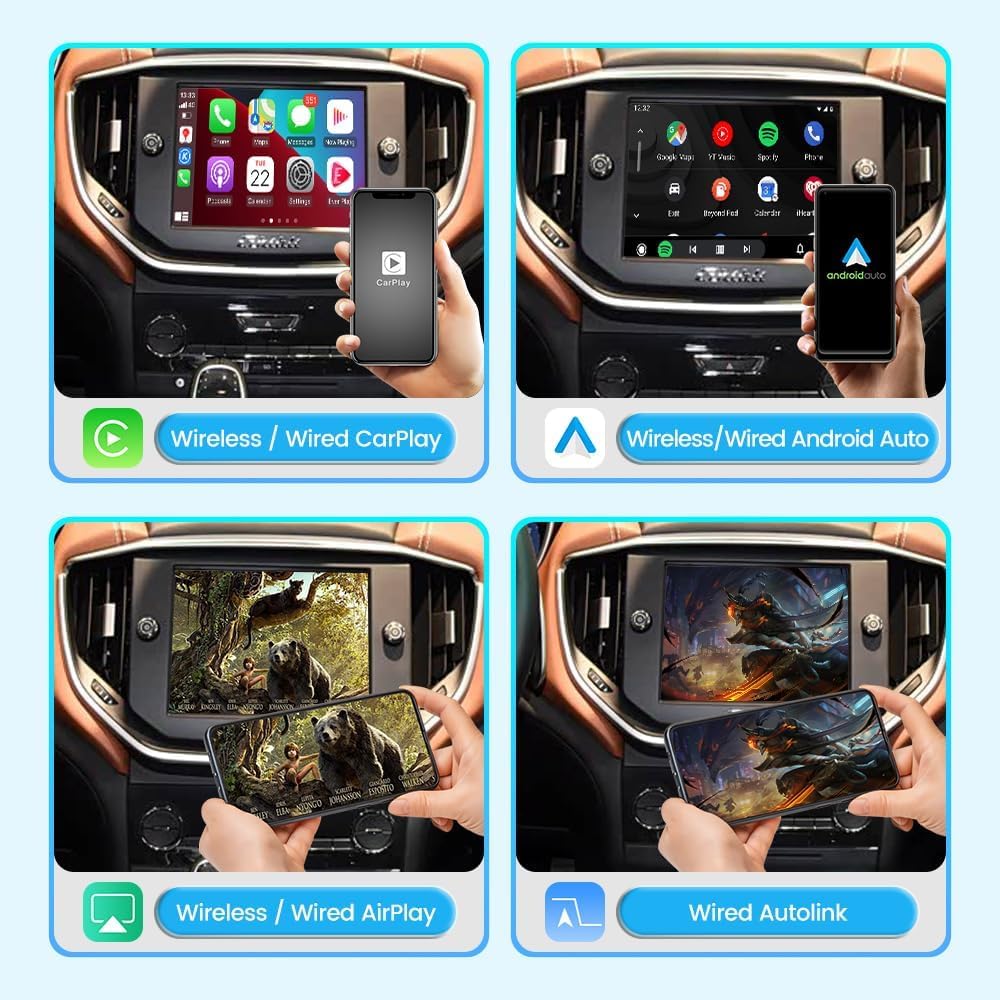
Image 2.1: Overview of Wireless/Wired CarPlay, Android Auto, AirPlay, and Autolink functionalities.
3. Compatibility
This retrofit kit is compatible with:
- Maserati Quattroporte (2014-2016)
- Maserati Ghibli (2014-2016)
If you are unsure about compatibility, please contact the seller with pictures of your vehicle's display screen and control panels for verification.

Image 3.1: Supported Maserati models and features.
4. Package Contents
The JOYEAUTO Wireless CarPlay Android Auto Retrofit Kit includes the following components:
- Main Retrofit Module
- Power Cord
- LVDS Cable
- USB Cable
- WiFi Antenna
- Microphone
- AUX Adapter

Image 4.1: Components included in the product package.
5. Installation Guide
Professional installation is highly recommended. If you are not confident in performing the installation yourself, please seek assistance from a qualified specialist or contact the seller for support. Always test all features before completing the reassembly.
General Installation Steps:
- Disassemble Dashboard: Carefully remove the dashboard panels and the head unit.
- Remove Display: Unscrew and gently take out the display unit.
- Internal Modification: Disassemble the display unit to access the internal circuit board. Replace the original circuit board with the provided JOYEAUTO kit circuit board. Ensure all connections are secure and correct.
- Connect Cables: Connect the JOYEAUTO box to the vehicle's wiring harness using the provided 54PIN power cable, LVDS cable (LCD_OUT), and AUX cable (AUDIO-IN to AUDIO-OUT).
- Route Cables: Carefully route all cables to ensure they are not pinched or interfere with other components.
- Install Microphone: Install the external microphone in a suitable location, such as near the rearview mirror or A-pillar, for optimal voice command performance.
- Set DIP Switch: According to the installation diagram, set the DIP switches on the JOYEAUTO box to match your vehicle's configuration.
- Test Functionality: Before reassembling, power on the vehicle and test all CarPlay, Android Auto, MirrorLink, and camera functions to ensure proper operation.
- Reassemble: Once all functions are verified, carefully reassemble the display unit, dashboard panels, and air conditioning panels.

Image 5.1: Visual guide for the general installation process.
Installation Video Reference:
For a detailed step-by-step installation video specific to your Maserati model, please contact JOYEAUTO customer support. The provided videos in the product listing may be for different vehicle models and serve as general guidance for functionality rather than precise installation steps for your specific vehicle.
6. Operating Instructions
6.1 Switching Between Systems
To switch between the original OEM system and the JOYEAUTO CarPlay/Android Auto system, use the designated
Related Documents - B09TZQGSNG
 |
Joyeauto Wireless CarPlay Installation Guide for Mercedes NTG Systems Detailed installation diagrams and instructions for Joyeauto's wireless CarPlay and Android Auto interface for Mercedes-Benz NTG5, NTG4.5, and NTG4.0 infotainment systems. Includes dip switch settings and connection guides. |
 |
Audi Wireless CarPlay Installation Guides and Diagrams by Joyeauto Comprehensive installation diagrams and instructions for Joyeauto wireless CarPlay multimedia video interfaces, covering various Audi models including S8, A8, A4, A5, Q5, A3, A1, Q3, A6, A7, and MMI 2G systems. Details connections, dip switch settings, and control operations. |
 |
JoyeAuto USB Wireless CarPlay Dongle User Manual User manual for the JoyeAuto USB Wireless CarPlay Dongle, detailing connection steps for wireless CarPlay functionality with compatible vehicles and iPhones. |
 |
Bentley Wireless CarPlay Installation and Connection Guide (WZBT-0) Detailed installation diagram and step-by-step guide for the JoyeAuto WZBT-0 Wireless CarPlay interface for Bentley vehicles, including wireless connection instructions for Apple CarPlay. |
 |
WJBM-2 CarPlay Decoder Installation and Operation Guide Comprehensive guide for the WJBM-2 CarPlay decoder, detailing its connections, dip switch settings, and FCC compliance information. Learn how to integrate and operate the device for enhanced vehicle infotainment. |