Product Overview
The Paragon In-Wall Safe is designed to protect important documents, passports, jewelry, money, and family heirlooms. Its flat design allows for discreet installation between wall studs, easily concealed behind wall art or within a closet. This security safe features a digital keypad for programming passcodes and includes manual override keys for emergency access. A built-in alarm system provides an additional layer of security against unauthorized access attempts.
- Brand: Paragon Lock & Safe
- Model: 83-DT5913
- Color: Gray
- Capacity: 0.83 Cubic Feet
- Material: Alloy Steel
- Product Dimensions: 4"D x 16.5"W x 22"H
- Interior Dimensions: 3.75"D x 14.25"W x 20.25"H
- Item Weight: 30.6 pounds
- Lock Type: Electronic, Key
- Control Type: Touchpad Control
- Included Components: Safe
- Power Source: Battery Powered
- Alarm: Audible
- Water Resistance Level: Not Water Resistant
- Date First Available: September 10, 2012
Important Safety Information
- Always keep manual override keys in a secure location away from the safe. Do not store them inside the safe.
- Ensure the safe is securely mounted to prevent unauthorized removal or tampering.
- Keep the keypad dry and clean to ensure proper function and longevity.
- Replace batteries promptly when the low battery indicator appears to avoid being locked out.
- This safe is designed primarily for security against theft. It is not rated for fire or water resistance unless explicitly stated in the product specifications.
Package Contents
- 1 x In-Wall Safe Unit
- 1 x Electronic Keypad (integrated)
- 2 x Manual Override Keys
- Anchor Bolts for Installation
- 4 x AA Batteries
Setup and Installation
1. Unpacking and Initial Inspection
Carefully remove the safe from its packaging. Inspect the unit for any signs of damage. Verify that all listed package contents are present before proceeding with installation.
2. Battery Installation
The safe's electronic keypad requires 4 AA batteries for operation. The battery compartment is located on the inside of the safe door. Open the battery cover, insert the batteries according to the polarity indicators (+/-), and then securely close the cover.

Image: Hand inserting AA batteries into the battery compartment of the safe's electronic lock. The compartment is located on the inside of the safe door, covered by a small plastic flap.
3. Choosing an Installation Location
This in-wall safe is designed for mounting between standard wall studs, which are typically spaced 16 inches on center. Select a discreet location that offers adequate structural support. Common installation spots include behind wall art or within a closet for enhanced concealment.

Image: Front view of the gray in-wall safe, showing the electronic keypad and manual override lock. The safe is designed to fit flush within a wall.
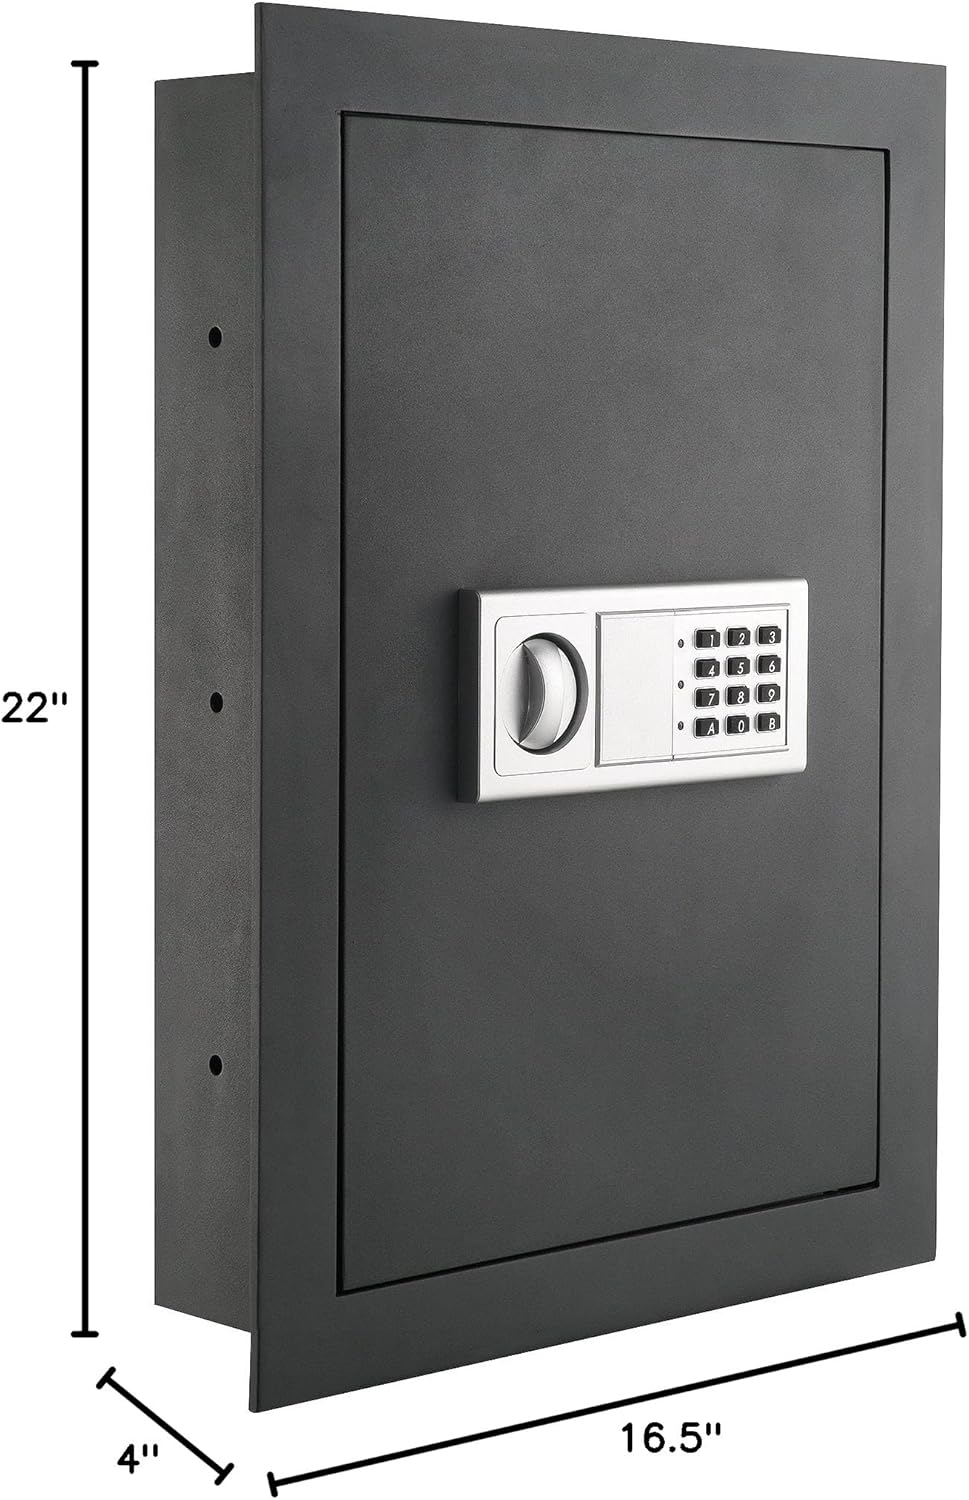
Image: A diagram illustrating the external dimensions of the in-wall safe, which are 22 inches in height, 16.5 inches in width, and 4 inches in depth.
4. Wall Preparation and Mounting
Use a stud finder to locate two adjacent wall studs. Mark the precise outline for the safe's opening on the drywall, ensuring it matches the safe's external dimensions (16.5" W x 22" H). Carefully cut the opening. Insert the safe into the prepared opening. Utilize the provided anchor bolts to secure the safe firmly to the wall studs through the pre-drilled holes on the sides of the safe. Confirm the safe is level before fully tightening the bolts.

Image: The in-wall safe with its door open, showcasing the interior storage space with shelves and the electronic lock mechanism mounted on the inside of the door.

Image: An interior view of the safe, highlighting its two adjustable shelves designed for organizing various items.

Image: A close-up of the two solid locking bolts that extend from the safe door into the frame, providing enhanced security when the safe is locked.
Operating Instructions
1. Opening the Safe for the First Time (Using Override Key)
For initial access or if the batteries are depleted, the safe can be opened using one of the provided manual override keys. Insert the key into the keyhole located behind the small cover on the keypad panel. Turn the key clockwise while simultaneously turning the knob on the keypad to open the safe door.

Image: A hand demonstrating the use of a manual override key by inserting it into the hidden keyhole on the electronic keypad panel.
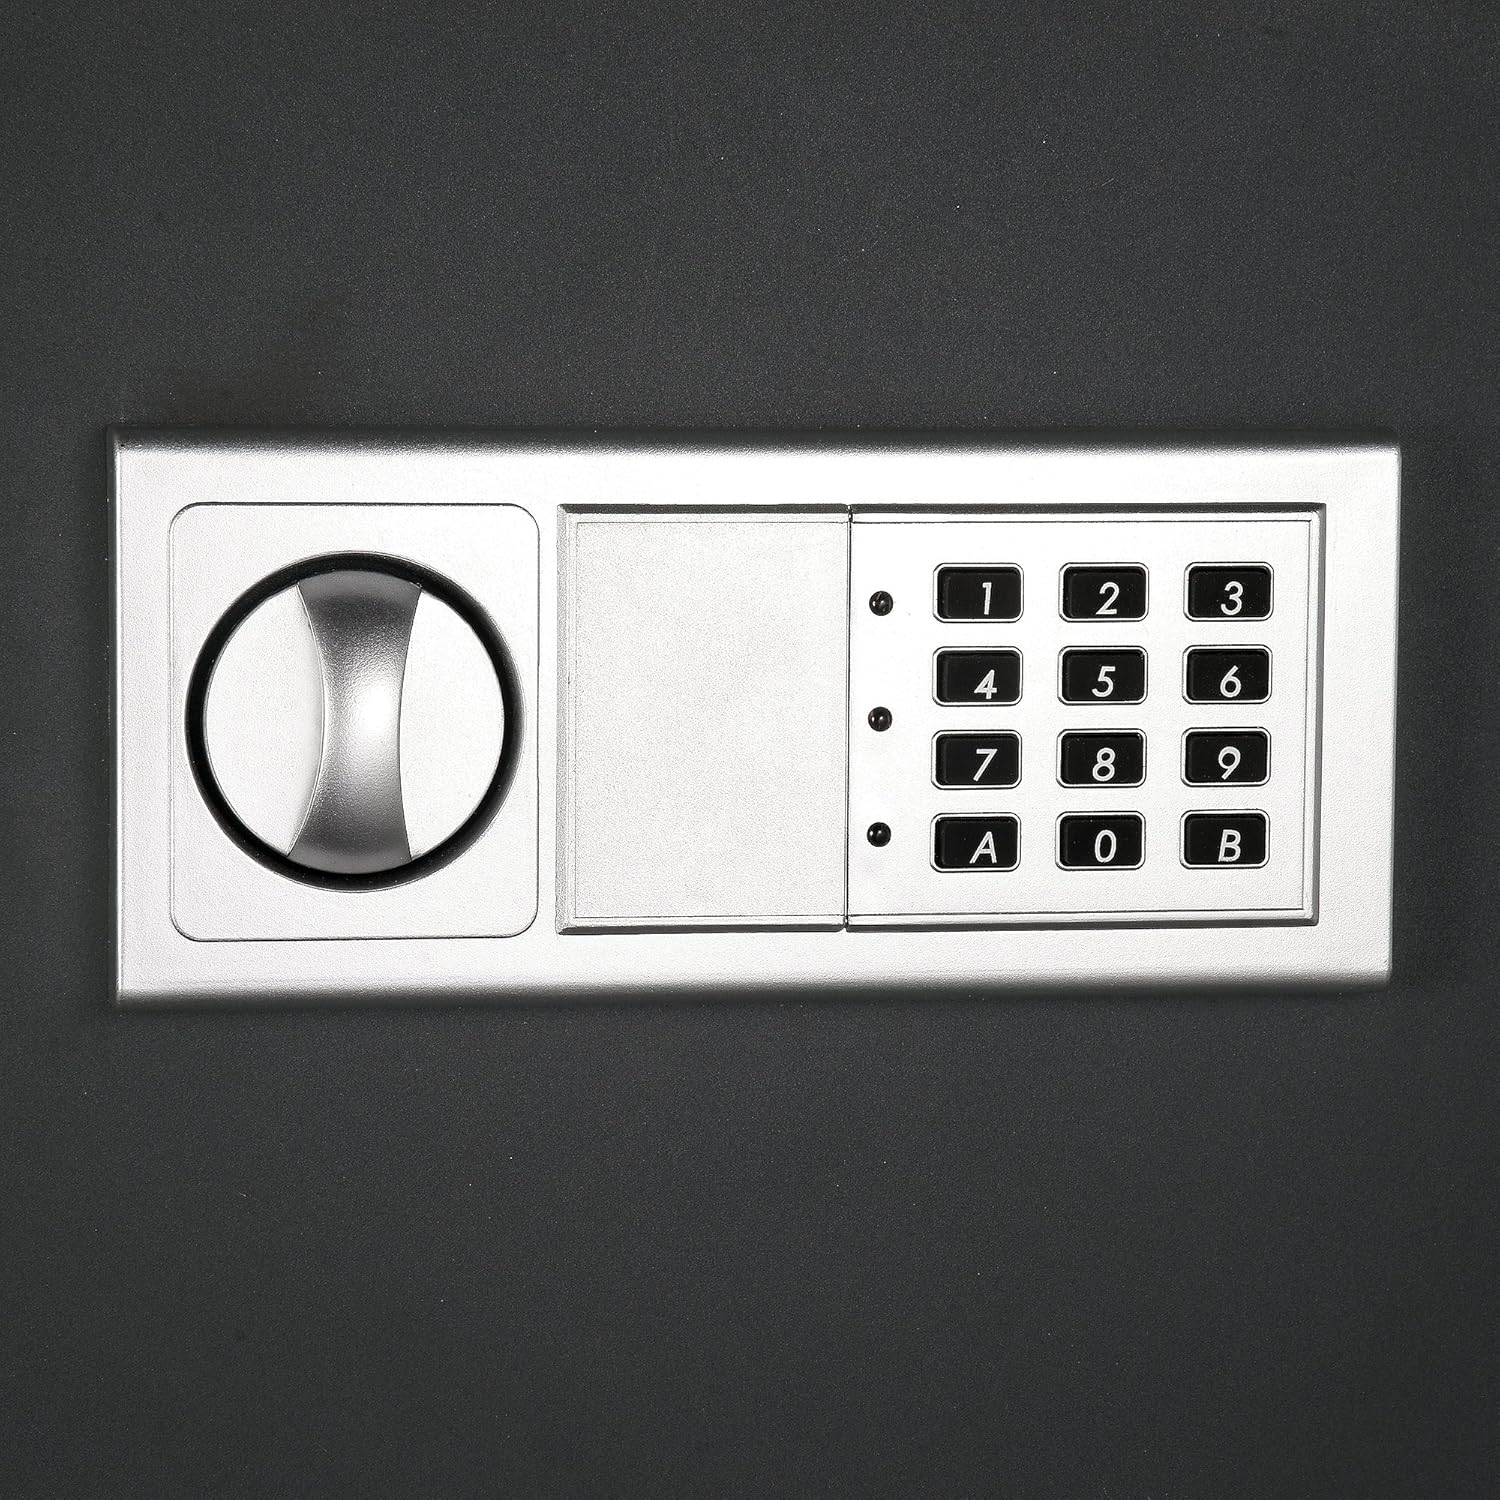
Image: A detailed view of the electronic keypad, with the small protective cover slid open to reveal the manual override keyhole and the key inserted.
2. Programming Your Passcode
With the safe door open, locate the red reset button on the inside of the door, typically near the hinge. Press the reset button. The keypad will emit a beep, and an indicator light will flash. Enter your desired 3- to 8-digit passcode on the keypad, then press 'C' or 'E' to confirm. It is recommended to test the new passcode with the door open before closing it.

Image: A close-up shot of the small red reset button, positioned on the interior side of the safe door, typically used for programming new passcodes.
To program a second passcode (guest passcode), after setting the first combination, press "0" twice, then the red reset button, then enter the second combination, and finally press "C" or "E" (whichever was NOT used for the first passcode).
3. Locking the Safe
Close the safe door. Turn the knob on the keypad counter-clockwise to engage the internal locking bolts. The safe is now securely locked.

Image: A clear front view of the electronic keypad, showing the circular knob on the left and the numerical buttons on the right, used for entering passcodes and operating the lock.
4. Unlocking the Safe (Using Passcode)
Enter your programmed 3- to 8-digit passcode on the keypad. If the passcode is correct, the indicator light will turn green. Within 5 seconds of the green light, turn the knob clockwise to open the safe door.
5. Anti-Theft Alarm Feature
If an incorrect passcode is entered 3 times consecutively, a built-in alarm will sound for 20 seconds. If an incorrect code is entered 3 more times (total of 6 incorrect attempts), the alarm will sound for an extended period of 5 minutes, alerting you to attempted unauthorized access.
Maintenance
- Battery Replacement: The safe requires 4 AA batteries. Battery life is approximately 4-5 months with daily usage. Replace batteries when the low battery indicator light illuminates or if the keypad becomes unresponsive.
- Cleaning: Wipe the exterior of the safe and keypad with a soft, dry cloth. Avoid using abrasive cleaners, solvents, or harsh chemicals that could damage the finish or electronic components.
- Keyhole Maintenance: Keep the manual override keyhole free of dust and debris. Do not lubricate the keyhole unless specifically recommended by the manufacturer.
- Door Alignment: If the door becomes difficult to open or close, check the alignment of the door and hinges. Minor adjustments may be possible using a Philips screwdriver and an Allen key on the hinge pins, if applicable.
Troubleshooting
| Problem | Possible Cause | Solution |
|---|---|---|
| Keypad is unresponsive or lights do not illuminate. | Dead or incorrectly installed batteries. | Replace all 4 AA batteries, ensuring correct polarity. |
| Safe does not open after entering correct passcode. | Knob not turned within 5 seconds of green light; locking bolts are jammed. | Re-enter passcode and turn knob immediately. Check for obstructions around the door or bolts. Use manual override key if necessary. |
| Alarm sounds frequently. | Incorrect passcode attempts. | Ensure correct passcode is being entered. Wait for alarm to reset before re-attempting. |
| Manual override key does not work. | Key not fully inserted; safe not upright (if first use). | Ensure key is fully inserted and turned correctly. If safe is new, ensure it is in an upright position as if installed. |
| Door is difficult to open or close. | Door alignment issue; internal obstruction. | Check for any items obstructing the door. Adjust hinge pins if necessary (refer to "Operating Instructions" for details on door adjustment). |
Specifications
- Brand: Paragon Lock & Safe
- Model Number: 83-DT5913
- Product Dimensions: 4"D x 16.5"W x 22"H
- Interior Dimensions: 3.75"D x 14.25"W x 20.25"H
- Capacity: 0.83 Cubic Feet
- Lock Type: Electronic, Key
- Color: Gray
- Material: Alloy Steel
- Mounting Type: Wall Mount
- Control Type: Touchpad Control
- Item Weight: 30.6 pounds
- Power Source: Battery Powered (4 AA batteries, included)
- Alarm: Audible (sounds for incorrect passcode entries)
- Water Resistance Level: Not Water Resistant
Warranty and Support
Paragon Lock & Safe products are designed for durability and reliability. While specific warranty details should be confirmed with the manufacturer or retailer, customer reviews indicate a 10-year warranty for this product. For detailed warranty information, product support, or to inquire about replacement parts, please contact Paragon Lock & Safe directly through their official channels or the retailer where the product was purchased.
- Manufacturer: Trademark GLB
- UPC: 610708143918
- Date First Available: September 10, 2012
Visit the Paragon Lock & Safe Store on Amazon for more information.


