1. Introduction
Thank you for choosing the HUXGO HXA007 Wireless Alarm System. This system provides comprehensive home security with dual Wi-Fi and GSM 4G connectivity, allowing for flexible control and reliable alerts. This manual will guide you through the installation, operation, and maintenance of your alarm system to ensure optimal performance and security.
2. Package Contents
The HUXGO HXA007 Wireless Alarm System package includes the following components:
- 1x Control Panel with 4.3" TFT LCD Touchscreen
- 1x Internal Siren
- 1x Wireless External Siren
- 5x Wireless Motion Detectors
- 5x Wireless Door/Window Opening Sensors
- 2x Remote Controls
- 2x RFID Key Fobs
- 1x Power Adapter
- Batteries (for backup power)
- Installation Accessories (screws, adhesive tape)
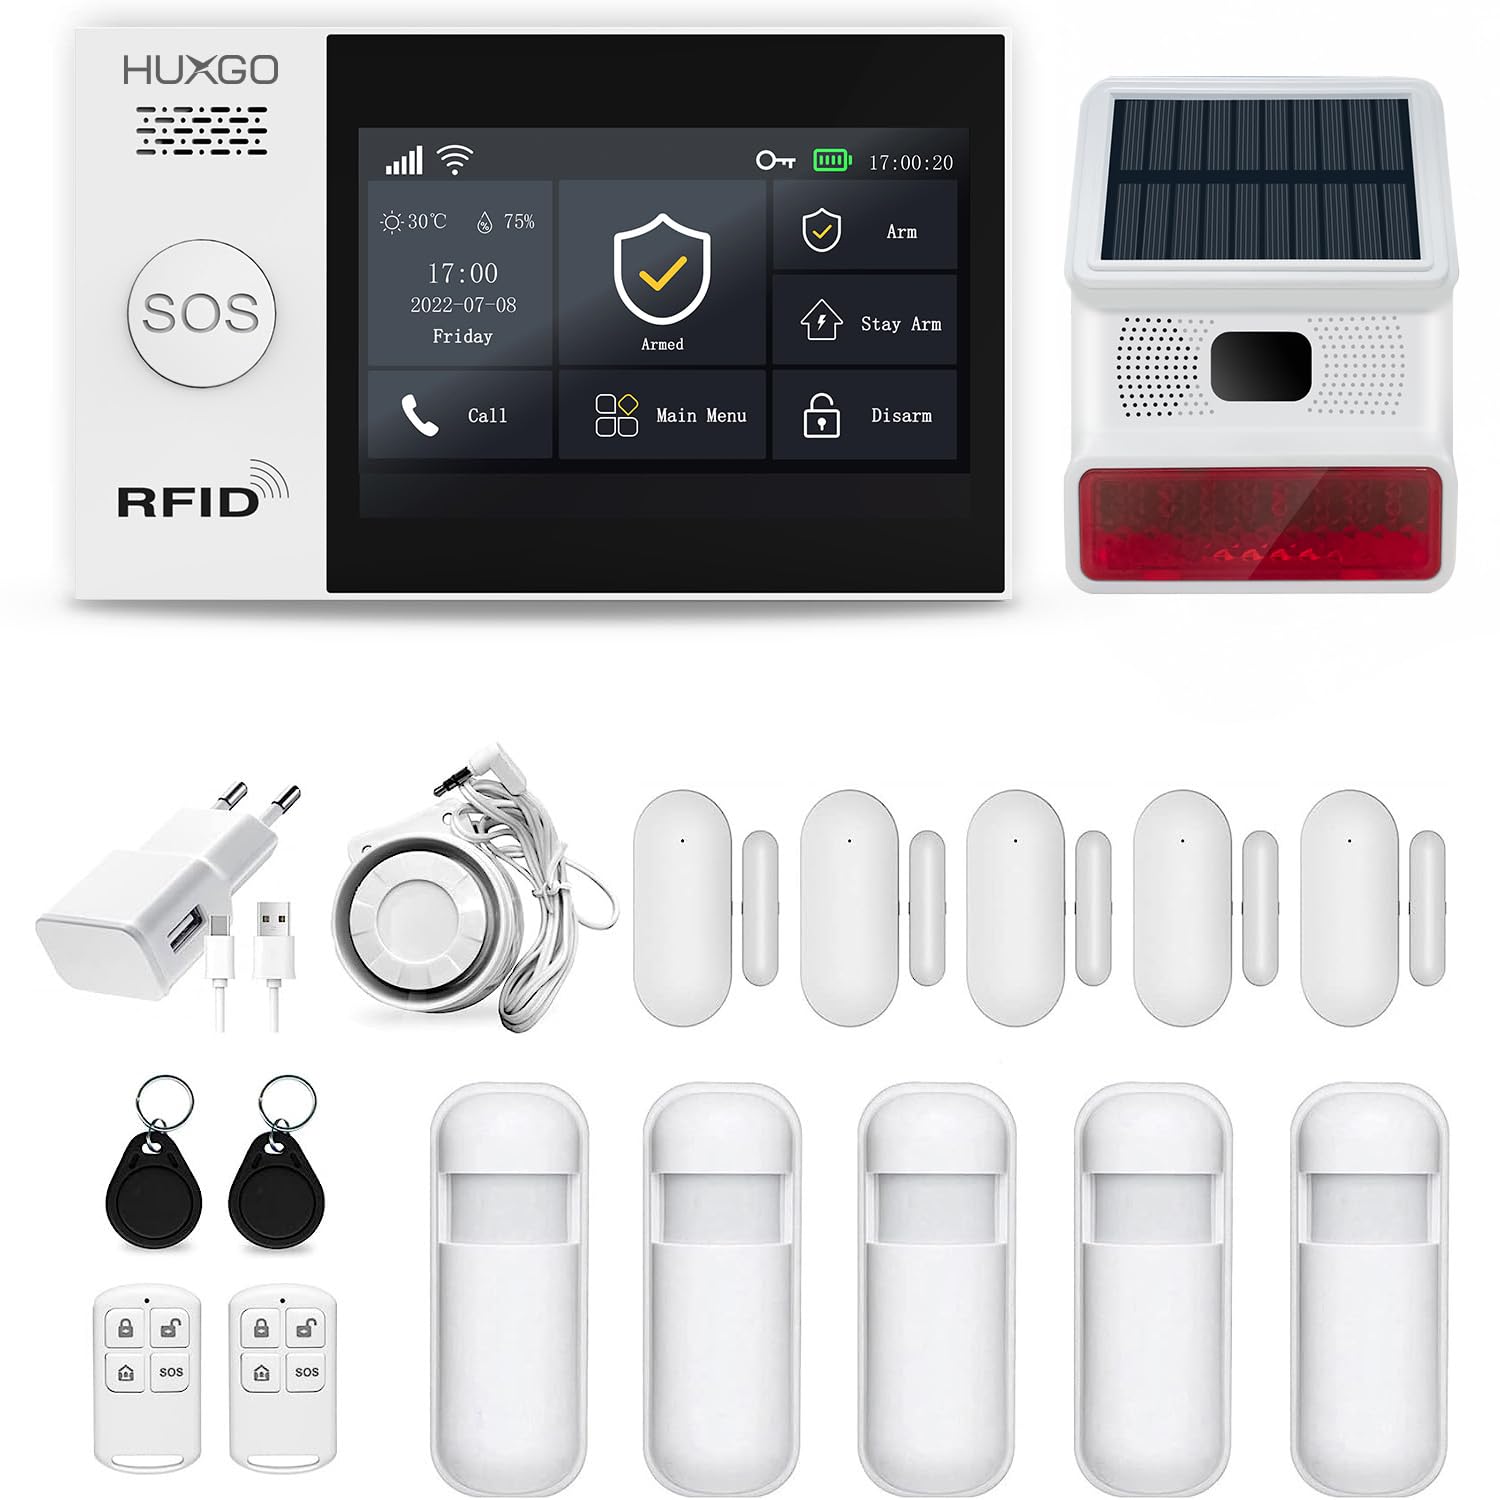
Image 2.1: Overview of the HUXGO HXA007 Wireless Alarm System components, including the control panel, outdoor siren, motion sensors, door/window sensors, remote controls, and RFID key fobs.
3. Product Overview
3.1 Control Panel
The central control panel features a 4.3-inch TFT LCD touchscreen for easy interaction. It serves as the brain of your alarm system, managing all connected sensors and communication modules.

Image 3.1: Front and side views of the HUXGO HXA007 control panel, illustrating its compact dimensions (160mm width, 98mm height, 19mm depth).
3.2 Sensors
The system includes wireless motion detectors and door/window opening sensors to detect unauthorized entry.

Image 3.2: A wireless motion sensor, designed to detect movement within its coverage area.

Image 3.3: A wireless door/window opening sensor, consisting of two parts that trigger an alarm when separated.
3.3 Sirens
The system includes both an internal and a wireless external siren, capable of producing a loud 120-decibel alert to deter intruders and notify neighbors.

Image 3.4: The wireless outdoor siren, featuring a solar panel for power and a flashing light for visual alert.

Image 3.5: The wired internal siren, designed for indoor use to provide an audible alarm.
3.4 Remote Controls and RFID Key Fobs
The system can be armed or disarmed using the included remote controls or by tapping an RFID key fob on the control panel.

Image 3.6: A remote control with buttons for arming, disarming, home arming, and an SOS function.
4. Setup
4.1 Initial Setup and Power Connection
- Insert SIM Card (Optional): If you plan to use GSM 4G features, insert a compatible SIM card into the designated slot on the control panel. Ensure the SIM card is active and has sufficient credit for SMS and calls.
- Connect Power: Connect the power adapter to the control panel and plug it into a standard electrical outlet. The control panel has a built-in backup battery providing 4-6 hours of emergency power.
- Power On: The system will automatically power on. Follow the on-screen prompts for initial language selection and basic settings.
4.2 App Installation and Wi-Fi Connection
The HUXGO HXA007 system is compatible with the Tuya Smart mobile application, available for iOS and Android devices.
- Download App: Search for "Tuya Smart" in your device's app store and install it.
- Register/Log In: Create a new account or log in if you already have one.
- Add Device: In the Tuya Smart app, tap '+' to add a new device. Select 'Security & Video Surveillance' > 'Alarm (Wi-Fi)'.
- Connect to Wi-Fi: Follow the in-app instructions to connect your control panel to your home Wi-Fi network. This typically involves putting the control panel into pairing mode and entering your Wi-Fi credentials in the app.

Image 4.1: Illustration of the dual network control capabilities, showing control via the Tuya Smart app (Wi-Fi) and SMS (GSM).
4.3 Pairing Sensors and Accessories
The wireless sensors allow for quick and efficient installation without additional cabling.
- Enter Pairing Mode: On the control panel, navigate to the 'Sensor Management' or 'Add Device' menu.
- Activate Sensor: For motion sensors, trigger them by moving in front of them. For door/window sensors, separate the two parts. For remote controls/RFID fobs, press any button or tap the fob on the control panel.
- Confirmation: The control panel will confirm successful pairing. Assign each sensor to a specific zone (e.g., 'Interior Zone', '24/7 Zone', 'Exterior Zone') and give it a descriptive name for easy identification.

Image 4.2: Diagram illustrating the three types of security zones: Interior Zone, 24/7 Zone, and Exterior Zone, for customized alarm behavior.
5. Operating the System
5.1 Arming and Disarming
The system can be armed or disarmed using the control panel, remote controls, RFID key fobs, or the Tuya Smart app.
- Arm (Full Arm): Activates all sensors. Use when leaving the premises.
- Stay Arm (Home Arm): Activates perimeter sensors (e.g., door/window sensors) while allowing movement within interior zones. Use when staying at home.
- Disarm: Deactivates all sensors, allowing free movement.
5.2 SOS Function
In case of emergency, press the SOS button on the control panel or remote control. The system will immediately trigger an alarm and send alerts to pre-programmed emergency contacts.

Image 5.1: Visual representation of alarm scenarios, including an intruder triggering a motion sensor or door/window sensor, and the use of the SOS button on the remote control for emergencies.
5.3 Notifications and Control
The system provides alarm notifications via SMS and the Tuya Smart app. You can also control the system remotely.
- SMS Alerts: When an alarm is triggered, the system sends SMS messages to configured phone numbers.
- App Control: The Tuya Smart app allows you to arm/disarm the system, check status, and receive real-time notifications from anywhere with an internet connection.
- Two-Way Communication: The control panel supports two-way audio communication, allowing you to speak through the panel and hear responses.

Image 5.2: An illustration depicting a user interacting with the alarm control panel and receiving alerts on a smartphone, highlighting the system's connectivity and user interface.
6. Maintenance
6.1 Battery Management
- Control Panel Backup Battery: The control panel has an internal backup battery that provides power during outages. Ensure the control panel is always connected to power to keep this battery charged.
- Sensor Batteries: Wireless sensors are battery-powered. The system will notify you when sensor batteries are low. Replace batteries promptly to ensure continuous protection.
- Outdoor Siren: The wireless outdoor siren is solar-powered with a backup battery. Ensure its solar panel is exposed to sufficient sunlight.
6.2 Cleaning
Wipe the control panel and sensors with a soft, dry cloth. Avoid using abrasive cleaners or solvents that could damage the surfaces.
7. Troubleshooting
- Sensor Not Triggering:
- Check battery levels of the sensor.
- Ensure the sensor is correctly paired with the control panel.
- Verify the sensor's placement and ensure it's within range and not obstructed. - No App Notifications:
- Ensure the control panel is connected to Wi-Fi.
- Check your phone's notification settings for the Tuya Smart app.
- Verify your internet connection. - No SMS Alerts:
- Ensure a valid and active SIM card is inserted in the control panel.
- Check SIM card balance.
- Verify the emergency contact numbers are correctly configured in the system. - False Alarms:
- Adjust sensitivity settings for motion detectors if available.
- Ensure door/window sensors are securely mounted and not affected by vibrations or drafts.
- Check for pets or objects that might trigger motion sensors. - Control Panel Not Responding:
- Ensure the power adapter is connected and the backup battery is charged.
- Try restarting the control panel by disconnecting and reconnecting power.
8. Specifications
| Manufacturer | HUXGO |
| Model Number | HXA007 4G B R5D5 WS |
| Dimensions (Control Panel) | 16 x 9.8 x 2 cm |
| Weight | 1.69 kg |
| Power Source | Electric cable, Battery powered (backup) |
| Installation Method | Wireless |
| Sound Level (Siren) | 120 Decibels |
| Connectivity Technology | Wireless (Wi-Fi & GSM 4G) |
| Control Method | Application (Tuya Smart) |
| Compatible Devices | Smartphone, Tablet |
| Backup Battery Life | Approximately 5 hours |
| Expandability | Supports up to 99 sensors |
9. Warranty and Support
For warranty information and technical support, please refer to the documentation provided with your purchase or contact HUXGO customer service directly. Details regarding spare parts availability are currently unavailable.
You can visit the HUXGO brand store for additional information and products: HUXGO Store