Moulinex EZ501810
Moulinex Easy Fry & Grill Digital Air Fryer and Grill User Manual
Model: EZ501810
1. Introduction
Thank you for choosing the Moulinex Easy Fry & Grill Digital Air Fryer and Grill. This versatile 2-in-1 appliance combines the functions of an air fryer and a grill, offering a convenient way to prepare a wide variety of delicious and healthy meals. Its exclusive dual technology features a die-cast aluminum grill plate for perfectly seared meats and vegetables, alongside a classic air frying function for crispy, golden results with little to no added oil.
This manual provides essential information for the safe and efficient operation of your appliance. Please read it thoroughly before first use and keep it for future reference.

Image 1.1: Moulinex Easy Fry & Grill Digital Air Fryer and Grill with its removable grill plate.
2. Important Safety Instructions
When using electrical appliances, basic safety precautions should always be followed, including the following:
- Read all instructions before use.
- Do not touch hot surfaces. Use handles or knobs.
- To protect against electric shock, do not immerse cord, plugs, or appliance in water or other liquid.
- Close supervision is necessary when any appliance is used by or near children.
- Unplug from outlet when not in use and before cleaning. Allow to cool before putting on or taking off parts.
- Do not operate any appliance with a damaged cord or plug or after the appliance malfunctions or has been damaged in any manner. Contact customer service for examination, repair, or adjustment.
- The use of accessory attachments not recommended by the appliance manufacturer may cause injuries.
- Do not use outdoors.
- Do not let cord hang over edge of table or counter, or touch hot surfaces.
- Do not place on or near a hot gas or electric burner, or in a heated oven.
- Extreme caution must be used when moving an appliance containing hot oil or other hot liquids.
- Always attach plug to appliance first, then plug cord into the wall outlet. To disconnect, turn any control to "off", then remove plug from wall outlet.
- Do not use appliance for other than intended use.
- This appliance is for household use only.
3. Product Overview
3.1 Components
- Main Unit with Digital Control Panel
- Removable Cooking Basket
- Die-Cast Aluminum Grill Plate
- Power Cord

Image 3.1: Front view of the appliance, showing the control panel and handle.
3.2 Control Panel
The digital control panel features an intuitive interface for easy operation. It includes:
- Power Button: To turn the appliance on/off.
- Temperature/Time Dial: To adjust cooking temperature and time.
- Preset Program Icons: 8 automatic programs for various dishes (Fries, Nuggets, Chicken, Pizza, Meat, Fish, Vegetables, Desserts).
- Timer Display: Shows remaining cooking time.
- Temperature Display: Shows current cooking temperature.
4. Setup and First Use
4.1 Unpacking
- Remove all packaging materials, stickers, and labels from the appliance.
- Ensure all components listed in Section 3.1 are present.
4.2 Cleaning Before First Use
- Wash the cooking basket and grill plate with hot water, dish soap, and a non-abrasive sponge.
- Rinse and dry all parts thoroughly.
- Wipe the inside and outside of the main unit with a damp cloth.
- Do not immerse the main unit in water or any other liquid.
4.3 Placement
- Place the appliance on a stable, horizontal, and heat-resistant surface.
- Ensure there is at least 10 cm (4 inches) of free space on the back and sides, and 10 cm (4 inches) above the appliance to allow for proper air circulation.
- Do not place the appliance against a wall or other appliances.
5. Operating Instructions
5.1 General Operation
- Plug the appliance into a grounded wall outlet.
- Press the Power button to turn on the appliance. The display will light up.
- Place your ingredients into the cooking basket or onto the grill plate, depending on the cooking method. Do not overfill.
- Slide the cooking basket back into the main unit until it clicks into place.
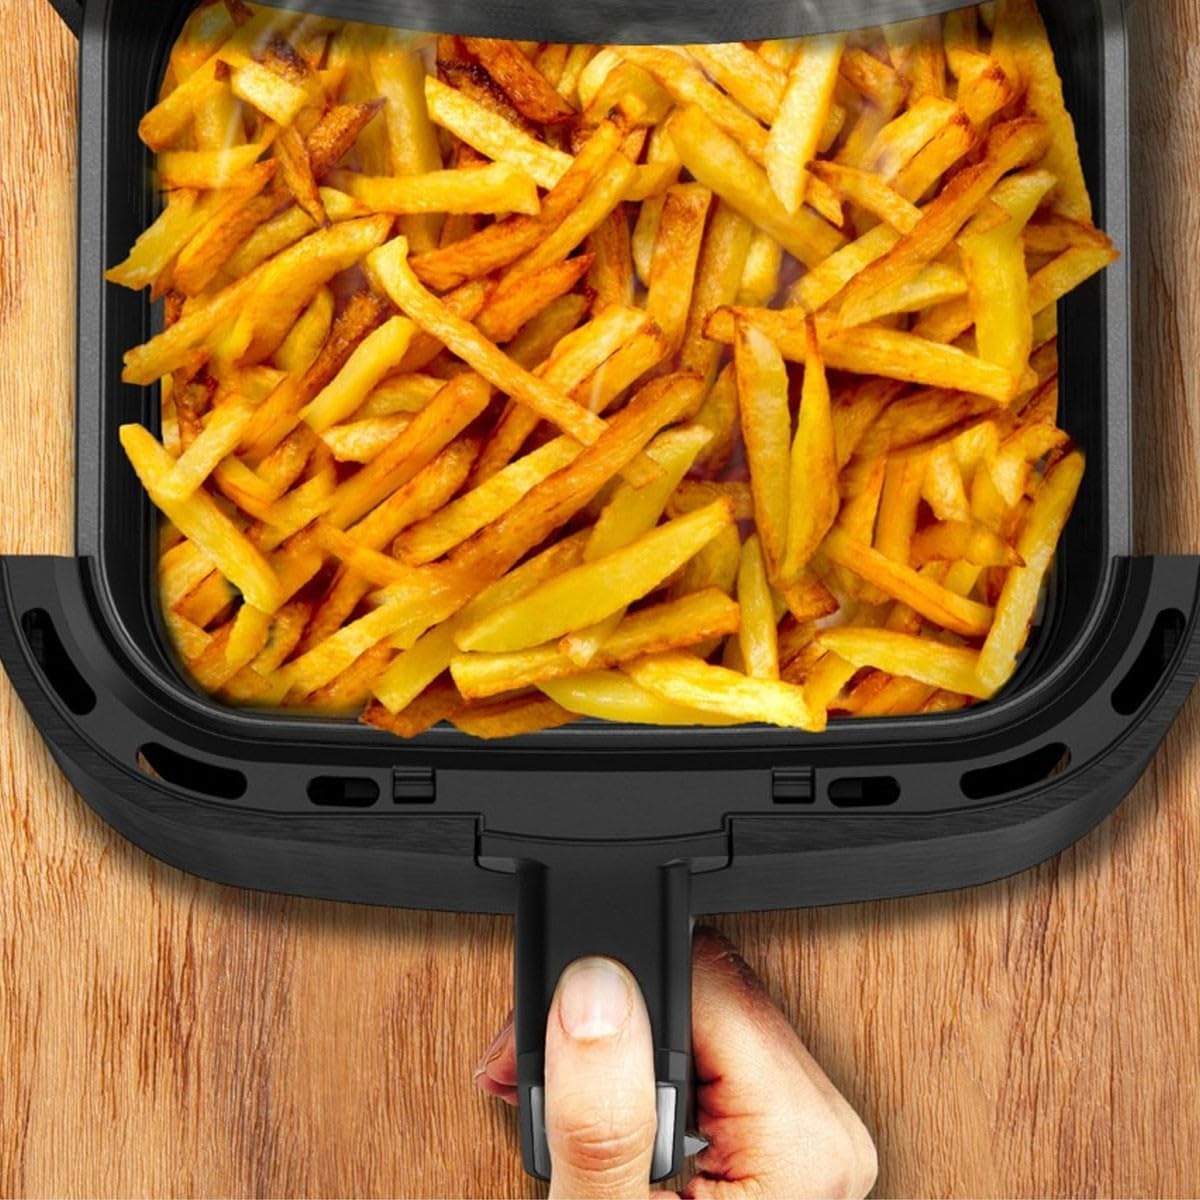
Image 5.1: Example of food (fries) placed inside the cooking basket.
5.2 Using Air Fry Function
The air fry function is ideal for achieving crispy results with minimal oil.
- Ensure the grill plate is removed if you are only air frying.
- Select one of the 8 preset programs by rotating the dial, or manually set the temperature and time.
- For manual settings, rotate the dial to adjust temperature (e.g., 180°C / 350°F) and then press the dial to switch to time adjustment (e.g., 15 minutes).
- Press the Start/Pause button to begin cooking.
- Some recipes may require shaking the basket halfway through cooking for even results. The appliance may beep to remind you.
- Once cooking is complete, the appliance will beep. Carefully pull out the basket and remove the food.
5.3 Using Grill Function
The die-cast aluminum grill plate allows for perfect grilling results indoors.
- Place the grill plate inside the cooking basket.
- Preheat the grill plate for optimal results. Select the "Meat" or "Fish" preset, or manually set the temperature to 200°C (390°F) for 5-10 minutes.
- Once preheated, carefully place your meat or vegetables onto the hot grill plate.
- Close the basket and continue cooking according to your recipe.
- Flip food halfway through cooking for even grilling marks.

Image 5.2: The appliance demonstrating its dual Air Fry and Grill capabilities with prepared meals.
5.4 Dehydration Function
The appliance also supports dehydration for healthy snacks like dried fruits and vegetables.
- Prepare ingredients by slicing them thinly and evenly.
- Place them in a single layer in the basket or on the grill plate.
- Set a low temperature (e.g., 40-60°C / 105-140°F) and a long cooking time (several hours), checking periodically until desired dryness is achieved.
6. Maintenance and Cleaning
Regular cleaning ensures optimal performance and extends the lifespan of your appliance.
6.1 Cleaning After Each Use
- Unplug the appliance and allow it to cool down completely before cleaning.
- Remove the cooking basket and grill plate.
- Wash the basket and grill plate with hot water, dish soap, and a non-abrasive sponge. These parts are also dishwasher safe.
- For stubborn food residue, soak the basket and grill plate in hot water with dish soap for about 10 minutes.
- Wipe the exterior of the appliance with a damp cloth. Do not use abrasive cleaning agents or scouring pads.
- Clean the heating element with a cleaning brush to remove any food residue.
- Ensure all parts are completely dry before storing.
6.2 Storage
Store the appliance in a cool, dry place, away from direct sunlight and moisture. Ensure the power cord is neatly wrapped.
7. Troubleshooting
If you encounter issues with your Moulinex Easy Fry & Grill, please refer to the following table before contacting customer service.
| Problem | Possible Cause | Solution |
|---|---|---|
| Appliance does not turn on. | Not plugged in; Power outlet not working; Appliance damaged. | Ensure the power cord is securely plugged into a working outlet. Try a different outlet. If still not working, contact customer service. |
| Food is not cooked evenly. | Basket overloaded; Food not shaken/flipped. | Do not overload the basket. Cook in smaller batches if necessary. Shake or flip food halfway through cooking. |
| Food is not crispy. | Too much moisture; Not enough oil (for some foods); Temperature too low; Cooking time too short. | Pat food dry before cooking. Lightly coat with oil if desired. Increase temperature or cooking time. |
| White smoke coming from appliance. | Greasy residue from previous use; High fat content food. | Clean the basket and grill plate thoroughly after each use. For high-fat foods, drain excess fat during cooking. |
| Appliance smells like burning plastic. | New appliance smell; Overheating. | A slight smell is normal during first few uses. Ensure proper ventilation. If smell persists or is strong, unplug immediately and contact customer service. |
8. Specifications
| Feature | Specification |
|---|---|
| Brand | Moulinex |
| Model Number | EZ501810 |
| Color | Black |
| Capacity | 4.6 Liters |
| Power | 1400 Watts |
| Voltage | 230 Volts |
| Material | Plastic |
| Special Feature | Temperature Control |
| Product Dimensions (L x W x H) | 36.1 x 27 x 32.4 cm (approx.) |
| Item Weight | 500 Grams |
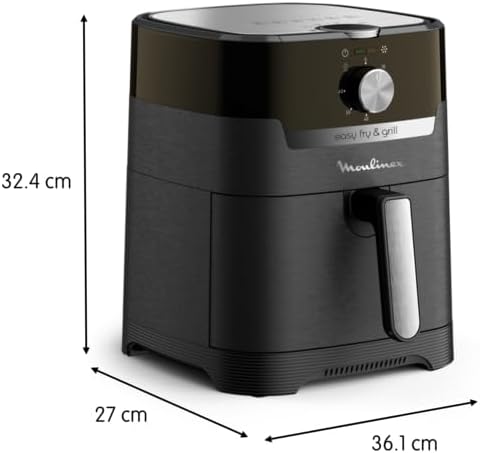
Image 8.1: Product dimensions for the Moulinex Easy Fry & Grill.
9. Warranty and Support
Information regarding spare parts availability is not provided in the product specifications. For warranty details, service, or support, please refer to the warranty card included with your purchase or visit the official Moulinex website.
You can also visit the Moulinex Store on Amazon for more product information and support resources.
Ask a question about this manual
Ask about setup, troubleshooting, compatibility, parts, safety, or missing instructions. Manuals+ will review the question and use this page’s manual context to help answer it.