
1. Introduction
Thank you for choosing the COSTWAY 45L Electronic Security Safe. This manual provides essential information for the correct installation, operation, and maintenance of your safe. Please read these instructions thoroughly before use and retain them for future reference. This safe is designed to protect your valuables with its robust construction, digital keypad, and advanced alarm system.
2. Important Safety Instructions
- Always keep the emergency keys in a secure location away from the safe and not inside it.
- Do not store the user manual or emergency keys inside the safe.
- Ensure the safe is securely mounted to prevent unauthorized removal.
- Keep the safe away from moisture and direct heat sources.
- Replace batteries promptly when the low battery indicator appears to ensure continuous functionality.
- Do not attempt to force the safe open if you forget the code or if the batteries are depleted. Use the emergency override methods described in this manual.
3. Setup and Installation
3.1 Package Contents
Before installation, please verify that all components are present:
- 1 x Electronic Safe
- 2 x Main Keys
- 2 x Emergency Keys
- 2 x Expansion Bolts
- 1 x Instruction Manual
3.2 Wall Mounting Installation
For enhanced security, it is recommended to mount the safe to a wall or floor. The safe includes pre-drilled holes and expansion bolts for this purpose.
- Choose a suitable location: Select a discreet and secure spot, such as inside a closet or cabinet.
- Mark drilling points: Place the safe in the desired position and mark the locations for the mounting holes on the wall or floor using a pencil.
- Drill holes: Using an appropriate drill bit, drill holes at the marked points. Ensure the depth and diameter are suitable for the expansion bolts.
- Insert expansion bolts: Insert the expansion bolts into the drilled holes.
- Secure the safe: Align the safe's mounting holes with the expansion bolts and tighten them securely.
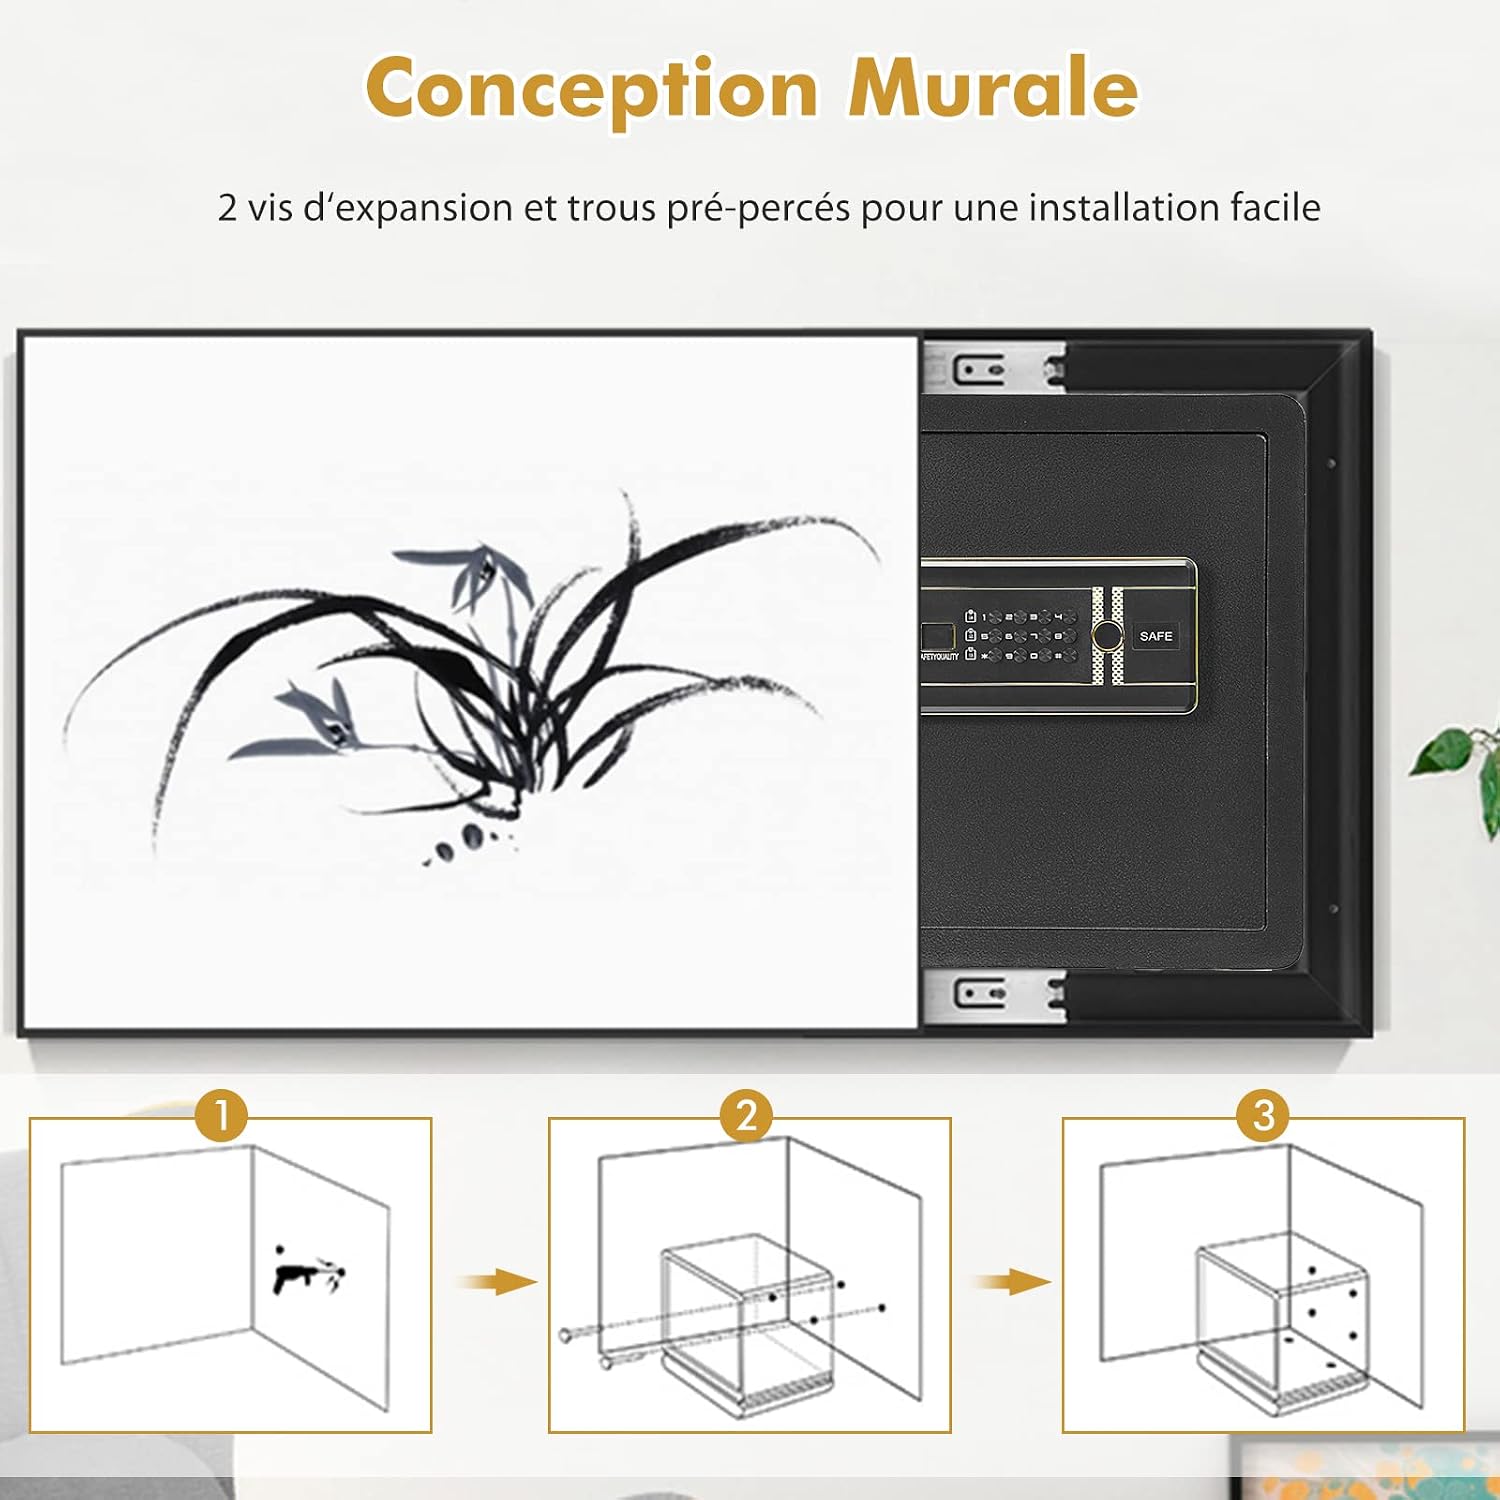
Image: Illustration of the wall mounting process for the security safe.
3.3 Battery Installation
The safe requires batteries for the electronic keypad to function. The battery compartment is typically located on the inside of the safe door.
- Open the safe using the emergency key (refer to section 4.1 if needed).
- Locate the battery compartment cover on the inside of the door.
- Remove the cover and insert the required batteries (usually AA or AAA, check the compartment for specific type and polarity).
- Replace the battery compartment cover.
4. Operating Instructions
4.1 Opening the Safe
Your safe offers three methods for opening:
- Daily Use (Personal Password + Main Key):
Enter your personal password on the digital keypad, then turn the main key clockwise to open the safe door. - Forgotten Password (Main Key + Emergency Key):
If you forget your personal password, insert the main key and the emergency key into their respective keyholes. Turn both keys simultaneously to open the safe. - Low Battery (Main Key + Personal Password + Portable Charger):
If the batteries are depleted, connect a portable charger (e.g., power bank) to the Micro-USB interface on the keypad. Then, enter your personal password and turn the main key to open the safe.

Image: Visual guide to the three methods for opening the COSTWAY security safe.
4.2 Setting/Changing the Personal Password
To set or change your personal password:
- With the safe door open, press the reset button located on the inside of the door (usually a small red or green button).
- The indicator light on the keypad will flash, indicating it is ready for a new password.
- Enter your desired 3-8 digit password on the keypad.
- Press the '#' key to confirm. The indicator light will stop flashing, confirming the new password is set.
4.3 Anti-Peeping Technology
This safe features anti-peeping technology to prevent others from guessing your password. You can enter any random numbers before or after your correct password. The safe will only recognize the correct sequence within the entered digits.

Image: Explanation of the anti-peeping function, allowing dummy digits around the actual code.
4.4 Alarm System
The safe is equipped with a sensitive alarm system:
- Incorrect Entry Alarm: If three consecutive incorrect password entries are made, or if the safe experiences violent vibrations, the alarm will activate with a loud beep and a flashing red light.
- Manual Alarm Activation: You can manually activate the alarm by pressing the '*' key on the keypad.

Image: Visual representation of the safe's double alarm system.
4.5 Storage Capacity and Removable Shelf
The 45L capacity safe provides ample space for various valuables such as cash, jewelry, passports, and cameras. It features a removable interior shelf, allowing you to adjust the storage space to accommodate larger items as needed. The interior is lined with leather to protect your belongings from scratches and wear.

Image: Interior view of the 45L safe demonstrating its storage capacity and dimensions.

Image: The removable shelf feature, offering flexible storage options within the safe.
5. Maintenance
- Cleaning: Wipe the safe's exterior with a soft, damp cloth. Avoid abrasive cleaners or solvents that could damage the finish.
- Battery Replacement: Replace batteries when the low battery indicator illuminates or if the keypad becomes unresponsive. Always use new batteries of the specified type.
- Key Care: Keep keys clean and dry. Do not force keys into the lock.
6. Troubleshooting
| Problem | Possible Cause | Solution |
|---|---|---|
| Safe does not open with password. | Incorrect password entered; batteries are low or dead. | Re-enter the correct password carefully. If batteries are low, use the main key + password + portable charger method. |
| Keypad is unresponsive. | Batteries are dead or incorrectly installed. | Replace batteries. Ensure correct polarity. Use the main key + emergency key to open if necessary. |
| Alarm sounds unexpectedly. | Three incorrect password entries; violent vibration detected. | Enter the correct password to disarm the alarm. Avoid bumping or shaking the safe. |
| Cannot set a new password. | Reset button not pressed correctly; password too short/long. | Ensure the reset button is pressed firmly. Enter a password between 3 and 8 digits. |
7. Product Specifications
| Feature | Detail |
|---|---|
| Brand | COSTWAY |
| Model Number | B09TR3CXZZ |
| Product Dimensions (D x W x H) | 36 x 31 x 41 cm |
| Internal Dimensions (D x W x H) | 35 x 30 x 36 cm |
| Lock Type | Key, Electronic |
| Color | Black |
| Capacity | 45 Liters |
| Material | Alloy Steel (Carbon Steel Construction) |
| Special Feature | Portable, Removable Shelf, Anti-Peeping Technology |
| Mounting Type | Wall Mount |
| Alarm | Yes (Incorrect entry, Vibration) |
| Weight | 13 kg |

Image: Detailed product specifications and package contents.
8. Warranty and Support
For warranty information and customer support, please refer to the documentation provided at the time of purchase or contact COSTWAY customer service directly. Keep your purchase receipt as proof of purchase for any warranty claims.