KCO L7087
KCO Lighting L7087 3-Light Glass Globe Pendant Light Instruction Manual
Model: L7087
Important Safety Information
Please read and understand all instructions before beginning installation. Failure to do so may result in electric shock, fire, or other injuries that could be fatal or cause serious damage. All electrical connections must be in accordance with local codes, ordinances, or the National Electric Code (NEC).
- Always disconnect power at the main circuit breaker before installation or maintenance.
- Consult a qualified electrician if you have any electrical questions.
- Wear safety glasses and appropriate protective gear during installation.
- Ensure the fixture is securely mounted to a structural ceiling component.
- Do not exceed the maximum wattage specified for the bulbs.
- This fixture is designed for indoor use only.
Package Contents
Verify that all components are present and undamaged before proceeding with installation.
- Ceiling Canopy (1)
- Mounting Bracket (1)
- Glass Globes (3)
- Lamp Bodies with Adjustable Cords (3)
- Hardware Pack (screws, wire nuts, anchors)

Figure 1: Exploded view of the pendant light components.
Specifications
| Feature | Detail |
|---|---|
| Brand | KCO |
| Model Number | L7087 |
| Color | Smoke Grey |
| Material | Glass |
| Light Fixture Form | Chandelier / Pendant |
| Product Dimensions | 5.9"L x 11.8"W x 59"H (Adjustable Cord) |
| Bulb Base | E26 |
| Maximum Compatible Wattage | 60 Watts per bulb |
| Voltage | 110-240V (AC) |
| Number of Light Sources | 3 |
| Installation Type | Semi Flush Mount |
| Special Feature | Adjustable Height |
| Indoor/Outdoor Usage | Indoor |
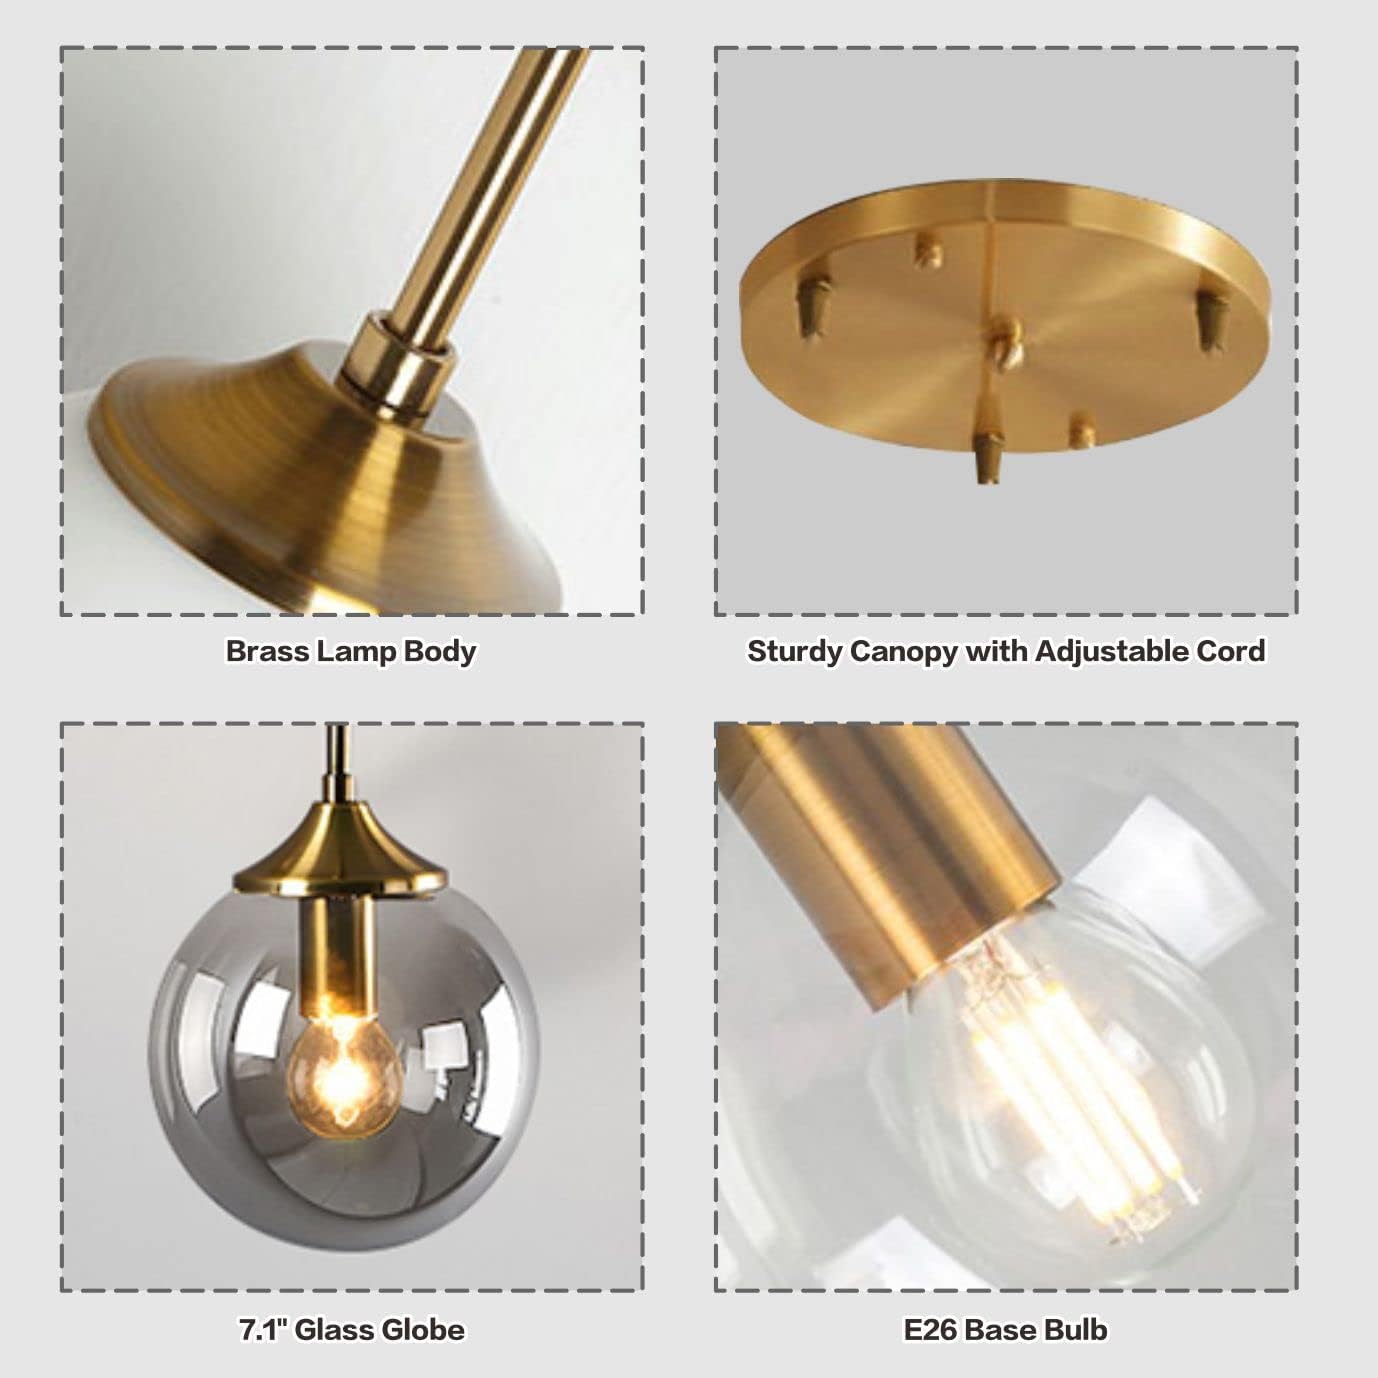
Figure 2: Product dimensions including globe diameter, canopy, and adjustable cord length.
Setup and Installation
Professional installation is recommended. Ensure power is OFF at the circuit breaker before starting.
- Prepare the Mounting Bracket: Attach the mounting bracket to your ceiling junction box using the provided screws. Ensure it is securely fastened.
- Adjust Cord Lengths: Determine the desired hanging height for each pendant. Loosen the cord grips on the canopy and adjust each cord to the desired length. Securely tighten the cord grips.
- Wire Connections: Connect the fixture's wires to your household electrical wires.
- Connect the black fixture wire to the black (Live) household wire.
- Connect the white fixture wire to the white (Neutral) household wire.
- Connect the green/copper fixture wire to the green/bare copper (Ground) household wire.
- Mount the Canopy: Carefully push the canopy up to the ceiling, aligning the mounting screws on the bracket with the holes in the canopy. Secure the canopy with the decorative nuts.
- Attach Glass Globes: Carefully screw each glass globe onto its respective lamp body. Do not overtighten.
- Install Bulbs: Insert E26 base bulbs (not included) into each socket. Do not exceed 60 watts per bulb.
Video 1: General guide on how to install a round ceiling canopy.

Figure 3: Wiring diagram for connecting the fixture to household electrical supply.
Operating Instructions
Once installed and wired correctly, restore power at the circuit breaker. The light fixture can be operated using a standard wall switch (not included). This fixture is compatible with E26 base bulbs, including LED, CFL, Halogen, and Incandescent types, up to 60 watts per bulb.

Figure 4: E26 bulb base detail.
Maintenance
- Cleaning: Disconnect power before cleaning. Wipe the fixture with a soft, dry cloth. Do not use abrasive cleaners or solvents as they may damage the finish or glass.
- Bulb Replacement: Ensure power is off and bulbs have cooled before replacing. Unscrew the old bulb and screw in a new E26 base bulb, ensuring it does not exceed 60 watts.
- Inspection: Periodically check all connections and mounting hardware for tightness.
Troubleshooting
| Problem | Possible Cause | Solution |
|---|---|---|
| Light does not turn on. | 1. Power is off at the circuit breaker. 2. Loose wire connections. 3. Faulty bulb. | 1. Check the circuit breaker and ensure power is on. 2. Verify all wire connections are secure (with power off). 3. Replace the bulb with a new one. |
| Flickering light. | 1. Loose bulb. 2. Incompatible dimmer switch (if applicable). 3. Loose wiring. | 1. Tighten the bulb. 2. Ensure dimmer switch is compatible with LED/CFL bulbs if used. 3. Check all wire connections (with power off). |
| Fixture is unstable. | Loose mounting screws or bracket. | Ensure the mounting bracket and canopy screws are securely tightened. |
Warranty
KCO Lighting provides a 3-year warranty for this product. If you receive broken, damaged, cracked glass lampshades, or are missing any parts, please contact the seller "KCO Lighting" via your order number for a replacement.
Support
For any questions, issues, or assistance, please communicate with the seller "KCO Lighting" through your order details. We aim to provide a solution within 24 hours.
Related Documents - L7087
 |
Chandelier Installation Guide Step-by-step instructions for installing a modern gold brass LED Sputnik chandelier with white acrylic lampshade. |
 |
Premio 2025 Product Solution Guide: Industrial Computing from Edge to Cloud Explore Premio's comprehensive 2025 Product Solution Guide, featuring rugged and reliable industrial computing solutions for edge-to-cloud applications. Discover edge AI, machine vision, railway, and smart city systems, alongside industrial panel PCs, touch monitors, and motherboards. |
 |
IBM 1735 Rack-Based Local Console Switches: Product Guide (Withdrawn) Product guide for the withdrawn IBM 1735 Rack-Based Local Console Switches, detailing features, specifications, part numbers, connectivity options like chaining and tiering, virtual media capabilities, and system compatibility for data center environments. |
 |
Premio Product Solution Guide 2026: Industrial Computing from Edge to Cloud Explore Premio's comprehensive 2026 Product Solution Guide, featuring industrial computers, panel PCs, and edge AI solutions designed for rugged environments, from the edge to the cloud. Discover robust hardware for AI factories, robotics, transportation, and more. |
 |
C&T Solution Inc. 2024 Product Solution Guide: Industrial Computing from Edge to Cloud Explore C&T Solution Inc.'s comprehensive 2024 Product Solution Guide, featuring rugged industrial computing solutions, panel PCs, touch monitors, and motherboards designed for robust edge-to-cloud applications. |
 |
Amazon Overstock BL# AMZOS0330-18p: Product Catalog Explore a diverse catalog of overstock items from Amazon, featuring a wide range of consumer goods including home decor, electronics, tools, and more, with product descriptions and pricing. |