1. Introduction
This manual provides comprehensive instructions for assembling your CUTEBEE QT32 DIY Miniature Dollhouse Kit. This kit is designed for hobbyists and collectors, offering a detailed and engaging building experience. The finished product serves as a decorative item rather than a toy.
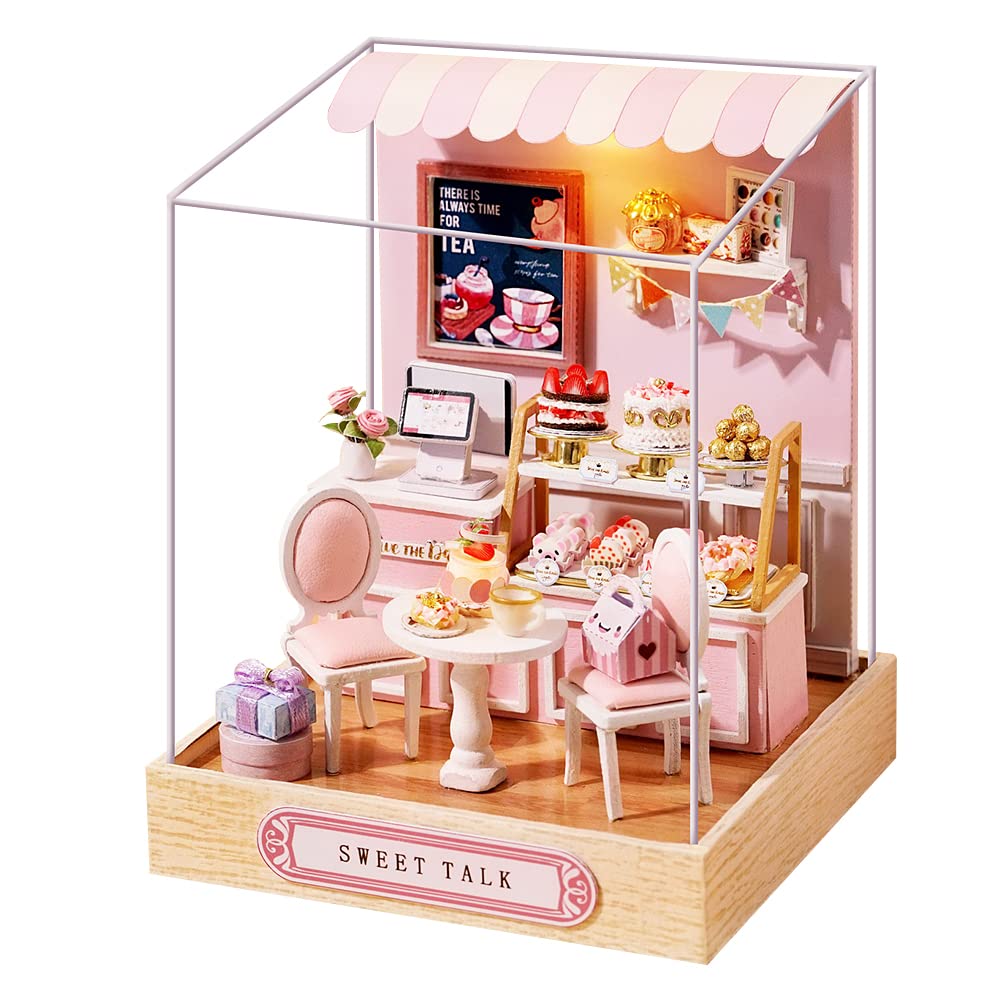
Image: The CUTEBEE QT32 miniature dollhouse kit, fully assembled, depicting a charming sweet shop with illuminated interior.
Please read all instructions carefully before beginning assembly. Patience and attention to detail are key to a successful build.
2. Safety Information
- This product contains small parts and is not suitable for children under 14 years of age. Adult supervision is recommended for younger builders.
- Exercise caution when using sharp tools such as knives and scissors during assembly.
- Keep glue and batteries out of reach of small children.
- Ensure adequate ventilation when using adhesives.
3. Package Contents
Your CUTEBEE QT32 kit includes the following:
- Pre-cut wooden pieces for the dollhouse structure and furniture.
- Various accessories such as fabric, paper, plastic, and metal components.
- LED light components.
- A visual, colorful instruction manual with step-by-step guidance.

Image: Product information graphic detailing dimensions (9x9x11.5cm), weight (0.45kg), assembly time (1-2 days), and materials (wood, paper, cloth).
4. Tools and Materials Not Included
The following items are essential for assembly but are not included in the kit due to shipping restrictions. Please prepare them before starting:
- Adhesive: Silicone liquid glue is recommended.
- Batteries: Three LR44 button cell batteries for the LED lights.
- Cutting Tools: Paper scissors, craft knife.
- Precision Tools: Precision tweezers, small screwdriver.
5. Setup and Assembly
The assembly process involves grinding, bonding, and modeling various components. Follow the included visual instruction manual for detailed, step-by-step guidance.
5.1 Preparation
- Unpack all components and verify against the parts list in your visual manual.
- Organize parts by type or step to streamline the assembly process.
- Prepare your workspace, ensuring it is clean, well-lit, and has enough space for all components and tools.
5.2 General Assembly Steps
Refer to your colorful instruction manual for specific diagrams and sequences. The general process includes:
- Cutting: Carefully cut out paper and fabric components using scissors or a craft knife.
- Sanding: Lightly sand wooden edges if necessary for a smoother fit.
- Bonding: Apply glue sparingly to join wooden and other components. Hold pieces together until the glue sets.
- Folding & Shaping: Fold paper components and shape wires as instructed.
- Wiring: Connect LED light components according to the diagrams. Ensure correct polarity for batteries.
- Detailing: Add small decorative elements using tweezers for precision.
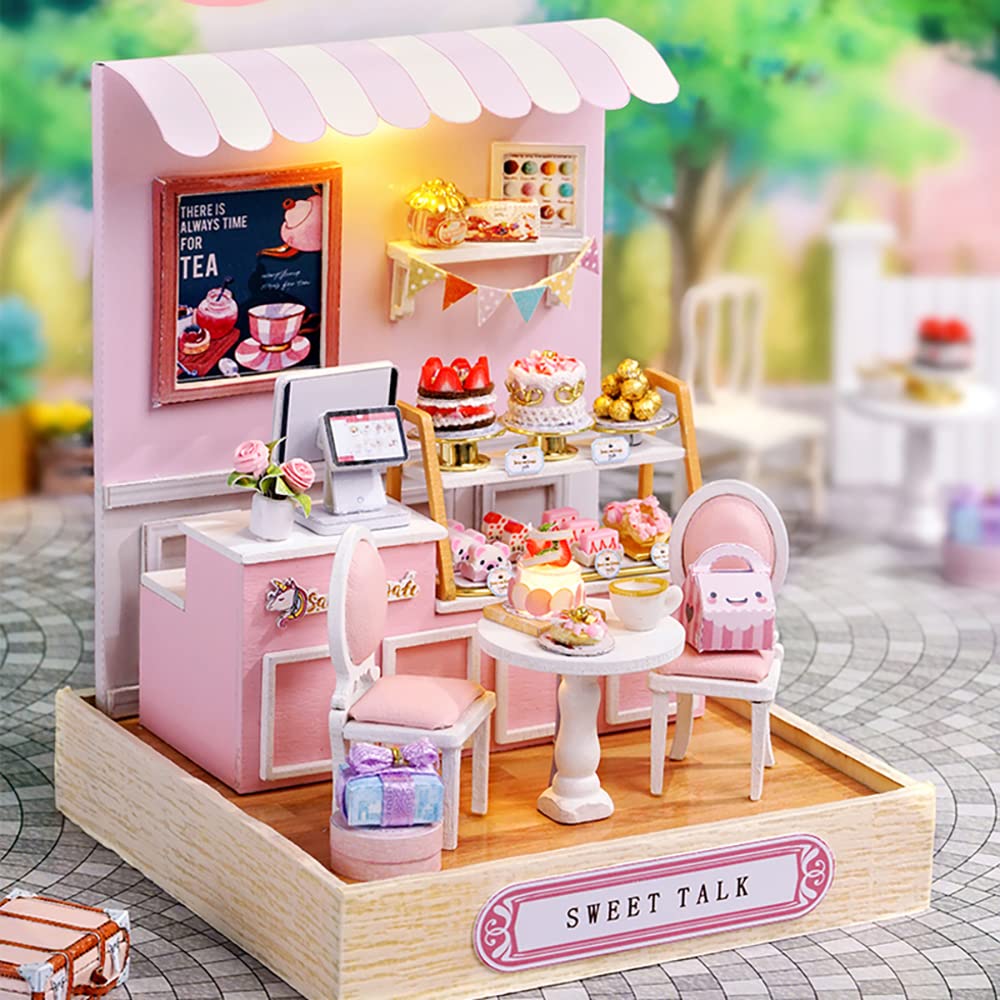
Image: A fully assembled CUTEBEE QT32 miniature dollhouse, depicting a charming sweet shop with cakes, a tea sign, and small furniture.

Image: A collage of detailed elements from the dollhouse, showing miniature gift boxes, a tiny tablet display, a vase with roses, and a shelf with various sweets.

Image: A close-up view of miniature cakes and pastries displayed on a shelf within the dollhouse, showcasing intricate details.

Image: A detailed shot of the miniature tea sign on the wall and a tiny point-of-sale system with a screen, adding realism to the sweet shop scene.

Image: A close-up of a miniature white table with a small cake and a coffee cup, illustrating the fine details of the dollhouse furniture and accessories.
6. Operating the LED Lights
Once assembly is complete and batteries are installed, the LED lights can be operated. Locate the battery compartment and switch, typically found at the base or rear of the dollhouse. Flip the switch to turn the lights on or off.
Ensure batteries are inserted with correct polarity (+/-) as indicated in the battery compartment.
7. Maintenance and Care
- Keep the dollhouse in a dry environment, away from direct sunlight and excessive humidity, to prevent material degradation.
- Dust regularly with a soft, dry cloth or a soft brush. Avoid using abrasive cleaners or liquids.
- If the LED lights dim, replace the LR44 batteries.
- Handle the finished dollhouse with care, as it contains delicate miniature components.
8. Troubleshooting
- Problem: Missing or damaged parts.
- Solution: If you encounter any missing or damaged parts during assembly, please contact CUTEBEE customer support immediately for unconditional replacement. Refer to the "Support" section for contact details.
- Problem: LED lights do not turn on.
- Solution:
- Check if the LR44 batteries are inserted correctly with the correct polarity.
- Ensure the batteries are new and fully charged.
- Verify all wiring connections are secure according to the instruction manual.
- Problem: Pieces do not fit together properly.
- Solution:
- Double-check the instruction manual to ensure you are using the correct pieces for the step.
- Lightly sand edges of wooden pieces if they are too tight.
- Avoid forcing pieces, as this can cause damage.
9. Specifications
The following specifications are based on the product information provided, including the "PRODUCT INFO" graphic:
| Brand | CUTEBEE |
| Model Name (as per product info graphic) | SWEET TALK |
| Product Model Number (from Amazon listing) | QT (also referred to as QT32 in product title) |
| Scale | 1:24 |
| Finished Product Dimensions | 9 x 9 x 11.5 cm (3.5 x 3.5 x 4.5 inches) |
| Product Weight | 0.45 kg (0.99 lbs) |
| Assembly Time | 1-2 days |
| Main Materials | Wood, Paper, Cloth, etc. |
| Recommended Age | 14+ years |
10. Support and Warranty
CUTEBEE is committed to customer satisfaction. If you encounter any issues during assembly, such as damaged or missing parts, please contact our customer support team for assistance.
Contact Information: Please refer to the packaging or the retailer's website for the most current customer service contact details.
Warranty: The manufacturer provides unconditional replacement for damaged or missing parts. Please retain your proof of purchase.