HOMVILLA HM606A
HOMVILLA Alarm Clock User Manual
Model: HM606A
Introduction
Thank you for choosing the HOMVILLA Digital Alarm Clock. This compact and versatile alarm clock is designed for convenience and reliability, featuring a clear LCD display, temperature reading, snooze function, and backlight. It is ideal for use in bedrooms, during travel, or in any space where a reliable timekeeping device is needed. Please read this manual carefully to ensure proper operation and to fully utilize all features of your new alarm clock.

Figure 1: Front view of the HOMVILLA Digital Alarm Clock displaying time, date, and temperature.
Package Contents
- 1 x HOMVILLA Digital Alarm Clock
- 2 x AAA Batteries
- 1 x User Manual (this document)
Product Overview

Figure 2: Rear view of the alarm clock, highlighting the control buttons and battery compartment.
Control Buttons:
| Button | Function |
|---|---|
| SNOOZE/LIGHT | Activates backlight for 8 seconds; when alarm sounds, press to activate 5-minute snooze. |
| SET | Enters setting mode for time, date, and alarm. |
| ALARM | Toggles alarm on/off; enters alarm setting mode. |
| UP (▲) | Increases value during setting; switches between 12/24H format. |
| DOWN (▼) | Decreases value during setting; switches between °C/°F temperature display. |
Setup
1. Battery Installation
- Open the battery compartment cover on the back of the alarm clock.
- Insert two (2) AAA batteries, ensuring correct polarity (+ and -).
- Close the battery compartment cover securely.
Figure 3: Insert 2*AAA batteries into the compartment as shown.
Note: Use high-quality carbon batteries for optimal performance and to prolong the life of the clockwork. Avoid strong alkaline or rechargeable batteries.
2. Initial Time and Date Setting
- Press the SET button once to enter time setting mode. The year will start flashing.
- Use the UP or DOWN buttons to adjust the year.
- Press SET again to confirm and move to the next setting (Month, Day, Hour, Minute).
- Repeat step 2 and 3 for Month, Day, Hour, and Minute.
- After setting the minutes, press SET to exit setting mode.
To switch between 12-hour and 24-hour time format, press the UP button while in normal time display mode.
To switch between Celsius (°C) and Fahrenheit (°F) temperature display, press the DOWN button while in normal time display mode.
Operating Instructions
1. Setting the Alarm
- Press the ALARM button once. The alarm time will be displayed.
- Press and hold the ALARM button for 3 seconds until the alarm hour starts flashing.
- Use the UP or DOWN buttons to adjust the alarm hour.
- Press ALARM again to confirm and move to the alarm minute setting.
- Use the UP or DOWN buttons to adjust the alarm minute.
- Press ALARM again to confirm and exit alarm setting mode.
2. Activating/Deactivating the Alarm
- In normal time display mode, press the ALARM button briefly to toggle the alarm on or off.
- When the alarm is active, an alarm icon (bell symbol) will appear on the display.
3. Snooze Function
When the alarm sounds, press the large SNOOZE/LIGHT button on top of the clock. The alarm will pause for 5 minutes and then sound again.
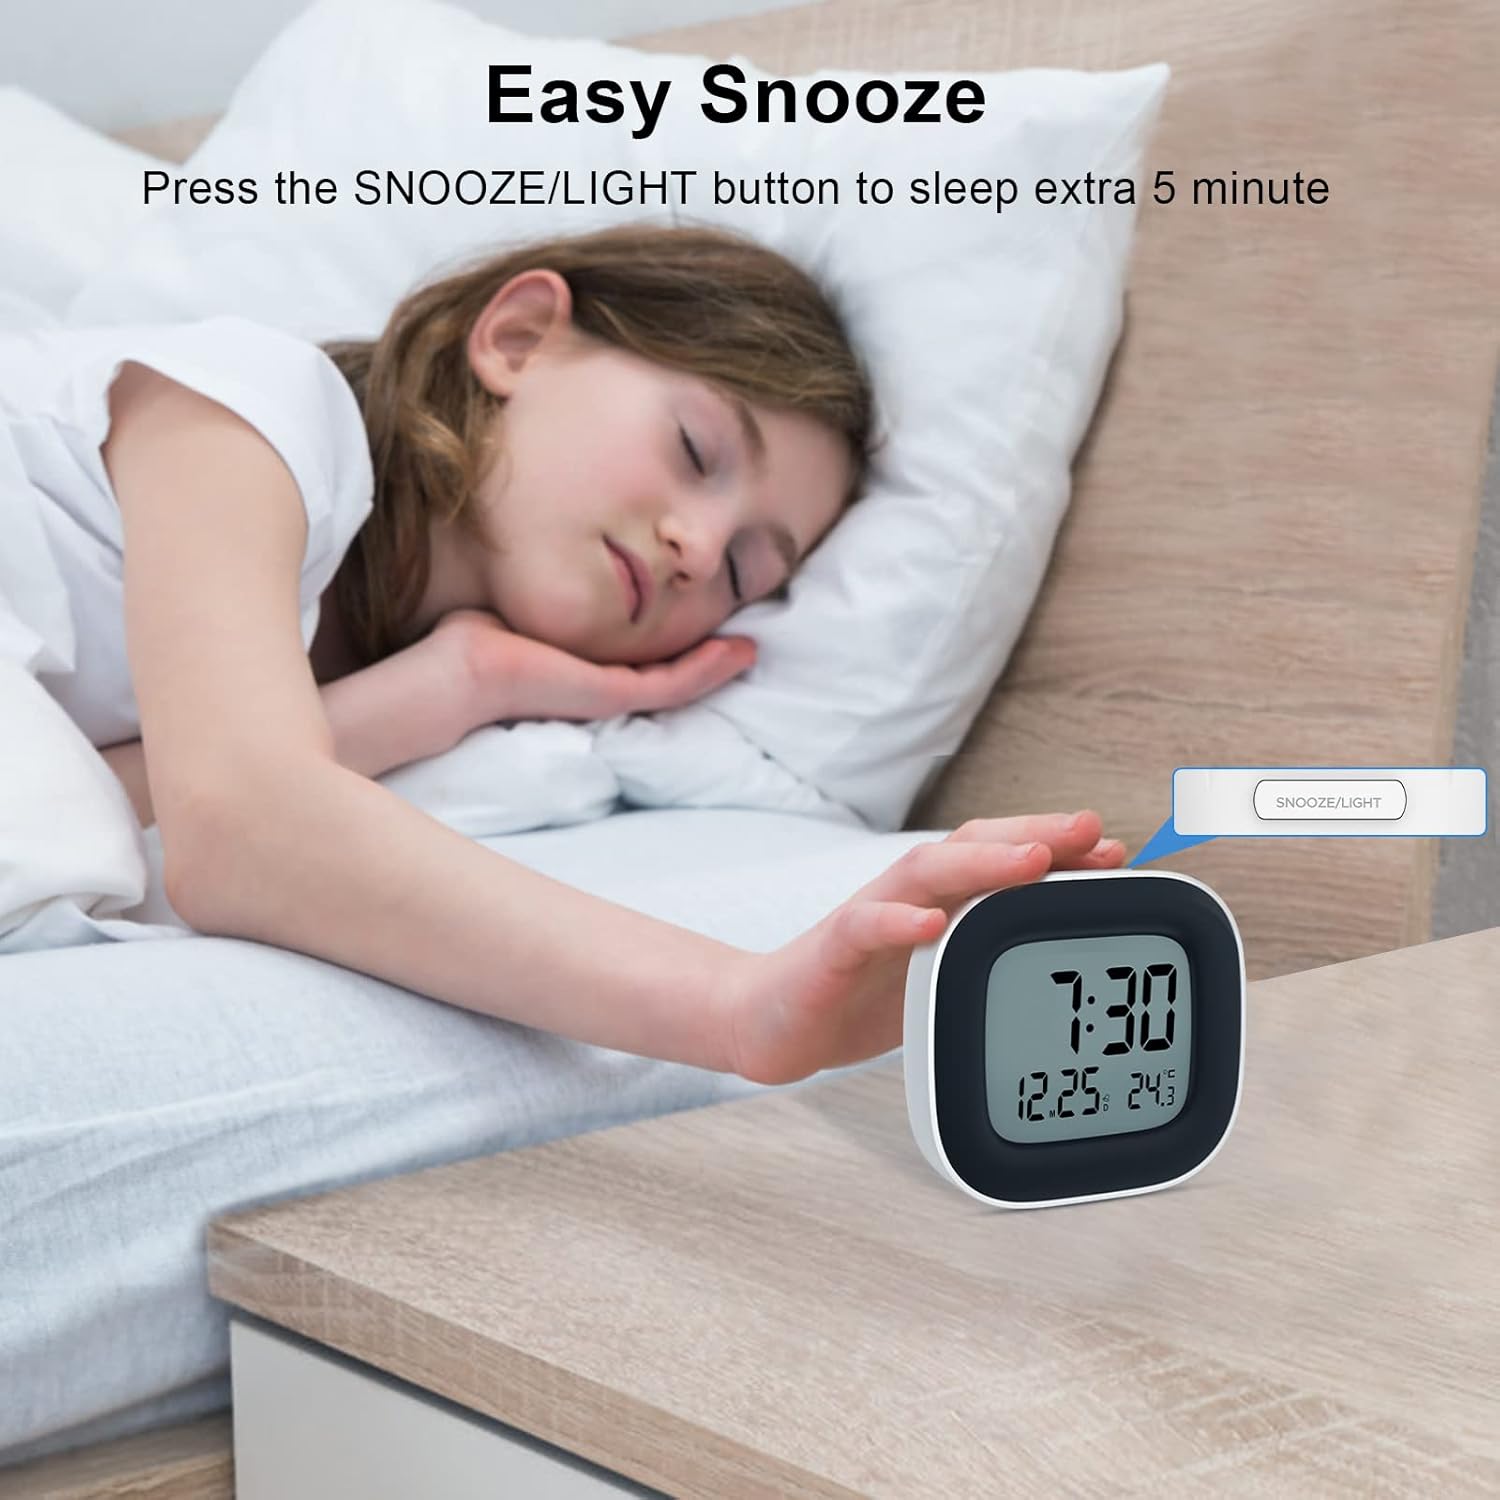
Figure 4: Activating the snooze function for an additional 5 minutes of sleep.
To turn off the alarm completely when it is sounding, press any button on the back of the clock (SET, ALARM, UP, DOWN). The alarm will reset for the next day.
4. Backlight Function
In low light conditions or at night, press the SNOOZE/LIGHT button on top of the clock to illuminate the display. The backlight will automatically turn off after approximately 8 seconds to conserve battery life.

Figure 5: The backlight provides clear visibility of the display in the dark.
Maintenance
1. Battery Replacement
When the display becomes dim or the alarm sound weakens, it is time to replace the batteries. Follow the battery installation steps in the "Setup" section. Always replace both AAA batteries at the same time.
2. Cleaning
Wipe the clock's surface with a soft, dry cloth. Do not use abrasive cleaners or chemical solvents, as these may damage the display or casing.
Troubleshooting
| Problem | Possible Cause | Solution |
|---|---|---|
| Display is blank or dim. | Batteries are low or incorrectly installed. | Replace with fresh AAA batteries, ensuring correct polarity. |
| Alarm does not sound. | Alarm is not activated or set incorrectly. | Ensure the alarm icon is visible on the display. Re-check alarm time settings. |
| Time/Date is incorrect. | Time/Date was not set properly or reset after battery change. | Follow the "Initial Time and Date Setting" instructions to set the correct time and date. |
| Backlight does not work. | Batteries are too low to power the backlight effectively. | Replace batteries. |
Specifications
- Brand: HOMVILLA
- Model Number: HM606A
- Colour: White
- Product Dimensions: 8.2 x 3.81 x 8 cm
- Item Weight: 24 g
- Material: Acrylonitrile Butadiene Styrene (ABS)
- Display Type: Digital LCD
- Special Features: Alarm, Snooze, Backlight, Temperature Display (°F/°C), 12/24H Format
- Power Source: 2 x AAA Batteries (included)

Figure 6: Dimensions of the HOMVILLA Digital Alarm Clock.
Warranty and Support
HOMVILLA provides a Lifetime Warranty for this product. We are committed to ensuring your satisfaction.
If you encounter any issues or have questions regarding your HOMVILLA Alarm Clock, please do not hesitate to contact our customer support team. We aim to resolve all inquiries within 24 hours.
For support, please refer to the contact information provided with your purchase or visit the official HOMVILLA website.
Ask a question about this manual
Ask about setup, troubleshooting, compatibility, parts, safety, or missing instructions. Manuals+ will review the question and use this page’s manual context to help answer it.