Introduction
This manual provides comprehensive instructions for the installation, operation, and maintenance of your TIGERSGATE Pre-wired 12-inch Rise Chrome Meathook Monkey Bar Handlebars. Please read this manual thoroughly before installation and retain it for future reference. Proper installation and care ensure optimal performance and safety.
Safety Information
Important: This is an aftermarket modification item. While designed for the listed models, modifications may be required. Professional installation is strongly recommended to ensure correct fitment and safe operation. Incorrect installation can lead to serious injury or damage to your motorcycle.
- Always wear appropriate safety gear during installation.
- Ensure the motorcycle is stable and secured before beginning any work.
- Disconnect the battery before working on electrical components.
- Refer to your motorcycle's service manual for specific torque specifications and procedures.
- After installation, thoroughly check all controls for proper function before riding.
Package Contents
Verify that all items listed below are present in your package:
- 1 x Pre-wired Handlebar (Chrome, 12-inch Rise)
- 1 x Plug-and-Play CAN-Bus Switch Control Harness (with connectors)
- 1 x Throttle By Wire (TBW) Harness (without plugs)
- 1 x Easy Installation Tools Kit (does not include pull cable)
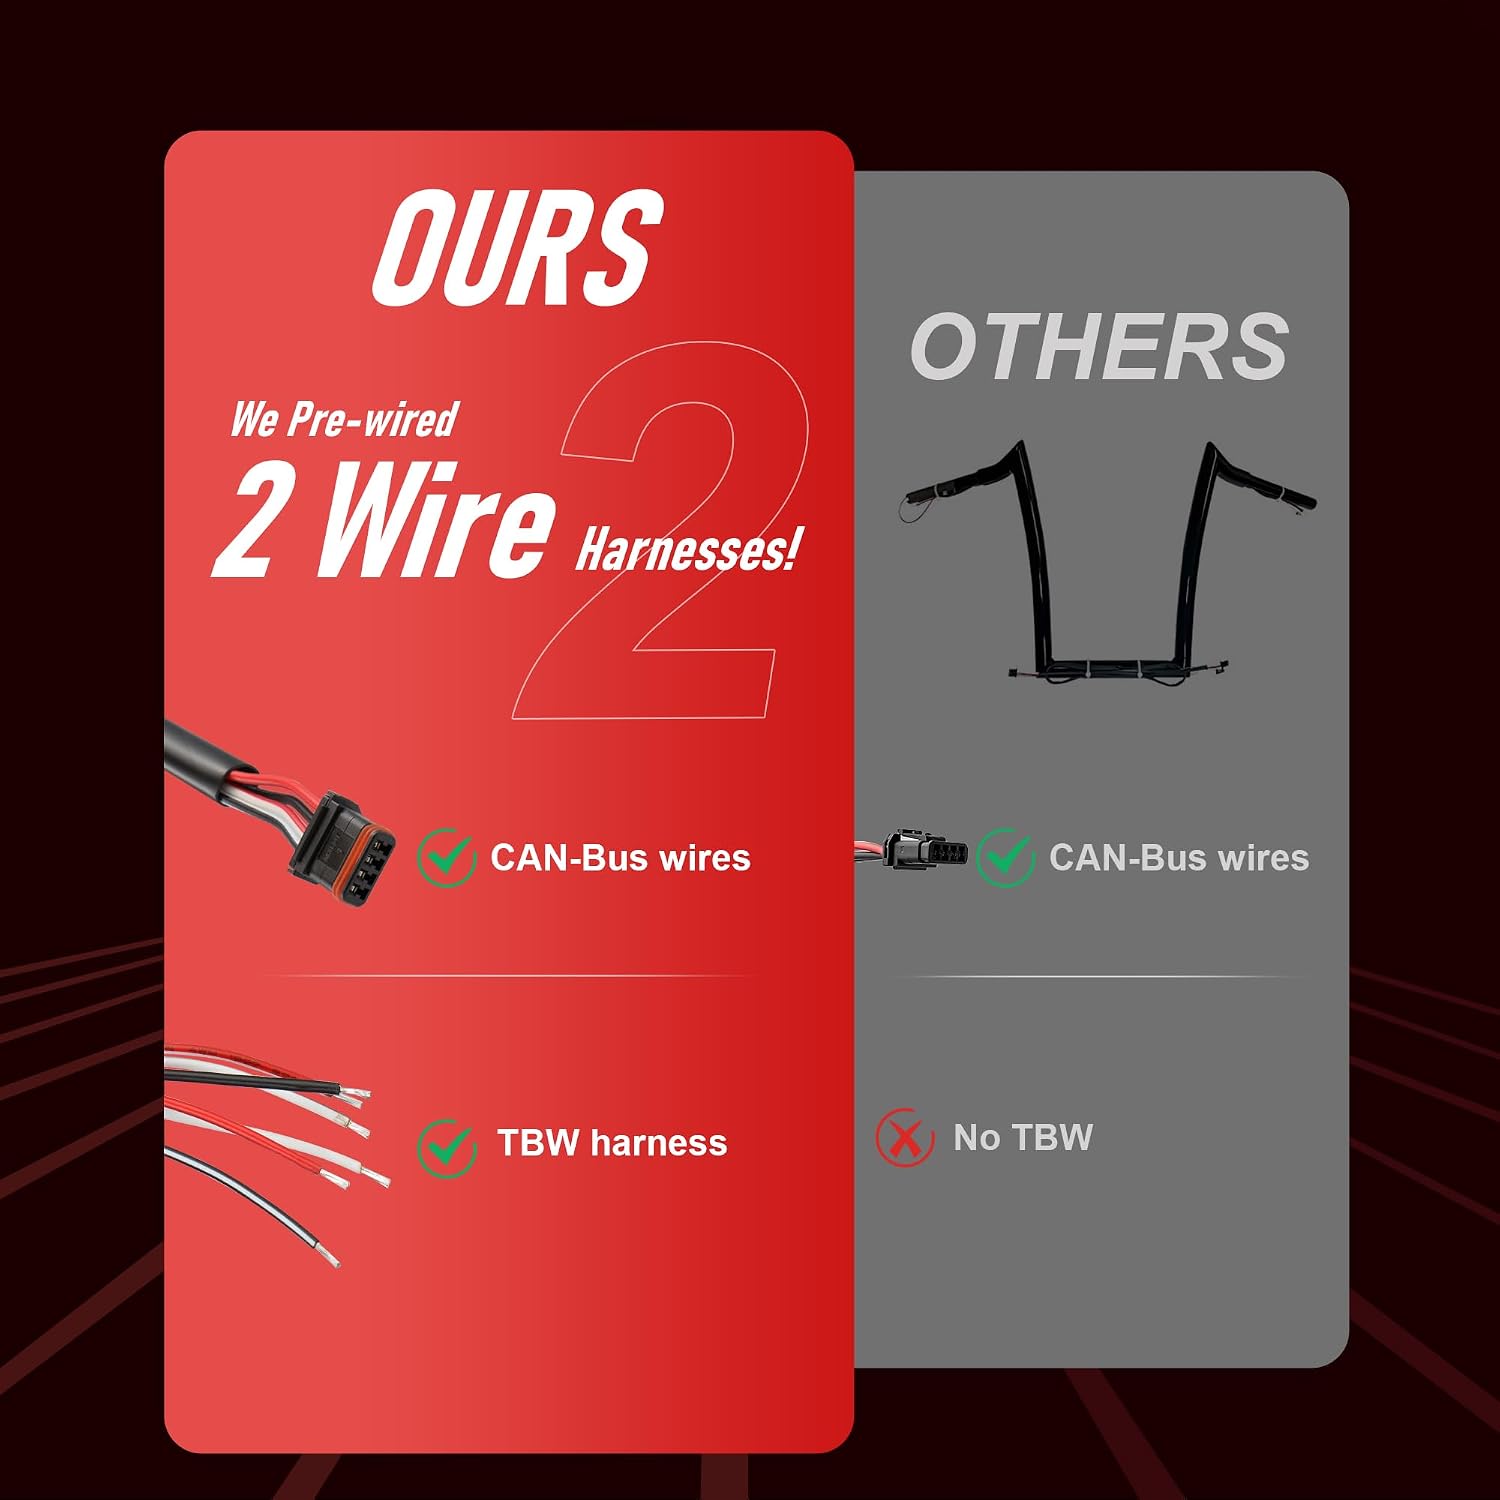
Image: Comparison of TIGERSGATE pre-wired handlebars with competitors, showing the inclusion of both CAN-Bus and Throttle By Wire (TBW) harnesses.
Specifications
| Brand | TIGERSGATE |
| Model Number | TIGERSGATE-PRE-10 |
| Color | Chrome |
| Rise (Height) | 12 inches (bottom-to-grip end rise) |
| Bar Diameter | 1.25 inches |
| Clamping Area Diameter | 1 inch (for stock mounting clamp) |
| Product Dimensions | Approximately 33"L x 12"W |
| Material | High-quality SAPH440 Steel with Chrome Plated Surface |
| Wiring | Pre-wired with CAN-Bus switch control harness and Throttle By Wire (TBW) harness |
Fitment
Designed for 2016-2023 Harley Road Glide models.
Note for CVO & Ultra Bikes: For CVO and Ultra Road Glide models, the alignment pin hole on the stock risers is located on the left side of the bar bottom, which differs from these handlebars. To fit these handlebars, you may either use pliers to remove the alignment pin from the risers or drill an additional hole on the left side of the handlebar bottom to accommodate the pin.

Image: Detailed size guide illustrating key dimensions of the handlebars, including rise, width, and bar diameter.

Image: Specifications diagram providing a visual overview of all critical handlebar measurements.
Setup and Installation
The TIGERSGATE handlebars are designed for easier installation due to their pre-wired nature. However, careful attention to detail is crucial.
1. Pre-wired System Overview
These handlebars come fully pre-wired with a CAN-Bus switch control harness (with connectors) and a Throttle By Wire (TBW) harness (without connectors). This significantly reduces the complexity of internal wiring.

Image: Diagram illustrating the pre-wired components, including CAN-Bus and TBW harnesses.
2. Throttle By Wire (TBW) Routing
The stock TBW wire is pre-installed. Due to potential space limitations within the handlebar, it may be necessary to cut and splice your existing TBW wire with the pre-wired TBW wire. If you prefer not to cut your original wire, you can attempt to pull out the pre-wired TBW wire and reroute your existing TBW wire, though this process can be challenging.
- Splicing Method: If cutting and splicing, ensure proper electrical connections using appropriate connectors and heat shrink tubing for a secure and weather-resistant seal.
- Rerouting Method: If rerouting, exercise extreme caution to avoid damaging the wires or the internal finish of the handlebars.
Contact TIGERSGATE customer support for detailed TBW wire connection instructions if needed.

Image: Installation notes highlighting the process for TBW wire management, including potential cutting and splicing.
3. General Installation Steps
- Secure the motorcycle on a stand.
- Carefully remove existing handlebars and controls, noting wire routing.
- Install the new TIGERSGATE handlebars onto the risers. Ensure proper alignment.
- Connect the CAN-Bus switch control harness.
- Manage the TBW wiring as described above.
- Mount all controls (grips, switches, levers) onto the new handlebars.
- Route all cables and wires, ensuring no pinching or excessive tension.
- Reconnect the battery.
- Test all functions (throttle, brakes, turn signals, horn, etc.) before riding.

Image: View of the handlebars installed on a Harley Road Glide motorcycle.
Operation
After successful installation, ensure you are comfortable with the new handlebar position and feel before operating the motorcycle at speed. The "meathook" style offers a distinct riding posture. Always maintain a firm grip and be aware of your surroundings.
- Familiarize yourself with the new ergonomics in a safe, controlled environment.
- Ensure all controls (throttle, clutch, brakes, switches) operate smoothly and without obstruction.
- The anti-slip knurling on the grip area provides enhanced control, especially in varying conditions.
Maintenance
Regular maintenance helps preserve the appearance and functionality of your TIGERSGATE handlebars.
- Cleaning: Clean chrome surfaces regularly with a soft cloth and a non-abrasive chrome cleaner to maintain shine and prevent corrosion.
- Inspection: Periodically inspect all wiring for signs of wear, fraying, or damage. Ensure all connections remain secure.
- Fasteners: Check all handlebar mounting bolts and control fasteners for proper torque according to your motorcycle's service manual.
- Wire Protection: The wires are made of high-quality polyethylene with insulated layers, resistant to moisture, solvents, and extreme temperatures. However, avoid exposing them to sharp edges or excessive heat.
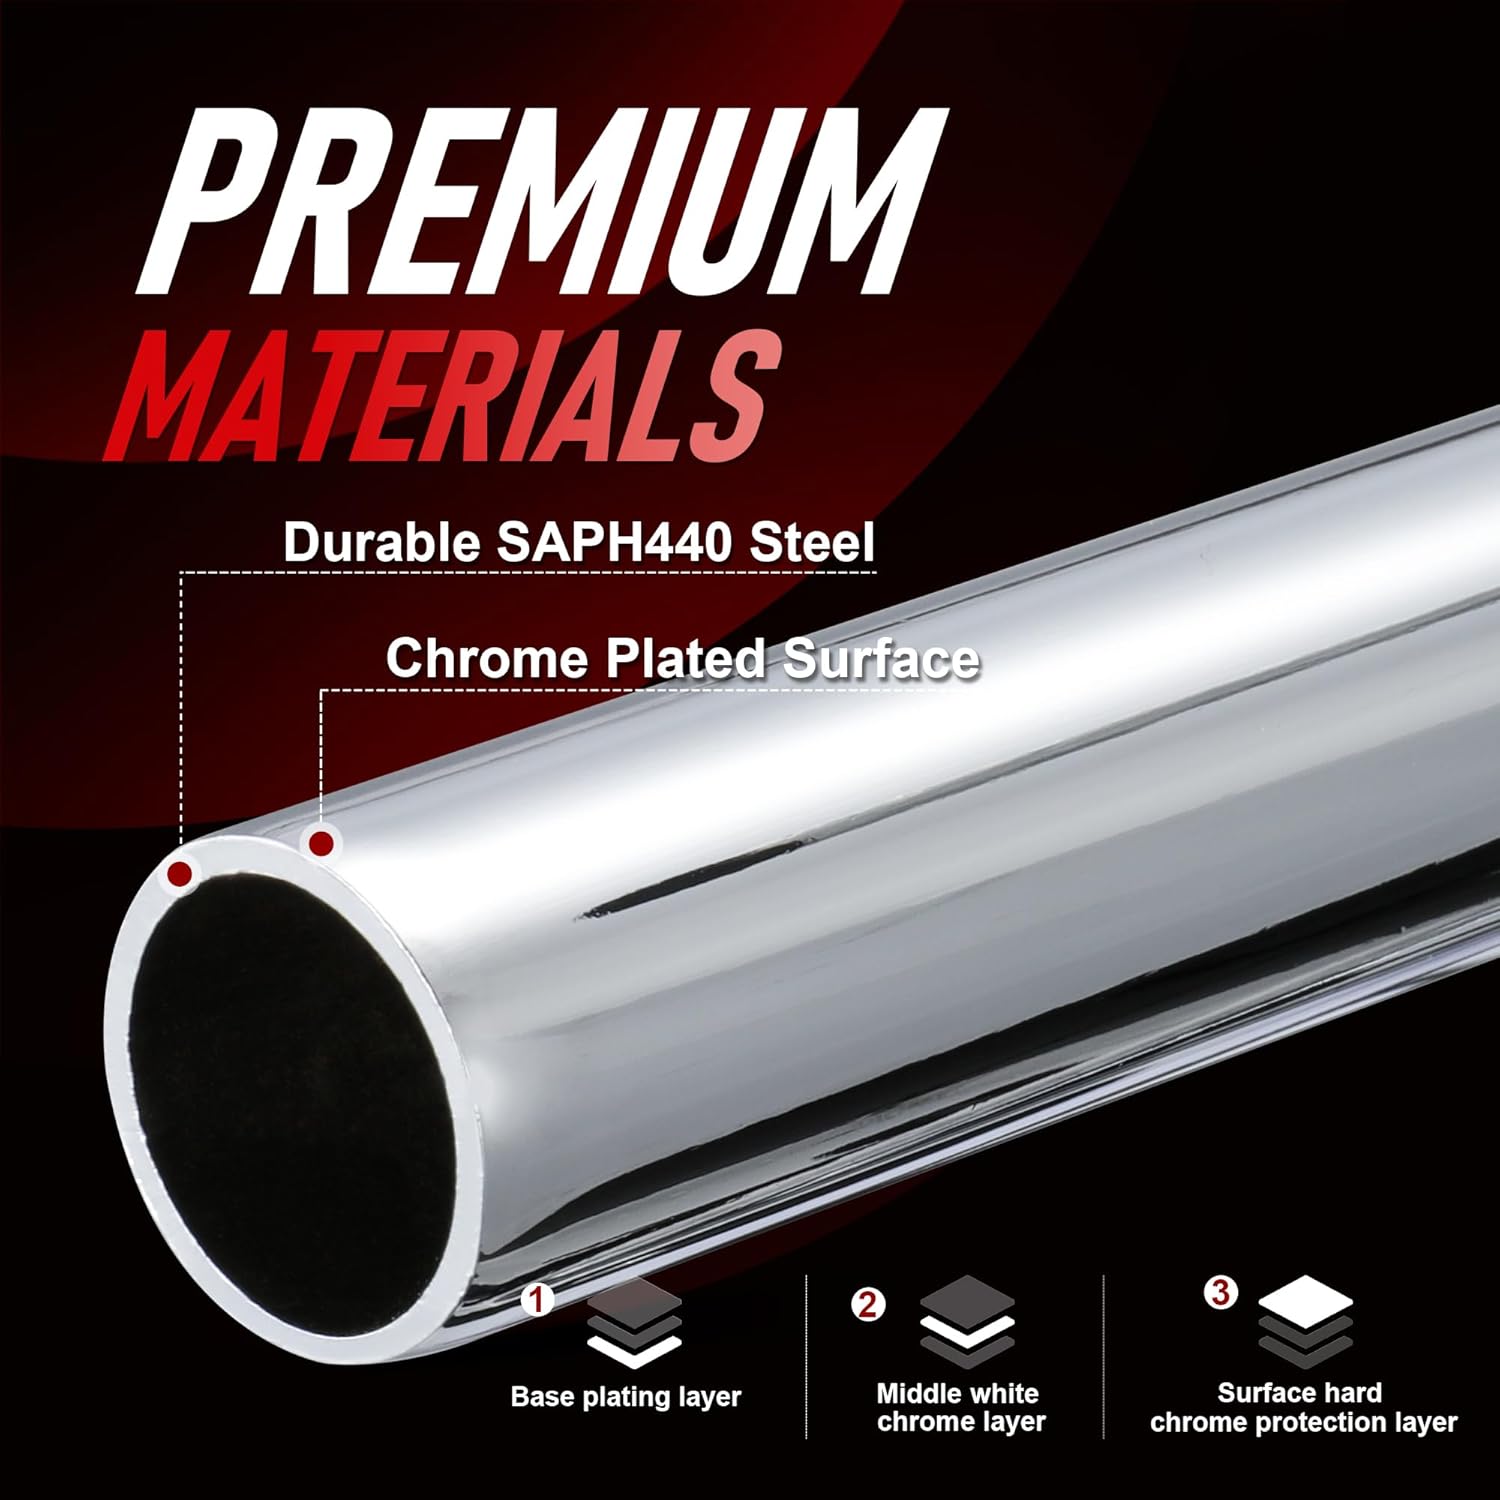
Image: Illustration of the premium material construction, including durable SAPH440 steel and multi-layer chrome plating.

Image: Detail of the high-quality pre-wired cables, emphasizing their durable construction and insulation.
Troubleshooting
| Problem | Possible Cause | Solution |
|---|---|---|
| Handlebars do not align with risers (CVO/Ultra models). | Alignment pin hole difference. | Remove the alignment pin from the risers using pliers, or drill an extra hole on the handlebar bottom. |
| Difficulty routing TBW wires. | Internal burrs or insufficient space. | Ensure internal surfaces are smooth. If necessary, cut and splice the TBW wires as described in the installation section. Use caution to avoid wire damage. |
| Controls not functioning after installation. | Incorrect wiring connections or damaged wires. | Double-check all electrical connections. Inspect wires for pinching or cuts. Consult a professional if issues persist. |
Warranty and Support
TIGERSGATE is committed to customer satisfaction and product quality.
- Customer Service: We provide 24/7 customer service. Our team of engineers is available to assist with any issues or questions you may have.
- Returns: We offer a 30-day return or exchange policy.
- Contact: For support, please refer to the TIGERSGATE seller profile for contact information.