
HOPE RX4+ Flat Mount Front +20mm Mineral Oil Type
Hope RX4+ Disc Brake Caliper Instruction Manual
Model: Flat Mount Front +20mm Mineral Oil Type
1. Introduction
This manual provides essential information for the proper installation, operation, and maintenance of your Hope RX4+ Disc Brake Caliper. Please read these instructions carefully before use to ensure optimal performance and safety. The Hope RX4+ caliper is designed for road, cyclocross, and gravel bikes, offering reliable stopping power with a monobloc CNC machined aluminum construction and 4-piston technology.
2. Setup and Installation
Proper installation is crucial for the safe and effective operation of your disc brake caliper. If you are unsure about any step, consult a qualified bicycle mechanic.
2.1 Unpacking and Inspection
Carefully remove the caliper from its packaging. Inspect all components for any signs of damage that may have occurred during shipping. Ensure all necessary parts are present:
- Hope RX4+ Disc Brake Caliper
- Brake Pads (pre-installed or separate)
- Mounting Hardware (bolts, washers)
2.2 Mounting the Caliper
The RX4+ caliper is a flat mount design with a +20mm offset, compatible with 140mm, 160mm, and 180mm rotors. Ensure your frame/fork is compatible with flat mount calipers and the chosen rotor size.
- Attach the caliper to the frame/fork using the provided mounting bolts. Ensure the bolts are threaded correctly and tightened to the manufacturer's specified torque settings. Refer to your frame/fork manufacturer's guidelines for specific torque values.
- Align the caliper over the rotor. The rotor should pass cleanly through the center of the brake pads without rubbing. Adjust the caliper position as needed.
- Once aligned, tighten the mounting bolts securely.
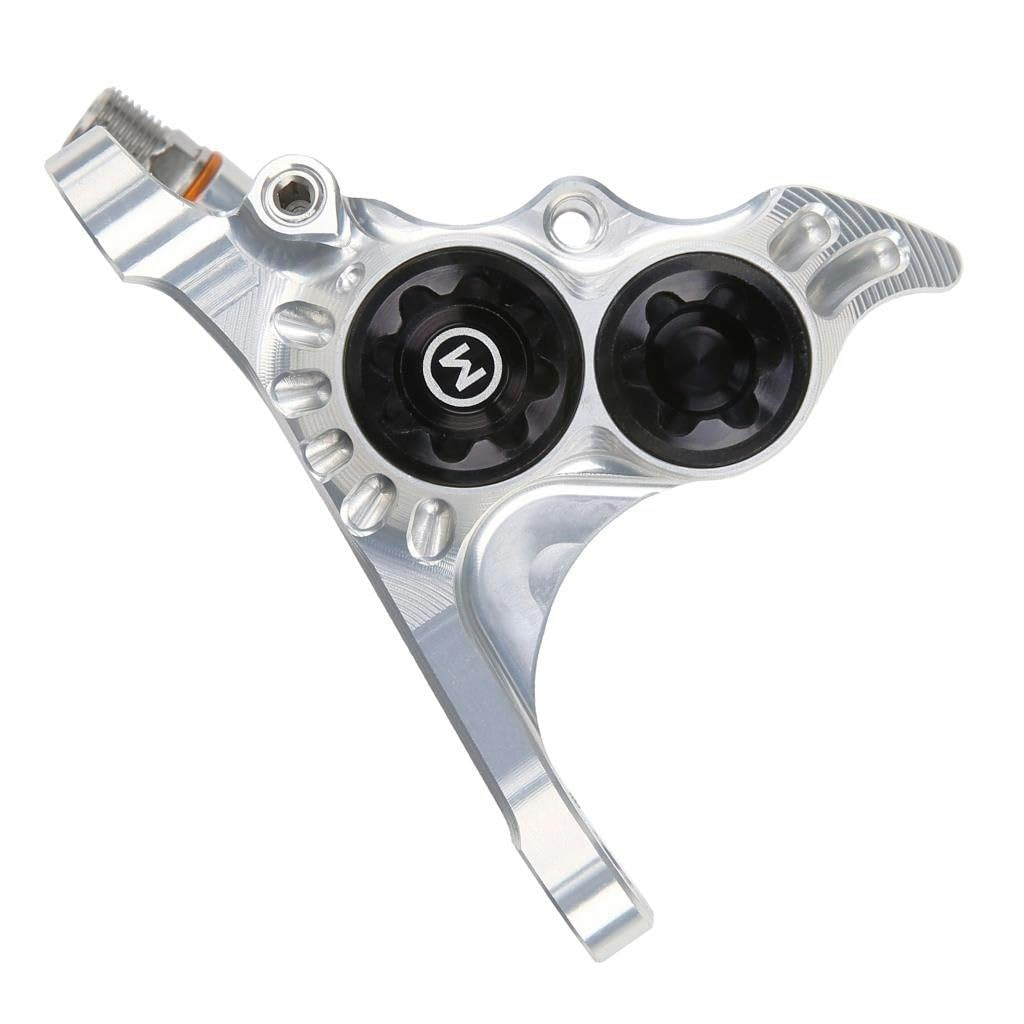
Image 1: Hope RX4+ Disc Brake Caliper. This image shows the caliper's design and how it typically appears when mounted on a bicycle.
2.3 Connecting Brake Line and Bleeding
Connect the hydraulic brake line from your lever to the caliper. The RX4+ uses mineral oil. Ensure you use the correct type of brake fluid and follow the bleeding procedure for your specific brake lever and hose system to remove any air from the hydraulic system. This is critical for proper brake function.
Note: Mineral oil cups are marked with an "M" for easy identification.
3. Operating Instructions
The Hope RX4+ Disc Brake Caliper provides powerful and consistent braking. Familiarize yourself with its operation before riding.
3.1 Bedding-In New Brake Pads
New brake pads and rotors require a bedding-in process to achieve optimal performance. This process transfers a layer of pad material onto the rotor surface, improving friction and reducing noise.
- Find a safe, open area away from traffic.
- Accelerate to a moderate speed (approx. 15-20 mph / 25-30 km/h).
- Apply the brakes firmly but gradually, slowing down to walking speed. Do not come to a complete stop. Repeat this 10-20 times.
- Allow the brakes to cool down.
- Repeat the process, but this time apply the brakes more forcefully, almost to a stop, without locking the wheels. Repeat 10-20 times.
After bedding-in, the brakes should feel more powerful and consistent.
3.2 Braking Technique
Use both front and rear brakes for effective stopping. The front brake provides most of the stopping power. Apply brakes smoothly and progressively. Avoid sudden, harsh braking, especially on loose or wet surfaces.
4. Maintenance
Regular maintenance ensures the longevity and performance of your Hope RX4+ Disc Brake Caliper.
4.1 Cleaning
Clean the caliper and rotor regularly with a clean cloth and disc brake cleaner or isopropyl alcohol. Avoid using oil-based cleaners or lubricants near the brake components, as this can contaminate pads and rotors, leading to reduced braking performance.
4.2 Brake Pad Replacement
Inspect brake pads regularly for wear. Replace pads when the pad material is worn down to approximately 0.5mm or less, or if they show signs of contamination (e.g., oil, grease). The RX4+ features a user-friendly top-entry pad fitting.
- Remove the pad retaining pin or clip.
- Slide the old pads out from the top of the caliper.
- Gently push the pistons back into the caliper body using a clean, blunt tool (e.g., a plastic tire lever). Be careful not to damage the pistons or seals.
- Insert new, clean brake pads, ensuring they are correctly seated.
- Reinstall the pad retaining pin or clip.
- Pump the brake lever several times until the pads engage the rotor.
- Bed-in the new pads as described in Section 3.1.
4.3 Fluid Checks and Bleeding
Periodically check the brake fluid level and condition. If the lever feels spongy or braking performance degrades, the system may need bleeding to remove air bubbles. Refer to a comprehensive guide for bleeding mineral oil brake systems or consult a professional mechanic.
5. Troubleshooting
This section addresses common issues you might encounter with your disc brake caliper.
| Problem | Possible Cause | Solution |
|---|---|---|
| Squealing/Noisy Brakes |
|
|
| Spongy Brake Lever |
|
|
| Reduced Braking Power |
|
|
| Rotor Rubbing |
|
|
6. Specifications
Key technical specifications for the Hope RX4+ Disc Brake Caliper.
- Model: RX4+ Flat Mount Front
- Offset: +20mm
- Brake Fluid Type: Mineral Oil (marked with "M")
- Piston Count: 4-piston slimline architecture
- Construction: Monobloc CNC Machined 2014-T6 Aluminum
- Rotor Compatibility: 140mm, 160mm, 180mm
- Pad Fitting: Top-entry
- Weight: Approximately 10.24 ounces (290 grams)
- Color: Silver
7. Warranty and Support
For warranty information and technical support, please refer to the official Hope Technology website or contact your authorized Hope dealer. Keep your proof of purchase for any warranty claims.
Manufacturer: Hope
Brand: HOPE
For further assistance, visit the HOPE Store on Amazon.
Ask a question about this manual
Ask about setup, troubleshooting, compatibility, parts, safety, or missing instructions. Manuals+ will review the question and use this page’s manual context to help answer it.