1. Introduction
This manual provides detailed instructions for the installation, operation, and maintenance of your AloftSun Solar Landscape Spotlights, Model 337. These spotlights are designed for outdoor use, featuring solar and USB charging capabilities, multiple lighting modes, and an IP68 waterproof rating.

Image 1.1: Two AloftSun solar landscape spotlights, ready for installation.
2. Package Contents
Please verify that all items listed below are included in your package:
- 2 x Solar Landscape Spotlights
- 6 x Screws
- 6 x Wall Plugs
- 2 x Ground Stakes
- 2 x Extension Rods
- 1 x 1m USB Cable (DC 5V/2A)
- 1 x User Manual
3. Specifications
| Feature | Detail |
|---|---|
| Waterproof Rating | IP68 |
| Lighting Color | Cold White |
| Battery | 2200mAh, 3.7V Lithium Ion |
| Solar Panel | 1.5W, Monocrystalline Silicon |
| Charging Method | Solar Powered & USB Charging (DC 5V/2A) |
| LEDs | 19 LEDs (35-45° focus lighting) |
| Material | Acrylonitrile Butadiene Styrene (ABS), Plastic |
| Product Dimensions | 40.01 x 10.49 x 13.79 cm |
| Max. Working Time (Low Light) | 20 hours |
| Max. Working Time (Medium Light) | 12 hours |
| Max. Working Time (High Light) | 6 hours |
| Max. Working Time (Gradual Breathing) | 12 hours |

Image 3.1: The spotlight's IP68 waterproof rating ensures durability in various weather conditions.
4. Setup and Installation
4.1 Initial Charging
Before first use, it is recommended to fully charge the spotlights. Place the solar panel in direct sunlight for at least 6-8 hours. For faster charging or during prolonged cloudy weather, use the provided USB cable to charge the unit via the USB port (DC 5V/2A).
4.2 Choosing a Location
Select an outdoor location where the solar panel can receive direct sunlight for the majority of the day. Avoid areas shaded by trees, buildings, or other obstructions, as this will reduce charging efficiency and illumination time.
4.3 Installation Methods
The AloftSun Solar Landscape Spotlights offer two installation options:
- Ground Stake Installation:
Attach the extension rod and ground stake to the spotlight. Insert the assembled unit firmly into soft ground in your desired location. Ensure the solar panel faces upwards towards the sun. - Wall Mount Installation:
Using the provided screws and wall plugs, secure the spotlight's base to a wall or other vertical surface. Adjust the angle of the spotlight and solar panel as needed to optimize light direction and sun exposure.

Image 4.1: Illustration of ground stake and wall mount installation options.

Image 4.2: Examples of multi-scene installation for the spotlights.
5. Operating Instructions
5.1 Power On/Off and Mode Selection
Locate the power button and mode switch on the back of the spotlight unit. Press the ON/OFF button to activate the light. Subsequent presses of the 'Switch Mode' button will cycle through the available lighting modes:
- Low Light Mode: Provides up to 20 hours of illumination.
- Medium Light Mode: Provides up to 12 hours of illumination.
- High Light Mode: Provides up to 6 hours of illumination.
- Gradual Breathing Mode: Provides up to 12 hours of illumination with a gentle fading effect.
The spotlight features a memory function, meaning it will remember the last selected mode when it turns on automatically.

Image 5.1: Overview of the four lighting modes and their durations.
5.2 Automatic Dusk-to-Dawn Operation
The spotlights are equipped with a light sensor that automatically detects ambient light levels. Once activated, the lights will:
- Automatically turn ON at dusk when the environment becomes dark enough.
- Automatically turn OFF at dawn when sufficient light is detected, and begin charging.

Image 5.2: The spotlight's automatic dusk-to-dawn functionality.
5.3 USB Charging
In situations with insufficient sunlight (e.g., prolonged cloudy weather, winter months), the spotlights can be charged via the USB port. Connect the provided 1m USB cable to the spotlight's USB port and a DC 5V/2A power adapter (not included). A full charge typically takes 2.5 hours.
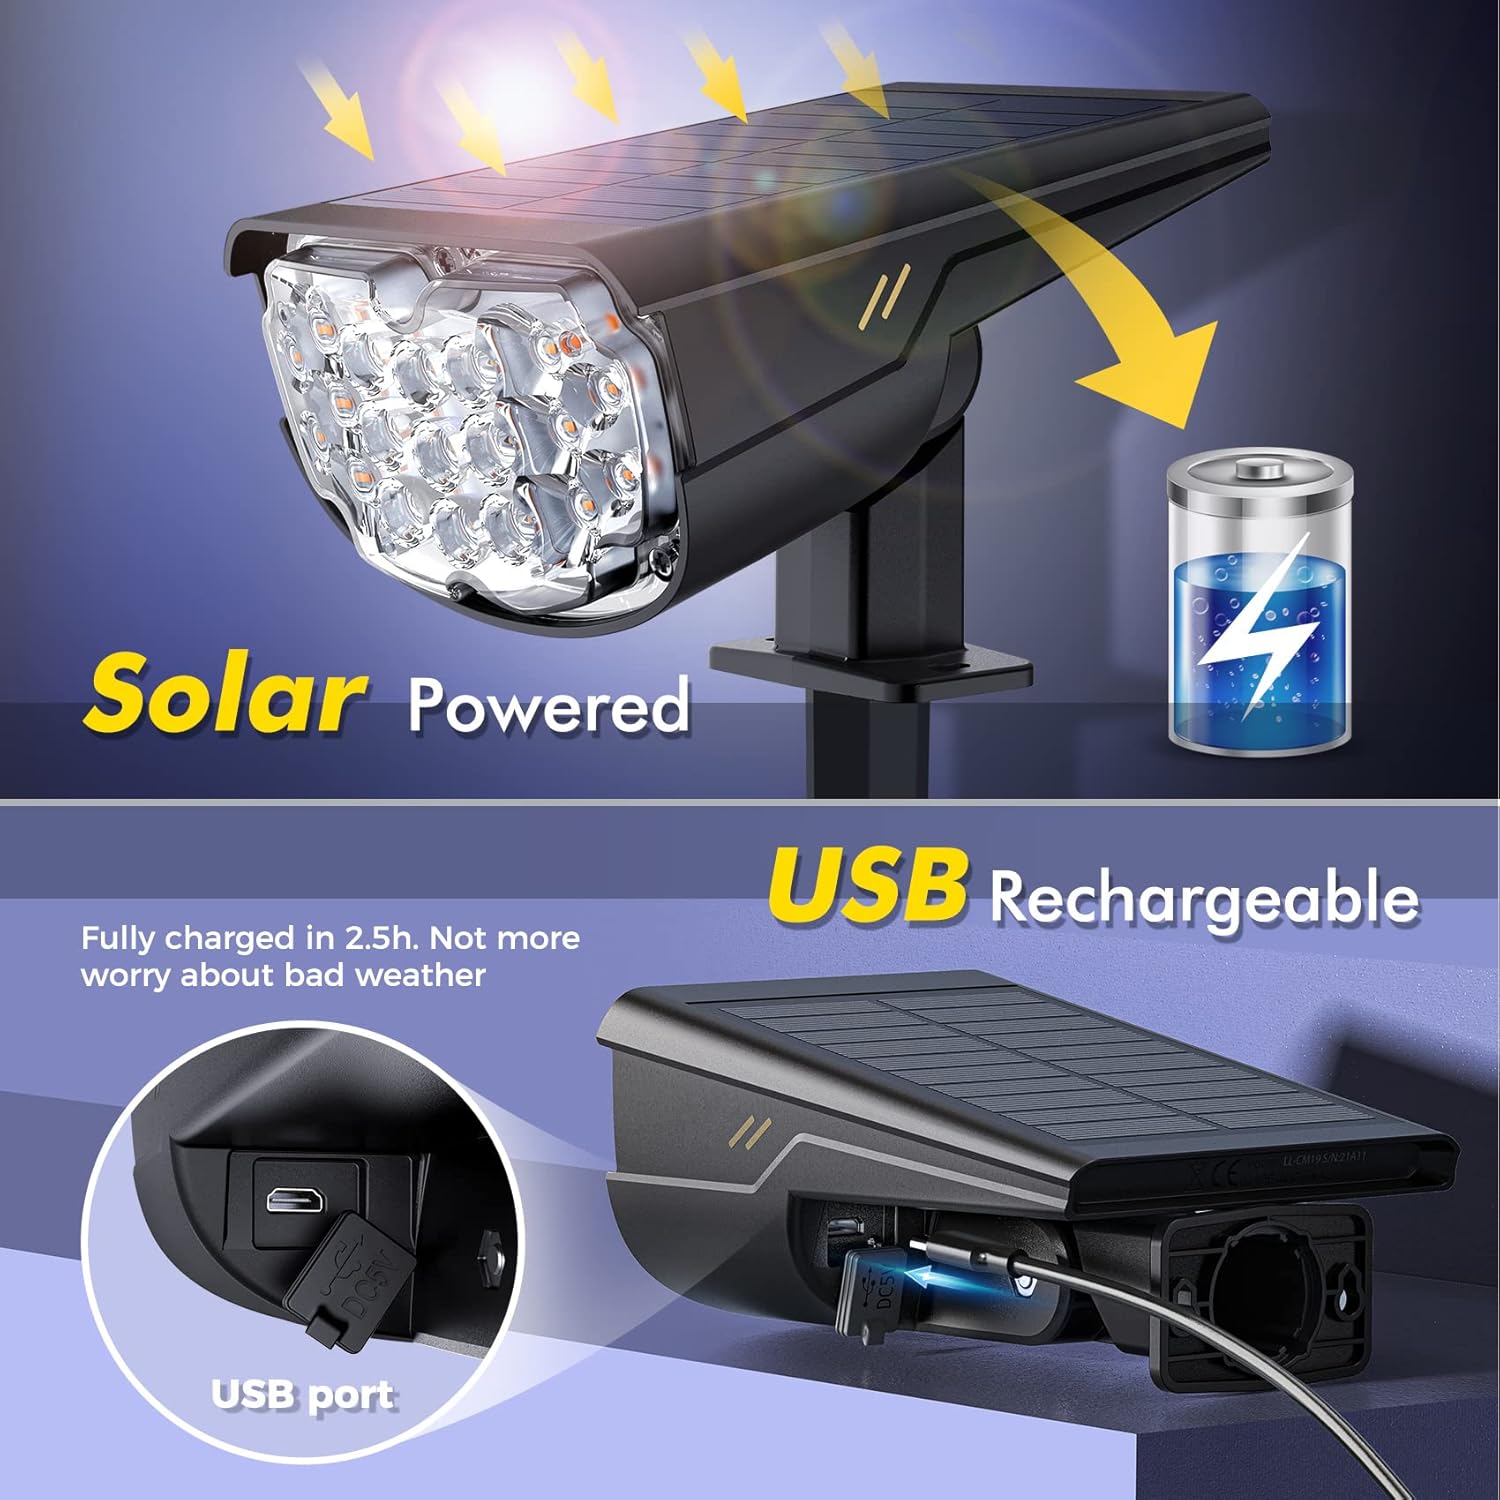
Image 5.3: Solar and USB charging options for continuous operation.
5.4 Charge Indicator Light
The spotlight includes an LED indicator light to show the charging status:
- Flashing Red Light: Low power.
- Always-on Red Light: Charging (approximately 70% charged).
- Always-on Green Light: Fully charged (100%).

Image 5.4: USB charging port and LED power indicator details.
6. Maintenance
To ensure optimal performance and longevity of your solar landscape spotlights, follow these maintenance guidelines:
- Clean Solar Panel: Regularly wipe the solar panel with a soft, damp cloth to remove dust, dirt, leaves, or snow. A clean panel ensures maximum sunlight absorption and charging efficiency.
- Check Connections: Periodically inspect all connections and mounting points to ensure they are secure.
- Battery Care: While the battery is designed for long-term use, extreme temperatures can affect its lifespan. If storing the lights for an extended period, ensure they are fully charged and store them in a cool, dry place.
7. Troubleshooting
If your AloftSun Solar Landscape Spotlights are not functioning as expected, please refer to the following common issues and solutions:
- Light Does Not Turn On at Night:
- Ensure the power button is in the 'ON' position.
- Verify the solar panel is clean and receiving direct sunlight for at least 6-8 hours during the day.
- Check for any obstructions (e.g., trees, buildings) blocking sunlight from reaching the solar panel.
- The battery may be depleted. Try charging the unit via USB for 2.5 hours.
- Ensure the light sensor is not obstructed or exposed to other light sources at night (e.g., streetlights, porch lights), which could prevent it from activating.
- Light Illumination Time is Short:
- Insufficient solar charging due to cloudy weather, short daylight hours, or a dirty solar panel. Clean the panel and ensure maximum sun exposure.
- The selected lighting mode (e.g., High Light Mode) naturally has a shorter duration. Consider switching to a lower light mode for extended illumination.
- Battery performance can decrease in very cold temperatures.
- Light Flickers or is Dim:
- This usually indicates a low battery charge. Allow the unit to charge fully in direct sunlight or via USB.
8. Warranty and Support
For warranty information or technical support, please refer to the product packaging or contact the manufacturer directly through their official website or customer service channels. Keep your purchase receipt as proof of purchase.