1. Safety Information
Always prioritize safety when operating pneumatic tools. Failure to follow these instructions may result in serious injury.
- Eye Protection: Always wear ANSI Z87.1 compliant safety glasses with side shields.
- Hearing Protection: Wear hearing protection to prevent noise-induced hearing loss.
- Respiratory Protection: In dusty environments, wear a dust mask or respirator.
- Air Pressure: Never exceed the maximum recommended operating pressure for the tool. Disconnect the air supply before making adjustments, clearing jams, or servicing the tool.
- Tool Handling: Keep hands and body parts away from the discharge area of the tool. Never point the tool at yourself or others.
- Work Area: Ensure your work area is clean, well-lit, and free of obstructions. Keep bystanders, especially children, away from the work area.
- Proper Fasteners: Use only the type and size of fasteners specified for this tool.
- Maintenance: Regularly inspect the tool for damaged or worn parts. Do not operate a damaged tool.
2. Product Overview and Components
The Dotool 16GA Finish Nailer T64C is designed for driving 16-gauge finish nails from 1-inch to 2-1/2-inch in length. Familiarize yourself with the tool's components before operation.
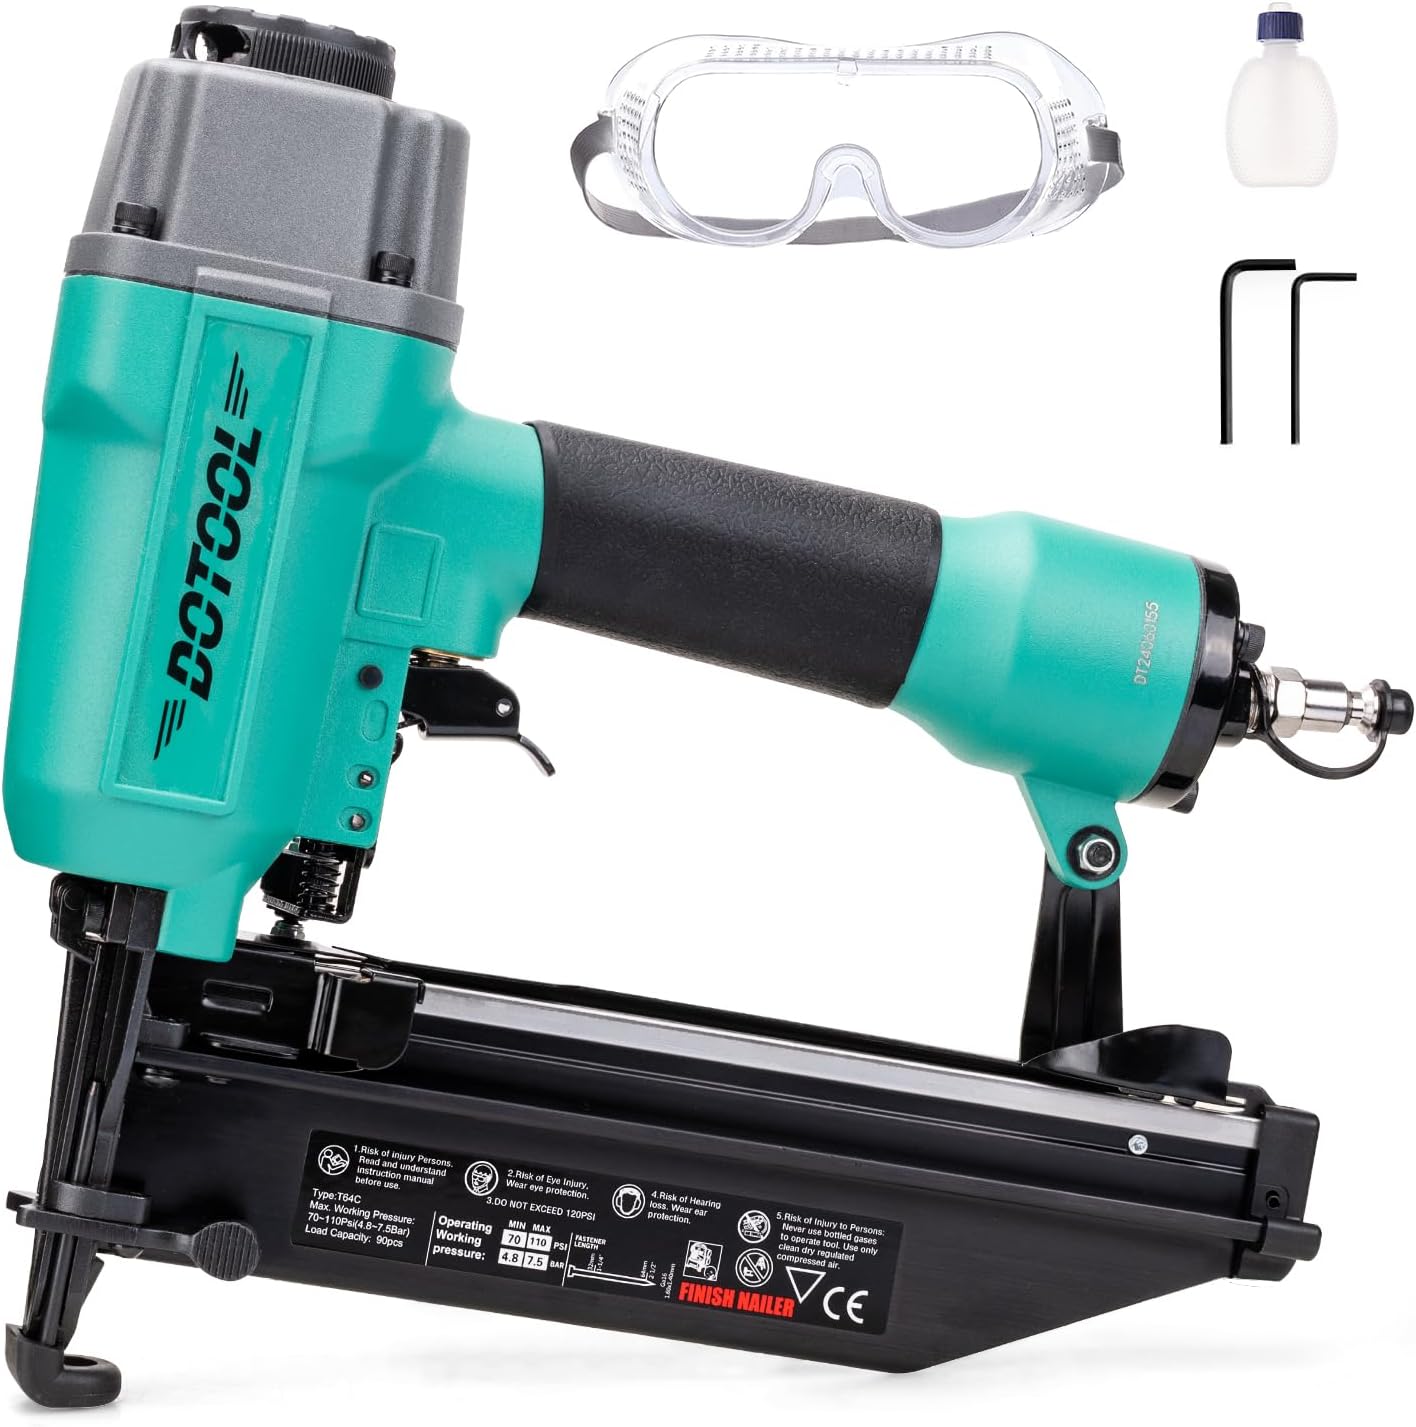
Figure 2.1: Dotool 16GA Finish Nailer T64C and included accessories (safety glasses, oil, hex wrenches).

Figure 2.2: Key features including the 360-degree adjustable exhaust, tool-free jam release, and depth adjustment mechanism.
Key Components:
- Trigger: Activates the nailing mechanism.
- Magazine: Holds the strip of nails.
- Depth Adjustment Wheel: Allows for precise control over nail depth.
- Tool-Free Jam Release: Provides easy access to clear jammed nails.
- 360-Degree Adjustable Exhaust Port: Directs air exhaust away from the user.
- Air Inlet: Connection point for the air hose.
- Contact Trip: Safety mechanism that must be pressed against the workpiece for the tool to fire.
3. Specifications
Understanding the tool's specifications is crucial for proper operation and compatibility.
| Specification | Value |
|---|---|
| Model Number | DOTOOL T64C |
| Nail Gauge | 16 Gauge |
| Nail Length Range | 1-inch to 2-1/2-inch (25mm - 64mm) |
| Magazine Capacity | 90 nails |
| Operating Pressure | 70-110 PSI (4.8-7.5 Bar) |
| Item Weight | 4.9 pounds |
| Package Dimensions | 12.68 x 12.4 x 3.5 inches |
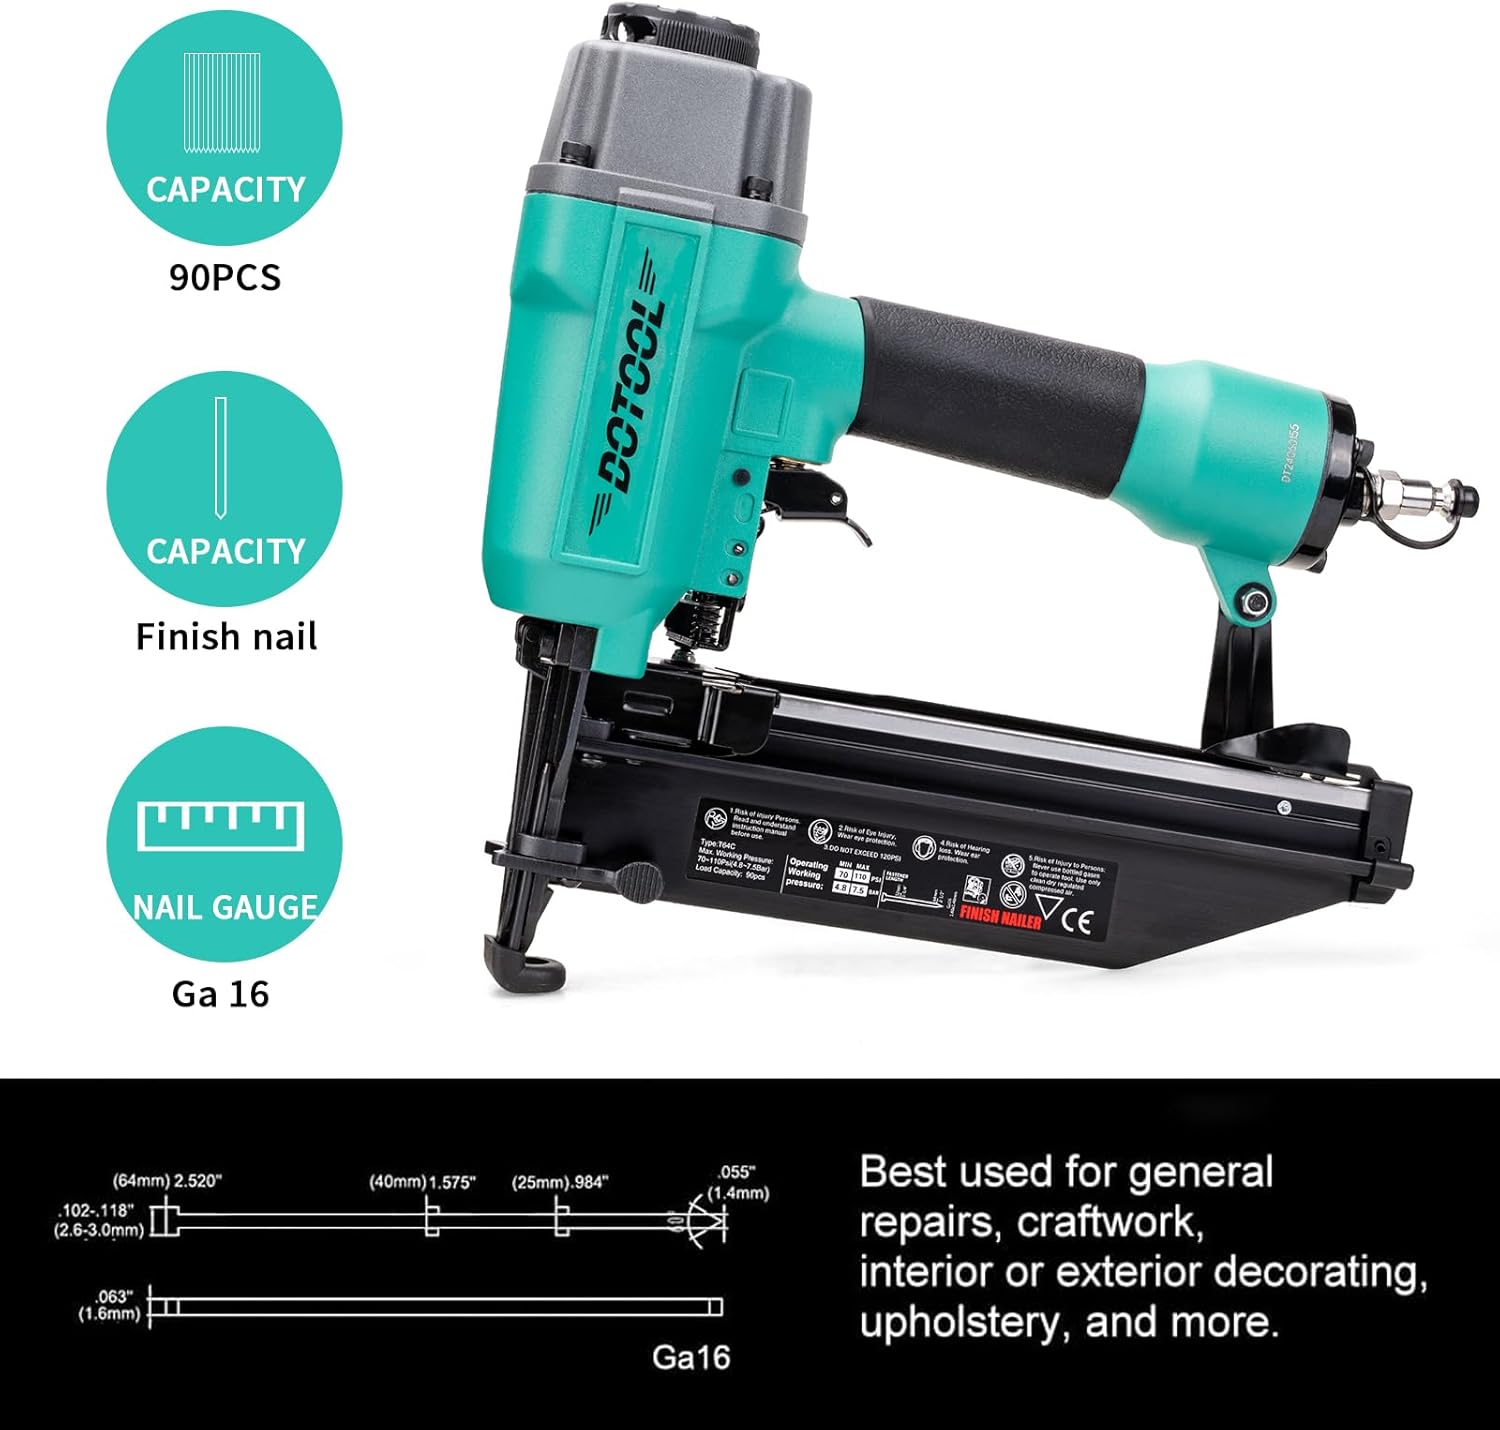
Figure 3.1: Visual representation of nail capacity, gauge, and compatible nail dimensions.
4. Setup
Proper setup ensures safe and efficient operation of your finish nailer.
4.1 Connecting to Air Supply
- Ensure the air compressor is off and the air hose is disconnected from any power source.
- Attach a quick-connect fitting (not included) to the air inlet of the nailer.
- Connect the air hose from the compressor to the quick-connect fitting on the nailer.
- Set the air compressor pressure to the recommended operating range (70-110 PSI). Do not exceed 110 PSI.
- Before use, check all connections for air leaks.
4.2 Loading Nails
Always disconnect the air supply before loading nails.

Figure 4.1: Step-by-step guide for loading nails into the magazine.
- Slide the Loading Button Open: Locate the loading button at the rear of the magazine. Slide it open to extend the nail pusher.
- Place Nails into the Magazine: Insert a strip of 16-gauge finish nails into the magazine with the nail points facing forward. Ensure the nails are properly seated.
- Slide the Loading Button Closed: Push the loading button back until it locks, securing the nails in place.
4.3 Adjusting Depth of Drive
The tool-less depth adjustment feature allows you to control how deep the nail is driven into the material.
- Locate the depth adjustment wheel near the nose of the tool.
- Rotate the wheel to adjust the depth. Turning it one direction will drive nails deeper, and the other direction will drive them shallower.
- Test the depth on a scrap piece of material before beginning your project.
5. Operation
Follow these steps for safe and effective operation of your finish nailer.

Figure 5.1: Proper handling of the finish nailer during operation.
5.1 Firing Procedure (Sequential Mode)
This tool operates in sequential mode, requiring two actions for each fastener.
- Ensure the air supply is connected and the pressure is set correctly.
- Place the nose of the tool firmly against the workpiece. This engages the contact trip.
- Pull the trigger to drive a nail.
- Lift the tool from the workpiece and release the trigger to prepare for the next nail.
5.2 Clearing Nail Jams
If a nail jams, follow these steps to clear it safely.
- Disconnect Air Supply: Immediately disconnect the air hose from the tool.
- Open Jam Release: Locate the tool-free jam release mechanism near the nose of the tool. Open it to access the jammed nail.
- Remove Jammed Nail: Carefully remove the jammed nail using pliers if necessary. Do not force it.
- Close Jam Release: Close the jam release mechanism securely.
- Reconnect Air Supply: Reconnect the air hose and test the tool on a scrap piece of material.
6. Maintenance
Regular maintenance extends the life of your tool and ensures optimal performance.
6.1 Lubrication
- Apply 2-3 drops of pneumatic tool oil into the air inlet daily before use.
- Do not over-oil the tool.
6.2 Cleaning
- Keep the tool clean and free of debris. Use a clean, dry cloth.
- Periodically clean the magazine to ensure smooth nail feeding.
6.3 Air Filter
- Check the air filter on your compressor regularly and clean or replace it as needed to ensure clean air supply to the tool.
7. Troubleshooting
Refer to this section for common issues and their solutions.
| Problem | Possible Cause | Solution |
|---|---|---|
| Tool does not fire | No air supply Low air pressure No nails in magazine Contact trip not fully depressed Jammed nail | Connect air supply Increase air pressure Load nails Press tool firmly against workpiece Clear jam (see Section 5.2) |
| Nails not driven to full depth | Low air pressure Depth adjustment set too shallow Worn driver blade | Increase air pressure Adjust depth setting deeper Contact service for replacement |
| Nails jam frequently | Incorrect nail size/type Damaged nails Magazine dirty or damaged Low air pressure | Use correct 16GA finish nails Use new, undamaged nails Clean/inspect magazine Increase air pressure |
| Air leaks from tool | Loose fittings Damaged O-rings/seals | Tighten fittings Contact service for repair/replacement |
8. Warranty and Support
For warranty information or technical support, please refer to the documentation included with your purchase or contact Dotool customer service. Keep your purchase receipt as proof of purchase.
For further assistance, visit the official Dotool website or contact their support channels.