MAD OWL MINI 192BP +W
MAD OWL MINI 192BP +W DMX512 Console User Manual
Portable 192-Channel Stage Lighting Controller
Introduction
This user manual provides detailed instructions for the MAD OWL MINI 192BP +W DMX512 Console. This ultra-thin, portable DMX controller is designed for managing stage lighting fixtures, offering 192 channels to control up to 12 smart lights with 16 channels each. It features a built-in battery for dual-purpose operation, programmable scenes, and various control modes suitable for a range of applications from DJ setups to professional stage productions.
Product Overview
Key Features
- Built-in Battery: Offers portable operation without constant power connection.
- 192 DMX Channels: Controls up to 12 intelligent lights, each with up to 16 DMX channels.
- Programmable Scenes: Store up to 240 scenes across 23 banks of 8 scenes.
- Chase Functions: Create and execute 6 sets of chases with multiple scenarios.
- Audio Control: Built-in microphone for sound-activated operation.
- MIDI Beat Activation: Synchronize lighting with MIDI input.
- Tap Synchronization: Manual tempo control for chases.
- Standard Connectivity: Equipped with a 3-pin XLR DMX512 output.
Component Identification
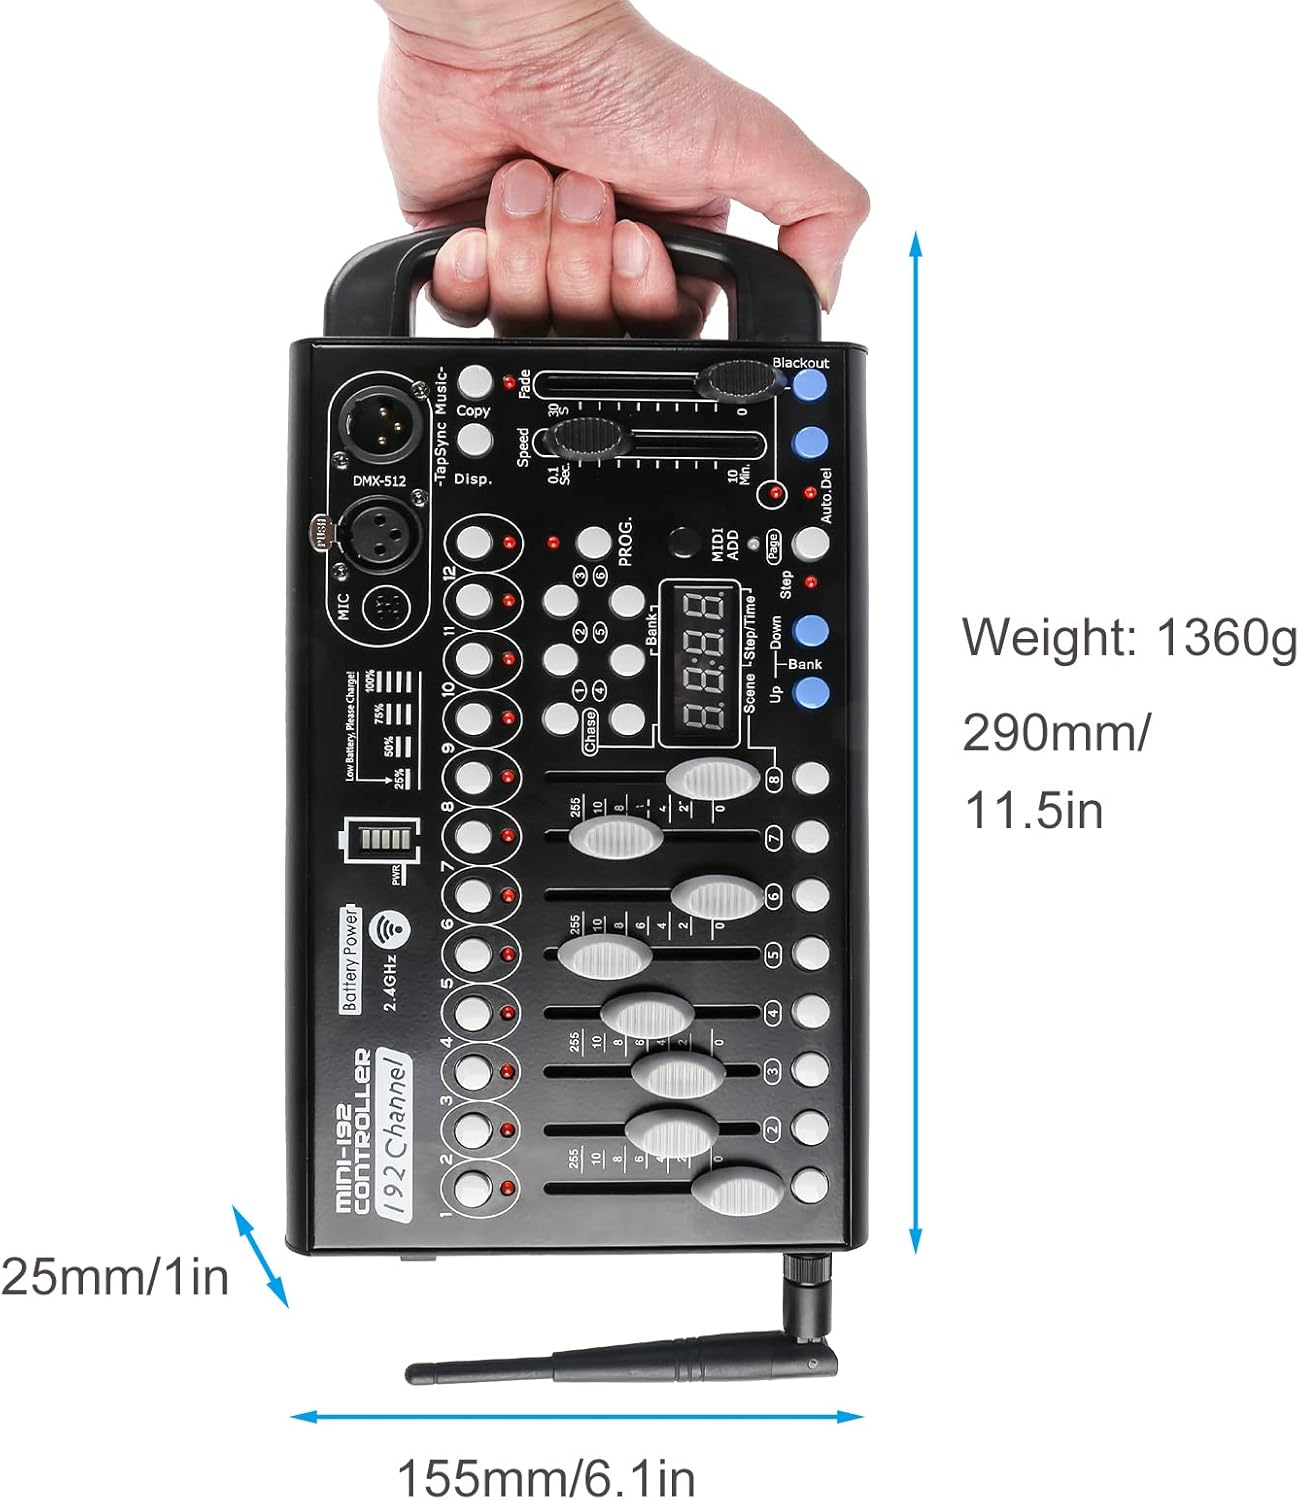
Figure 1: Top-down view of the DMX512 Console, highlighting faders, buttons, and display.
The console features 12 fixture selection buttons, 8 channel faders, a master fader, speed and fade time faders, a digital display, and various function buttons for programming and playback. On the side, you will find the DC power input, power switch, and DMX output.

Figure 2: Side view detailing the power input, on/off switch, and DMX output port.
Setup
Powering On
The MINI 192BP +W console can be powered via its built-in battery or by connecting the included DC power adapter to a standard electrical outlet. Ensure the power switch on the side of the unit is in the "OFF" position before connecting the power adapter. Once connected, switch to "ON".

Figure 3: Battery charge indicator. A full charge is indicated by all segments illuminated.
The battery indicator lights will show the current charge level. For optimal battery life, fully charge the unit before first use.
Connecting Lighting Fixtures
Connect your DMX-compatible lighting fixtures to the console's DMX512 output using standard 3-pin XLR DMX cables. Ensure all fixtures are properly addressed according to their individual manuals and that their DMX addresses correspond to the channels you intend to control on the console.

Figure 4: Compatibility with various DMX lighting fixtures using 3-pin XLR cables.
Operating Instructions
Channel Control
The console features 8 channel faders. Each fader controls a specific DMX channel within the selected fixture bank. Adjusting a fader changes the intensity or parameter value of the corresponding DMX channel from 0 to 255.

Figure 5: Channel faders for precise control of DMX values.
Fixture Selection and Bank Switching
Use the 12 fixture selection buttons to choose which intelligent light you wish to control. The console organizes channels into banks. Use the "Bank Up" and "Bank Down" buttons to navigate through the available banks (Bank 1-23) to access all 192 DMX channels.
Programming Scenes
The console allows you to program and store up to 240 scenes. A scene is a static snapshot of all DMX channel values at a given moment.
- Select a Fixture: Press the desired fixture button(s) (1-12).
- Adjust Channels: Use the channel faders to set the desired DMX values for your selected fixtures.
- Enter Program Mode: Press the PROG. button. The display will show "PROG".
- Select a Scene Bank: Use the Bank Up/Down buttons to choose a bank (1-23) where you want to store the scene.
- Store the Scene: Press the ADD button, then press one of the scene buttons (1-8) within the selected bank to save the scene. The display will flash to confirm.
- Exit Program Mode: Press the PROG. button again.
To play back a scene, simply select the desired bank using the Bank Up/Down buttons, then press the corresponding scene button (1-8).
Chase Functions
The console supports 6 programmable chases, allowing you to create dynamic sequences of scenes.
Creating a Chase
- Enter Program Mode: Press the PROG. button.
- Select a Chase: Press the Chase button, then select one of the 6 chase buttons (1-6).
- Add Scenes to Chase: Select the desired scene bank and scene button to add it to the chase. Press ADD to confirm each step. Repeat for all scenes you want in the chase.
- Exit Program Mode: Press the PROG. button again.
Running a Chase
To activate a chase, press the Chase button, then the corresponding chase button (1-6). Use the Speed and Fade faders to adjust the playback speed and transition time between scenes in the chase.
The Tap Sync button allows you to manually set the tempo of the chase by tapping it in rhythm.
MIDI and Audio Control
The MINI 192BP +W console supports external control and synchronization:
- MIDI Beat Activation: Connect a MIDI device to the console's MIDI input. The console can then synchronize its chases and scenes to incoming MIDI clock signals. Refer to your MIDI device's manual for proper setup.
- Built-in Microphone: The integrated microphone allows for sound-activated operation. In certain modes (e.g., Auto Run), the lighting sequences can react to ambient sound, making it ideal for dynamic party environments.
Maintenance
Proper maintenance ensures the longevity and reliable performance of your DMX controller.
- Cleaning: Use a soft, dry cloth to clean the exterior of the console. Avoid abrasive cleaners or solvents that could damage the finish or internal components.
- Storage: Store the console in a cool, dry place away from direct sunlight and extreme temperatures. If storing for extended periods, ensure the battery is partially charged (around 50%) to preserve its health.
- Battery Care: Recharge the battery regularly, even if not in frequent use, to prevent deep discharge. Avoid fully depleting the battery before recharging.
- Connectivity: Periodically check DMX and power cables for signs of wear or damage. Replace any faulty cables immediately.
Troubleshooting
| Problem | Possible Cause | Solution |
|---|---|---|
| Console does not power on. | Battery is depleted; Power adapter is not connected or faulty; Power switch is off. | Charge the battery; Check power adapter connection and outlet; Ensure power switch is in "ON" position. |
| Lights do not respond to console. | Incorrect DMX addressing on fixtures; Faulty DMX cable; Fixtures not in DMX mode; Console DMX output issue. | Verify DMX addresses on fixtures match console settings; Test DMX cable; Ensure fixtures are set to DMX mode; Consult fixture manual. |
| Scenes/Chases do not play back correctly. | Incorrect programming; Speed/Fade faders set too low/high; Console not in playback mode. | Re-program scenes/chases carefully; Adjust Speed/Fade faders; Ensure console is out of PROG mode. |
| Sound activation not working. | Microphone sensitivity too low; No sound input; Console not in sound-activated mode. | Increase microphone sensitivity (if adjustable); Ensure adequate sound source; Verify console mode. |
Specifications
| Feature | Detail |
|---|---|
| Model Number | MINI 192BP +W |
| DMX Channels | 192 Channels |
| Controllable Fixtures | Up to 12 intelligent lights (16 channels each) |
| Programmable Scenes | 240 scenes (23 banks of 8 scenes) |
| Chase Functions | 6 chases |
| DMX Output | 3-pin XLR |
| Power Source | Built-in Lithium-Ion Battery / DC 12V Power Adapter |
| Dimensions (L x W x H) | 11.42" x 6.3" x 1.77" (290mm x 160mm x 45mm) |
| Item Weight | 3.78 pounds (1.72 kg) |
| Material | Aluminum |
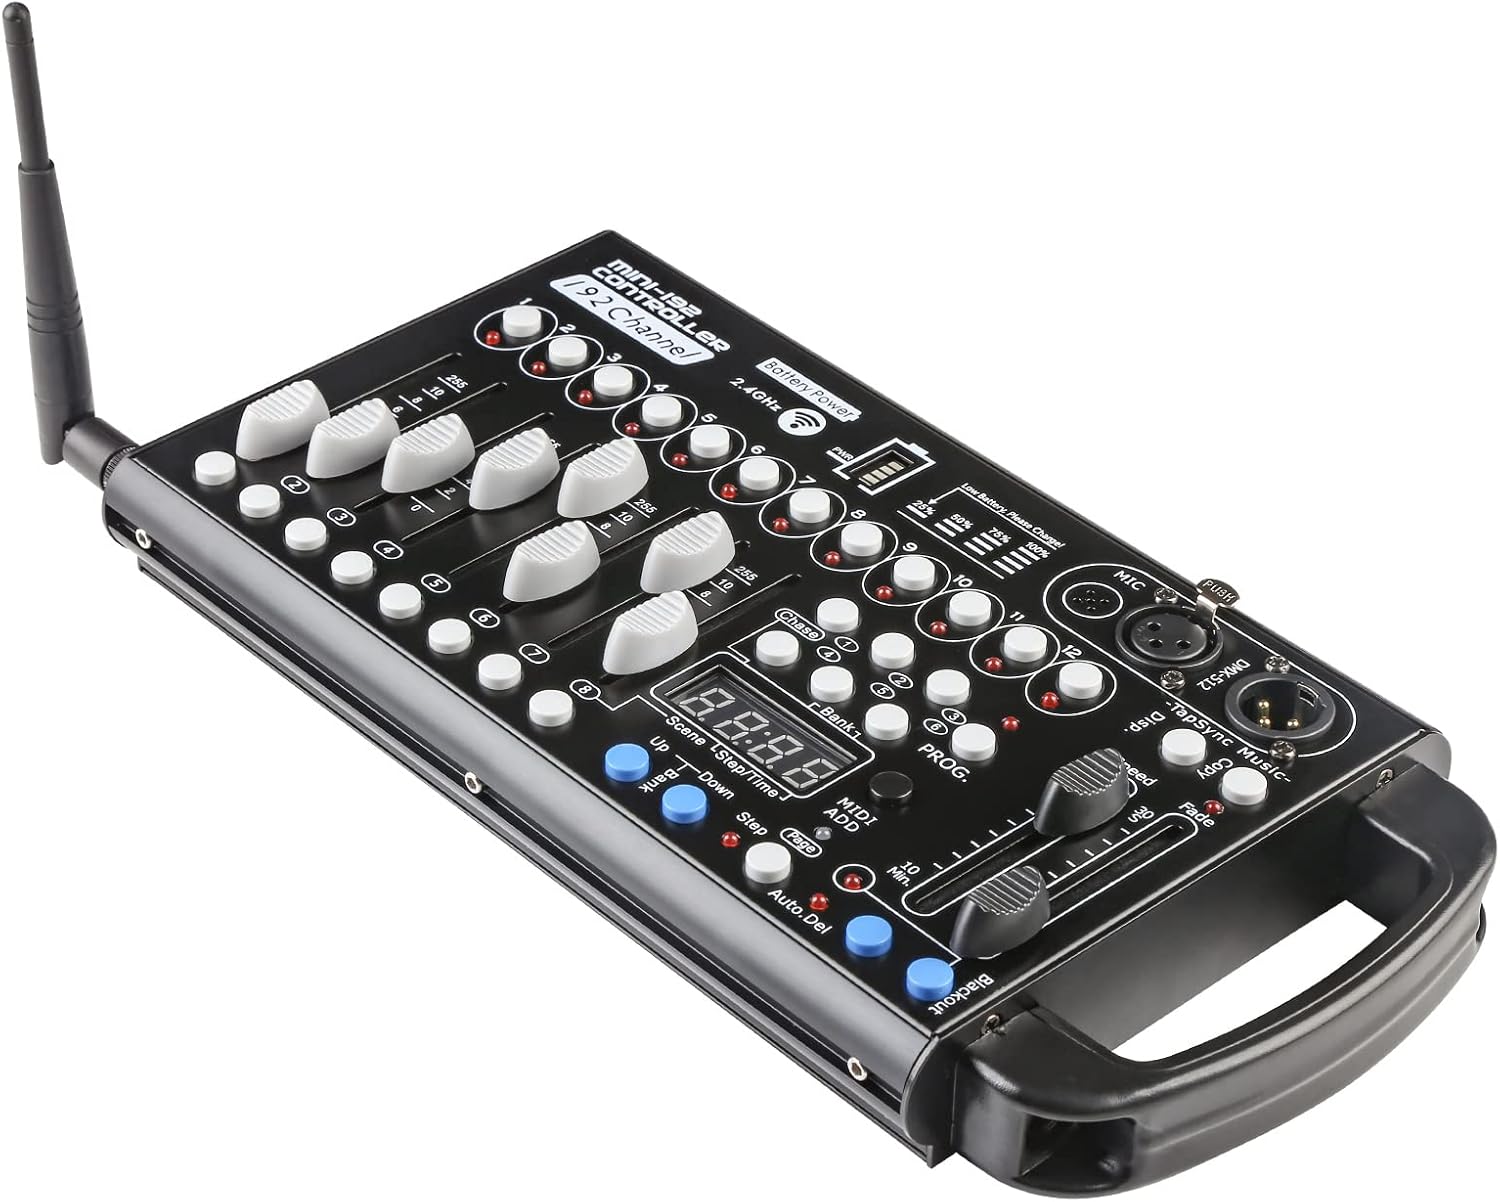
Figure 6: Physical dimensions and weight of the DMX512 Console.
Support
For further assistance, technical support, or warranty inquiries, please contact MAD OWL customer service through the retailer's platform or the official MAD OWL website. Please have your product model number (MINI 192BP +W) and purchase information ready when contacting support.
Ask a question about this manual
Ask about setup, troubleshooting, compatibility, parts, safety, or missing instructions. Manuals+ will review the question and use this page’s manual context to help answer it.