
1. Introduction
Thank you for choosing the Kazeila Sprinkler Timer. This device is designed to automate your garden watering, ensuring your plants receive optimal hydration while conserving water. It features three independent watering programs, an automatic rain sensor, child lock, and both automatic and manual watering modes, all within an IP65 waterproof design.
2. Safety Information
- Ensure the timer is securely attached to the faucet to prevent leaks.
- Use only 2x1.5V AA Alkaline batteries. Do not mix old and new batteries or different battery types.
- Do not immerse the device in water. While it is IP65 waterproof, prolonged submersion is not recommended.
- Keep out of reach of children when the child lock is not activated.
- Operate within the specified water pressure range (up to 145psi / 10bar).
3. Product Overview
Familiarize yourself with the components and controls of your Kazeila Sprinkler Timer.

Figure 3.1: Kazeila Sprinkler Timer with key components labeled. This image shows the LCD screen, control buttons (up, down, OK, manual watering, exit/pause, child lock), rain sensor, and connection points. Labels include 'Watering', 'Rain Sensor', 'Next Irrigation', 'First Watering Time', 'Program 1', 'Watering Duration', 'Program 2', 'Watering Frequency', 'Program 3', 'Chip del sensore' (sensor chip), 'Current Time', 'Child Lock', 'Exit/Pause Button', 'Manual Watering', 'Set up/Confirm', 'Number Increase', and 'Number Decrease'.
4. Setup and Installation
4.1. Battery Installation
- Locate the battery compartment on the back of the timer.
- Open the compartment and insert two 1.5V AA Alkaline batteries, ensuring correct polarity.
- Close the battery compartment securely to maintain its waterproof seal.
4.2. Attaching to Faucet
The timer is designed for easy installation without tools.

Figure 4.1: The Kazeila Sprinkler Timer connected to a standard outdoor faucet. The image illustrates the timer's compact design and how it integrates with a hose connection.
- Screw the timer onto a standard 3/4 inch (NPT/UN) outdoor faucet. Hand-tighten only.
- Connect your garden hose or irrigation system to the outlet at the bottom of the timer.
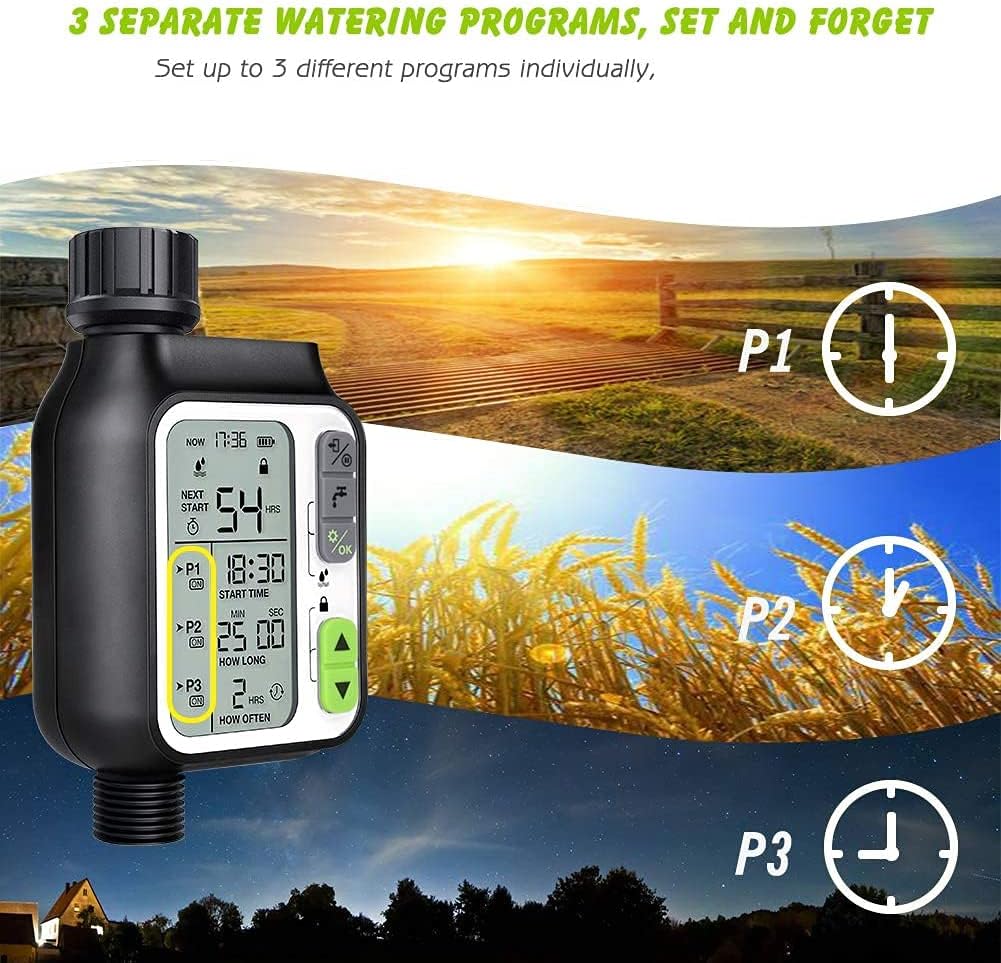
Figure 4.2: A close-up view of the Kazeila Sprinkler Timer properly installed on a faucet, with a hose connected to its outlet. This demonstrates the secure and leak-proof connection.
5. Operating Instructions
5.1. Setting Current Time
Upon battery installation, the display will activate. Use the 'Set up/Confirm' button (OK) to navigate and the 'Number Increase' (up arrow) and 'Number Decrease' (down arrow) buttons to adjust the current time.
5.2. Programming Watering Schedules (P1, P2, P3)
The Kazeila Sprinkler Timer allows for three independent watering programs (P1, P2, P3). Each program can have its own start time, duration, and frequency.

Figure 5.1: The timer's display illustrating the settings for three separate watering programs (P1, P2, P3), each with its own ON/OFF status, start time, duration, and frequency. This highlights the flexibility in scheduling.
- Press the 'Set up/Confirm' (OK) button to enter programming mode.
- Use the up/down arrows to select P1, P2, or P3. Press OK to confirm.
- Set the Start Time for the selected program using the up/down arrows and OK to confirm.
- Set the Watering Duration (from 1 second to 99 minutes) using the up/down arrows and OK to confirm.
- Set the Watering Frequency (from 1 hour to 15 days) using the up/down arrows and OK to confirm.
- Repeat for other programs as needed.
5.3. Rain Sensor Functionality
The integrated rain sensor automatically detects rainfall and pauses the scheduled watering to prevent overwatering and conserve water. Watering will resume as scheduled once the sensor dries out.

Figure 5.2: The Kazeila Sprinkler Timer demonstrating its rain sensor technology. The left side shows the timer operating (ON) in dry conditions, while the right side shows it paused (OFF) during rainfall, indicated by the rain sensor icon on the display.
5.4. Manual Watering Mode
To water manually, press the 'Manual Watering' button. Use the up/down arrows to set the desired duration, then press OK to start. The timer will automatically stop after the set duration.
5.5. Child Lock Function
Activate the child lock to prevent accidental changes to settings or unintended watering.

Figure 5.3: A hand activating the child lock feature on the Kazeila Sprinkler Timer by long-pressing the up and down arrow buttons simultaneously. This prevents accidental changes to the settings.
- To activate: Long press the 'Number Increase' (up arrow) and 'Number Decrease' (down arrow) buttons simultaneously for 3 seconds. A lock icon will appear on the display.
- To deactivate: Long press the 'Number Increase' (up arrow) and 'Number Decrease' (down arrow) buttons simultaneously for 3 seconds. The lock icon will disappear.
5.6. Power System and Low Power Protection
The timer operates on 2x1.5V AA Alkaline batteries, providing over 6 months of operation. The LCD screen displays remaining power and automatically turns off after 30 seconds of inactivity to conserve energy. The device will shut off before batteries are completely depleted to prevent unexpected watering interruptions.
6. Product Videos
6.1. 3 Independent Irrigation Programs
This video demonstrates the Kazeila Sprinkler Timer's capability to set up and manage three independent irrigation programs, showcasing how to customize start times, durations, and frequencies for different watering needs. It highlights the ease of programming and the versatility for various garden scenarios.
7. Maintenance
- Cleaning: Wipe the exterior of the timer with a damp cloth. Do not use abrasive cleaners.
- Battery Replacement: Replace batteries when the low power indicator appears on the display. Remove batteries if the timer will not be used for an extended period.
- Winter Storage: In freezing conditions, disconnect the timer from the faucet and store it indoors to prevent damage from ice expansion.
8. Troubleshooting
| Problem | Possible Cause | Solution |
|---|---|---|
| Timer not watering | Low batteries, faucet off, program not set, rain sensor active. | Replace batteries, open faucet, check program settings, wait for rain sensor to dry. |
| Water leakage | Loose connection, damaged washer. | Ensure connections are tight, check and replace rubber washers if damaged. |
| Display not working | Dead batteries, screen timeout. | Replace batteries. Press any button to wake up the screen from timeout. |
| Child lock engaged | Buttons unresponsive. | Long press up and down arrows for 3 seconds to deactivate child lock. |
9. Specifications
- Brand: Kazeila
- Model: B09SZ4FMWN
- Color: Black, Gray, Green, White
- Material: Rubber, 30% reinforced nylon (top connector)
- Item Weight: 508 Grams
- Number of Settings: 3 (independent watering programs)
- Water Pressure: Up to 145psi / 10bar
- Watering Duration: 1 second to 99 minutes
- Watering Frequency: 1 hour to 15 days
- Power Source: 2 x 1.5V AA Alkaline batteries (not included)
- Waterproof Rating: IP65
- Certifications: CE, FCC, RoHS
10. Warranty and Support
For warranty information and customer support, please refer to the product packaging or contact Kazeila customer service directly. Keep your purchase receipt for warranty claims.