Souldershop 533e55d9-96d1-47ee-b9da-051db184aa04
Souldershop Universal Remote Control for Mitsubishi A/C Air Conditioners
Model: 533e55d9-96d1-47ee-b9da-051db184aa04
Brand: Souldershop
1. Introduction
This manual provides instructions for the Souldershop Universal Remote Control, designed as a replacement for various Mitsubishi A/C air conditioner models. This remote offers a convenient and effective solution for controlling your air conditioning unit. Please read this manual carefully before use to ensure proper operation and to maximize the lifespan of your remote control.
2. Product Overview
The Souldershop Universal Remote Control is a compact and user-friendly device. It features a clear LCD display and intuitive button layout for easy operation of your Mitsubishi A/C unit.

Figure 2.1: Front view of the remote control, showing the display and primary buttons including ON/OFF and temperature adjustments.

Figure 2.2: The remote control with its sliding lower panel open, revealing additional function buttons such as MODE, FAN, VANE, SLEEP, and timer controls.

Figure 2.3: Rear view of the remote control, showing the open battery compartment ready for battery insertion.
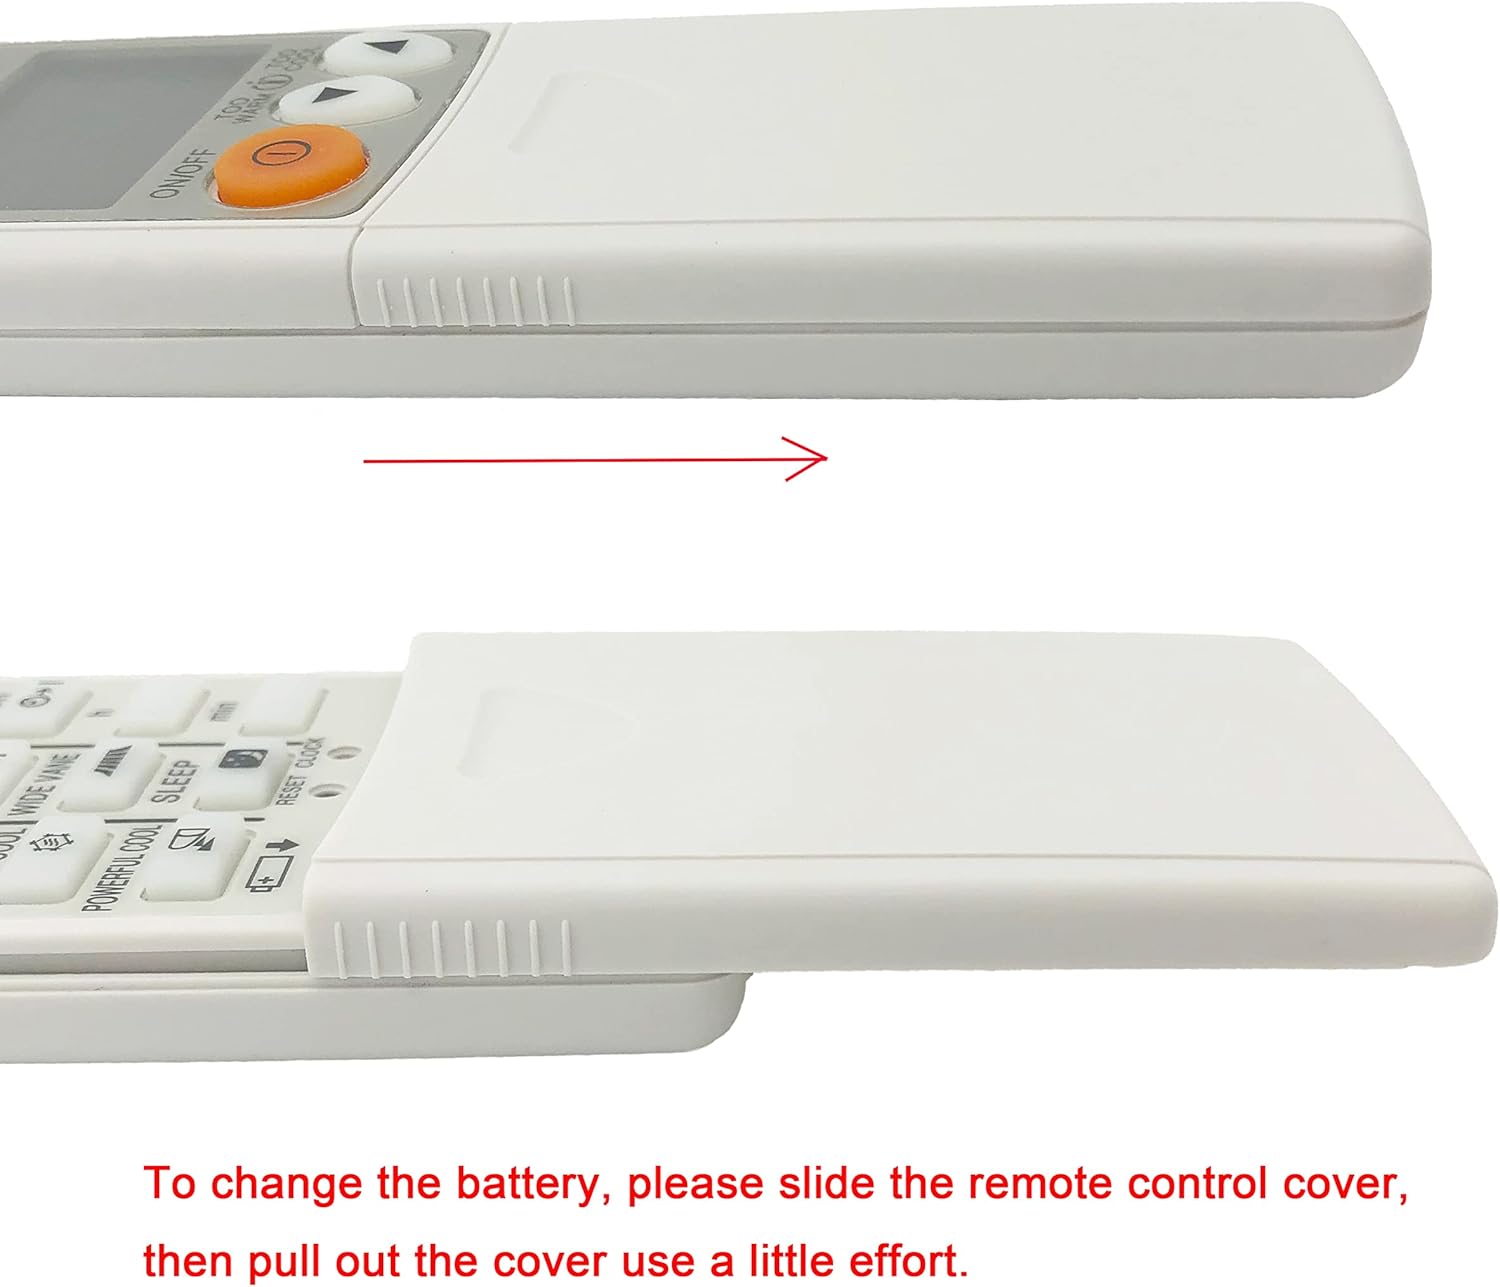
Figure 2.4: Side profile of the remote control, illustrating how the battery cover slides open to access the battery compartment.
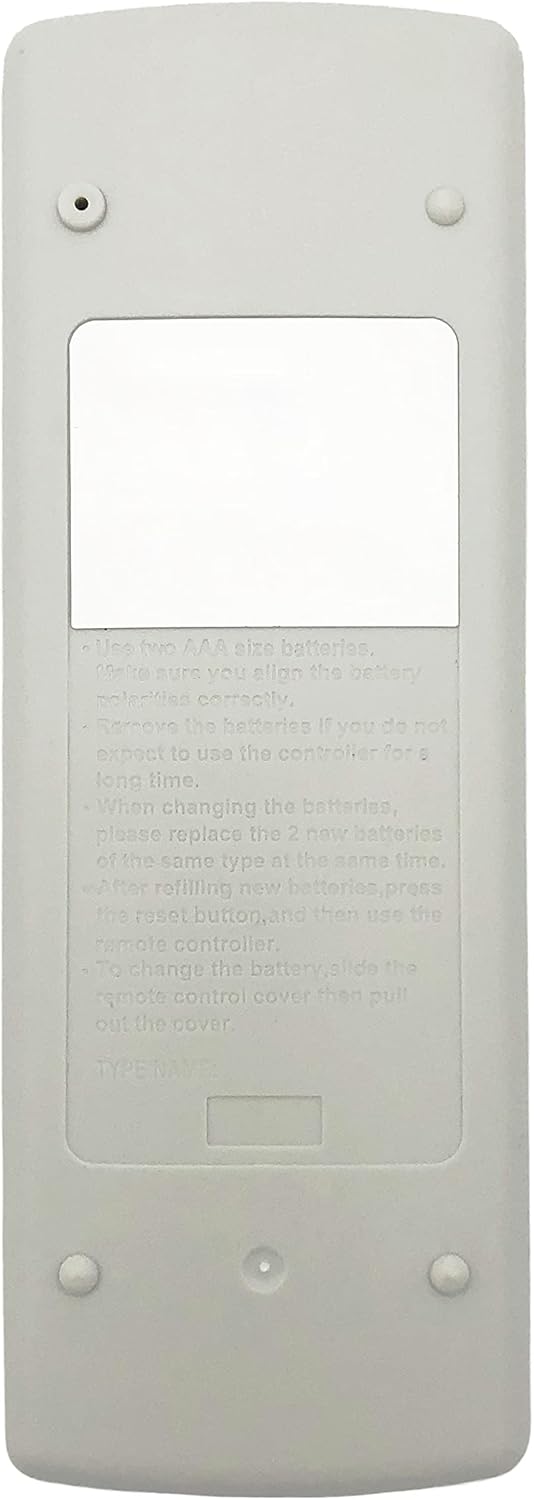
Figure 2.5: The back of the remote control, displaying printed instructions for battery usage and replacement, including polarity and reset information.

Figure 2.6: A hand holding the remote control, demonstrating the accessibility of the hidden function buttons when the lower panel is open.
3. Setup
3.1 Battery Installation
The remote control requires two 1.5V AAA batteries (not included). Follow these steps to install the batteries:
- Locate the battery compartment on the back of the remote control.
- Slide the battery cover downwards and pull it out gently. (Refer to Figure 2.4)
- Insert two AAA batteries, ensuring the correct polarity (+ and -) as indicated inside the compartment.
- Slide the battery cover back into place until it clicks securely.
3.2 Initial Pairing and Configuration
This universal remote is designed to work with most Mitsubishi A/C models directly without programming. However, if it does not function immediately, a simple configuration process is required:
- Ensure your air conditioner unit is powered on.
- Point the remote control towards your A/C unit.
- Press and hold the "ON/OFF" button on the remote for approximately 5 seconds to initiate the automatic search function.
- Release the "ON/OFF" button as soon as your A/C unit turns on or off, indicating it has received a signal.
- Immediately press the "ON/OFF" button again to save the detected code.
If only some buttons function after this setup, attempt to reset and reconfigure the remote following the steps above.
4. Operating Instructions
The remote control features a memory function, allowing it to retain settings even after battery changes. The display shows temperature in Celsius only and cannot be changed to Fahrenheit.
4.1 Basic Functions
- ON/OFF: Press to turn the air conditioner on or off.
- Temperature Adjustment: Use the "TOO WARM" (down arrow) and "TOO COOL" (up arrow) buttons to adjust the desired temperature.
4.2 Advanced Functions (Under Sliding Cover)
Slide down the front panel to access additional controls:
- MODE: Cycle through operating modes (e.g., Cool, Heat, Fan, Dry, Auto).
- FAN: Adjust fan speed.
- VANE / WIDE VANE: Control the direction of the air flow.
- ECONO COOL / POWERFUL COOL: Activate energy-saving or rapid cooling modes.
- SLEEP: Engage sleep mode for quiet operation and optimized temperature during sleep.
- TIMER (h / min): Set on/off timers for the unit.
- RESET CLOCK: Reset the internal clock of the remote.
5. Maintenance
5.1 Cleaning
To clean the remote control, wipe it gently with a soft, dry cloth. Do not use liquid cleaners, sprays, or abrasive materials, as these can damage the remote's surface or internal components.
5.2 Battery Replacement
When the remote's display becomes dim or the remote stops responding, it is time to replace the batteries. Follow the battery installation steps in Section 3.1. Always replace both batteries with new ones of the same type (AAA 1.5V) at the same time. After replacing batteries, press the reset button (if available) or re-pair the remote if necessary.
5.3 Storage
If the remote control will not be used for an extended period, remove the batteries to prevent leakage and potential damage to the device.
6. Troubleshooting
6.1 Remote Not Responding
- Check Batteries: Ensure batteries are correctly inserted with proper polarity and are not depleted. Replace if necessary.
- Line of Sight: Make sure there are no obstructions between the remote and the A/C unit's receiver.
- Re-pair: If the remote still does not respond, try the initial pairing and configuration steps outlined in Section 3.2.
6.2 Only Some Buttons Work
This indicates a partial code match. Perform the initial pairing and configuration steps (Section 3.2) again to ensure the remote fully synchronizes with your A/C unit.
6.3 Display Shows Only Celsius
This is a design feature of the remote. The Souldershop Universal Remote Control displays temperature exclusively in Celsius and does not support Fahrenheit display.
7. Specifications
| Brand | Souldershop |
| Model | 533e55d9-96d1-47ee-b9da-051db184aa04 |
| Product Type | Electronics |
| Compatible Devices | Air conditioner (Mitsubishi A/C models) |
| Special Features | Universal, Infrared |
| Power Source | 2 x AAA 1.5V Batteries (not included) |
| Number of Units | 1 |
| Color | White |
| Product Dimensions | 16.3 x 5.9 x 2 cm (6.4 x 2.3 x 0.8 inches) |
| Product Weight | 109 g (3.84 ounces) |
8. Warranty
This Souldershop product is covered by a standard manufacturer's warranty. For specific details regarding warranty coverage, duration, and terms, please refer to the warranty information provided at the time of purchase or contact Souldershop customer support directly. Keep your proof of purchase for warranty claims.
9. Support
If you encounter any issues or have questions not covered in this manual, please contact Souldershop customer support. For the most up-to-date contact information, please visit the official Souldershop website or refer to your product packaging.