1. Introduction
The C-Zone SNDWAY SW-526A is a digital sound level meter designed for accurate noise measurement in various environments. Featuring an 18-inch large LCD display, it measures sound levels from 30 to 130dB. This device is suitable for monitoring noise in locations such as libraries, hotels, theaters, lobbies, factories, offices, and homes. It includes an alarm function to alert users when sound levels exceed a set threshold.
This manual provides detailed instructions for the proper setup, operation, and maintenance of your SNDWAY SW-526A sound level meter.

Figure 1: SNDWAY SW-526A in various monitoring environments.
2. Product Overview
The SNDWAY SW-526A features a large digital display for clear readings and intuitive controls. Understanding the components and their functions is essential for effective use.
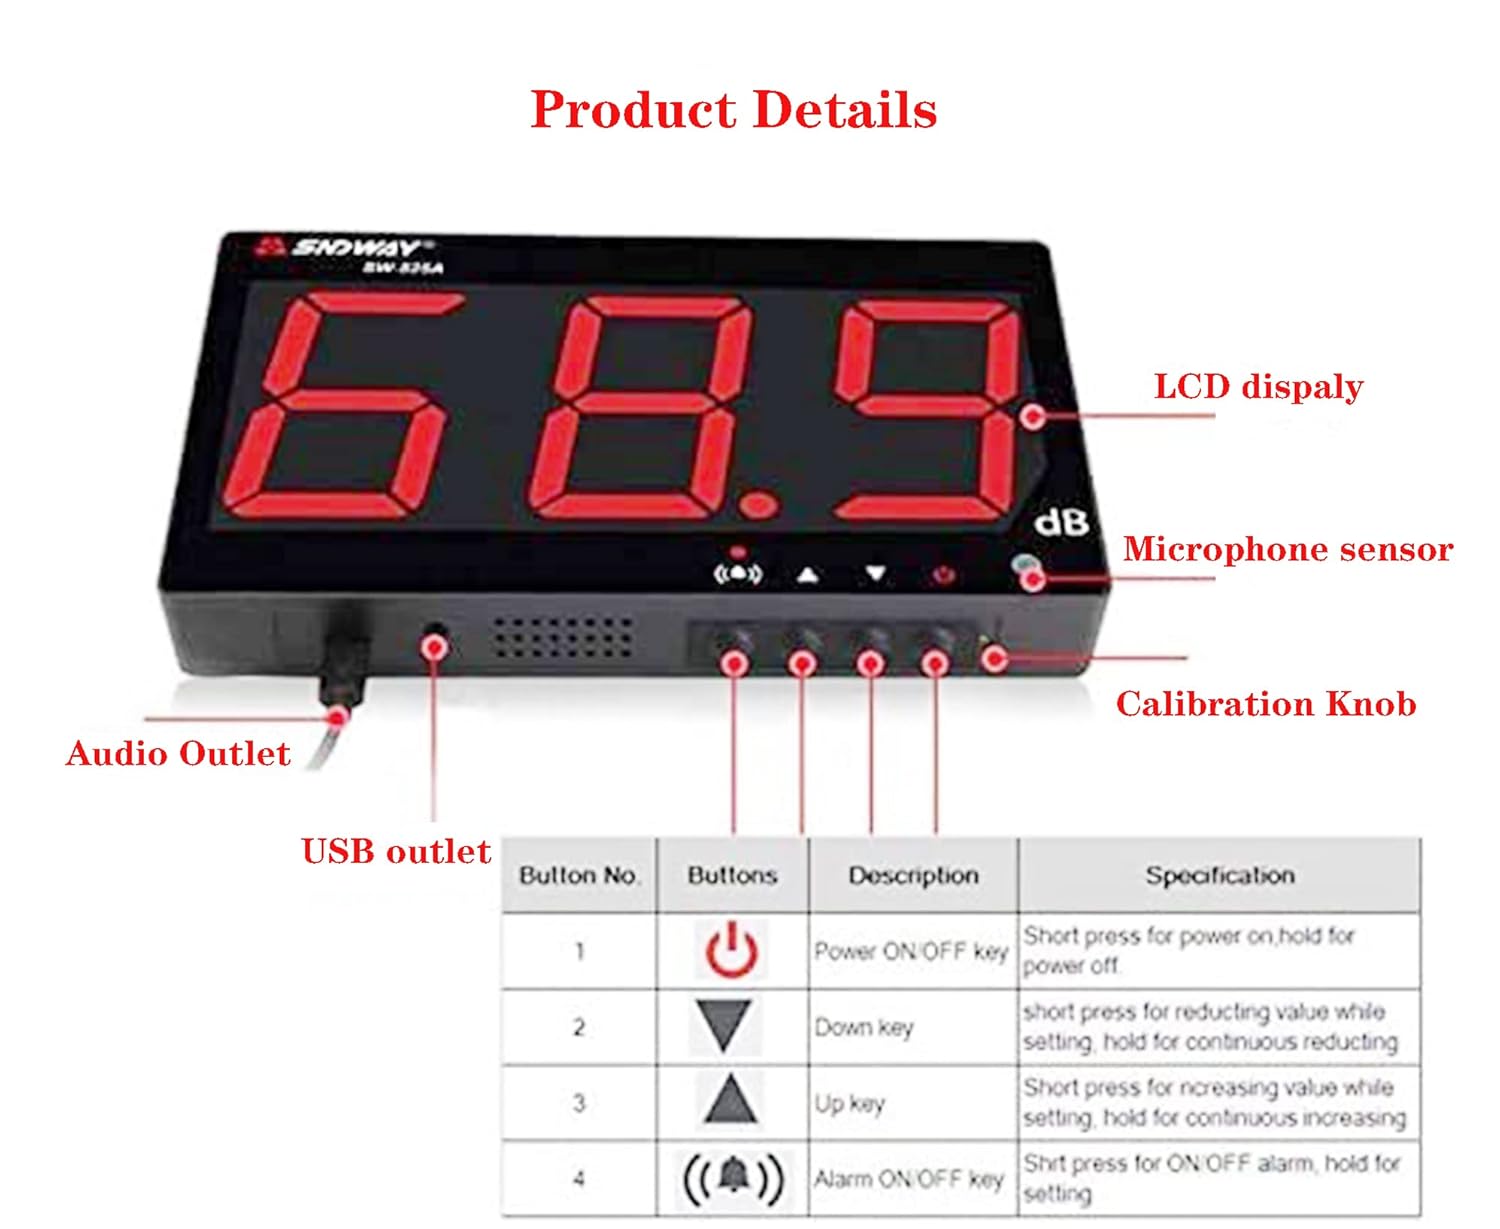
Figure 2: Front and side view of the SW-526A with labeled components.
Key Components:
- LCD Display: 18-inch large screen for displaying sound level readings.
- Microphone Sensor: 6mm condenser microphone for sound detection.
- Control Buttons:
- Power ON/OFF Key: Short press to power on, hold to power off.
- Down Key: Reduces value while setting, holds for continuous reduction.
- Up Key: Increases value while setting, holds for continuous increase.
- Alarm ON/OFF Key: Short press to toggle alarm, hold for alarm settings.
- USB Outlet: Micro USB port for 5V 2A DC power supply.
- Audio Outlet: 3.5mm jack for connecting external speakers.
- Calibration Knob: Used for device calibration (refer to advanced calibration procedures if needed).
3. Setup
3.1 Power Connection
- The SW-526A does not contain an internal battery and requires an external power source.
- Connect the provided USB cable to the Micro USB port on the device.
- Connect the other end of the USB cable to a 5V 2A DC charger (not included). Ensure the charger meets the specified voltage and current requirements to prevent damage to the circuit board.
- The device will automatically power on once connected to a suitable power supply.
3.2 Mounting the Device
The SW-526A is designed for wall-mounted installation and includes hooks and a tripod mounting screw for flexible placement.

Figure 3: Wall-mounted installation example.
- Wall Hanging: Use the integrated hooks on the back of the device to hang it securely on a wall.
- Tripod Mounting: A tripod mounting screw is available on the back for alternative mounting options.
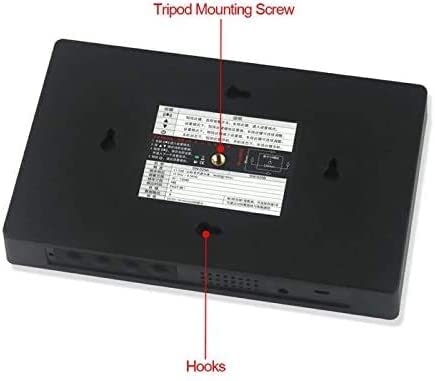
Figure 4: Back panel showing mounting options.
4. Operating Instructions
4.1 Power On/Off
- Power On: The device automatically powers on when connected to a 5V 2A DC power supply.
- Power Off: Short press the Power ON/OFF key () to shut down the device. Long press the Power ON/OFF key to activate the automatic startup function, which means the product will automatically turn on when connected to the power supply.
4.2 Basic Sound Measurement
Once powered on, the device will immediately begin measuring sound levels and display the readings in decibels (dB) on the large LCD screen. The measurement range is 30 to 130dB.

Figure 5: Typical sound level display.
4.3 Alarm Settings
The device features an adjustable alarm to notify you when sound levels exceed a predefined threshold.
- Toggle Alarm: Short press the Alarm ON/OFF key () to turn the alarm function on or off. When the alarm is active, the red indicator light will be on. When off, the red light will be off.
- Set Alarm Value: In the normal measurement state, long press the Alarm ON/OFF key to enter the alarm setting mode.
- Use the Up key () and Down key () to adjust the desired alarm threshold value.
- Short press the Alarm ON/OFF key again to save the new alarm value. Alternatively, short press the Power ON/OFF key to cancel the setting without saving.
When an alarm condition is met, the indicator light will flash, and a buzzer alarm sound will activate. The alarm time is adjustable from 6 to 120 seconds, and the alarm sound has 1-3 adjustable levels.

Figure 6: Alarm prompt visualization.
4.4 Connecting External Speakers
The SW-526A supports connecting external speakers via its 3.5mm audio outlet. This allows for audio output of the measured sound, if desired.
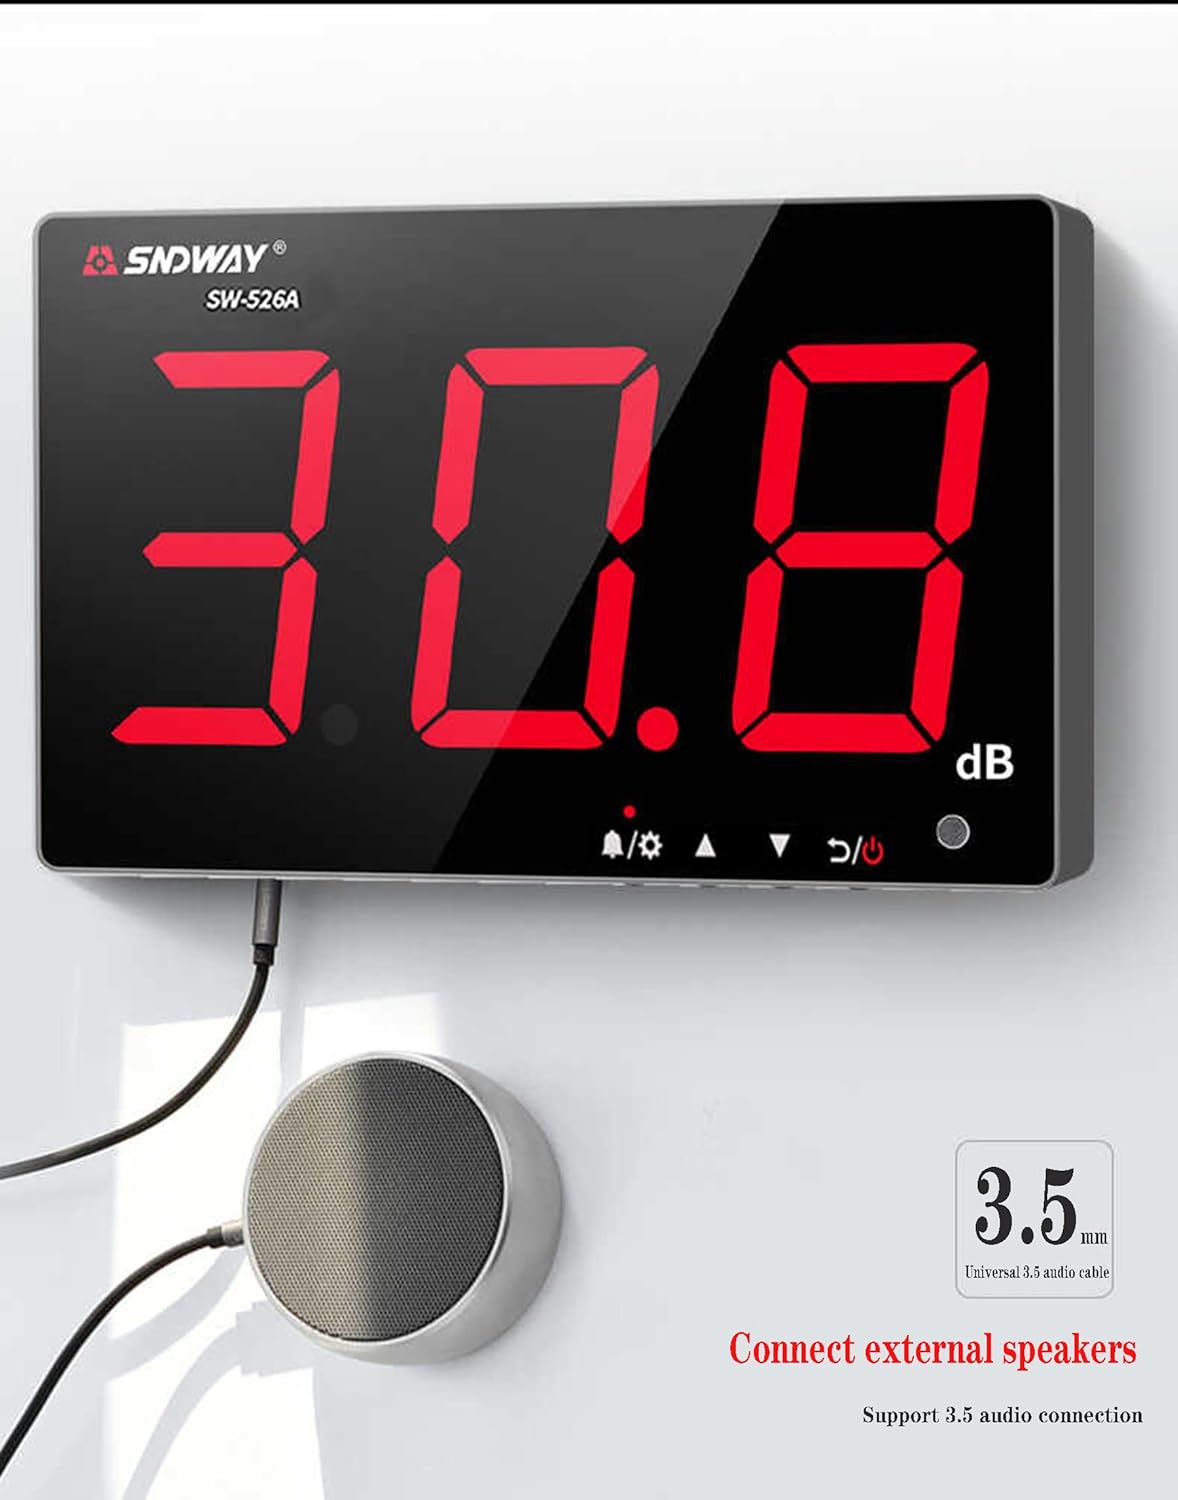
Figure 7: Connecting external speakers.
5. Maintenance
- Keep the device clean and free from dust. Use a soft, dry cloth for cleaning the display and casing.
- Ensure the microphone sensor is not obstructed by foreign matter, as this can affect measurement accuracy.
- Store the device in a dry environment within the specified storage temperature and humidity ranges (-10~60°C, 10~70%RH).
- Avoid exposing the device to extreme temperatures, direct sunlight, or high humidity.
6. Troubleshooting
| Problem | Possible Cause | Solution |
|---|---|---|
| LCD display shows garbled characters or numbers do not jump. | Temporary software glitch. | Restart the device by disconnecting and reconnecting the power supply. |
| Device does not power on or LCD display is blank. |
|
|
| Inaccurate sound level readings. | Microphone sensor obstructed. | Ensure the microphone sensor is clear of any foreign objects or debris. |
| Alarm not functioning correctly. | Incorrect alarm settings. | Review and adjust the alarm settings as described in Section 4.3. |
7. Specifications
| Parameter | Value |
|---|---|
| Model | SW-526A |
| Measurement Range | 30 ~ 130dB |
| Accuracy | ±1.5 dB (reference sound pressure level, 94dB @ 1kHz) |
| Frequency Response | 31.5Hz ~ 8.5kHz |
| Response Time | Fast |
| Microphone | 6mm condenser microphone |
| Power Supply | 5V 2A DC micro USB |
| Working Environment | 0 - 40°C (32 - 104°F), 10 - 80%RH |
| Storage Temperature & Humidity | -10 - 60°C (14 - 140°F), 10 - 70%RH |
| Dimensions | 400 x 230 x 34.5mm (15.72 x 9.04 x 1.36in) |
| Weight | 1442g (approx. 3.18 lbs) |
Figure 8: Device dimensions.
8. Warranty and Support
8.1 Warranty Information
Specific warranty details for the C-Zone SNDWAY SW-526A Sound Level Meter are not provided in this manual. Please refer to the purchase documentation or contact your retailer for warranty terms and conditions.
8.2 Customer Support
If you encounter any issues not covered in the troubleshooting section, or require further assistance, please contact the seller or manufacturer directly. Provide your product model (SW-526A) and a detailed description of the problem for efficient support.