1. Important Safety Instructions
Please read and understand all safety instructions before operating this heat gun. Failure to follow these instructions may result in electric shock, fire, or serious personal injury.
- Electrical Safety: Ensure the power outlet matches the voltage specified on the heat gun. Do not operate in wet conditions or expose to rain. Always use a grounded outlet.
- Burn Hazard: The nozzle and accessories become extremely hot during use and remain hot for a period after shutdown. Avoid direct contact with skin. Allow the tool to cool completely before storing.
- Fire Hazard: Do not point the heat gun at flammable materials. Ensure adequate ventilation when working with materials that may release toxic fumes. Keep a fire extinguisher nearby.
- Ventilation: Always operate the heat gun in a well-ventilated area.
- Children and Bystanders: Keep children and bystanders away from the work area.
- Initial Use Smoke: During the first use, a small amount of smoke may be emitted due to the glue contained in the built-in mica paper drying up. This is normal and will dissipate after approximately 10 minutes of use. It will not affect the performance or safety of the heat gun.
- Overheating Protection: The heat gun is equipped with an overheat protection mode. If the internal temperature becomes too high, the heating element will automatically stop. Heating will resume once the temperature returns to normal operating levels.
2. Product Overview
The Asnish 1850W Heat Gun is a versatile tool designed for various tasks requiring concentrated heat. It features dual temperature settings and comes with multiple nozzles for different applications.
Components
- Asnish 1850W Heat Gun
- Smaller Concentrator Nozzle
- Concentrator Nozzle
- Deflector Nozzle
- Reflector Nozzle
- UL-Certified Power Cord

Figure 2.1: The Asnish 1850W Heat Gun, showing the main unit and the dual temperature setting switch.

Figure 2.2: Heat gun dimensions and the four versatile nozzles: Smaller Concentrator, Concentrator, Deflector, and Reflector.

Figure 2.3: Key safety and design features, including high temperature protection, 2-speed setting, UL-certified power cord, and upgraded cooling fan.
3. Specifications
| Feature | Specification |
|---|---|
| Brand | Asnish |
| Wattage | 1850 watts |
| Power Source | AC |
| Temperature Settings | Dual-temp: 572°F (300°C) and 932°F (500°C) |
| Compatible Material | Plastic, Rubber, Stainless Steel |
| Included Components | Heat gun, 4 Nozzles |
4. Setup
Attaching Nozzles
- Ensure the heat gun is unplugged and completely cool.
- Select the appropriate nozzle for your task.
- Align the nozzle with the heat gun's outlet.
- Push the nozzle firmly onto the outlet until it is securely seated. Do not force it.
- To remove, allow the heat gun and nozzle to cool, then pull the nozzle off.
5. Operating Instructions
Powering On and Temperature Control
- Plug the heat gun into a suitable power outlet.
- Locate the power switch, typically on the handle.
- The heat gun features dual temperature settings:
- Mode I: Provides 572°F (300°C) with a lower airflow (250L/min).
- Mode II: Provides 932°F (500°C) with a higher airflow (500L/min).
- Slide the switch to 'I' for the lower temperature setting or 'II' for the higher temperature setting. Slide to 'O' to turn off.
Hands-Free Operation
The heat gun is designed with a flat base, allowing it to stand upright for hands-free operation. This is useful for tasks requiring both hands, such as bending pipes or working with heat-shrink tubing.

Figure 5.1: The heat gun's stand-up design enables convenient hands-free use for various tasks.
Applications with Nozzles
- Concentrator Nozzles: Direct heat to a specific area for tasks like shrink wrapping, electronics repair, or epoxy resin crafting.
- Deflector Nozzle: Spreads heat over a wider, flatter area, ideal for paint removal or thawing frozen pipes.
- Reflector Nozzle: Distributes heat evenly around a workpiece, such as for bending plastic pipes or heat-shrinking wire insulation.

Figure 5.2: Using the Reflector Nozzle for heat-shrinking wire links in electronics.
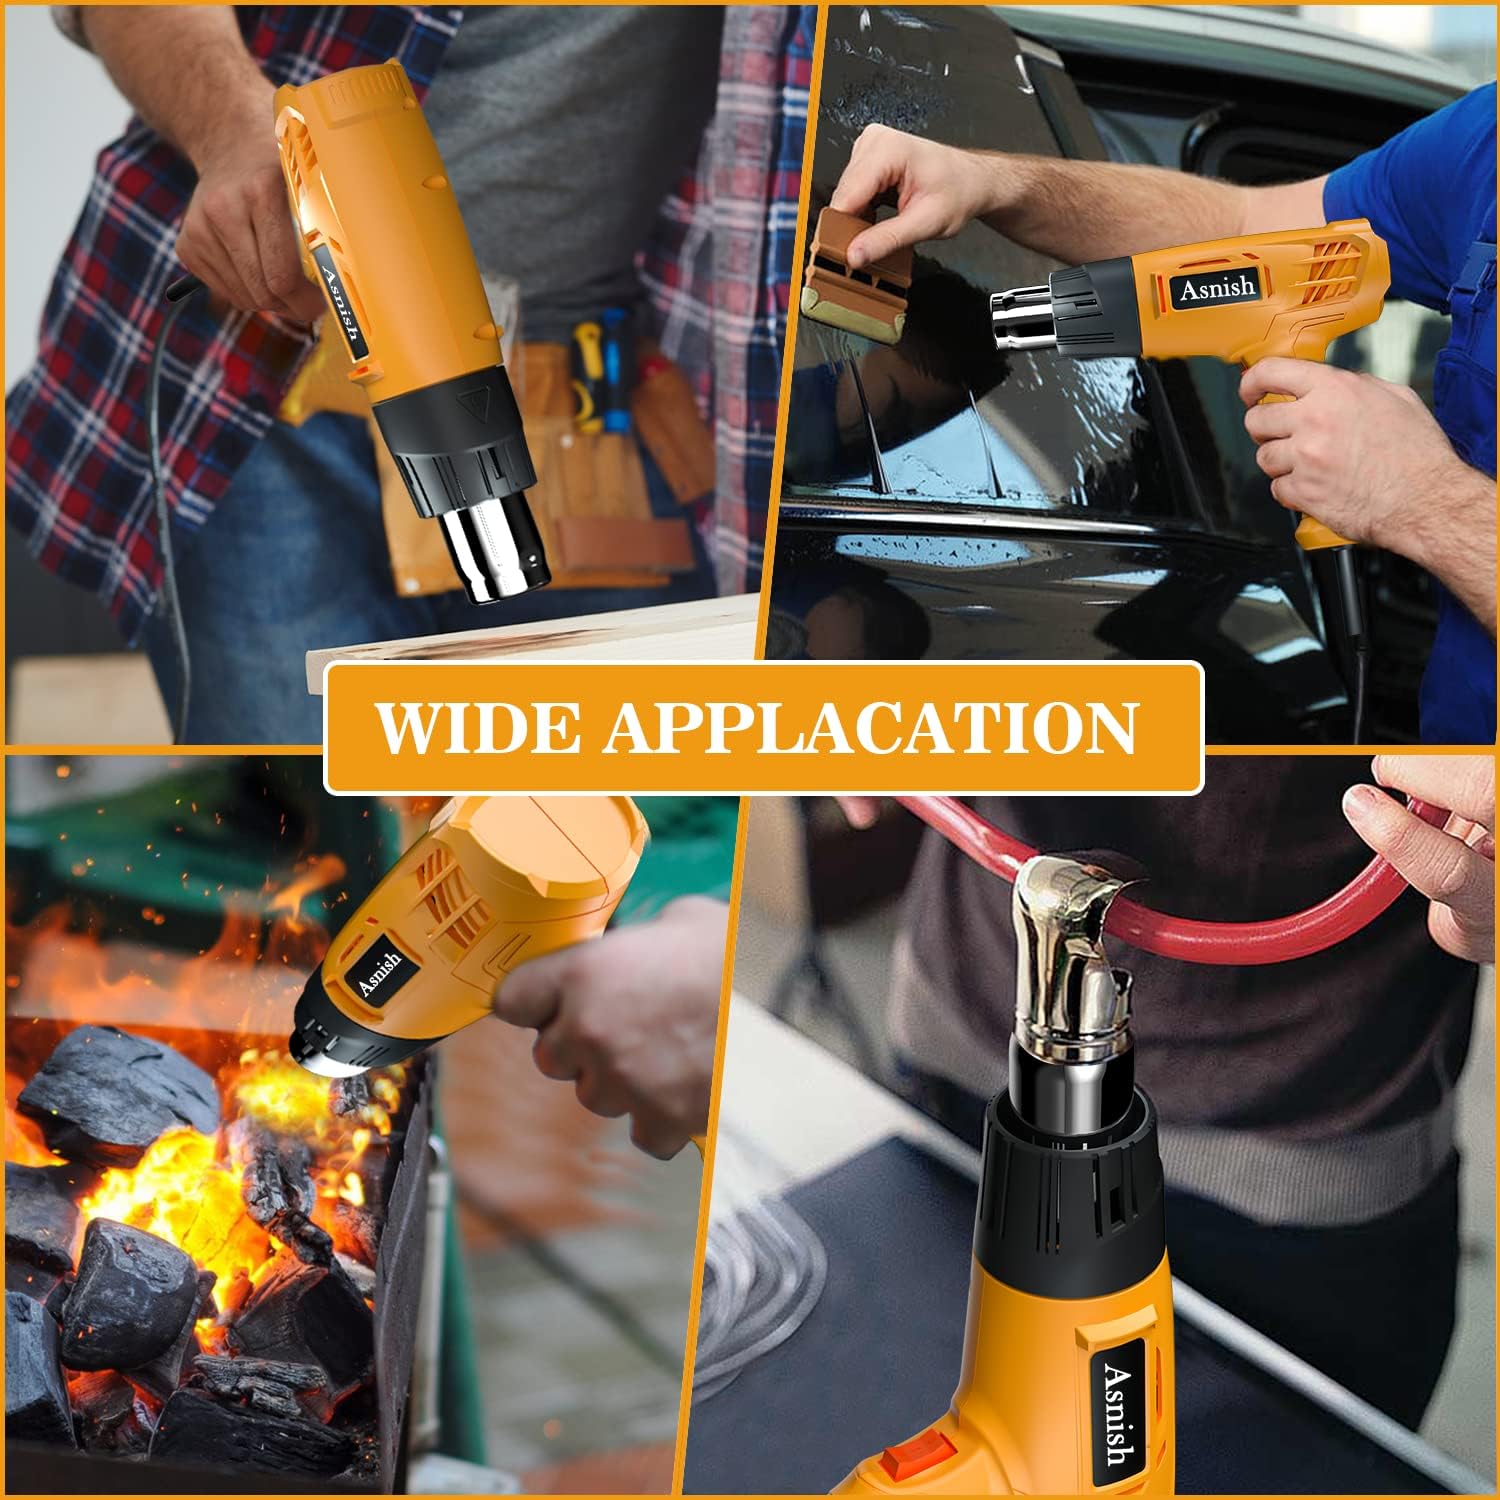
Figure 5.3: Examples of wide applications: shrink wrapping, paint removal, igniting charcoal, and bending PVC pipes.
6. Maintenance and Care
- Cleaning: Ensure the heat gun is unplugged and cool before cleaning. Wipe the exterior with a damp cloth. Do not use abrasive cleaners or solvents. Keep the air intake and exhaust vents clear of dust and debris.
- Storage: Store the heat gun in a dry, secure location, out of reach of children. Ensure the tool is completely cool before storing.
- Cord Care: Regularly inspect the power cord for damage. Do not use the heat gun if the cord is frayed or damaged.
7. Troubleshooting
Common Issues and Solutions
- Issue: Heat gun does not turn on.
- Solution: Check if the power cord is securely plugged into a working outlet. Verify the power switch is in the 'I' or 'II' position.
- Issue: Heat gun produces smoke during first use.
- Solution: This is normal due to the protective coating on the heating coil or glue in the mica paper. The smoke will dissipate after a short period (approx. 10 minutes) and will not affect performance.
- Issue: Heat gun stops heating unexpectedly.
- Solution: The overheat protection may have activated. Allow the tool to cool down. Heating will resume automatically once the internal temperature is safe.
8. Warranty and Support
For warranty information, technical support, or service inquiries, please refer to the contact details provided with your purchase documentation or visit the official Asnish website. Keep your proof of purchase for any warranty claims.