1. Safety Information
Read all instructions carefully before assembling, installing, or operating this appliance. Failure to follow these instructions could result in property damage, bodily injury, or death.
- This pizza oven is for outdoor use only. Do not operate indoors or in an enclosed area.
- Maintain a minimum clearance of 3 feet (0.9 meters) from the back and sides of the oven to any combustible materials.
- Always use heat-resistant gloves when handling hot surfaces or tools.
- Keep children and pets away from the oven during operation and while it is cooling down.
- Never leave the oven unattended while in use.
- Ensure the oven is placed on a stable, level, non-combustible surface.
- Only use recommended wood types for firing. Avoid treated wood or trash.
- Do not store flammable materials near the oven.
2. Package Contents
Verify that all components are present before beginning assembly.
- Pizza Oven Main Body
- Oven Stand with Wheels
- Chimney with Damper
- Side Panel/Shelf
- Pizza Oven Door
- Refractory Bricks (for cooking surface)
- 4x S-shape pothooks
- Pizza cutter
- Pizza wheel
- Pizza oven brush
- Large pizza oven shovel
- Assembly Hardware (screws, nuts, etc.)

Figure 2.1: Included accessories for the Empava pizza oven.
3. Setup and Assembly
Follow these steps to assemble your Empava Commercial-Style Wood-Fired Outdoor Pizza Oven. It is recommended to have two people for certain assembly steps.
3.1 Assembly Video Guide
Video 3.1: Detailed assembly instructions for the Empava pizza oven.
3.2 Step-by-Step Assembly
- Assemble the Oven Stand: Attach the legs to the base of the oven stand using the provided screws. Ensure all connections are secure.
- Install Wheels: Secure the four wheels to the bottom of the oven stand. Two wheels are swivel and two are fixed, allowing for easy movement and locking. Use a screwdriver to tighten the screws.
- Mount the Oven Body: Carefully lift the main oven body and place it onto the assembled stand. Align the pre-drilled holes and secure the oven body to the stand with screws.
- Attach Side Panel/Shelf: Install the side panel/shelf to the designated mounting points on the oven stand. This provides additional workspace. Secure it firmly with screws.
- Install Chimney: Place the chimney onto the top opening of the oven body. Secure it using the provided screws. Ensure the chimney damper is correctly oriented for easy access.
- Attach Tool Hooks and Bar: Mount the accessory bar and S-hooks to the side of the oven stand. This allows for convenient storage of your pizza tools.
- Insert Refractory Bricks: Carefully place the refractory bricks onto the cooking surface inside the oven. Arrange them to form a solid, even base.

Figure 3.1: Dimensional drawing of the Empava pizza oven.

Figure 3.2: Assembled Empava pizza oven, front view.
4. Operating Instructions
This section details how to operate your wood-fired pizza oven for optimal cooking results.
4.1 Fueling the Oven
- Use only dry, seasoned hardwood such as oak, maple, or fruitwoods. Avoid softwoods, treated wood, or charcoal.
- Place small pieces of kindling and paper in the rear of the oven, on the refractory bricks.
- Light the kindling and gradually add larger pieces of wood as the fire establishes.
- Maintain a consistent fire to heat the oven to the desired temperature.

Figure 4.1: Convenient wood storage beneath the oven.
4.2 Temperature Control
- The built-in thermometer on the front of the oven displays the internal temperature.
- Adjust the chimney damper to control airflow and heat retention. Opening the damper increases airflow and temperature, while closing it reduces airflow and retains heat.
- The half-spherical dome design helps circulate heat evenly, cooking pizzas quickly in minutes.

Figure 4.2: Integrated thermometer for monitoring oven temperature.
4.3 Cooking with the Oven
- Once the oven reaches the desired temperature (typically 700-900°F / 370-480°C for pizza), push the embers to one side to create a cooking zone.
- Use the pizza peel to slide your pizza into the oven. The large mouth allows for easy placement and retrieval of various food items.
- Rotate the pizza periodically for even cooking. Pizzas typically cook in 1-3 minutes.
- The refractory tiles store heat, ensuring a crispy crust and evenly cooked toppings.
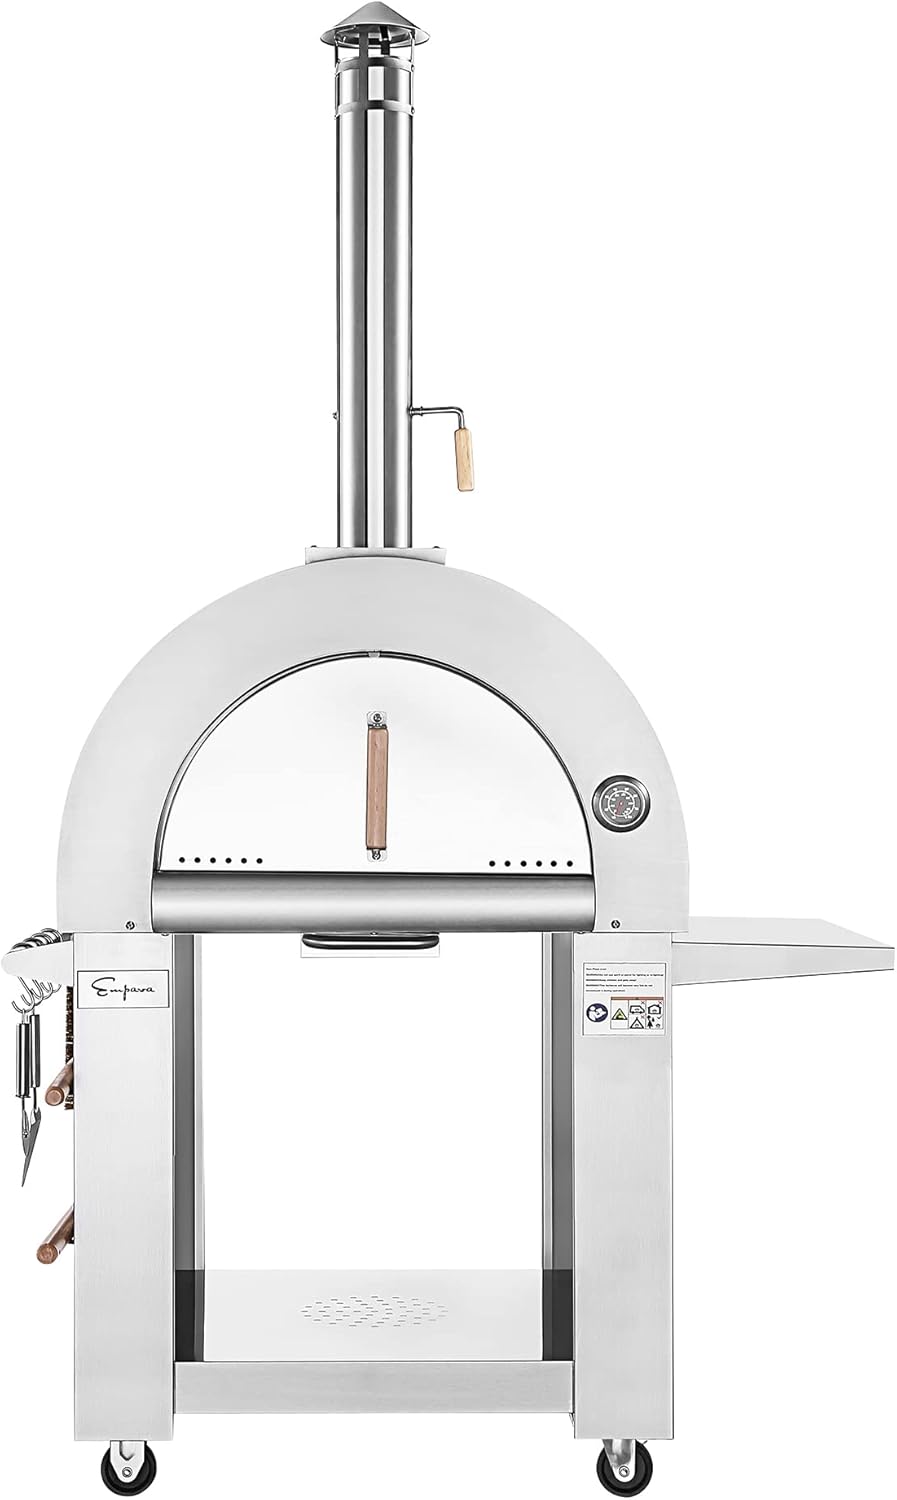
Figure 4.3: Oven interior with door open, ready for cooking.
5. Maintenance
Regular maintenance ensures the longevity and optimal performance of your pizza oven.
- Cleaning the Interior: After the oven has completely cooled, use the provided pizza oven brush to sweep out ash and debris from the cooking surface.
- Cleaning the Exterior: Wipe down the stainless steel exterior with a damp cloth and mild detergent. Avoid abrasive cleaners that can scratch the surface.
- Chimney Maintenance: Periodically check the chimney for creosote buildup. Clean as necessary to ensure proper ventilation.
- Refractory Bricks: The bricks may darken over time, which is normal. If any bricks become cracked or damaged, they should be replaced.
- Storage: When not in use, especially during inclement weather, it is recommended to cover the oven or move it to a sheltered location. The wheels allow for easy portability.
6. Troubleshooting
This section addresses common issues you might encounter with your pizza oven.
| Problem | Possible Cause | Solution |
|---|---|---|
| Oven not reaching high temperatures | Insufficient fuel, wet wood, closed damper, poor airflow. | Ensure adequate dry hardwood. Open chimney damper fully. Clear any obstructions. |
| Excessive smoke | Wet wood, improper fire starting, chimney obstruction. | Use dry wood. Start fire with small kindling. Check and clean chimney. |
| Pizza burning on one side | Uneven heat distribution, pizza too close to flames. | Rotate pizza frequently. Ensure embers are evenly distributed or to one side away from direct cooking area. |
| Pizza crust not crispy | Oven not hot enough, insufficient preheating of bricks. | Allow oven to preheat longer until bricks are very hot. Ensure proper oven temperature. |
7. Specifications
| Feature | Detail |
|---|---|
| Brand | Empava |
| Model Number | PG05 |
| Size | 33 Inch |
| Color | Stainless Steel |
| Heating Method | Wood |
| Fuel Type | Wood |
| Finish Type | Stainless Steel |
| Installation Type | Freestanding |
| Additional Features | Portable (with 4 wheels) |
| Item Dimensions (D x W x H) | 32.3"D x 46.3"W x 79.8"H |
| Cooking Capacity | 30-inch x 25-inch |
| Material Type | 18-gauge Stainless Steel |
| Included Components | 4x s-shape pothooks, pizza cutter, pizza wheel, pizza oven brush, large pizza oven shovel |
8. Warranty and Support
Empava provides a limited manufacturer warranty for this product.
- Warranty Period: 2-year limited manufacturer warranty.
- For warranty claims or technical assistance, please contact Empava customer support. Refer to the contact information provided in your purchase documentation or on the official Empava website.