Introduction
This manual provides detailed instructions for the installation, operation, and maintenance of your Everycom EC-901 80mm Thermal POS Receipt Printer. Please read this manual thoroughly before using the printer to ensure proper functionality and to prevent damage.
Safety Information
- Ensure the printer is connected to a power source with the correct voltage.
- Do not expose the printer to water or high humidity.
- Avoid placing the printer in direct sunlight or near heat sources.
- Use only specified thermal paper for optimal performance and to prevent damage to the print head.
- Do not attempt to disassemble or repair the printer yourself. Contact qualified service personnel.
Package Contents
Verify that all items are present in the package:
- Everycom EC-901 Thermal POS Receipt Printer
- Roll paper × 1 Roll (for initial testing)
- CD-ROM (containing Drivers, Utility Software, Manuals)
- Paper Guide
- Paper Bearing
- USB Cable
- Power Adapter Cable
Product Overview
The Everycom EC-901 is a compact 80mm (3-inch) thermal POS receipt printer designed for efficient and reliable printing. It features a USB and LAN interface for versatile connectivity.

Figure 1: Front view of the Everycom EC-901 Thermal POS Receipt Printer.
Key Features:
- Fast Printing Speed: Up to 160mm per second for quick receipt output.
- Easy Paper Loading: Drop-in paper loading mechanism for quick and easy media changes.
- Compact Design: Low space requirement with an integrated power supply.
- Variable Paper Width: Supports 80mm paper width.
- Connectivity: USB and LAN interface options.
- High Resolution: 203 x 203 DPI for clear print quality.
- Low Noise Levels: Operates quietly, suitable for various work environments.

Figure 2: Top-open design for easy paper roll installation.
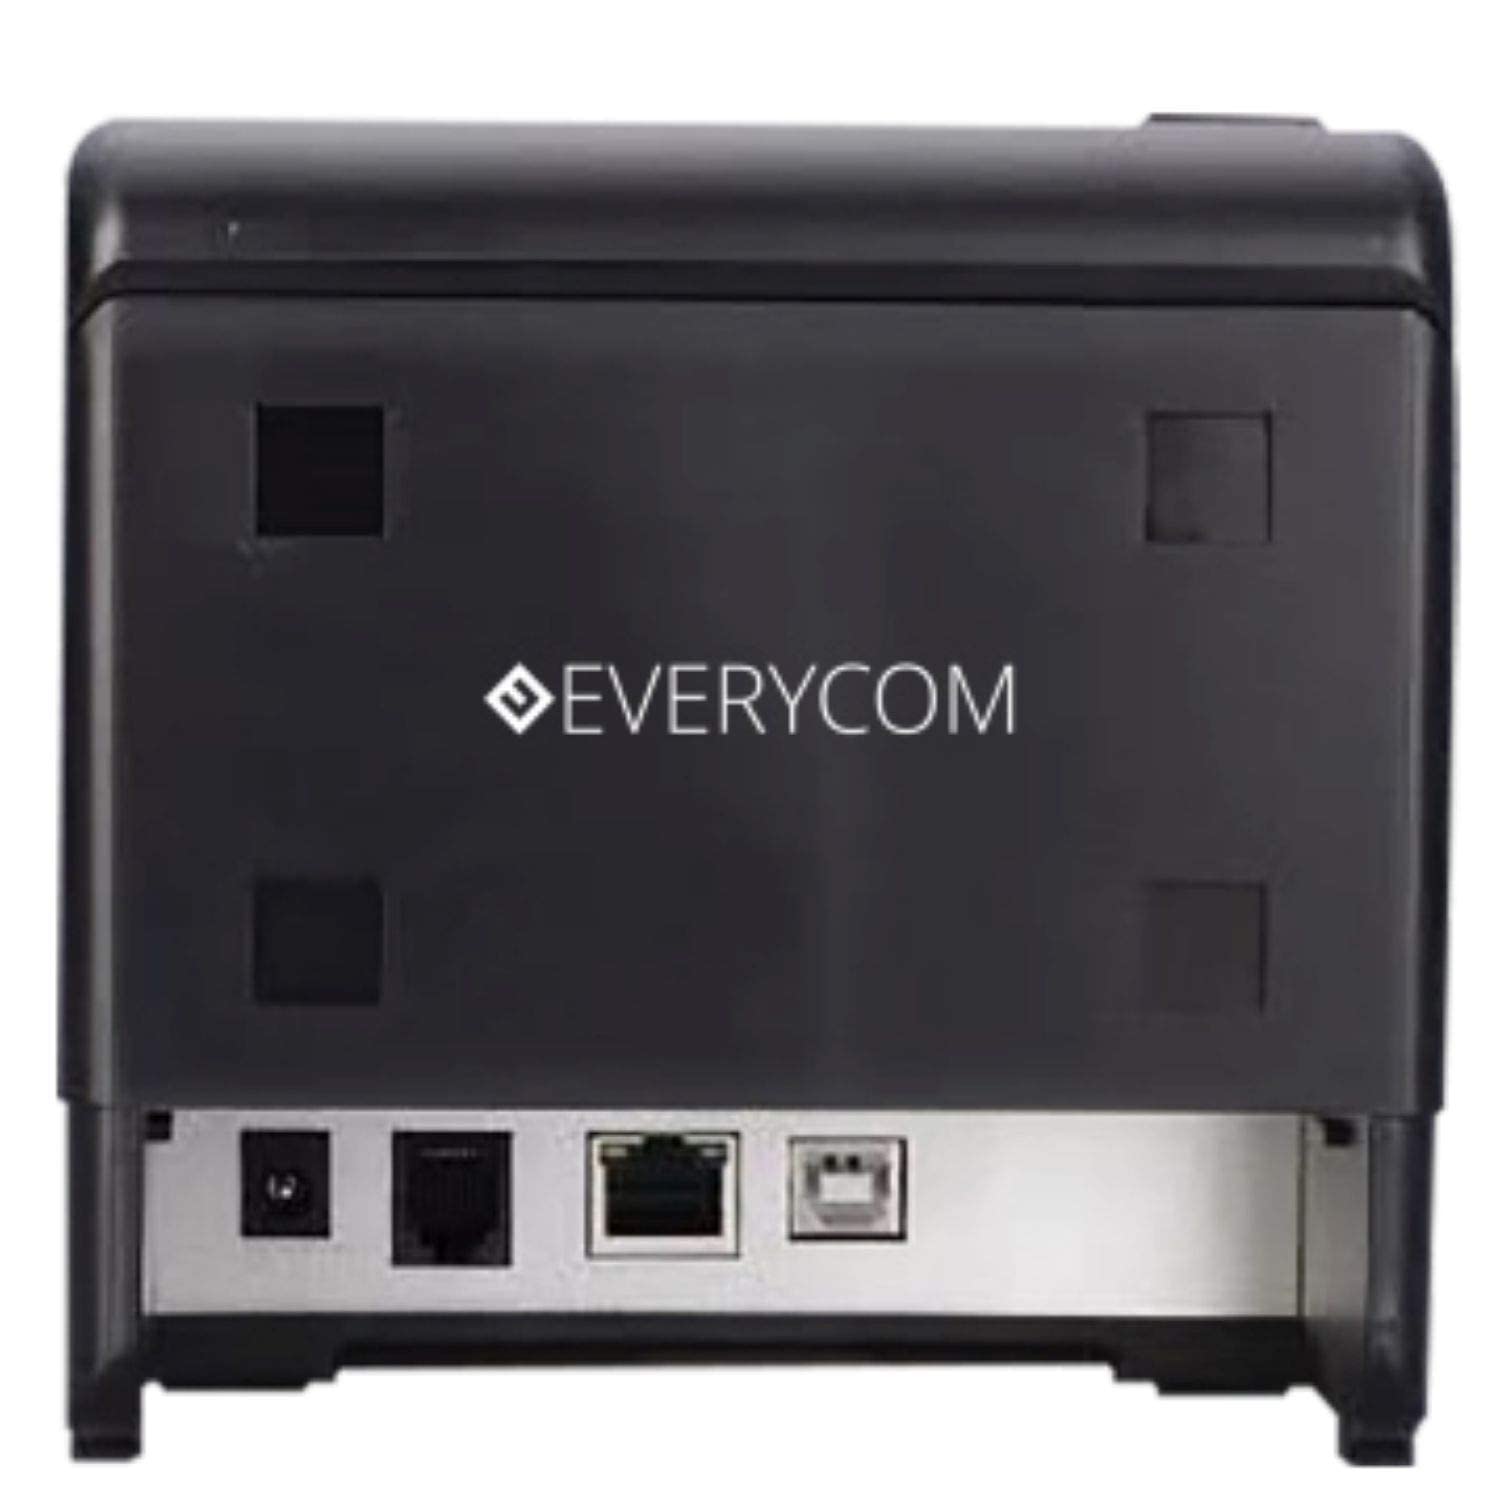
Figure 3: Rear view showing USB and LAN connectivity ports.

Figure 4: The EC-901 printer is designed for low noise operation.

Figure 5: The EC-901 printer features an easy-to-use design for paper installation.
Setup
1. Connecting the Printer
- Connect the power adapter cable to the printer's power port and then plug it into a suitable electrical outlet.
- For USB connection: Connect one end of the USB cable to the printer's USB port and the other end to your computer.
- For LAN connection: Connect an Ethernet cable to the printer's LAN port and the other end to your network router or switch.
- Turn on the printer using the power switch located on the front or side of the device.
2. Installing the Paper Roll
- Open the printer cover by pressing the release button or lifting the cover.
- Insert the thermal paper roll into the compartment with the paper feeding from the bottom and exiting towards the front.
- Pull a small amount of paper out past the cutter.
- Close the printer cover firmly until it clicks into place.
3. Driver Installation
Insert the provided CD-ROM into your computer's CD/DVD drive. Follow the on-screen instructions to install the printer drivers and utility software. Drivers are typically compatible with Windows operating systems, including Windows 10.
Operating Instructions
Indicator Lights:
- POWER: Indicates the printer is powered on.
- ERROR: Lights up or flashes to indicate an error (e.g., print head overheating, cover open).
- PAPER: Indicates low paper or no paper.
Basic Printing:
Once the printer is connected and drivers are installed, you can print receipts from your POS software or any application that supports printing. Ensure the Everycom EC-901 is selected as the default printer or the desired printer in your application's print settings.
Maintenance
Cleaning the Printer:
- Turn off the printer and disconnect the power cable before cleaning.
- Use a soft, lint-free cloth dampened with isopropyl alcohol to gently clean the thermal print head. Allow it to dry completely before use.
- Wipe the exterior of the printer with a soft, dry cloth. Do not use abrasive cleaners.
Replacing Paper:
When the PAPER indicator lights up or printing becomes faint, replace the paper roll following the steps outlined in the "Installing the Paper Roll" section.
Troubleshooting
| Problem | Possible Cause | Solution |
|---|---|---|
| Printer does not power on. | Power cable disconnected or power outlet issue. | Check power cable connections. Ensure the power outlet is functional. |
| No printing or blank output. | No paper, paper loaded incorrectly, or print head issue. | Check paper roll and ensure it's loaded correctly. Clean the print head if necessary. Verify printer drivers are installed. |
| PAPER indicator is on. | Paper roll is empty or low. | Replace the paper roll. |
| ERROR indicator is on. | Printer cover open, print head overheating, or other internal error. | Ensure the printer cover is closed properly. Turn off the printer, wait a few minutes for it to cool down, then restart. If the issue persists, contact support. |
| Printer not recognized by computer. | Driver not installed or USB/LAN cable issue. | Reinstall printer drivers. Check USB/LAN cable connections. Try a different port or cable. |
Specifications
| Feature | Detail |
|---|---|
| Model Name | EC-901 |
| Printing Technology | Thermal |
| Print Media | Paper (plain thermal) |
| Maximum Media Size | 3 inches (80mm) |
| Maximum Print Speed | 160 mm/second |
| Resolution | 203 x 203 DPI |
| Connectivity Technology | USB, LAN Interface |
| Printer Output | Monochrome |
| Operating System | Windows 10 (and compatible with other Windows versions) |
| Product Dimensions (LxWxH) | 19.8 x 14.8 x 14.8 cm |
| Item Weight | 1.8 kg |
| Special Feature | Without Auto cutter |
Warranty and Support
For technical assistance, warranty claims, or any product-related inquiries, please contact Everycom customer support.
- Toll-Free Number: 1800 121 4480
- Working Hours: Monday - Saturday, 10:00 AM - 6:30 PM (Except on Public Holidays)


