wifi smart camera A8
Smart IP WiFi Security Camera A8 User Manual
Brand: wifi smart camera | Model: A8
1. Introduction
Thank you for choosing the Smart IP WiFi Security Camera A8. This manual provides detailed instructions on how to set up, operate, and maintain your camera to ensure optimal performance and security for your home or business. Please read this manual carefully before use and keep it for future reference.
Package Contents:
- Smart IP WiFi Security Camera A8
- Power Adapter
- Mounting Screws and Wall Plugs
- User Manual (this document)
2. Key Features
- Full HD Resolution: Provides clear and detailed video footage.
- Remote Access: View live feed and recordings from anywhere via your mobile phone (Android/iOS compatible).
- Pan/Tilt/Zoom (PTZ): Remotely control the camera's viewing angle.
- Two-Way Audio: Built-in microphone and speaker for communication.
- Infrared Night Vision: Clear black and white video in low light conditions up to 10 meters.
- Color Night Vision: Built-in LED lights enable full-color recording day and night.
- Motion Detection: Receive real-time alerts on your mobile phone upon detecting movement.
- Local Storage: Supports Micro SD card up to 128GB for continuous recording.
- Cloud Storage: Option for cloud recording via the ICSee application.
- Multi-User Viewing: Share access with multiple users.
- Multi-Platform Support: Compatible with various devices.
- Easy Installation: Designed for straightforward setup.
- IP66 Waterproof: Durable design for outdoor use, resistant to weather, anti-lighting, thermostability, and antifreeze.
3. Setup Guide
3.1 Physical Installation
Before mounting, ensure you have a stable Wi-Fi signal at the desired installation location.
- Choose Location: Select a suitable location for the camera, ensuring it has a clear view and is within Wi-Fi range.
- Mounting: Use the provided screws and wall plugs to securely mount the camera to a wall or ceiling.
- Power Connection: Connect the power adapter to the camera and plug it into a power outlet. The camera will power on and perform a self-test.
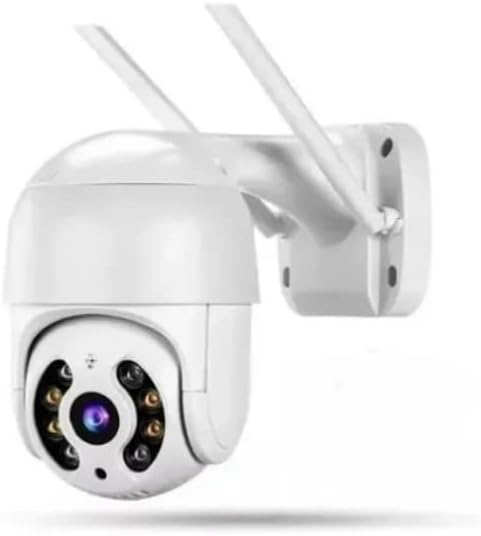
Figure 3.1: Overview of the Smart IP WiFi Security Camera A8. This image shows the camera's main body with two antennas, designed for outdoor mounting.

Figure 3.2: Detailed diagram of the camera showing dimensions and key components. Labels include Dual Antenna, Speaker, Microphone, Lens, White LEDs, IR Sensor, and TF Card Slot. Dimensions are provided as 139mm height and 89mm width for the camera body, and 78mm for the mounting bracket.

Figure 3.3: Image illustrating the camera's IP66 waterproof rating. It shows the camera mounted outdoors with a person running in the rain, highlighting its weatherproof, anti-lighting, thermostability, and antifreeze features.
3.2 App Installation and Configuration (ICSee App)
- Download App: Search for "ICSee" in your mobile app store (Google Play Store for Android or Apple App Store for iOS) and download the application.
- Register Account: Open the ICSee app and follow the prompts to register a new account.
- Add Device:
- Tap the "+" icon to add a new device.
- Select "Add Camera" or "Wi-Fi Camera".
- Follow the on-screen instructions to connect the camera to your Wi-Fi network. This usually involves scanning a QR code on the camera or using an audio pairing method.
- Set Password: Create a strong password for your camera for security.
- Name Camera: Assign a name to your camera (e.g., "Front Door", "Backyard").
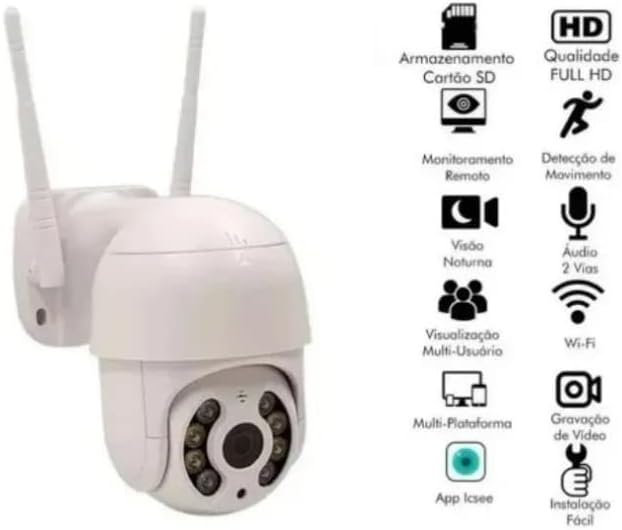
Figure 3.4: Visual representation of the camera's features and its compatibility with the ICSee app. Icons indicate SD card storage, Full HD quality, motion detection, night vision, two-way audio, multi-user viewing, multi-platform support, and easy installation, all managed via the ICSee app.
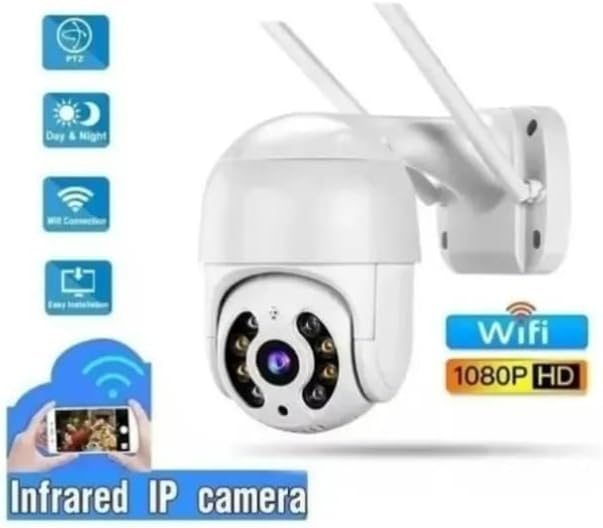
Figure 3.5: An image highlighting key functionalities of the camera, including PTZ (Pan/Tilt/Zoom), Day & Night vision, Wi-Fi connection, and easy installation. It also shows a smartphone displaying the camera's live feed, emphasizing remote access.
3.3 Micro SD Card Installation (Optional)
To enable local video recording, install a Micro SD card (up to 128GB, not included).
- Locate Slot: Refer to Figure 3.2 to locate the TF Card Slot on the camera.
- Insert Card: Gently insert the Micro SD card into the slot until it clicks into place.
- Format Card: Within the ICSee app, navigate to the camera settings and format the SD card. This is crucial for proper recording.
4. Operation
4.1 Live View
Open the ICSee app and select your camera from the device list to view the live feed. You can pinch to zoom and use on-screen controls for PTZ.
4.2 Two-Way Audio
Tap the microphone icon in the live view interface to speak through the camera's speaker. Tap the speaker icon to listen to audio from the camera's microphone.

Figure 4.1: This image demonstrates the two-way audio feature. It shows a person at a door speaking, and a smartphone displaying the live feed with speech bubbles indicating communication between the person and the camera user.
4.3 Recording and Playback
- Manual Recording: Tap the record button in the app to start/stop manual recording.
- Scheduled Recording: Configure recording schedules in the camera settings.
- Motion-Activated Recording: Enable motion detection recording in settings.
- Playback: Access recorded footage via the "Playback" or "History" section in the app. Select the date and time to review events.
4.4 Night Vision Modes
The camera supports both Infrared (IR) and Color Night Vision modes.
- Infrared Vision: Automatically activates in low light, providing clear black and white images.
- Color Night Vision: Utilizes built-in LED lights to provide full-color video even in darkness. This can be configured in the app settings.

Figure 4.2: Comparison of Infrared Vision (left, monochrome) and Color Night Vision (right, full color) in low light conditions. The image emphasizes that the camera can record in full color day and night thanks to built-in LED lights.
4.5 Motion Detection and Alerts
When motion detection is enabled, the camera will send real-time alerts to your mobile phone.
- Enable/Disable: Go to camera settings in the ICSee app to enable or disable motion detection.
- Sensitivity: Adjust the motion detection sensitivity to reduce false alarms.
- Alerts: Ensure app notifications are enabled on your phone to receive alerts.

Figure 4.3: This image illustrates the motion detection feature. It shows a person running, with a blue box indicating detected motion, and a smartphone displaying a "Motion Detected" notification.
5. Maintenance
- Cleaning: Regularly wipe the camera lens and body with a soft, dry cloth. Do not use harsh chemicals or abrasive cleaners.
- Firmware Updates: Check the ICSee app periodically for firmware updates. Keeping your camera's firmware updated ensures optimal performance and security.
- Network Stability: Ensure your Wi-Fi network is stable and strong to prevent connection issues.
- SD Card Management: If using an SD card, periodically check its status in the app and consider formatting it every few months to maintain performance.
6. Troubleshooting
| Problem | Possible Cause | Solution |
|---|---|---|
| Camera offline | No power; Wi-Fi signal too weak; Router changed. | Check power connection; Move camera closer to router or use a Wi-Fi extender; Reconfigure Wi-Fi settings in the app. |
| Cannot connect to Wi-Fi | Incorrect Wi-Fi password; Camera too far from router; Router firewall settings. | Double-check Wi-Fi password; Ensure camera is within range; Temporarily disable firewall or add camera to trusted devices. |
| No recording to SD card | SD card not inserted correctly; SD card not formatted; SD card full or faulty. | Reinsert SD card; Format SD card via app; Replace SD card if faulty. |
| Motion alerts not received | Motion detection disabled; App notifications off; Low sensitivity. | Enable motion detection in app; Enable notifications for ICSee app on your phone; Increase sensitivity. |
| Poor image quality | Dirty lens; Insufficient lighting; Network bandwidth issues. | Clean the lens; Ensure adequate lighting or check night vision settings; Check network speed. |
7. Specifications
| Model | A8 |
| Brand | wifi smart camera |
| Connectivity Technology | Wireless (Wi-Fi) |
| Power Source | Corded Electric |
| Power Consumption | 5 watts |
| Night Vision Range | 10 Meters |
| Material | Plastic |
| Form Factor | Dome |
| Controller Type | Android, iOS (via ICSee App) |
| Max SD Card Support | 128GB |
| Dimensions (Packaging) | 18.5 x 17.3 x 10.9 cm; 580 g |
| ASIN | B09RR17PC7 |
| EAN | 7899752301885 |
8. Warranty and Support
This product comes with a standard manufacturer's warranty. Please refer to your purchase documentation for specific warranty terms and conditions. For technical support, troubleshooting assistance, or warranty claims, please contact the retailer or manufacturer directly using the contact information provided with your purchase.
For the latest information, FAQs, and software updates, please visit the official website of "wifi smart camera" or the ICSee app support section.
Ask a question about this manual
Ask about setup, troubleshooting, compatibility, parts, safety, or missing instructions. Manuals+ will review the question and use this page’s manual context to help answer it.