Cane Creek SP6A272
Cane Creek Thudbuster ST Seatpost Instruction Manual
Model: SP6A272
Brand: Cane Creek
1. Introduction
The Cane Creek Thudbuster ST Seatpost is engineered to provide superior comfort and control by absorbing road and trail vibrations. Its short-travel suspension system is particularly beneficial for riders on gravel bikes, e-bikes, or any bicycle where enhanced ride quality is desired. This manual will guide you through the proper setup, operation, and care of your Thudbuster ST Seatpost.
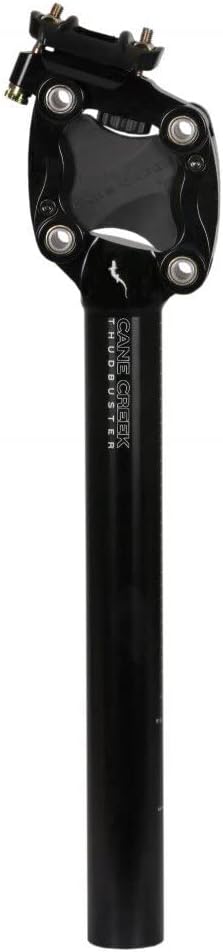
Figure 1: Cane Creek Thudbuster ST Seatpost (Black 27.2MM)
2. Specifications
- Product Dimensions: 5"W x 19"H
- Post Length: 354mm
- Extension: Minimum 100mm, Maximum 274mm
- Rider Weight Limit: 115kg / 250lb
- Suspension Travel: Up to 50mm
- Elastomer Design: 2-piece, offers tool-free inner elastomer change
- Material: Aluminum
- Available Sizes: 27.2MM, 30.9MM, 31.6MM
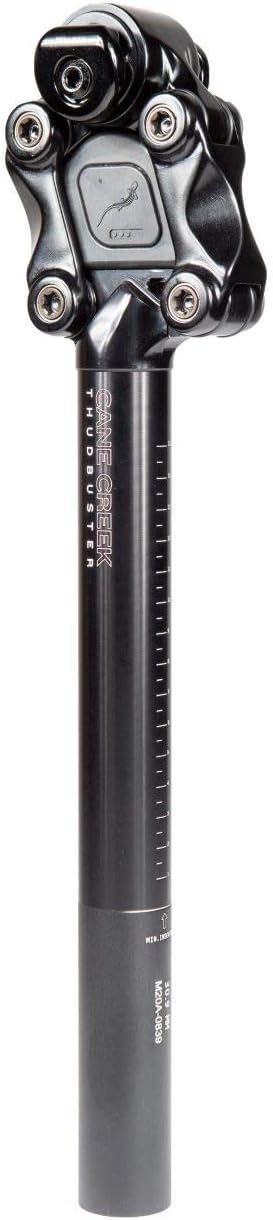
Figure 2: Thudbuster ST Seatpost showing measurement markings.
3. Setup & Installation
Proper installation is crucial for optimal performance and safety. Please follow these steps carefully.
3.1. Pre-Installation
- Before removing your old seatpost, measure and note your current saddle height. Also, observe the positioning of your saddle's rails and its angle. This will help you replicate your preferred riding position.
- Loosen the seatpost clamp on your bike frame with an Allen key and carefully remove the original seatpost and saddle.
3.2. Thudbuster Compatibility
- Thudbuster ST Seatposts are available in 27.2MM, 30.9MM, and 31.6MM diameters. Ensure you have the correct size for your bike frame.
- If your frame requires a different diameter, additional shims are available for purchase separately.
3.3. Elastomer Selection & Changing
The Thudbuster ST can be tuned for rider weight and preference by selecting the appropriate elastomer. Soft, medium, and firm elastomers are included with your seatpost. Extra soft and extra firm elastomers are available for separate purchase.
- Refer to the instruction manual (included with the product) for a grid that recommends elastomer firmness based on rider weight.
- Elastomer firmness is rated by 1 to 5 dots found on the inner elastomer (1 dot = extra soft, 5 dots = extra firm).
- To change an elastomer, firmly press on the center of the inner elastomer to remove it. The outer elastomer will remain in the seatpost.
- Install your desired inner elastomer by pressing firmly until it is fully seated in the outer elastomer. Never use a softer elastomer than recommended for your rider weight.
Video 1: Thudbuster ST Installation and Elastomer Change Guide. This video demonstrates elastomer selection (0:35-1:04) and changing (2:56-3:14).
3.4. Saddle Installation onto Thudbuster
- Loosen the 5mm bolt on the seat clamp just enough to slide your saddle rails onto the seatpost. It is not necessary to completely remove the bolt.
- Ensure the laser-etched height lines on the seatpost are facing forward.
- Squeeze the seat clamp together with both saddle rails installed and tighten the seat clamp bolt to 16 Nm.
Refer to Video 1 for a visual guide on saddle installation (1:11-2:02).
3.5. Seatpost Installation into Bike Frame
- Apply a light coat of grease to the seatpost shaft before inserting it into your bike frame. For carbon frames, consult your frame manufacturer's instructions for specific grease requirements.
- If using a shim (sold separately), align the slit in the shim with the slit found on your frame's seat tube before inserting the seatpost.
- Install the Thudbuster into your frame's seat tube. Be mindful of the minimum seatpost insertion height, which is depicted on the Thudbuster shaft.
- Measure your desired saddle height and adjust as needed.
- Tighten your bike's seatpost clamp to the appropriate Newton Meter rating (refer to your bike frame manufacturer's specifications) to hold the post firmly in place.
Refer to Video 1 for a visual guide on seatpost installation into the frame (2:03-2:55).
4. Operating Instructions
Once installed and adjusted, the Thudbuster ST Seatpost operates automatically to provide suspension. The 50mm of travel will absorb impacts from bumps, cracks, and uneven terrain, allowing you to maintain a smoother ride and better control.
Video 2: All-New Thudbuster ST. This video highlights the features and benefits of the Thudbuster ST in action.
5. Maintenance
- Regular Inspection: Periodically inspect all bolts on the seatpost and clamp for proper torque.
- Cleanliness: Keep the seatpost clean from dirt and debris, especially around the elastomer and pivot points.
- Elastomer Check: Inspect the elastomers for any signs of wear, cracking, or damage. Replace them if necessary to maintain optimal suspension performance.
- Greasing: If you remove the seatpost from the frame, re-apply a light coat of appropriate grease to the shaft before re-inserting.
6. Troubleshooting
- Saddle feels too soft or too hard: This indicates the elastomer may not be suited for your weight or riding style. Refer to section 3.3 on Elastomer Selection & Changing to install a firmer or softer elastomer as needed.
- Saddle slipping or changing angle: Ensure the seat clamp bolt is tightened to the recommended 16 Nm. Verify that the saddle rails are correctly seated within the clamp mechanism.
- Unusual noises (creaking, squeaking): Check all bolts for proper torque. Disassemble, clean, and re-grease the seatpost shaft and saddle clamp components if necessary. Inspect elastomers for any damage that might cause friction.
7. Warranty & Support
Warranty: The Cane Creek Thudbuster ST Seatpost is covered by a warranty that ensures the product is replaced if broken or if it is defected from the factory.
Support: For any additional questions, technical assistance, or warranty claims, please visit the official Cane Creek website or contact their customer support team directly. Contact information can typically be found on the product packaging or the Cane Creek website.
Ask a question about this manual
Ask about setup, troubleshooting, compatibility, parts, safety, or missing instructions. Manuals+ will review the question and use this page’s manual context to help answer it.