1. Introduction
This manual provides essential instructions for the safe and efficient operation of your Fuegobird Mini Projector, Model B09R73DF6G. Please read this manual thoroughly before using the product and retain it for future reference.
The Fuegobird Mini Projector is a portable LCD video projector designed for home entertainment, offering a versatile viewing experience with support for HD 1080P content.
2. Product Features
- Superior Home Theater Experience: Features a 2000:1 contrast ratio and supports 1080p resolution, delivering brighter images for an enhanced viewing experience.
- Large Screen Projection: Offers a projection size from 72 inches to 240 inches, with a recommended projection distance between 6.8 feet and 22 feet. The optimal projection distance is 9.5 feet.
- Built-in Speakers: Integrated speakers provide audio without the need for external sound systems.
- Multiple Device Connectivity: Connects easily to laptops, smartphones, tablets, and USB drives. For smartphone connection, an additional HDMI adapter is required.
- 1080P HD Supported: Enjoy home entertainment such as movies, TV shows, video games, and music with 1080P HD supported content and native 720P resolution.
- Compact & Portable Design: This pocket-sized projector measures approximately 21.9cm x 15.1cm x 7.6cm and weighs 0.475kg. Its portability allows for use in various settings, including home, outdoor camping, or parties.
3. Product Overview

Image 3.1: Fuegobird Mini Projector with smartphone connected.

Image 3.2: Projector demonstrating its compact and portable size.
3.1 Interface Display

Image 3.3: Projector Interface Diagram.
- Focusing Pulley: Adjusts image clarity.
- Off button: Power on/off.
- Menu button: Accesses menu options.
- Main interface button: Navigates to the main screen.
- Right arrow button: Navigates right in menus.
- Enter button: Confirms selection.
- Return key: Goes back to the previous screen.
- DC 12V input: Power input port.
- DC 5V input: Alternative power input port.
- Indicator light: Shows power/status.
- USB interface: Connects USB storage devices.
- IR: Infrared receiver for remote control.
- Headphone jack: Connects external audio devices.
3.2 Remote Control
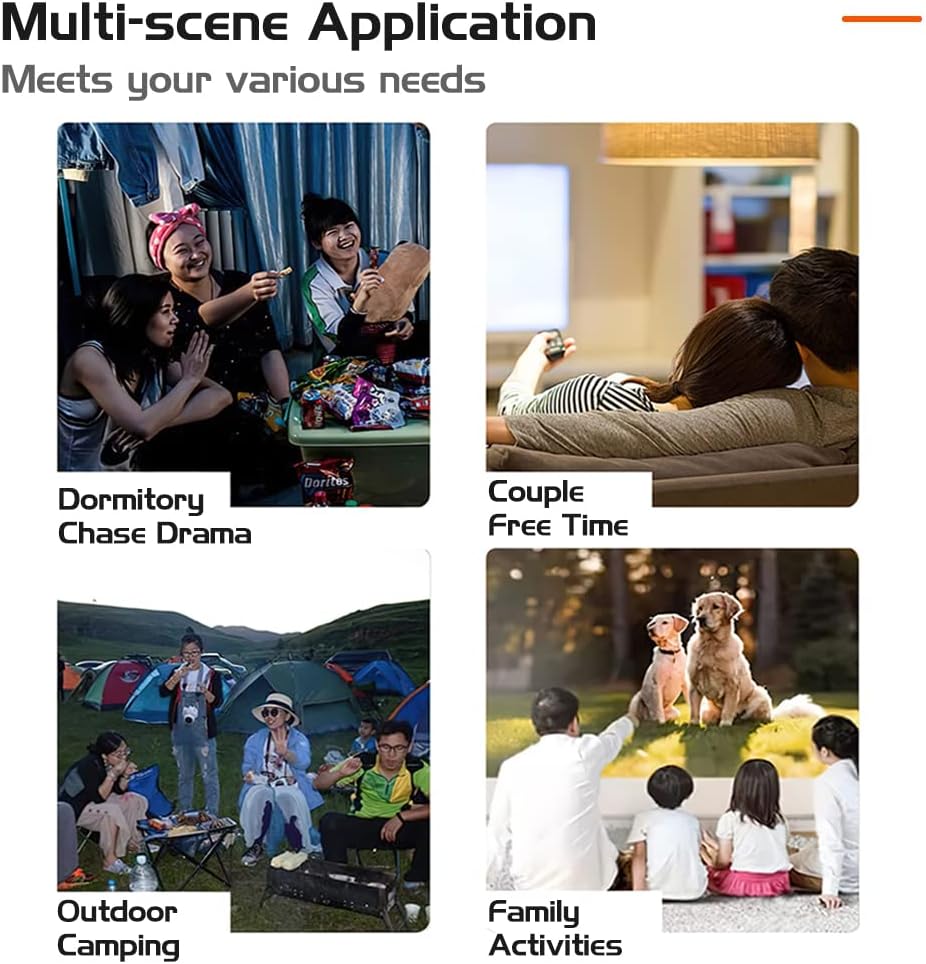
Image 3.4: Remote Control Layout.
The remote control allows for convenient operation of the projector from a distance. Key functions include power on/off, volume control, menu navigation, and input selection.
4. Setup
4.1 Placement
Position the projector on a stable, flat surface. For optimal viewing, place the projector with the lens facing the wall or screen. Ensure there is adequate ventilation around the projector.

Image 4.1: Recommended Projection Distances and Screen Sizes.
Refer to the table below for recommended projection distances and screen sizes:
| Projection Distance | Screen Size |
|---|---|
| 0.8m (2.6ft) | 30 inches |
| 2.5m (8.2ft) | 80 inches |
| 3.8m (12.5ft) | 110 inches |
| Optimal: 9.5ft | Optimal: 72-240 inches |
4.2 Power Connection
- Connect the power adapter to either the DC 12V input or DC 5V input port on the projector.
- Plug the power adapter into a suitable electrical outlet.
4.3 Initial Power On and Focus Adjustment
- Press the 'Off' button on the projector or the 'ON/OFF' button on the remote control to power on the device.
- Once the projector is on, adjust the Focusing Pulley (refer to Image 3.3) until the projected image appears clear and sharp on the screen.
5. Operation
5.1 Input Source Selection
To display content from an external device:
- Connect your device (e.g., USB drive, laptop via HDMI) to the appropriate port on the projector.
- Press the 'Menu' button on the projector or remote control to access the input source options.
- Use the navigation buttons (e.g., 'Right arrow' on the projector or directional buttons on the remote) to select the desired input source (e.g., USB, HDMI).
- Press the 'Enter' or 'OK' button to confirm your selection.
5.2 Media Playback (USB Input)
When using a USB drive:
- Insert the USB drive into the USB interface port.
- Select 'USB' as the input source.
- Navigate through the on-screen menu to select the type of media you wish to play (e.g., Movies, Music, Picture, Text).
- Select the desired file and press 'Enter' or 'OK' to begin playback.
5.3 Volume Control
Adjust the volume using the 'Vol+' and 'Vol-' buttons on the remote control. You can also mute the audio using the 'Mute' button on the remote.
5.4 Multi-Scene Application

Image 5.1: Examples of projector use in various environments.
The projector is suitable for a variety of uses, including:
- Home cinema for movies and TV shows.
- Outdoor movies and camping entertainment.
- Gaming with connected consoles or devices.
- Sharing photos and videos with family and friends.
6. Connectivity
The Fuegobird Mini Projector offers multiple connectivity options:
- USB: For playing media files directly from USB storage devices.
- HDMI: Connects to laptops, gaming consoles, and other HDMI-enabled devices. An additional HDMI adapter is required for smartphone connection.
- Earphone Jack: For connecting external headphones or speakers.
- Wireless Connectivity (via adapter/device): Supports WIFI, AIRPLAY, MIRACAST, WIRECAST, DLNA functions when connected to compatible external devices or adapters.
7. Maintenance
7.1 Remote Control Battery Care
- Do not mix old and new batteries.
- If the remote control will not be used for an extended period, remove the batteries to prevent leakage.
- Ensure batteries are inserted with correct polarity.
7.2 Cleaning
- Use a soft, dry cloth to clean the projector's exterior.
- For the lens, use a specialized lens cleaning cloth and solution to avoid scratches.
- Do not use abrasive cleaners or solvents.
8. Troubleshooting
If you encounter issues with your projector, please refer to the following common solutions:
- No Power: Ensure the power adapter is securely connected to both the projector and a working electrical outlet. Try a different outlet.
- No Image: Check that the correct input source is selected. Verify all cables (HDMI, USB) are properly connected. Adjust the focus ring.
- Blurry Image: Adjust the Focusing Pulley until the image is clear. Ensure the projection distance is within the recommended range.
- No Sound: Check the volume settings on both the projector and the connected device. Ensure the projector is not muted. If using external speakers, verify their connection and power.
- Remote Control Not Working: Check the batteries in the remote control. Ensure there are no obstructions between the remote and the projector's IR receiver.
For further assistance, please contact customer support.
9. Specifications
| Feature | Specification |
|---|---|
| Image Unit | TFT LCD |
| Native Resolution | 320x240 |
| Support Resolution | 1920x1080 (1080P HD) |
| Lamp Type | LED |
| Lamp Life | 20000 hours |
| Power Consumption | 20W (max) |
| Power Supply | 12V-1.5A |
| Lens | Coated Lens |
| Operation Mode | Manual/Remote |
| Projection Distance | 60-400cm (6.8ft - 22ft) |
| Projection Size | 16-110 inches (72-240 inches stated in features) |
| Dimensions (LWH) | 21.9 x 15.1 x 7.6 cm |
| Net Weight | 0.475 kg |
| Aspect Ratio | 16:9/4:3 |
| Speaker | 4Ω2W |
| Input Terminal | USB, 5V-2A power in |
| Output Terminal | Headphone |
| Connectivity Technology | HDMI, USB |
| Special Features | Built-in Speaker, Portable |
| Mounting Type | Tabletop Mount |
| Voltage | 5 Volts |
| Wattage | 60 watts |
| Display Technology | LCD |
10. Warranty and Support
For warranty information, product registration, and customer support, please refer to the retailer's website where you purchased the product or contact the manufacturer directly. Keep your purchase receipt as proof of purchase.


