1. Introduction
This manual provides detailed instructions for the assembly, operation, and maintenance of your GeeekPi DeskPi Lite case for Raspberry Pi 4. Please read these instructions carefully before beginning the setup process to ensure proper functionality and longevity of your device.
2. What's Included
The GeeekPi DeskPi Lite kit typically includes the following components:
- DeskPi Lite Case
- Heatsink with PWM Fan
- 32GB Micro SD Card
- Micro SD Card Adapter
- QC3.0 Power Supply (USB-C)
- 4K HDMI Cable
- Screwdriver and mounting screws
- Thermal pads
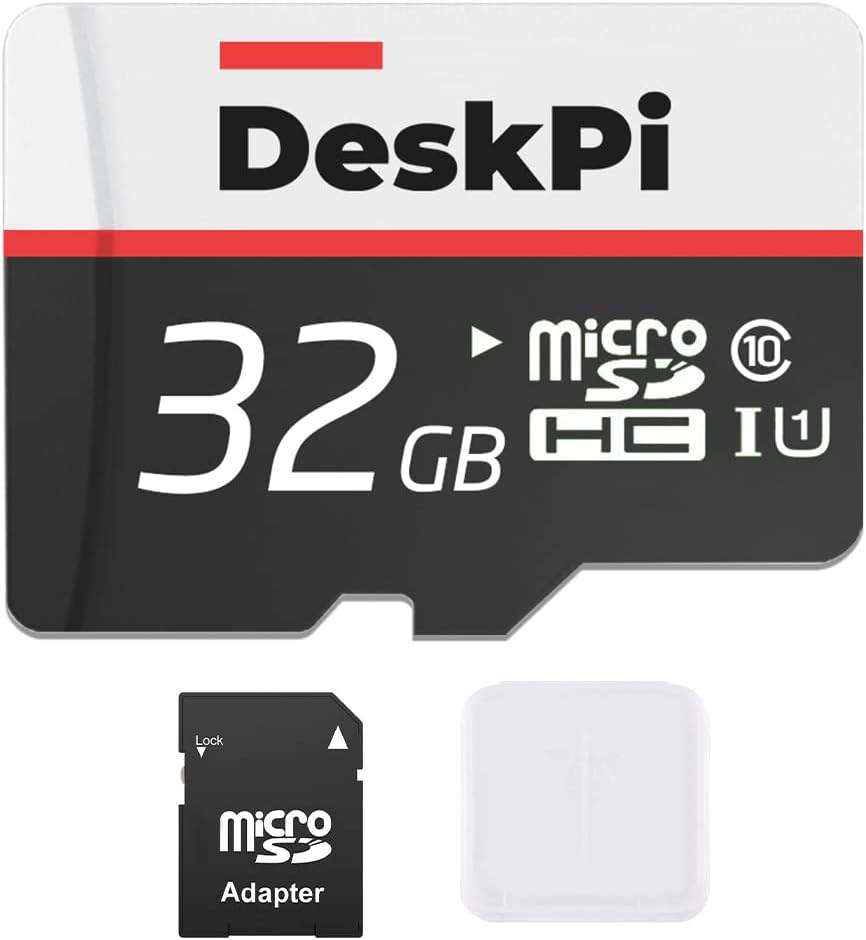
Image: 32GB Micro SD Card with Adapter for your Raspberry Pi 4.

Image: 4K HDMI Cable for connecting your Raspberry Pi to a display.

Image: QC3.0 USB-C Power Supply for reliable power delivery.
3. Setup and Assembly
Follow these steps to assemble your Raspberry Pi 4 within the DeskPi Lite case.
3.1. Disassembling the Case
- Carefully remove the eight screws located on the bottom of the DeskPi Lite case using the provided screwdriver.
- Separate the bottom plate from the main case body to access the internal components.
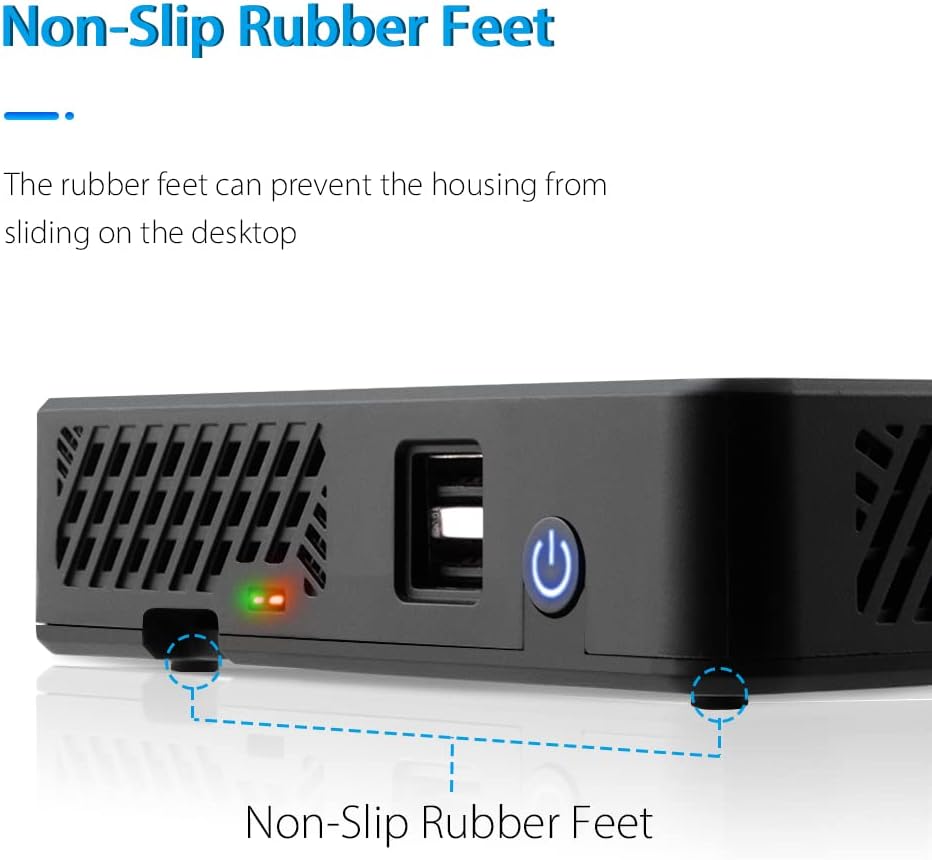
Image: Exploded view showing the DeskPi Lite case components, including the top cover, Raspberry Pi 4, expansion board, and bottom cover.
3.2. Installing Thermal Pads and Cooler
- Apply the thermal pads to the designated areas on your Raspberry Pi 4 board. These pads ensure efficient heat transfer to the heatsink.
- Position the heatsink with the integrated PWM fan onto the Raspberry Pi 4, aligning it with the thermal pads and mounting holes.
- Secure the heatsink in place using the two small screws provided, ensuring a firm connection.

Image: Internal view of the DeskPi Lite case, showing the Raspberry Pi 4 board with the heatsink and fan installed.
3.3. Connecting Raspberry Pi to Expansion Board
- Carefully connect your Raspberry Pi 4 board (with the cooler installed) to the expansion board inside the DeskPi Lite case. Ensure all connections, including USB-C for power, micro HDMI, and audio, are properly aligned and seated.
- The expansion board extends the Raspberry Pi's ports to the case's exterior, including full-size HDMI ports and additional USB ports.
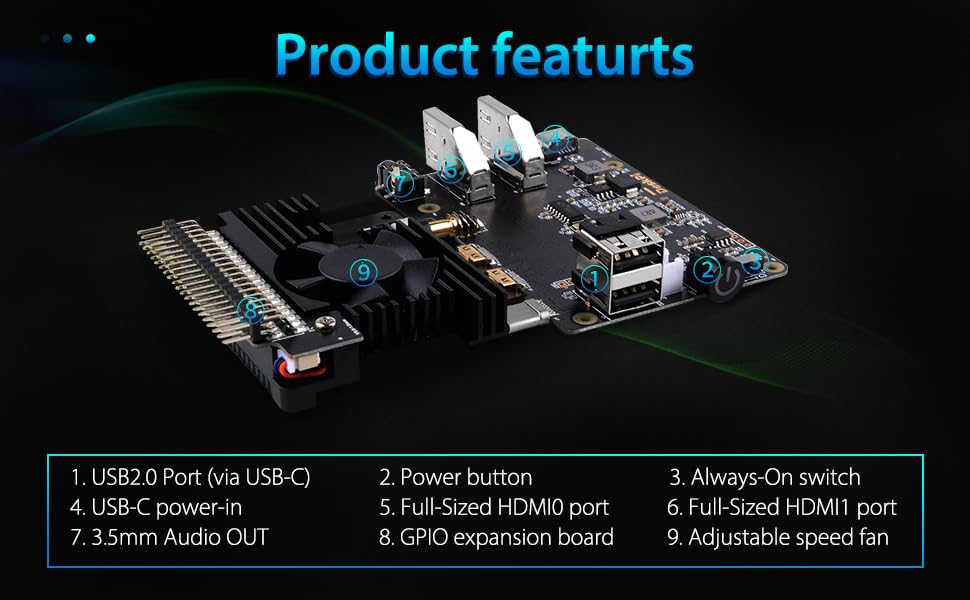
Image: The Raspberry Pi 4 board connected to the DeskPi Lite expansion board, ready for case reassembly.
3.4. Reassembling the Case
- Once the Raspberry Pi 4 is securely connected to the expansion board and placed within the case, reattach the bottom plate.
- Fasten the eight screws back into their respective positions on the bottom of the case.
3.5. Initial Software Configuration (Fan Control & USB)
To enable advanced features like front USB 2.0 ports and fan temperature control, specific software configurations are required. These steps assume you have Raspberry Pi OS (or a compatible Linux distribution) installed on your 32GB SD card.
Enable Front USB 2.0 Ports:
Add dtoverlay=dwc2,dr_mode=host to your /boot/config.txt file. Remember to reboot your Raspberry Pi for changes to take effect.
Enable Fan Temperature Control:
The fan supports PWM signal control via GPIO14 (physical pin 12, TXD). It will spin when the CPU temperature exceeds a set threshold (e.g., 60 degrees Celsius). You can configure this via raspi-config:
- Open a terminal and type:
sudo raspi-config - Navigate to Performance Options -> P4 Fan.
- Select Yes, then set the GPIO pin (e.g., 14) and the temperature threshold (e.g., 60).
- Select Yes to confirm, then Finish and reboot your Raspberry Pi.
You can also write custom code to control the fan via GPIO14 by sending a PWM signal.
3.6. Assembly Video Guide
Video: A detailed guide on assembling the Raspberry Pi 4 into the DeskPi Lite case, including screw removal, thermal pad application, cooler installation, and board connections.
4. Operating Instructions
4.1. Power On/Off
The DeskPi Lite case features a dedicated power button on the front panel. Press this button to power on or gracefully shut down your Raspberry Pi 4. The system supports programmable power cut-off functionality.
4.2. LED Indicators
The front panel includes two LED indicators:
- Red LED: Indicates power status (Power On).
- Green LED: Indicates disk activity (Disk Status).

Image: Front view of the DeskPi Lite case, highlighting the power button and LED indicators for power and disk status.
4.3. Cooling System
The integrated PWM fan and heatsink provide efficient cooling for your Raspberry Pi 4. The fan supports both official speed regulation and programmable speed regulation, ensuring optimal temperature management during operation.

Image: The DeskPi Lite case demonstrating airflow for its fast cooling system, featuring a PWM variable speed fan.
5. Maintenance
To ensure the longevity and optimal performance of your DeskPi Lite case and Raspberry Pi 4, consider the following maintenance tips:
- Cleaning: Periodically clean the exterior of the case with a soft, dry cloth. Ensure the ventilation grilles are free from dust to maintain proper airflow.
- Fan Check: Occasionally check the fan for any obstructions or unusual noises. If the fan appears to be malfunctioning, consult the troubleshooting section or contact support.
- Environment: Operate the device in a well-ventilated area, away from direct sunlight, excessive heat, and moisture.
6. Troubleshooting
If you encounter issues with your GeeekPi DeskPi Lite, try the following common troubleshooting steps:
- No Power: Ensure the QC3.0 power supply is correctly connected to the USB-C port and plugged into a working power outlet. Check the red power LED indicator.
- No Display: Verify that the 4K HDMI cable is securely connected to both the DeskPi Lite's HDMI port and your display. Ensure the display is set to the correct input source.
- USB Ports Not Working: Confirm that the software configuration for enabling front USB 2.0 ports (
dtoverlay=dwc2,dr_mode=hostin/boot/config.txt) has been applied and the Raspberry Pi has been rebooted. - Fan Not Spinning: Check the fan's connection to the GPIO pins. Verify that the fan temperature control settings in
raspi-configare correctly configured and the CPU temperature has reached the set threshold. - SD Card Not Detected: Ensure the 32GB Micro SD card is properly inserted into the Raspberry Pi's slot. Try re-seating the card.
For further assistance, please refer to the support information provided in Section 8.
7. Specifications
| Feature | Detail |
|---|---|
| Brand | GeeekPi |
| Model Name | DeskPi Lite |
| Compatible Devices | Raspberry Pi 4B/4 Model B |
| Cooling System | Heatsink with PWM Fan |
| Power Supply | QC3.0 USB-C Power Plug with Cord |
| Storage Included | 32 GB Micro SD Card |
| Video Output | 2 x Full-Size HDMI Ports (via expansion board) |
| USB Ports | 2 x USB 2.0 (front), 2 x USB 3.0 (rear), 2 x USB 2.0 (rear) |
| Audio Output | 3.5mm Audio Jack |
| Network Connectivity | Ethernet Port |
| GPIO Access | Full access to GPIO ports via expansion board |
| Operating System Compatibility | Raspberry Pi OS (or other compatible Linux distributions like Ubuntu, RetroPie), Windows 10 IoT Core |
8. Warranty and Support
For warranty information and technical support, please refer to the official GeeekPi website or contact their customer service directly. Keep your purchase receipt as proof of purchase for warranty claims.
Official GeeekPi Store: Visit the GeeekPi Store on Amazon