1. Important Safety Instructions
Read and understand all safety warnings and instructions before operating this air compressor. Failure to follow the warnings and instructions may result in electric shock, fire, and/or serious injury.
General Safety
- Always wear appropriate personal protective equipment (PPE), including safety glasses, hearing protection, and gloves.
- Ensure the work area is clean, well-lit, and free from obstructions.
- Do not operate the compressor in explosive atmospheres, such as in the presence of flammable liquids, gases, or dust.
- Keep children and bystanders away while operating the compressor.
Electrical Safety
- The compressor must be connected to a properly grounded outlet.
- Do not expose the compressor to rain or wet conditions.
- Never carry the compressor by its power cord.
Compressor Specific Safety
- Do not exceed the maximum operating pressure of 8 bar.
- Regularly inspect the air tank for signs of damage or corrosion.
- Always drain condensation from the air tank after each use.
- Ensure adequate ventilation around the compressor during operation.
2. Product Overview
The Ingco AC255081E is a 50-liter oil-lubricated air compressor designed for various domestic and advanced hobby applications. It features a 1.0 kW motor and a maximum pressure of 8 bar.
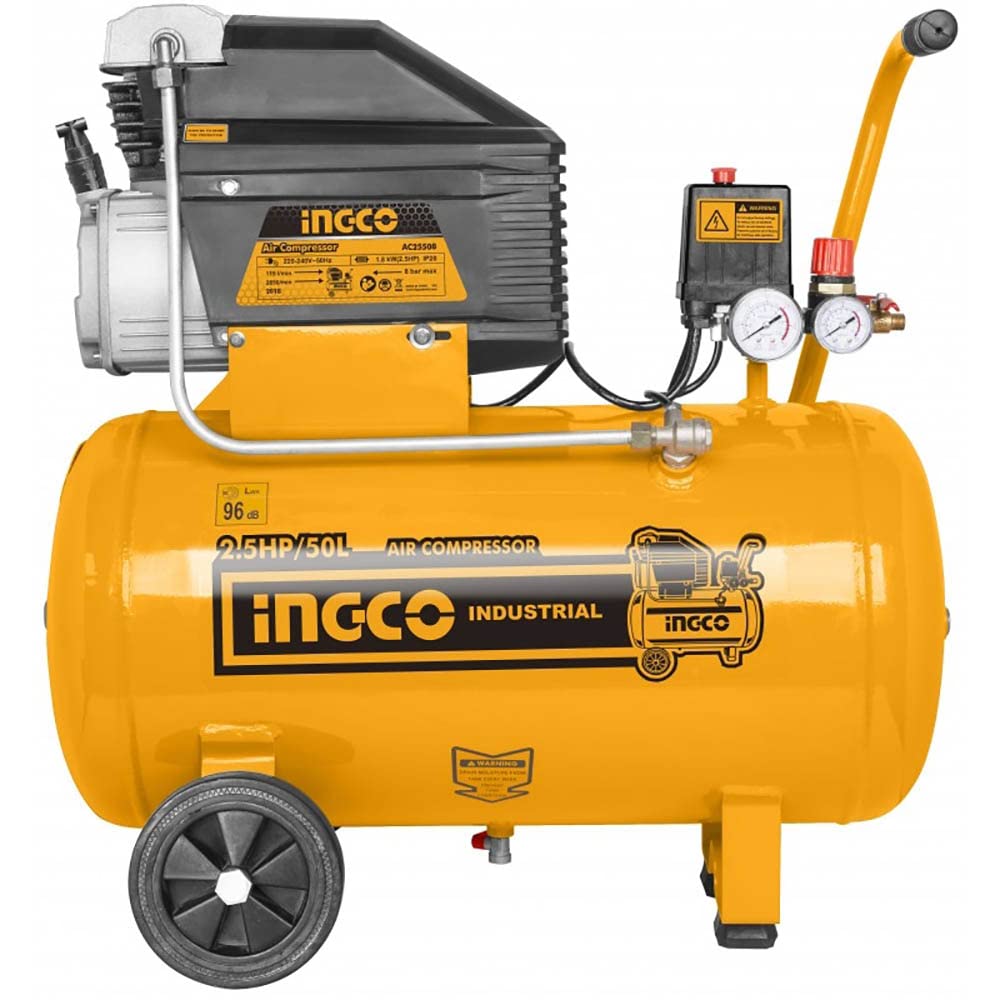
Figure 1: Ingco AC255081E 50 Liter Air Compressor. This image shows the complete compressor unit, including the motor, air tank, pressure gauges, and wheels for portability.
Key Features:
- 50 Liter (13.2 Gallon) Tank: Provides ample air storage for sustained operation.
- 1.0 kW Motor: Delivers reliable power for various tasks.
- 8 Bar (116 PSI) Max Pressure: Suitable for inflating, blowing, painting, nailing, and more.
- Oil-Lubricated Pump: Ensures durability and extended service life.
- 220-240V Power: Standard electrical connection for home and workshop use.
3. Setup and Initial Preparation
Before first use, ensure all components are present and the compressor is prepared correctly.
Unpacking and Inspection
- Carefully remove the compressor from its packaging.
- Inspect the unit for any shipping damage. If damage is found, do not operate the compressor and contact your supplier.
- Verify that all included components, such as wheels, handles, and oil, are present.
Attaching Wheels and Handle (if not pre-assembled)
- Attach the wheels to the compressor base using the provided hardware.
- Secure the handle to the designated mounting points.
Adding Compressor Oil
The compressor is supplied with oil. It is crucial to add the oil before first operation.
- Locate the oil filler cap/dipstick on the pump housing.
- Remove the cap and carefully pour the supplied compressor oil into the reservoir until the oil level reaches the mark on the dipstick or sight glass. Do not overfill.
- Replace the oil filler cap securely.
Electrical Connection
- Ensure the power switch is in the "OFF" position.
- Connect the power cord to a grounded 220-240V electrical outlet.
- Avoid using extension cords if possible. If an extension cord is necessary, ensure it is rated for the compressor's power requirements and is of adequate gauge.
4. Operating Instructions
Follow these steps for safe and effective operation of your Ingco air compressor.
Starting the Compressor
- Ensure the drain valve at the bottom of the tank is closed.
- Connect your air tool or hose to the quick-connect coupler.
- Turn the power switch to the "ON" position. The compressor will start and build pressure until it reaches its maximum pressure (8 bar), then it will shut off automatically.
- Adjust the regulated air pressure using the pressure regulator knob, if your application requires less than maximum pressure.
Using Air Tools
- Always refer to the air tool's instruction manual for its specific pressure requirements.
- Ensure the air hose and connections are secure before operating.
- When finished, turn off the compressor and bleed any remaining air pressure from the tank and hose.
Stopping the Compressor
- Turn the power switch to the "OFF" position.
- Disconnect the compressor from the power supply.
- Slowly open the drain valve at the bottom of the air tank to release all air pressure and drain any accumulated condensation. Close the valve after draining.
5. Maintenance
Regular maintenance ensures the longevity and safe operation of your compressor.
Daily Maintenance
- Drain Air Tank: After each use, drain condensation from the air tank. This prevents rust and corrosion.
- Check Oil Level: Before each use, check the oil level using the dipstick. Add oil if necessary.
Weekly/Monthly Maintenance
- Clean Air Filter: Inspect and clean the air filter. A clogged filter reduces compressor efficiency. Replace if damaged.
- Inspect for Leaks: Check all air connections and hoses for leaks. Tighten or replace as needed.
Oil Change
Change the compressor oil after the first 20 hours of operation, then every 100-200 hours or every 3 months, whichever comes first. Use only recommended compressor oil.
- Ensure the compressor is off, unplugged, and the tank is depressurized.
- Place a suitable container under the oil drain plug.
- Remove the oil drain plug and allow the old oil to drain completely.
- Replace the drain plug and refill with new compressor oil to the correct level.
- Dispose of used oil responsibly.
6. Troubleshooting
This section provides solutions to common problems you may encounter with your air compressor.
| Problem | Possible Cause | Solution |
|---|---|---|
| Compressor does not start. | No power supply. Thermal overload tripped. Faulty switch. | Check power connection and outlet. Allow motor to cool down, then reset. Contact qualified service personnel. |
| Compressor runs continuously or cycles frequently. | Air leak in system. Pressure switch malfunction. Clogged air filter. | Check hoses, fittings, and drain valve for leaks. Tighten or replace. Contact qualified service personnel. Clean or replace air filter. |
| Low air pressure output. | Air leak. Clogged air filter. Worn piston rings. | Check for leaks. Clean or replace air filter. Contact qualified service personnel. |
| Excessive noise or vibration. | Loose components. Low oil level. Damaged motor/pump. | Check and tighten all fasteners. Check and add oil. Contact qualified service personnel. |
If you cannot resolve the issue using this guide, please contact customer support.
7. Technical Specifications
| Feature | Specification |
|---|---|
| Model Number | AC255081E |
| Brand | Ingco |
| Power Input | 1.0 kW (1 Kilowatt) |
| Voltage | 220-240 Volt |
| Tank Capacity | 50 Liters (13.2 Gallons) |
| Maximum Pressure | 8 Bar (116 PSI) |
| No-load Speed | 2850 rpm |
| Noise Level | 96 dB |
| Pump Type | Oil-lubricated |
| Dimensions (L x W x H) | 73 x 64 x 37 cm |
| Weight | 28 kg |
| Included Components | Oil |
8. Warranty Information
The product description mentions a "Garanzia di 1000 ore" (1000 hours warranty). This typically refers to the operational lifespan or a specific component warranty rather than a general product warranty period.
For detailed warranty terms and conditions, please refer to the documentation provided with your purchase or contact Ingco customer support. Keep your proof of purchase for warranty claims.
9. Customer Support
If you have any questions, require technical assistance, or need to report a problem, please contact Ingco customer support or your authorized dealer.
Please have your model number (AC255081E) and purchase information ready when contacting support.
Note: No specific contact details were provided in the product data. Please refer to the manufacturer's official website or your retailer for current support information.