
Introduction
This manual provides essential instructions for the assembly, operation, and maintenance of your Relaxdays Tomato Greenhouse. Please read this manual thoroughly before use to ensure safe and efficient operation and to maximize the lifespan of your product.
Safety Information
Important Safety Instructions:
- Always secure the greenhouse to the ground using the provided pegs to prevent it from overturning or blowing away, especially in windy conditions.
- Exercise caution when handling the greenhouse, as the PE film can be damaged if not handled properly.
Product Overview
The Relaxdays Tomato Greenhouse is designed to provide an optimal growing environment for your plants. Key features include:
- High Structure: Suitable for tall-growing tomato varieties.
- Temperature Regulation: Light-transmitting foil greenhouse with two windows to regulate humidity and temperature.
- Protection: Sloping roof design for efficient rainwater runoff and mesh to protect against pests.
- Weather-Resistant: Stable steel tube frame and durable PE film. Includes ground pegs for stability.
- Versatile Use: Can also be used as a grow house for cucumbers, peppers, and eggplants.

Image: The Relaxdays Tomato Greenhouse positioned next to a garden shed, showcasing its size and placement in a garden environment. Tomato plants are visible inside.
Setup and Assembly
Follow these steps to assemble your greenhouse:
- Unpack Components: Carefully remove all parts from the packaging. Verify that all components listed in the parts list (not provided in this document, refer to product packaging) are present and undamaged.
- Assemble Frame: Connect the steel tubes to form the greenhouse frame. Ensure all connections are secure.
- Attach Cover: Drape the PE film cover over the assembled frame. Ensure the cover is properly aligned with the frame structure.
- Secure Cover: Fasten the cover to the frame using any integrated ties or fasteners. Ensure the zipper door is functional.
- Ground Anchoring: Use the provided ground pegs to firmly anchor the greenhouse to the soil. This is crucial for stability, especially in windy conditions.
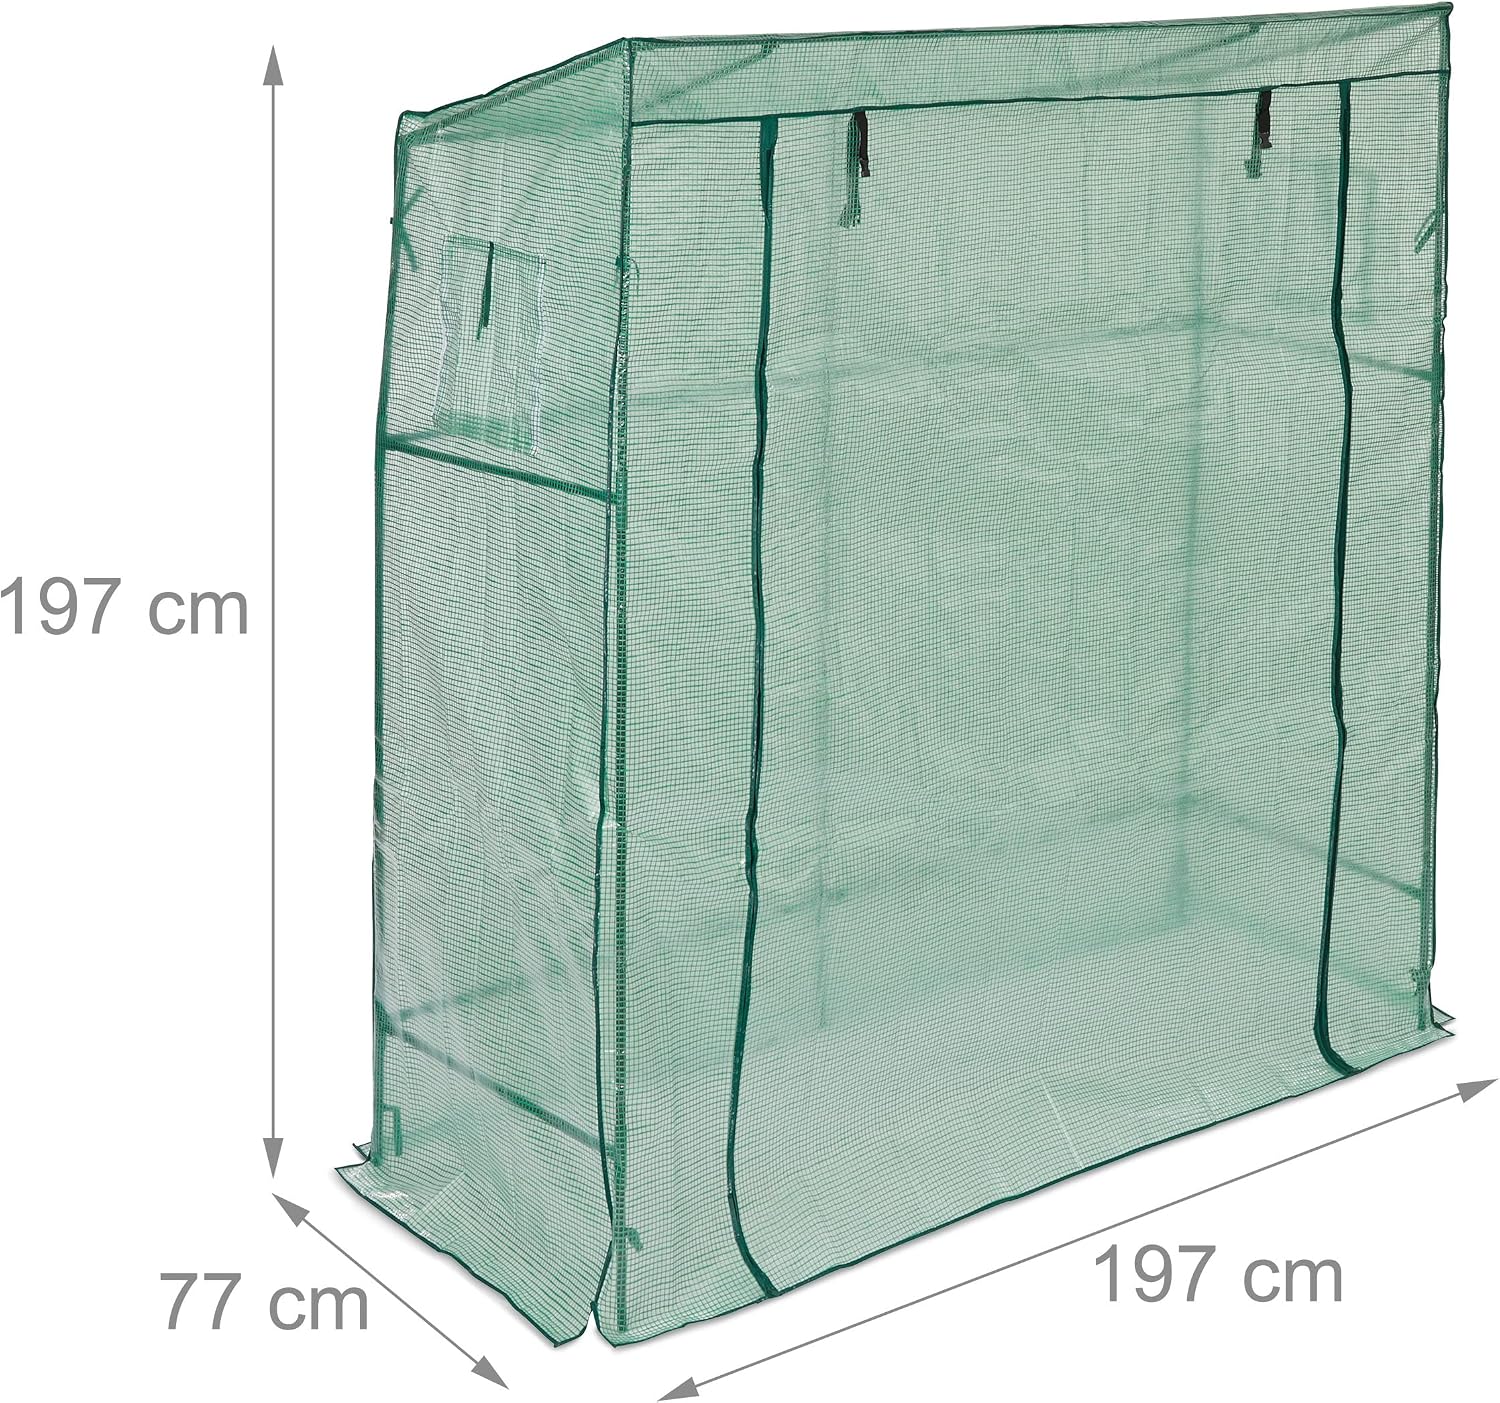
Image: A diagram showing the dimensions of the greenhouse: 197 cm height, 197 cm width, and 77 cm depth.

Image: Four close-up images showing details of the greenhouse: rolled-up door flap, open ventilation window with mesh, a tie-down strap, and the zipper closure.

Image: Two images showing the green ground pegs and rope used to secure the greenhouse to the ground.
Operating Instructions
To ensure optimal growth conditions for your plants:
- Access: Use the zipper door for easy access to your plants. The door can be rolled up and secured to remain open for extended periods.
- Ventilation: Utilize the two windows to regulate airflow and humidity inside the greenhouse. Open them during warm periods to prevent overheating and excessive humidity. Close them during cooler periods or at night to retain warmth.
- Watering: Water plants as needed. The greenhouse helps retain moisture, so monitor soil conditions carefully to avoid overwatering.
- Pest Control: The integrated mesh helps protect against pests. Regularly inspect plants for any signs of infestation.
Maintenance
Regular maintenance will extend the life of your greenhouse:
- Cleaning: Periodically clean the PE film cover with mild soap and water to ensure maximum light transmission. Avoid abrasive cleaners.
- Frame Inspection: Check the steel frame for any signs of rust or damage. Tighten any loose connections.
- Cover Inspection: Inspect the PE cover for tears or holes. Small tears can often be repaired with greenhouse repair tape.
- Anchoring: Regularly check that the ground pegs are firmly in place, especially after strong winds.
- Winter Storage: If not used year-round, disassemble the greenhouse and store the frame and cover in a dry, protected area during winter to prevent damage from heavy snow or extreme cold.
Troubleshooting
| Problem | Possible Cause | Solution |
|---|---|---|
| Greenhouse collapses or blows away | Insufficient anchoring; strong winds. | Ensure all ground pegs are deeply inserted and the greenhouse is securely anchored. Consider additional weights or tie-downs in very windy areas. |
| Water pooling on the roof | Heavy rain; cover not taut enough. | Ensure the cover is stretched tightly over the frame. Regularly check and clear any accumulated water to prevent damage. |
| Zipper or cover damage | Rough handling; wear and tear. | Handle the zipper and cover gently. Small tears can be repaired with specialized repair tape. For significant damage, contact customer support for replacement parts. |
| Poor plant growth | Inadequate ventilation, temperature, or watering. | Adjust window openings for better airflow. Monitor temperature and humidity. Ensure proper watering based on plant needs. |
Specifications
| Feature | Detail |
|---|---|
| Brand | Relaxdays |
| Model Number | 10039527 |
| Color | Green |
| Product Dimensions (L x W x H) | 197 cm x 197 cm x 197 cm |
| Cover Material | Polyethylene (PE) |
| Frame Material | Iron |
| Number of Doors | 1 (with zipper closure) |
| Number of Vents/Windows | 2 |
| Special Features | Sloping roof, pest net |
| Intended Use | Outdoor |
Warranty and Support
For warranty information, technical support, or to order replacement parts, please refer to the original product packaging or visit the official Relaxdays website. You may also contact Relaxdays customer service directly for assistance.
