1. Product Overview
The Cooler Master GD160 V1 PC Gaming Desk is designed for both work and play, offering a durable and ergonomic solution for your setup. It features ample space for multiple monitors and peripherals, an integrated full-surface mousepad, and adjustable height levels to suit various user needs.

Figure 1.1: The Cooler Master GD160 V1 PC Gaming Desk, showcasing its sleek design and spacious black tabletop with purple accents.
Key Features:
- Balanced Work and Play: Ample space for multi-monitor setups, keyboards, mice, and more, designed for both productivity and gaming sessions.
- 3 Height Adjustment Levels: Easily adjust the desk height between 28.0", 29.5" (default), and 31.1" to accommodate different seating or standing preferences.
- Cable Management: An integrated rear steel cable tray helps maintain a clean and tidy workspace by routing cables for peripherals and monitors.
- Built to Last: Thoroughly tested for durability, capable of supporting up to 220.5 lbs (100 kg).
- Full Surface Mousepad: Comes equipped with a water-resistant* full-surface gaming mousepad that covers the entire desk. (*Water resistance is only for cold liquids; hot liquids may still absorb into the mat.)
2. Setup and Assembly
Follow these steps carefully to assemble your Cooler Master GD160 V1 PC Gaming Desk. It is recommended that two people assemble the desk due to its weight and size.
2.1 Unboxing and Component Identification
Upon opening the package, you will find all the necessary components, hardware, and an instruction manual. Lay out all parts on a clean, flat surface to ensure all pieces are present before beginning assembly.
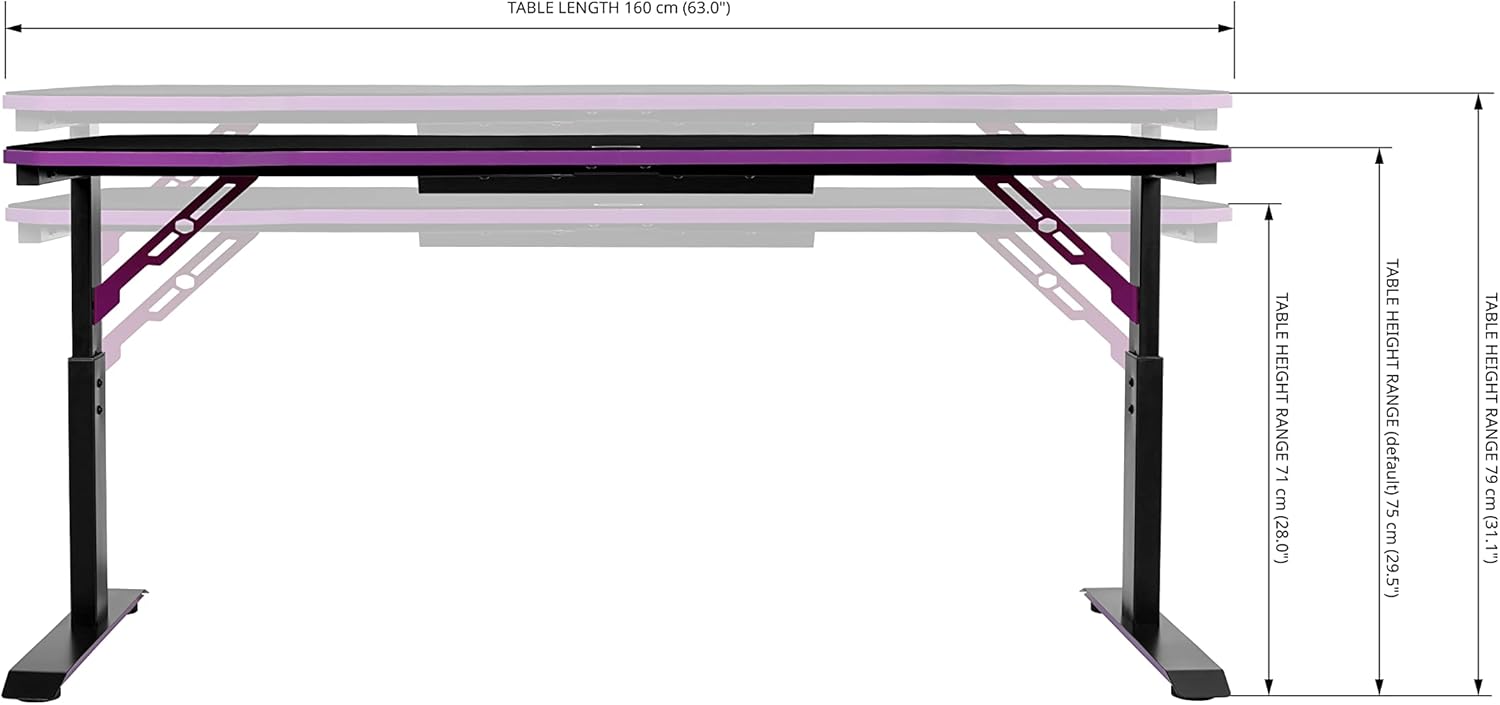
Figure 2.1: All components of the Cooler Master GD160 V1 PC Gaming Desk laid out, including the two-piece tabletop, frame parts, hardware kit, and instruction manual. Note the purple accents on some components.
2.2 Assembling the Leg Supports (Step 1)
Begin by assembling the two main leg supports. Each leg support consists of a vertical leg piece and a horizontal base piece with purple accents. Ensure the longer part of the base is aligned with the longer part of the vertical leg when fastening the screws. Use the provided tool (J) and screws (K) as indicated in the manual.

Figure 2.2: Close-up view of the leg support assembly, showing the connection points and the distinct purple base.
2.3 Assembling the Frame (Step 2)
Next, assemble the central ladder-like frame. This involves attaching pieces marked 'C' with pieces marked 'D'. Carefully line up the holes and slide the 'D' pieces into the 'C' pieces. Secure them in place using the provided bolts (K) and tool (J).
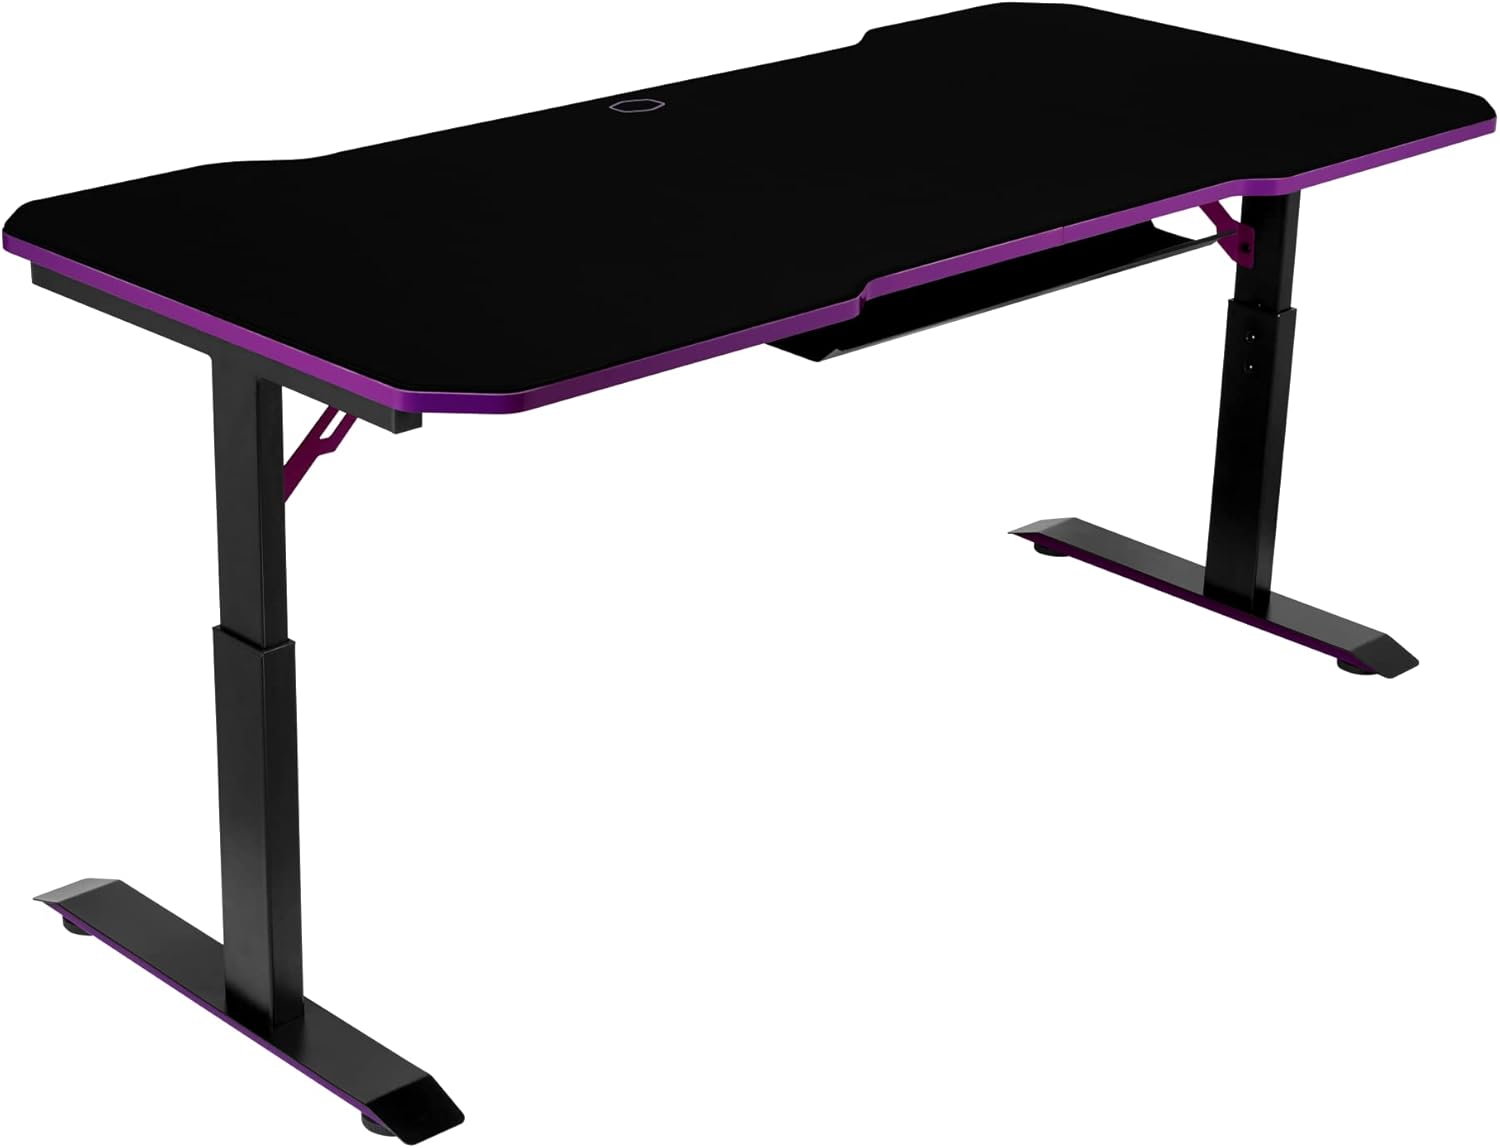
Figure 2.3: The assembled central frame, ready to be connected to the leg supports. Ensure all connections are flush and flat.
2.4 Connecting Legs to Frame (Step 3)
Now, attach the two assembled leg supports to the central frame. Ensure all bolts that connect these pieces are on the bottom side, allowing the top surface to remain flush and flat. The 'I' pieces should be installed on each side as shown in the manual.
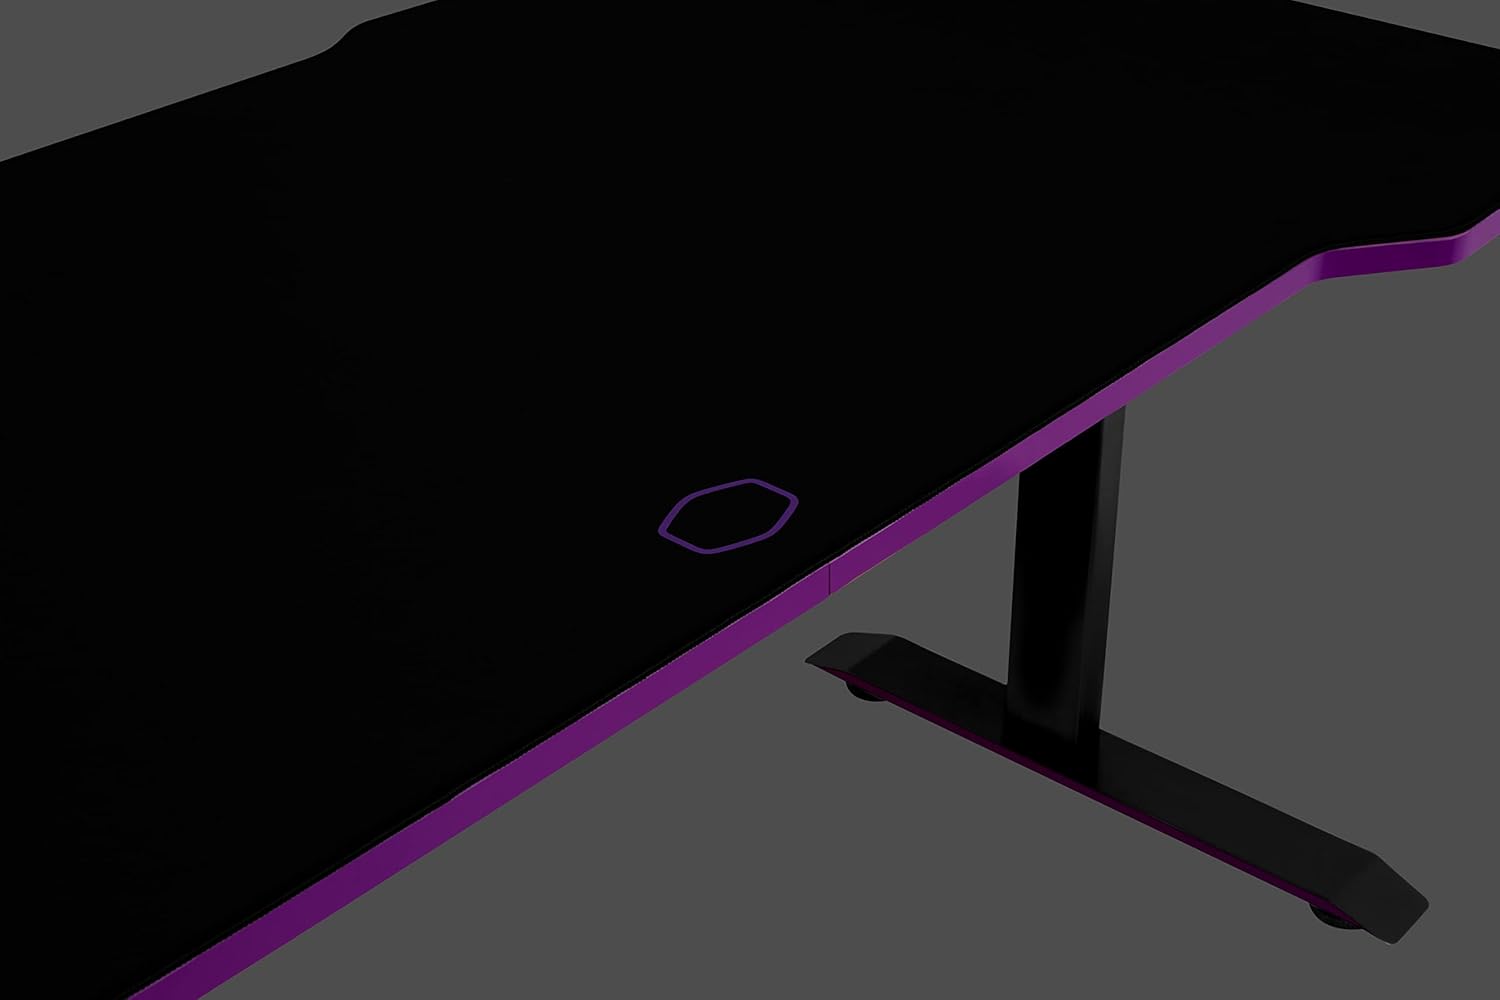
Figure 2.4: The desk frame fully assembled, with legs and central support connected.
2.5 Assembling the Tabletop (Step 4)
The tabletop comes in two pieces. Connect them using the three wooden dowels and then fasten them securely with the 'M' brackets and 'L' bolts. Ensure the connection is tight and the surface is even.

Figure 2.5: The two tabletop pieces joined together, showing the seam and the brackets underneath.
2.6 Final Assembly and Mousepad Installation (Step 5 & 6)
Attach the assembled tabletop to the desk frame. Secure all connections, including the feet, the cable management tray, and the two purple support brackets. Once the desk structure is complete, place the full-surface mousepad on top of the desk. The mousepad is designed to fit perfectly and features the Cooler Master logo.
Figure 2.6: The Cooler Master GD160 V1 PC Gaming Desk fully assembled and standing, with the full-surface mousepad in place.
3. Operating Instructions
3.1 Height Adjustment
The GD160 V1 desk offers three different height levels: 28.0", 29.5" (default), and 31.1". To adjust the height, loosen the bolts on the legs, manually adjust the leg sections to your desired height setting, and then securely tighten the bolts. Ensure the desk is stable after adjustment.

Figure 3.1: Detail of the height adjustment mechanism on the desk leg.
3.2 Cable Management
Utilize the integrated rear steel cable tray to organize your cables. Route power cords, display cables, and peripheral wires through the tray to keep your workspace neat and prevent tangles.

Figure 3.2: View of the cable management tray located at the rear underside of the desk.
3.3 Full Surface Mousepad
The desk comes with a full-surface mousepad that provides a consistent and comfortable surface for your mouse and keyboard. The mousepad is water-resistant for cold liquids, making it easy to clean. If you choose not to use the mousepad, be aware that the tabletop has a visible seam where the two halves meet.

Figure 3.3: The full-surface mousepad covering the entire desk, featuring the Cooler Master logo.
4. Maintenance
- Cleaning the Mousepad: The full-surface mousepad is water-resistant for cold liquids. In case of spills, wipe immediately with a damp cloth. Avoid hot liquids as they may absorb into the mat.
- Tabletop Care: The tabletop features an anti-scratch surface. To maintain its appearance, clean with a soft, dry cloth. Avoid abrasive cleaners or materials that could damage the finish.
- General Cleaning: Regularly dust the desk frame and legs with a soft cloth.
5. Troubleshooting
- Desk Instability: Ensure all bolts and screws are securely tightened. For added stability, especially if the desk feels wobbly, consider anchoring the desk to a wall.
- Difficulty Adjusting Height: Loosen the leg bolts sufficiently before attempting to adjust the height. If the desk is heavily loaded, remove items to reduce weight during adjustment.
- Missing Hardware/Misaligned Holes: If you encounter missing hardware or misaligned holes during assembly, double-check the instruction manual for correct part identification. If parts are genuinely missing or defective, contact Cooler Master customer support.
- Mousepad Not Lying Flat: After unboxing, the mousepad may have creases from being rolled. Allow it some time to relax and flatten out on the desk surface.
- Weight Limit Exceeded: The desk supports up to 220.5 lbs (100 kg). Exceeding this limit can compromise stability and damage the desk. Remove excess weight if necessary.
6. Specifications
| Feature | Detail |
|---|---|
| Brand | Cooler Master |
| Model Number | CMI-GD160-PRV1 |
| Product Dimensions (D x W x H) | 29.5"D x 63"W x 31.1"H (75cm D x 160cm W x 79cm H) |
| Color | Black, Purple |
| Style | GD160 |
| Base Material | Alloy Steel |
| Top Material Type | Alloy Steel (Laminated finish) |
| Special Feature | 3 Height Adjustment |
| Maximum Weight Recommendation | 220.5 Pounds (100 kg) |
| Included Components | Cable Management Tray, Full-size Gaming Mouse Mat |
| Required Assembly | Yes (Recommended 2 people) |
7. Warranty and Support
The Cooler Master GD160 V1 PC Gaming Desk comes with a 2-year limited warranty. For warranty claims, technical support, or any inquiries regarding your product, please refer to the official Cooler Master website or contact their customer support directly.
An official User Guide (PDF) is also available for download: Cooler Master GD160 User Guide