Introduction
This manual provides detailed instructions for the assembly, operation, maintenance, and troubleshooting of your Betterhood Large Metal Chicken Coop. Please read this manual thoroughly before assembly and use to ensure safe and proper operation of the product. Keep this manual for future reference.
The Betterhood Large Metal Chicken Coop is designed to provide a secure and spacious outdoor enclosure for various small to medium-sized animals, including chickens, ducks, rabbits, cats, dogs, sheep, birds, and land turtles. It features a durable steel frame, water-resistant and anti-UV cover, and hexagonal wire mesh for protection and ventilation.
Product Specifications
| Brand | Betterhood |
| Model Number | 476363352 |
| Product Dimensions (L x W x H) | 3.05L x 2.01W x 1.95H Meters (approximately 10' W x 6.6' L x 6.4' H) |
| Item Weight | 14.74 kg |
| Material | Galvanized Steel Frame, Polypropylene (240D Oxford Cloth) Cover |
| Gap Size (Mesh) | 0.6 Inches |
| Number of Doors | 1 |
| Special Features | Comfortable, Durable shielded, Spacious, Water-Resident, Anti-UV Cover |
 Image: Detailed dimensions of the Betterhood chicken coop.
Assembly Instructions
Before beginning assembly, ensure all parts are present and undamaged. It is recommended to assemble the coop on a flat, level surface. Two people are recommended for easier assembly.
Step-by-Step Assembly Guide:
- Unpack and Identify Parts: Lay out all components and identify them using the parts list (not provided in this text, refer to your product packaging).
- Assemble the Base Frame: Connect the horizontal base pipes using the provided connectors and bolts. Ensure all connections are secure.
- Install Vertical Supports: Insert the vertical support poles into the base connectors.
- Construct the Roof Frame: Attach the curved roof poles to the vertical supports and connect them at the peak using the appropriate connectors.
- Secure Frame Connections: Use the provided bolts and nuts to tighten all frame connections, ensuring the structure is stable.
- Install the Door Frame: Assemble the door frame separately and attach it to the main structure using the designated hinges and latches.
- Attach Wire Mesh: Unroll the hexagonal wire mesh and secure it to the frame using zip ties or wire fasteners. Ensure the mesh is taut and covers all open sides to prevent escape or entry of animals. Trim excess mesh if necessary.
- Install the Waterproof Cover: Drape the 240D Oxford Cloth cover over the roof frame. Secure it using the elastic buckles through the grommets, attaching them to the frame pipes. Ensure the cover is stretched tightly to prevent water pooling.
- Ground Anchoring: Use the provided ground stakes or anchors to secure the coop to the ground, especially in windy conditions.
Assembly Video:
Video: Step-by-step assembly guide for the Betterhood Large Metal Chicken Coop.
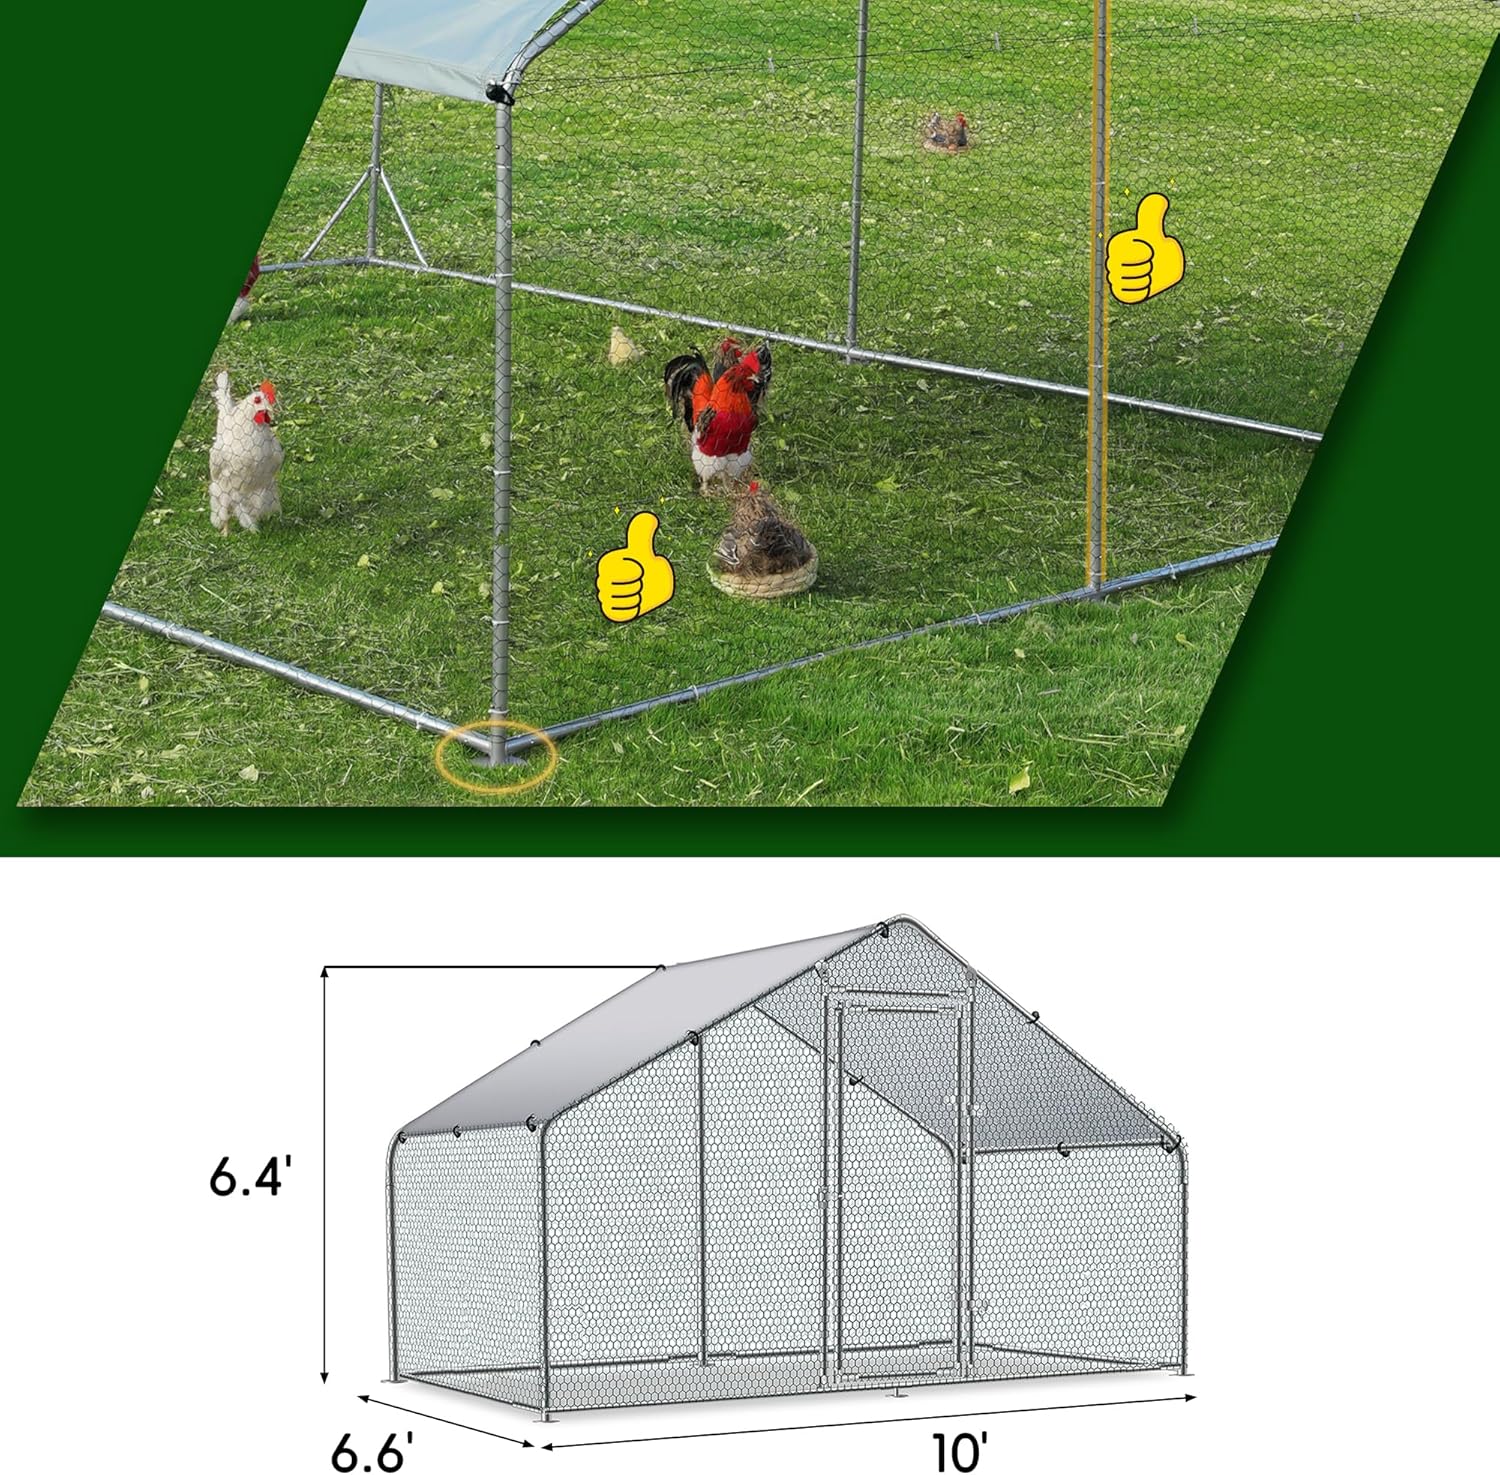 Image: Partially assembled chicken coop frame with roof cover.
 Image: Details of the metal mesh, elastic buckle, and frame connector.
Operation and Usage
The Betterhood Metal Chicken Coop provides a secure and spacious environment for your animals. Follow these guidelines for optimal use:
- Placement: Position the coop on a level area, ideally with some natural shade. Ensure good drainage to prevent water accumulation.
- Animal Capacity: The coop is suitable for a variety of small to medium-sized animals. Ensure the number of animals housed is appropriate for the coop's dimensions to allow sufficient space for movement and comfort.
- Door Security: Always ensure the door is securely latched to prevent animals from escaping and to protect them from predators.
- Weather Protection: The water-resistant and anti-UV cover provides protection from sun and light rain. In severe weather conditions (heavy rain, snow, strong winds), additional measures may be required to protect your animals and the coop.
 Image: The coop is suitable for various small animals.
Care and Maintenance
Regular maintenance will extend the lifespan of your chicken coop and ensure a healthy environment for your animals.
- Regular Cleaning: Clean the coop regularly to maintain hygiene. Remove animal waste and soiled bedding.
- Inspect Mesh: Periodically check the wire mesh for any damage, tears, or loose sections. Repair or reinforce as needed to maintain security.
- Frame Inspection: Inspect the steel frame for any signs of rust, bending, or loose connections. Tighten bolts if necessary.
- Cover Maintenance: Clean the waterproof cover with mild soap and water. Ensure it remains taut to prevent water pooling, which can lead to stretching or damage.
- Ground Anchors: Verify that ground anchors remain secure, especially after strong winds or heavy rain.
 Image: The cover offers UV resistance for durability.
Troubleshooting
- Coop Instability: If the coop feels unstable, re-check all frame connections and ensure bolts are tightened. Verify that ground anchors are properly installed and secure.
- Water Pooling on Cover: Ensure the cover is stretched tightly across the roof frame. Adjust elastic buckles if necessary. Clear any debris that may accumulate on the cover.
- Animal Escape/Predator Entry: Inspect the wire mesh for any gaps or holes. Reinforce weak points with additional wire or zip ties. Consider burying the bottom edge of the mesh or adding a hardware cloth skirt around the base for enhanced predator protection.
- Difficulty with Assembly: Refer to the assembly video and instructions carefully. Ensure correct parts are used for each step. If a part seems difficult to fit, double-check its orientation.
Customer Support
If you encounter any issues or have questions regarding your Betterhood Large Metal Chicken Coop, please contact our customer support team. We are committed to providing a satisfactory solution within 24 hours.
For assistance, please refer to the contact information provided with your purchase or visit the official Betterhood website.


