
1. Introduction
This manual provides essential information for the proper installation, operation, and maintenance of your Caltric Spindle Assembly. This component is designed as a replacement part for various lawn mowers. Please read this manual thoroughly before attempting any installation or maintenance procedures to ensure safety and optimal performance.
2. Safety Information
- Always wear appropriate personal protective equipment (PPE), including safety glasses and gloves, when handling or installing the spindle assembly.
- Ensure the lawn mower is turned off, the engine is cool, and the spark plug wire is disconnected before beginning any work to prevent accidental starting.
- Use proper lifting techniques and support the mower securely to prevent it from falling during installation.
- If you are unsure about any step, consult a qualified service technician.
- Keep children and bystanders away from the work area.
3. Product Overview and Compatibility
The Caltric Spindle Assembly is a critical component of a lawn mower's cutting deck, responsible for holding and rotating the cutting blade. This replacement part is compatible with the following models:
- Compatible with MTD Part Numbers: 753-05319, 717-0906, 717-0906A, 917-0906, 917-0906A
- Compatible with Cub Cadet Mower:
- 1106 (138-519-100) (1988-1989) 38"
- 1208 (130-552F100) (1990) 38"
- 1208 (131-552F100) (1991) 38"
- 1238 (132-552F100) (1992) 38"
- 1238 (133I582F100) (1993) 38"
- Compatible with White Outdoor:
- L-12 (131-455F190) 38" (1991)
- L-12 (132-455F190) 38" (1992)
- L-12 (133H471F190) 38" (1993)
- L-12 (134H471F190) 38" (1994)
- L-12 (135C471F190) 38" (1995)
- L-12 (135H471F190) 38" (1995)
- L-12 (136C471F190) 38" (1996)
- FST-14 (131-786G190) 42" (1991)
It is strongly recommended to compare the provided images and dimensions with your existing unit to ensure proper fitment before installation.
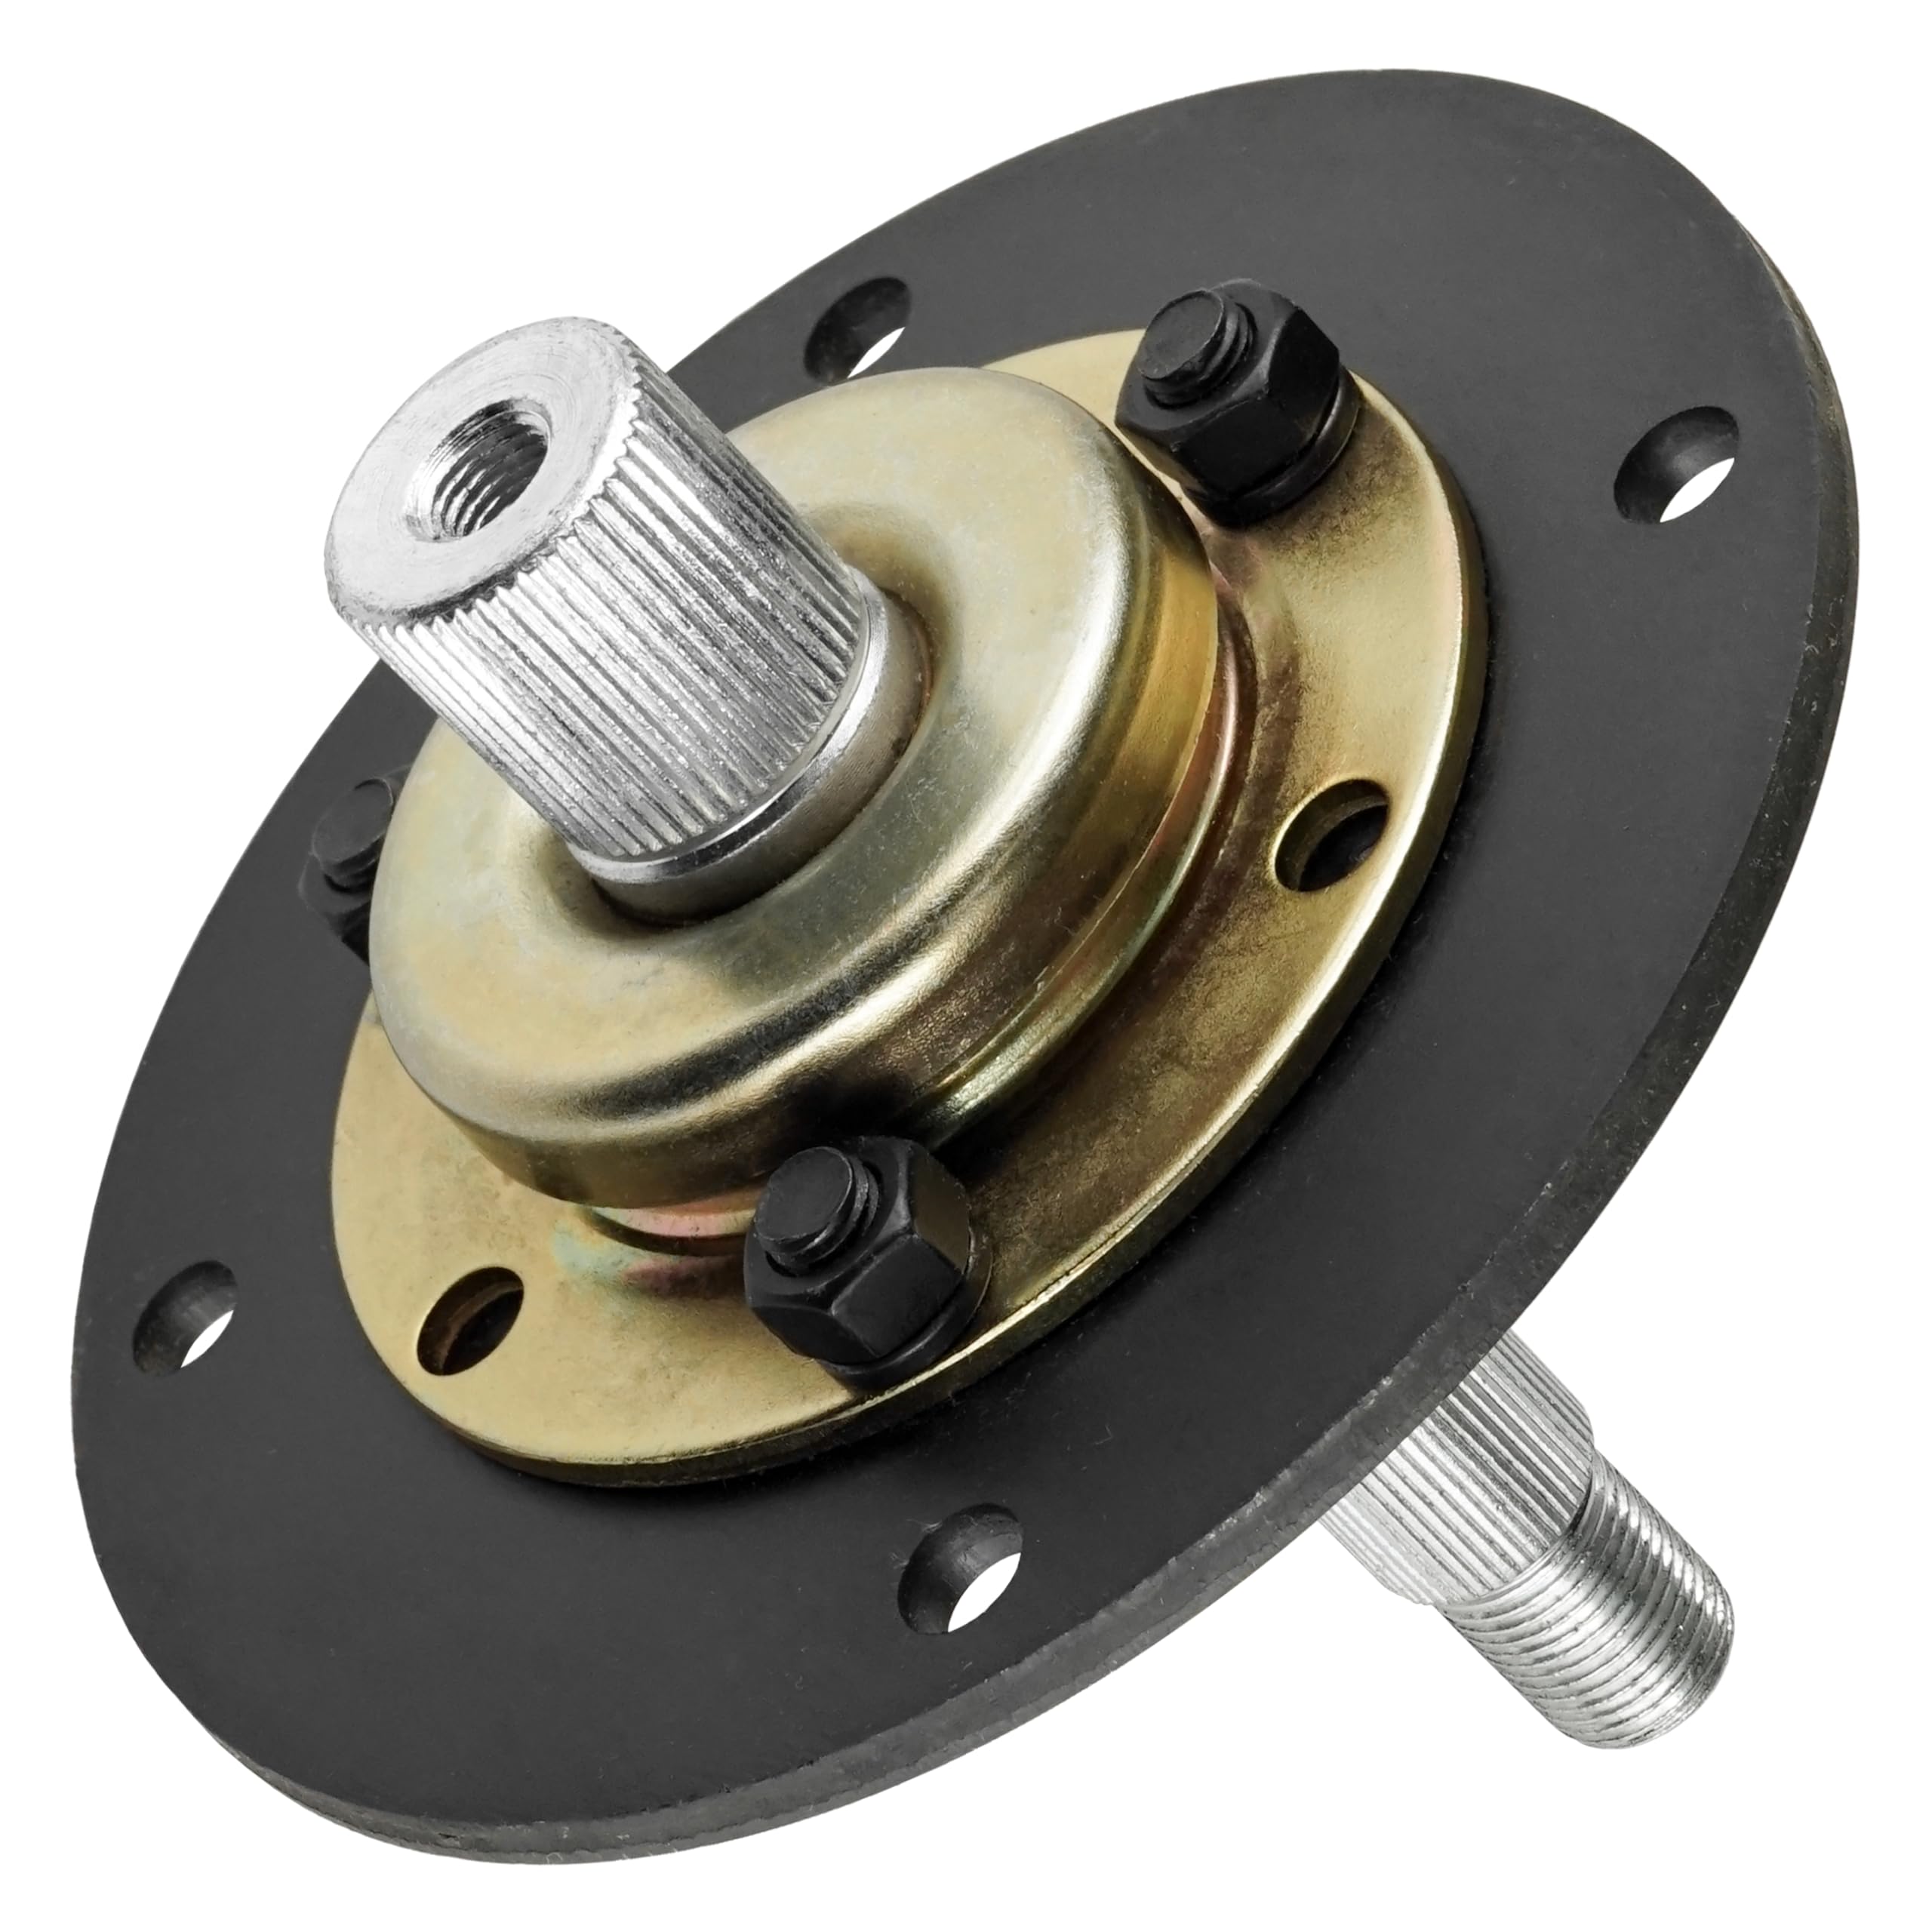
Figure 1: General view of the Caltric Spindle Assembly.
4. Dimensions
Accurate dimensions are crucial for proper fitment. Please refer to the following measurements:
- Overall Length: 137 mm (5.37 inches)
- Mounting Hole Distance: 117 mm (4.6 inches)

Figure 2: Spindle Assembly with overall length indicated.

Figure 3: Top view of Spindle Assembly showing mounting hole distance.
5. Setup and Installation
Replacing a spindle assembly requires mechanical aptitude. If you are not comfortable performing this task, it is recommended to seek professional assistance.
Required Tools:
- Wrenches or sockets (appropriate sizes for mounting bolts and blade nut)
- Torque wrench
- Blade removal tool (optional, but recommended)
- Safety glasses and gloves
Installation Steps:
- Prepare the Mower: Park the mower on a flat, stable surface. Turn off the engine, remove the ignition key, and disconnect the spark plug wire to prevent accidental starting.
- Access the Deck: Depending on your mower model, you may need to remove the cutting deck from the mower frame or tilt the mower to access the underside of the deck.
- Remove the Blade: Secure the blade from rotating (e.g., with a block of wood or blade removal tool) and carefully remove the blade retaining nut. Remove the blade and any washers.
- Remove the Old Spindle: Locate the mounting bolts that secure the spindle assembly to the deck. Remove these bolts. The old spindle assembly can now be removed from the deck.
- Clean the Mounting Area: Clean any debris or rust from the spindle mounting area on the deck to ensure a flat and secure fit for the new assembly.
- Install the New Spindle: Position the new Caltric Spindle Assembly onto the deck, aligning the mounting holes. Insert the mounting bolts and tighten them securely, following your mower's service manual for specific torque specifications if available.
- Reinstall the Blade: Place the blade back onto the spindle shaft, ensuring it is oriented correctly (cutting edge facing down). Reinstall any washers and the blade retaining nut. Tighten the blade nut to the manufacturer's specified torque.
- Reassemble and Test: Reattach the cutting deck if it was removed. Reconnect the spark plug wire. Perform a visual inspection to ensure all components are securely fastened. Start the mower briefly to check for unusual noises or vibrations.
6. Operating
The spindle assembly itself does not have operational controls. Its function is integral to the mower's cutting system. Once installed, ensure that the mower deck is properly leveled and the blades are sharp and balanced for optimal cutting performance. Always follow the operating instructions provided in your lawn mower's owner's manual.
7. Maintenance
Regular maintenance of your spindle assembly can extend its lifespan and ensure efficient mower operation.
- Regular Inspection: Periodically inspect the spindle assembly for signs of wear, damage, or looseness. Check for excessive play in the shaft or unusual noises during operation.
- Cleaning: Keep the area around the spindle assembly free of grass clippings and debris. Excessive buildup can lead to overheating and premature wear.
- Lubrication: Some spindle assemblies are sealed and do not require lubrication. If your mower's original spindle assembly had grease fittings, ensure the replacement is also lubricated according to the mower manufacturer's recommendations. If no grease fittings are present, no lubrication is typically required.
- Blade Maintenance: Always ensure the mower blades are sharp and balanced. Unbalanced blades can cause excessive vibration, leading to premature spindle bearing wear.
8. Troubleshooting
If you experience issues after installing the new spindle assembly, consider the following common problems and solutions:
| Problem | Possible Cause | Solution |
|---|---|---|
| Excessive vibration | Unbalanced blade, loose mounting bolts, bent blade, or damaged spindle. | Check blade balance, tighten mounting bolts, inspect blade for damage, or re-inspect spindle for defects. |
| Unusual noise (grinding, squealing) | Damaged bearings, lack of lubrication (if applicable), or debris in the assembly. | Inspect for debris, check for proper lubrication (if applicable), or consider replacing the spindle if bearings are faulty. |
| Blade not spinning freely | Obstruction, seized bearings, or incorrect installation. | Remove any obstructions, verify correct installation, or replace the spindle if bearings are seized. |
| Spindle feels loose | Loose mounting bolts or worn mounting holes. | Tighten mounting bolts to specifications. If mounting holes are worn, the deck may require repair or replacement. |
9. Specifications
- Product Type: Spindle Assembly
- Brand: Caltric
- Part Numbers: Compatible with MTD 753-05319, 717-0906, 717-0906A, 917-0906, 917-0906A
- Overall Length: 137 mm (5.37 inches)
- Mounting Hole Distance: 117 mm (4.6 inches)
- Material: Durable metal construction
10. Warranty and Support
For information regarding warranty coverage, returns, or technical support, please refer to the specific terms and conditions provided by your retailer or contact Caltric directly through their official channels. Keep your purchase receipt as proof of purchase.