
4 Pin cable - 2m length
Instruction Manual
RADIO YAESU FTM100/FTM400 Series 4-Pin Head Separation Cable
Model: 4 Pin cable - 2m length
Introduction
This manual provides essential information for the proper use and maintenance of your 4-Pin Head Separation Cable. This cable is designed to connect the detachable head unit to the transceiver unit of compatible Yaesu radio models, allowing for flexible installation options.
The cable features 4-pin RJ9/10/22 connectors (4P4C) on both ends, ensuring a secure and reliable connection. Please read this manual thoroughly before installation and operation.
Compatibility
This separation cable is compatible with the following Yaesu radio models:
- Yaesu FTM100
- Yaesu FTM100DE
- Yaesu FTM100DR
- Yaesu FTM400
- Yaesu FTM400DE
- Yaesu FTM400DR
Before connecting, ensure your radio unit has a 4-pin socket compatible with RJ9/10/22 (4P4C) connectors.
Setup and Installation
Follow these steps to properly connect the head separation cable:
- Power Off: Ensure both the Yaesu radio transceiver unit and the detachable head unit are powered off before making any connections.
- Locate Sockets: Identify the 4-pin RJ9/10/22 sockets on both the main transceiver unit and the detachable head unit. These are typically labeled for head unit connection.
- Connect Cable: Insert one end of the 4-pin separation cable into the corresponding socket on the Yaesu radio transceiver unit. Ensure the connector clicks securely into place.
- Connect Head Unit: Insert the other end of the 4-pin separation cable into the corresponding socket on the detachable head unit. Again, ensure a secure connection.
- Cable Routing: Route the cable in a manner that avoids kinks, sharp bends, or interference with other components. Secure the cable if necessary to prevent accidental disconnections or damage.
- Power On: Once the cable is securely connected, you may power on your Yaesu radio system. The head unit should now communicate with the transceiver unit.

Figure 1: The 4-pin head separation cable, coiled for packaging.
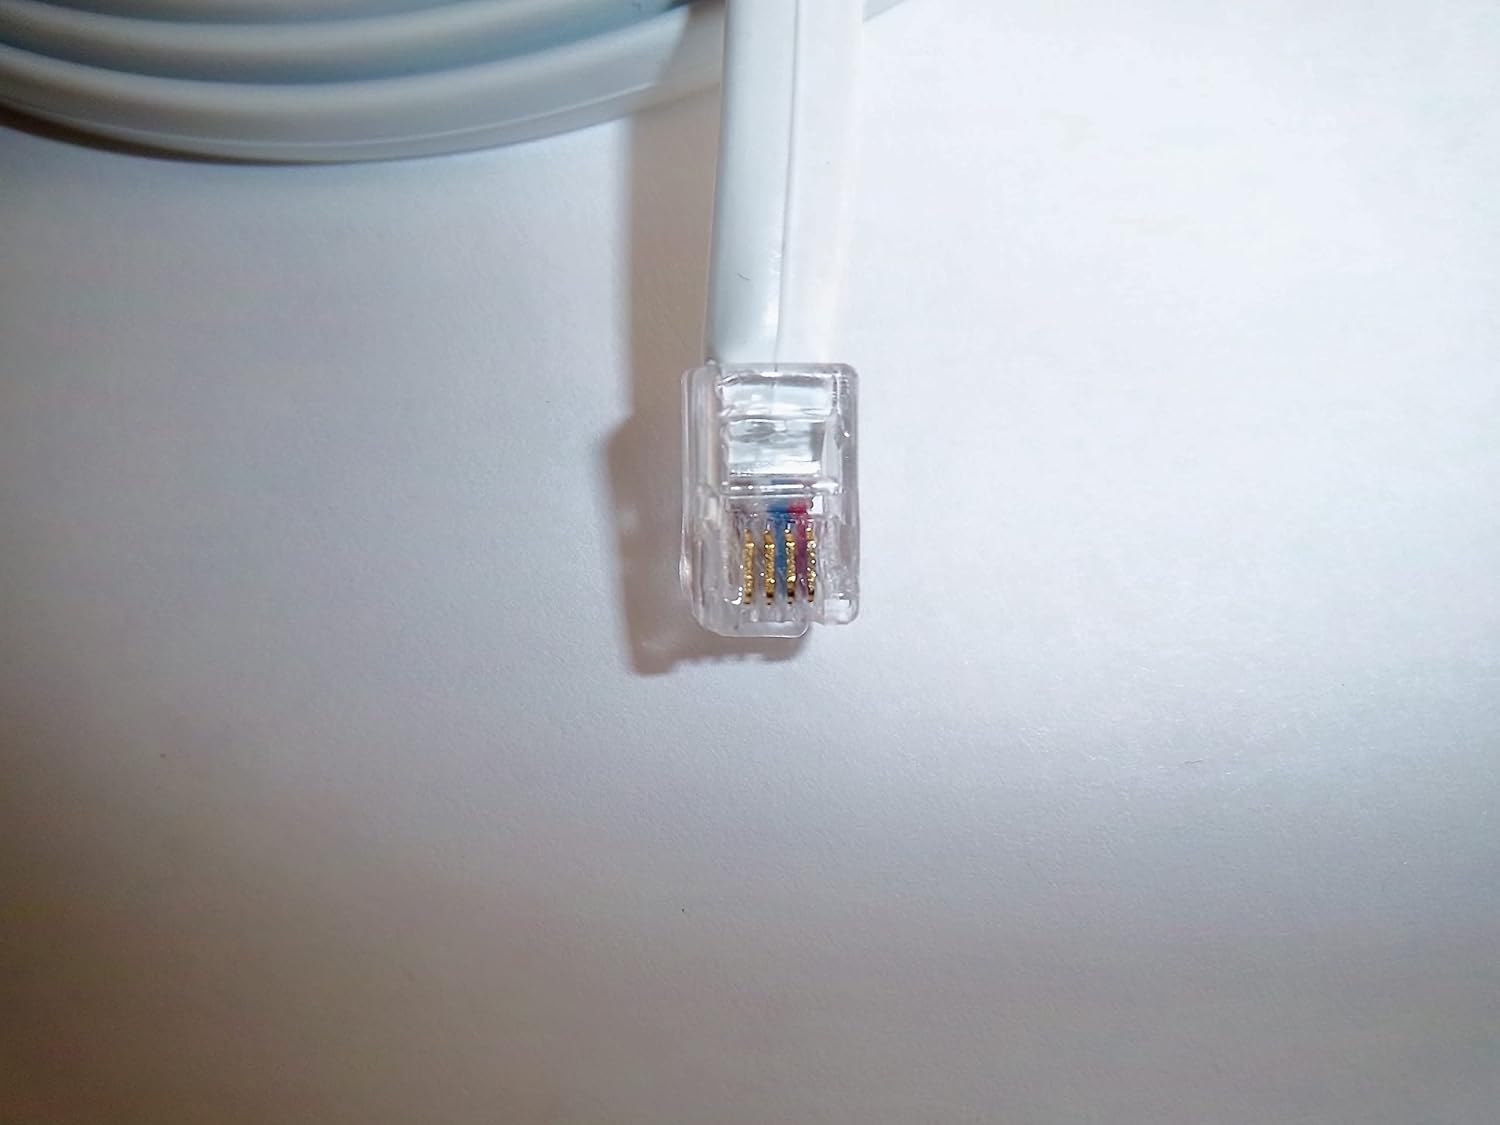
Figure 2: A detailed view of the 4-pin RJ9/10/22 connector, showing the pins.
Operation
This 4-pin head separation cable is a passive component designed to extend the connection between your Yaesu radio's main transceiver unit and its detachable head unit. Once properly connected, the cable facilitates the normal operation of your radio system as if the head unit were directly attached.
No specific operational steps are required for the cable itself beyond proper installation. The functionality of your radio will remain unchanged, allowing you to operate it from the separated head unit.
Maintenance
To ensure the longevity and reliable performance of your separation cable, observe the following maintenance guidelines:
- Handle with Care: Avoid pulling the cable by the wire itself when disconnecting. Always grasp the connector housing firmly.
- Avoid Kinks and Bends: Do not bend the cable sharply or coil it too tightly, as this can damage the internal conductors.
- Keep Clean: Periodically inspect the connectors for dust or debris. If necessary, gently clean them with a soft, dry cloth. Do not use liquid cleaners.
- Storage: When not in use, store the cable in a clean, dry environment, away from extreme temperatures and direct sunlight. Coil it loosely to prevent damage.
- Inspect for Damage: Regularly check the cable and connectors for any signs of wear, fraying, or damage. If damage is observed, discontinue use and replace the cable.
Troubleshooting
If you experience issues after connecting the separation cable, consider the following troubleshooting steps:
| Problem | Possible Cause | Solution |
|---|---|---|
| Head unit does not power on or display anything. |
|
|
| Intermittent connection or flickering display. |
|
|
| Radio functions are not responding from the head unit. |
|
|
If these steps do not resolve the issue, please refer to the Yaesu radio's original instruction manual or contact the radio manufacturer's support for further assistance.
Specifications
| Feature | Detail |
|---|---|
| Product Type | Head Separation Cable |
| Connector Type | RJ9/10/22 (4P4C) |
| Cable Type | Ethernet (for signaling, not network data) |
| Compatible Devices | Yaesu FTM100, FTM100DE, FTM100DR, FTM400, FTM400DE, FTM400DR |
| Length | 2m (various lengths available, this manual refers to the 2m version) |
| Brand | Generic |
Warranty and Support
For information regarding warranty coverage and customer support for this product, please refer to the retailer or point of purchase. As this is a generic accessory, specific warranty terms may vary.
For technical support related to the operation of your Yaesu radio, please consult the official Yaesu documentation or contact Yaesu customer service directly.
Ask a question about this manual
Ask about setup, troubleshooting, compatibility, parts, safety, or missing instructions. Manuals+ will review the question and use this page’s manual context to help answer it.