Introduction
Thank you for choosing the GETI GUC 20B Ultrasonic Cleaner. This manual provides essential information for the safe and efficient operation, maintenance, and troubleshooting of your device. Please read these instructions carefully before first use and keep them for future reference.
Safety Instructions
- Always ensure the unit is placed on a stable, level surface.
- Do not operate the unit without liquid in the tank.
- Avoid immersing the main unit in water or other liquids.
- Keep the unit out of reach of children.
- Use only appropriate cleaning solutions for ultrasonic cleaning.
- Unplug the unit from the power outlet before cleaning or maintenance.
- Do not touch the tank or solution during operation, as it may become hot.
- Ensure proper ventilation during use.
Product Overview
The GETI GUC 20B is a 20-liter ultrasonic cleaner designed for effective cleaning of various items using high-frequency sound waves. It features a stainless steel tank, digital controls for temperature and timer, and a drain valve for easy liquid disposal.
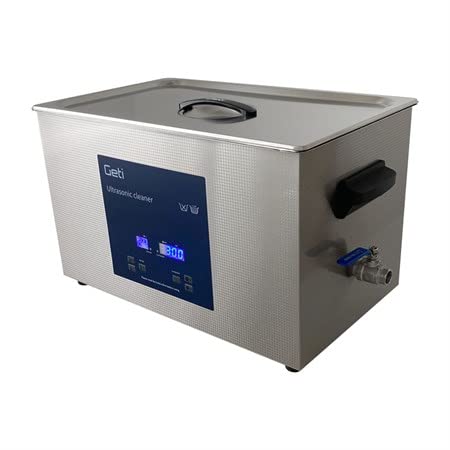
Image: Front view of the GETI GUC 20B Ultrasonic Cleaner, showing the stainless steel body and the blue digital control panel.
Setup
- Unpacking: Carefully remove the ultrasonic cleaner and all accessories from the packaging. Inspect for any damage.
- Placement: Place the unit on a firm, level, and dry surface, ensuring adequate ventilation around the device. Keep it away from heat sources and direct sunlight.
- Connect Drain Valve (if separate): Ensure the drain valve is securely attached to the unit. The valve allows for easy draining of the cleaning solution.
- Fill Tank: Fill the stainless steel tank with the appropriate cleaning solution. Ensure the liquid level is between the 'MIN' and 'MAX' marks. Do not overfill or underfill.
- Power Connection: Connect the power cord to the unit and then plug it into a grounded electrical outlet.
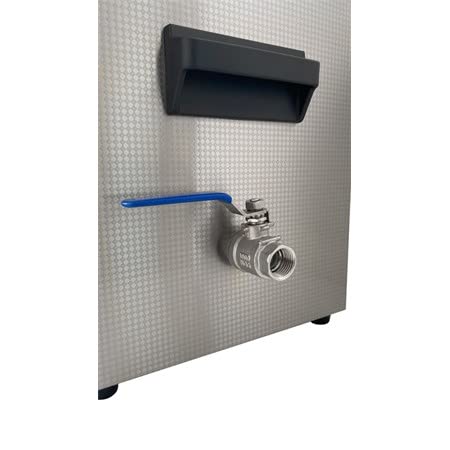
Image: Close-up view of the blue-handled drain valve located on the side of the ultrasonic cleaner, used for emptying the tank.
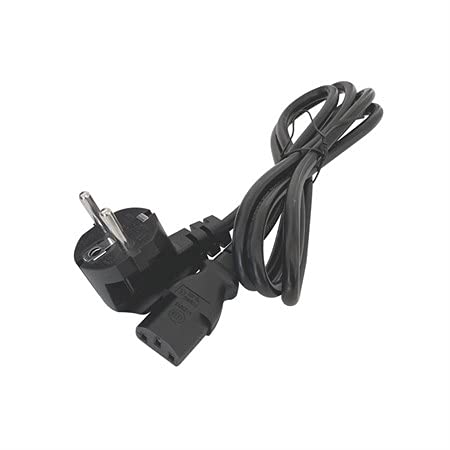
Image: A black power cord with a European-style plug on one end and a C13 connector on the other, used to power the ultrasonic cleaner.
Operating Instructions
- Prepare Items: Place the items to be cleaned into the cleaning basket. Ensure items are not directly touching the bottom of the tank.
- Set Temperature: Use the digital controls to set the desired cleaning temperature (0-80°C). The unit will begin heating the solution.
- Set Timer: Use the digital controls to set the desired cleaning time. Typical cleaning cycles range from 5 to 30 minutes, depending on the items and level of dirt.
- Start Cleaning: Press the 'ON/OFF' button to start the ultrasonic cleaning process. The unit will emit a buzzing sound, indicating operation.
- Monitor Process: Allow the unit to complete the set cleaning cycle. Do not interrupt the cycle unless necessary.
- Remove Items: Once the cycle is complete, turn off the unit and carefully remove the cleaning basket with the cleaned items. Rinse items with clean water and dry them thoroughly.

Image: An overhead view inside the ultrasonic cleaner's stainless steel tank, showing a wire mesh cleaning basket resting within it.

Image: A four-panel collage showing various items that can be cleaned with an ultrasonic cleaner, including dental tools, a wristwatch, jewelry (rings), and industrial bearings.
Maintenance
- Draining the Tank: After each use or when the solution is dirty, turn off and unplug the unit. Open the drain valve to empty the cleaning solution into a suitable container.
- Cleaning the Tank: Rinse the tank with clean water. For stubborn residue, use a soft cloth and a mild detergent. Do not use abrasive cleaners or steel wool.
- External Cleaning: Wipe the exterior of the unit with a soft, damp cloth. Do not use harsh chemicals.
- Storage: Store the unit in a cool, dry place when not in use. Ensure the tank is empty and dry.
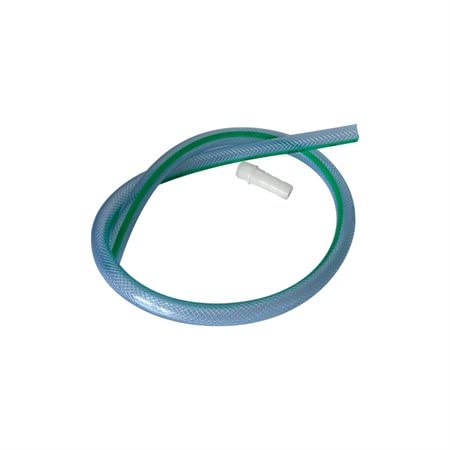
Image: A clear, flexible plastic hose with a green stripe, and a white barbed fitting, used for connecting to the drain valve to facilitate emptying the tank.
Troubleshooting
| Problem | Possible Cause | Solution |
|---|---|---|
| Unit does not power on | No power supply; Power cord not connected | Check power outlet; Ensure power cord is securely plugged in |
| No ultrasonic sound/action | Tank empty or liquid level too low; Unit not started | Fill tank to appropriate level; Press 'ON/OFF' button |
| Poor cleaning results | Incorrect cleaning solution; Too short cleaning time; Overloaded tank; Water too cold | Use appropriate solution; Increase cleaning time; Reduce load; Increase water temperature |
| Solution not heating | Heating function not activated; Faulty heating element | Ensure temperature is set; Contact customer support if issue persists |
Specifications
- Model: GUC 20B
- Tank Capacity: 20 Liters
- Ultrasonic Frequency: 40 kHz
- Ultrasonic Power: 500 W
- Heating Power: (Information not explicitly provided, typical for 20L units is 500W-1000W, assuming similar to ultrasonic power for general guidance)
- Temperature Range: 0 - 80 °C
- Tank Material: Stainless Steel
- Timer Settings: Digital (adjustable)
- Drain Valve: Yes
Warranty and Support
For warranty information or technical support, please refer to the documentation provided at the time of purchase or contact your retailer. Keep your purchase receipt as proof of purchase.