1. Introduction
This manual provides detailed instructions for the assembly, operation, and maintenance of your BOUDECH Greenhouse Tunnel (Model: serra2x4,5). Please read this manual thoroughly before beginning assembly or use to ensure safe and efficient operation. This greenhouse is designed to protect your plants from adverse weather conditions, insects, and pests, promoting optimal growth.
2. Safety Information
Please pay close attention to the following safety guidelines:
- Exercise caution during assembly. Handle any sharp or heavy components with care to prevent injury.
- Ensure the greenhouse is correctly anchored to the ground to prevent damage from wind or other weather events. Failure to do so may result in structural collapse and potential injury or property damage.
- Keep children and pets away from the assembly area.
- Do not use the greenhouse for purposes other than plant cultivation.
- Regularly inspect the structure for any signs of wear or damage. Address any issues promptly.
3. Components List
Before starting assembly, verify that all components are present and undamaged. Refer to the included parts diagram for identification.
- Galvanized Steel Frame (various tubes and connectors)
- PE Reinforced Cover (Green)
- Roll-up Entrance Door with Zippers
- 8 Window Openings with Mosquito Nets
- 4 Ground Stakes (ropes not included)
- Assembly Kit (fasteners, tools if provided)
4. Setup and Assembly
Follow these steps carefully for proper assembly. It is recommended to have at least two people for assembly.
4.1 Site Preparation
Choose a level, well-drained area for your greenhouse. Ensure adequate space around the greenhouse for access and anchoring.

Image: Dig a furrow around the perimeter where the greenhouse frame will be planted. This will allow the structure to have better resistance to adverse weather events.
4.2 Frame Assembly
- Unpack all steel frame components and lay them out.
- Connect the base frame sections according to the diagram in your assembly kit.
- Assemble the arched roof sections, ensuring all connections are secure.
- Attach the assembled roof sections to the base frame.
- Secure all joints with the provided fasteners. Ensure the frame is stable and rigid.

Image: Detail of the solid galvanized steel frame construction, showing a secure joint.
4.3 Cover Installation
- Carefully unfold the PE reinforced cover.
- Drape the cover over the assembled frame, ensuring it is centered and evenly distributed.
- Secure the cover to the frame using the ties or fasteners provided. Ensure the cover is taut to prevent flapping in the wind.
- Zip up the entrance door and ensure all window flaps are closed during initial installation.

Image: Interior view of the BOUDECH greenhouse, showcasing the spacious design and frame structure.
4.4 Anchoring
Use the provided ground stakes to firmly anchor the greenhouse to the soil. For additional stability, especially in windy areas, consider using additional ropes (not included) to secure the frame to the ground or other fixed points.
5. Operating Instructions
5.1 Door Operation
The greenhouse features a roll-up entrance door with side zippers. To open, unzip both sides and roll the door upwards, securing it with the integrated straps at the top. To close, unroll the door and zip it down completely.
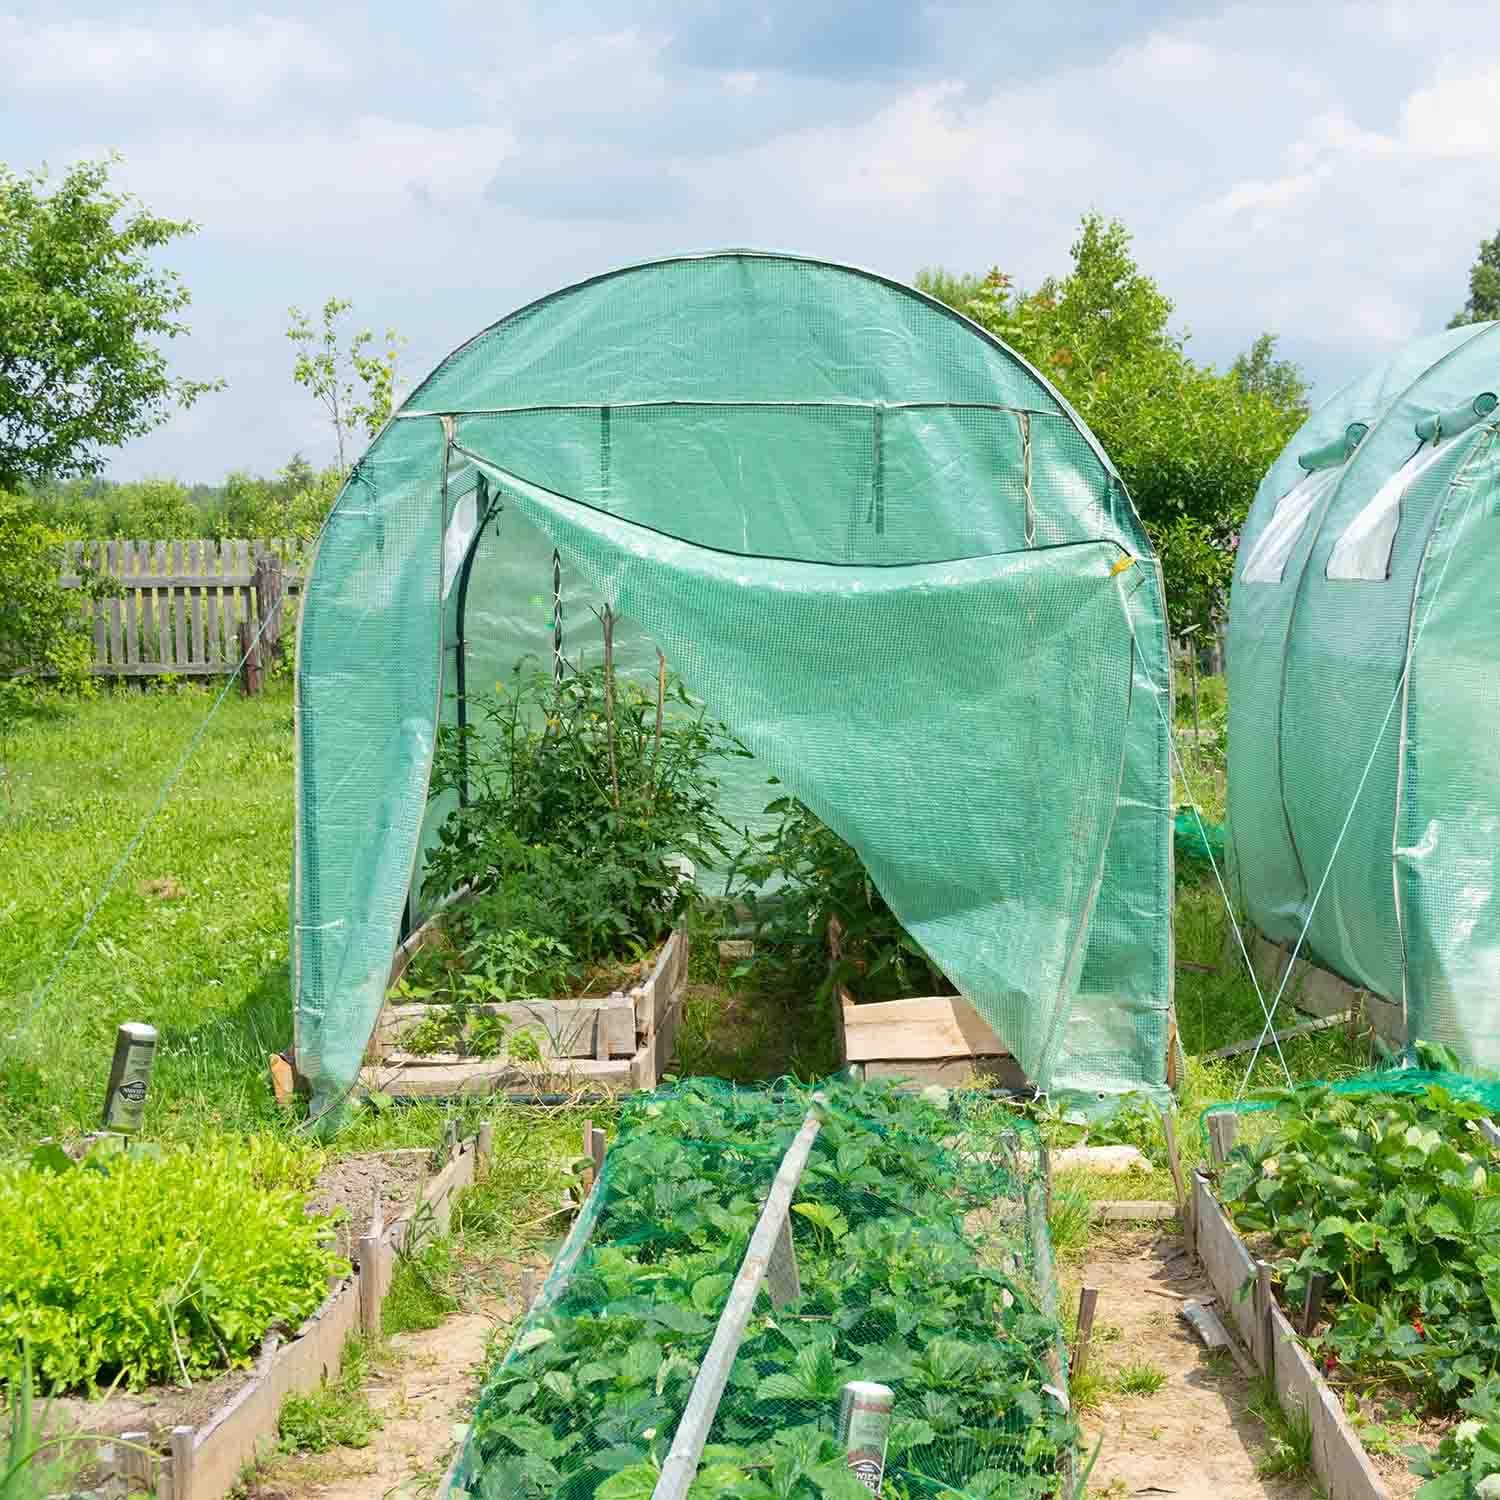
Image: The greenhouse in a garden, demonstrating the roll-up entrance door.
5.2 Ventilation
The greenhouse is equipped with 8 window openings, each with a mosquito net, to ensure proper air circulation. To ventilate, unfasten the window flaps and roll them up, securing them in place. This allows for temperature regulation and prevents excessive humidity, while the mosquito nets protect against insects and birds.

Image: Detail of a built-in ventilated window with mosquito net, designed for optimal air flow.
5.3 Environmental Control
The PE reinforced cover allows necessary light and UV rays to pass through, creating an optimal internal temperature for plant growth. Monitor the internal temperature and humidity, adjusting ventilation as needed to suit your plants' requirements.
6. Maintenance
6.1 Cleaning
Clean the PE cover periodically with mild soap and water. Avoid abrasive cleaners or brushes that could damage the material. Rinse thoroughly with clean water. Ensure the cover is dry before closing for extended periods to prevent mold or mildew.
6.2 Frame Inspection
Regularly inspect the galvanized steel frame for any signs of rust, corrosion, or loose connections. Tighten any loose fasteners. If rust appears, treat it promptly to prevent further deterioration.
6.3 Cover Inspection
Check the PE cover for any tears, punctures, or weak spots. Small damages can often be repaired with specialized greenhouse repair tape. Replace severely damaged covers to maintain optimal protection.
6.4 Winterization
In areas with heavy snowfall or extreme winter conditions, it is advisable to remove the cover to prevent damage from snow accumulation. Store the cover in a dry, protected area. The frame can typically remain outdoors if properly anchored.
7. Troubleshooting
- Greenhouse instability: Ensure all frame connections are tight and the greenhouse is securely anchored to the ground using all provided stakes. Consider additional anchoring methods in high-wind areas.
- Excessive heat/humidity: Open the door and multiple ventilation windows to increase airflow. Consider using a shade cloth during peak sunlight hours if temperatures remain too high.
- Insufficient light: Ensure the cover is clean and free from debris. If plants are still not receiving enough light, consider relocating the greenhouse to a sunnier spot.
- Water pooling on cover: Ensure the cover is taut and properly secured to the frame to prevent sagging. Clear any debris that may accumulate on the roof.
8. Specifications
| Feature | Specification |
|---|---|
| Model Number | serra2x4,5 |
| Dimensions (L x W x H) | 400 x 250 x 190 cm (2.5x4 M) |
| Weight | 25.2 kg |
| Frame Material | Galvanized Steel Alloy |
| Cover Material | Reinforced Polyethylene (PE) |
| Number of Doors | 1 (Roll-up with zippers) |
| Number of Vents/Windows | 8 (with mosquito nets) |
| Intended Use | Outdoor Cultivation |

Image: Dimensional diagram of the greenhouse, indicating its length, width, and height.
9. Warranty and Support
This product is typically covered by a return policy allowing returns within 30 days of receipt. For specific warranty details or technical support, please refer to your purchase documentation or contact the seller directly. Keep your proof of purchase for any warranty claims.