Sprwinautummer 1K0937125D, 1K0937125C, 5K0937123A, 1K0937125B
Relay Fuse Box Block Panel Assembly User Manual
Brand: Sprwinautummer
Model Numbers: 1K0937125D, 1K0937125C, 5K0937123A, 1K0937125B
Introduction
This manual provides essential information for the installation, operation, and maintenance of the Sprwinautummer Relay Fuse Box Block Panel Assembly. This component is designed as a direct replacement part for specific vehicle models, ensuring proper electrical distribution and protection within the engine compartment.
The assembly integrates various relays and fuses to manage electrical circuits, crucial for the reliable functioning of your vehicle's electronic systems. Please read this manual thoroughly before attempting any installation or maintenance.

Figure 1: Overview of the Relay Fuse Box Block Panel Assembly.
Product Specifications
| Part Numbers | 1K0937125D, 1K0 937 125D, 5K0937123A, 5K0 937 123 A, 1K0937125B, 1K0 937 125B, 1K0937125C, 1K0 937 125C |
| Size | Standard (STD) |
| Material | Plastic & Metal (Contact Material: Silver) |
| Color | Black |
| Applicable Engine Displacement | 1.2TSI, 1.4TFSI, 1.6L, 1.6TDI, 1.8TFSI, 1.9TDI, 2.0TDI, 2.0TFSI, 2.5L |
| Installation Location | Relay Plate located in engine compartment |
| Installation Type | Direct Replacement |
| Connector Type | Through Hole |
| Contact Type | Normally Open |
| Mounting Type | Surface Mount |
| Package Dimensions | 11.81 x 7.48 x 7.08 inches |
| Weight | 2.42 Pounds |
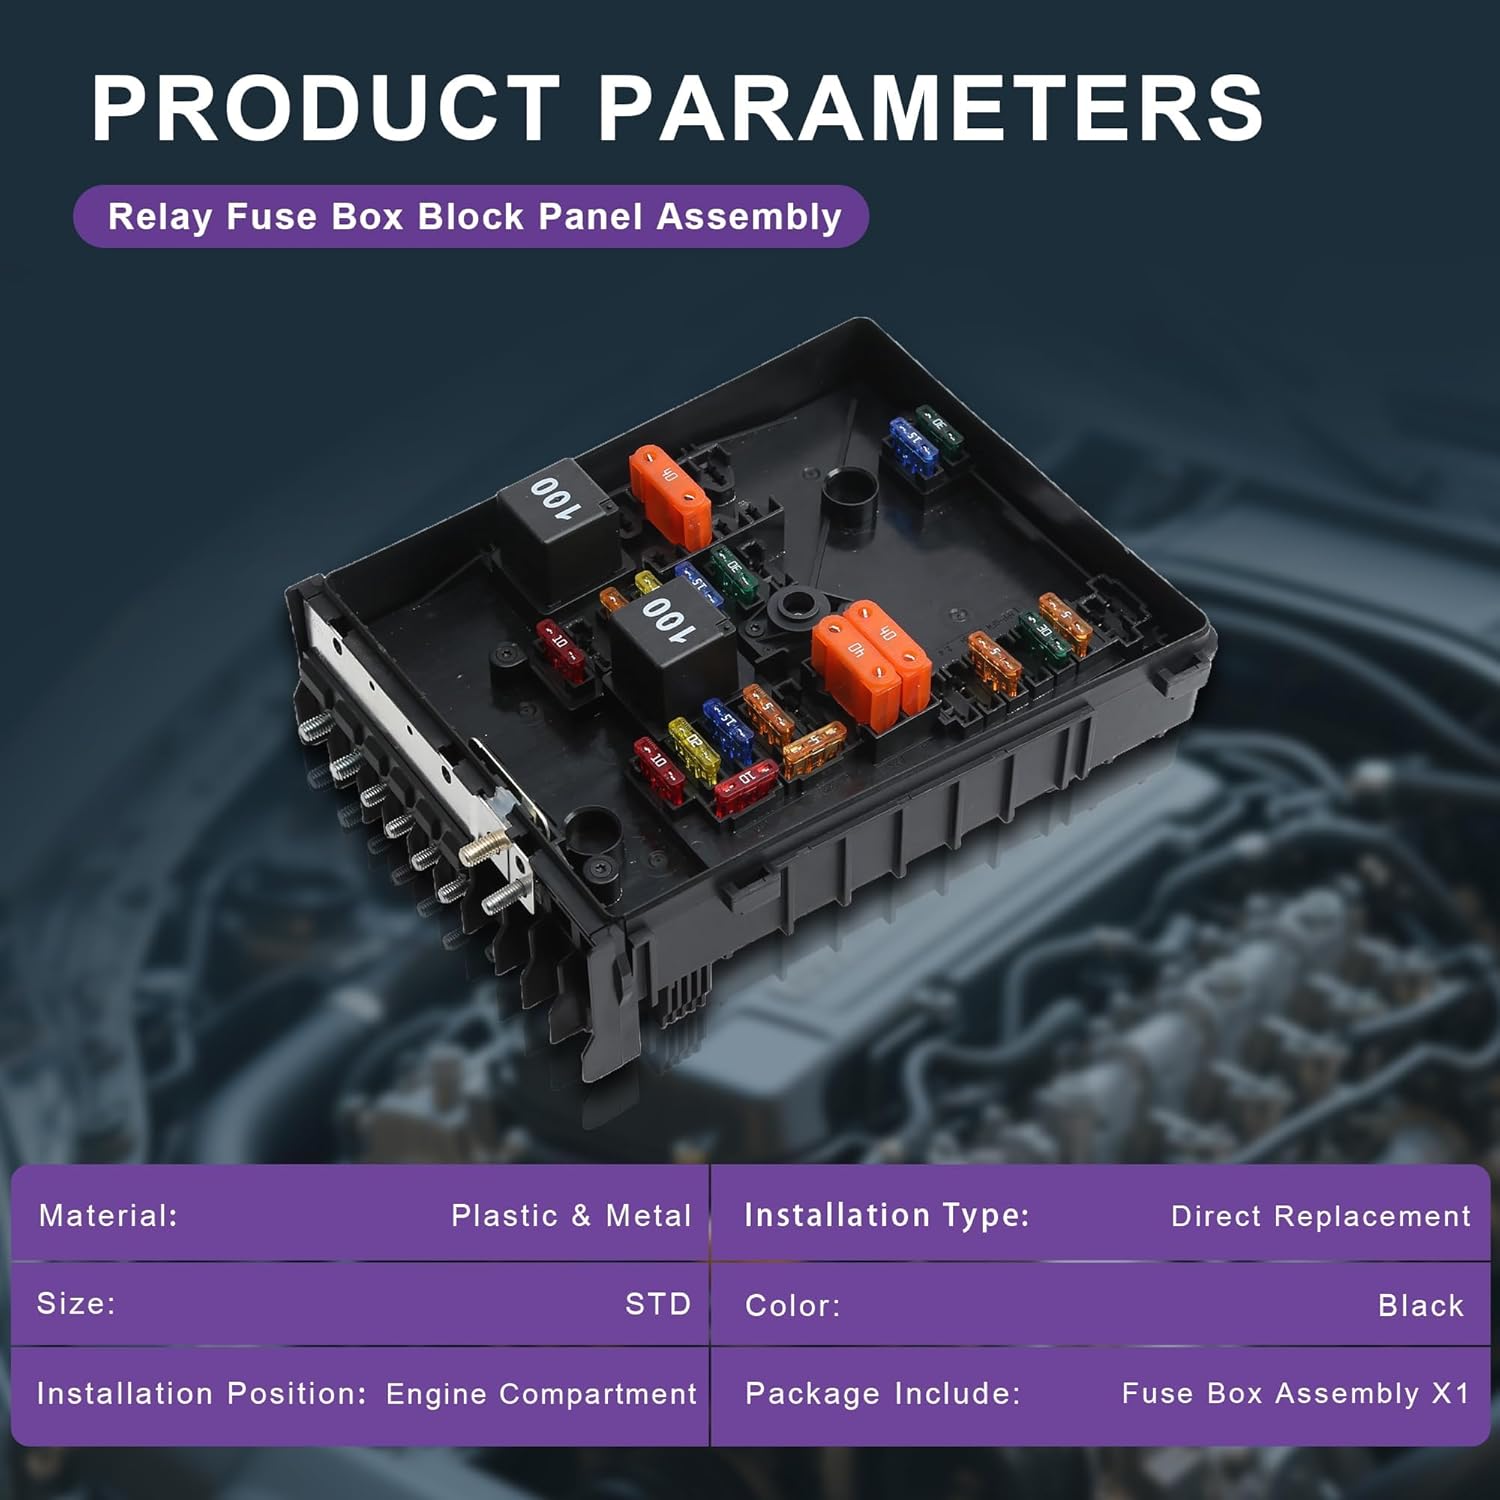
Figure 2: Visual representation of product parameters.
What's in the Box
- 1 x Relay Fuse Box Block Panel Assembly
Installation Guide
The Relay Fuse Box Block Panel Assembly is designed for direct replacement in compatible vehicle models. Installation should ideally be performed by a qualified mechanic or an individual with experience in automotive electrical systems.
Pre-Installation Check:
- Compatibility Verification: Before installation, it is crucial to verify that this part is suitable for your specific vehicle. Please compare the provided part numbers (1K0937125D, 1K0937125C, 5K0937123A, 1K0937125B) with your original part. If unsure, provide your vehicle's VIN (Vehicle Identification Number) or chassis number to a professional for confirmation.
- Safety First: Always disconnect the vehicle's battery before working on any electrical components to prevent electrical shock or damage to the vehicle's systems.
- Tools Required: Ensure you have the necessary tools for removing and installing automotive electrical components.

Figure 3: Important part numbers for compatibility verification.
Installation Steps (General):
- Locate the existing fuse box block panel assembly in your vehicle's engine compartment.
- Carefully disconnect all electrical connectors and wiring harnesses from the old assembly. Note their positions for re-connection.
- Remove any mounting screws or clips securing the old assembly.
- Gently remove the old fuse box.
- Position the new Sprwinautummer Relay Fuse Box Block Panel Assembly in the same location.
- Secure the new assembly using the original mounting hardware.
- Reconnect all electrical connectors and wiring harnesses to their corresponding ports on the new assembly. Ensure all connections are secure and properly seated.
- Reconnect the vehicle's battery.
- Test all relevant electrical systems to ensure proper functionality.

Figure 4: Diagram illustrating typical mounting positions and components of the fuse box assembly.
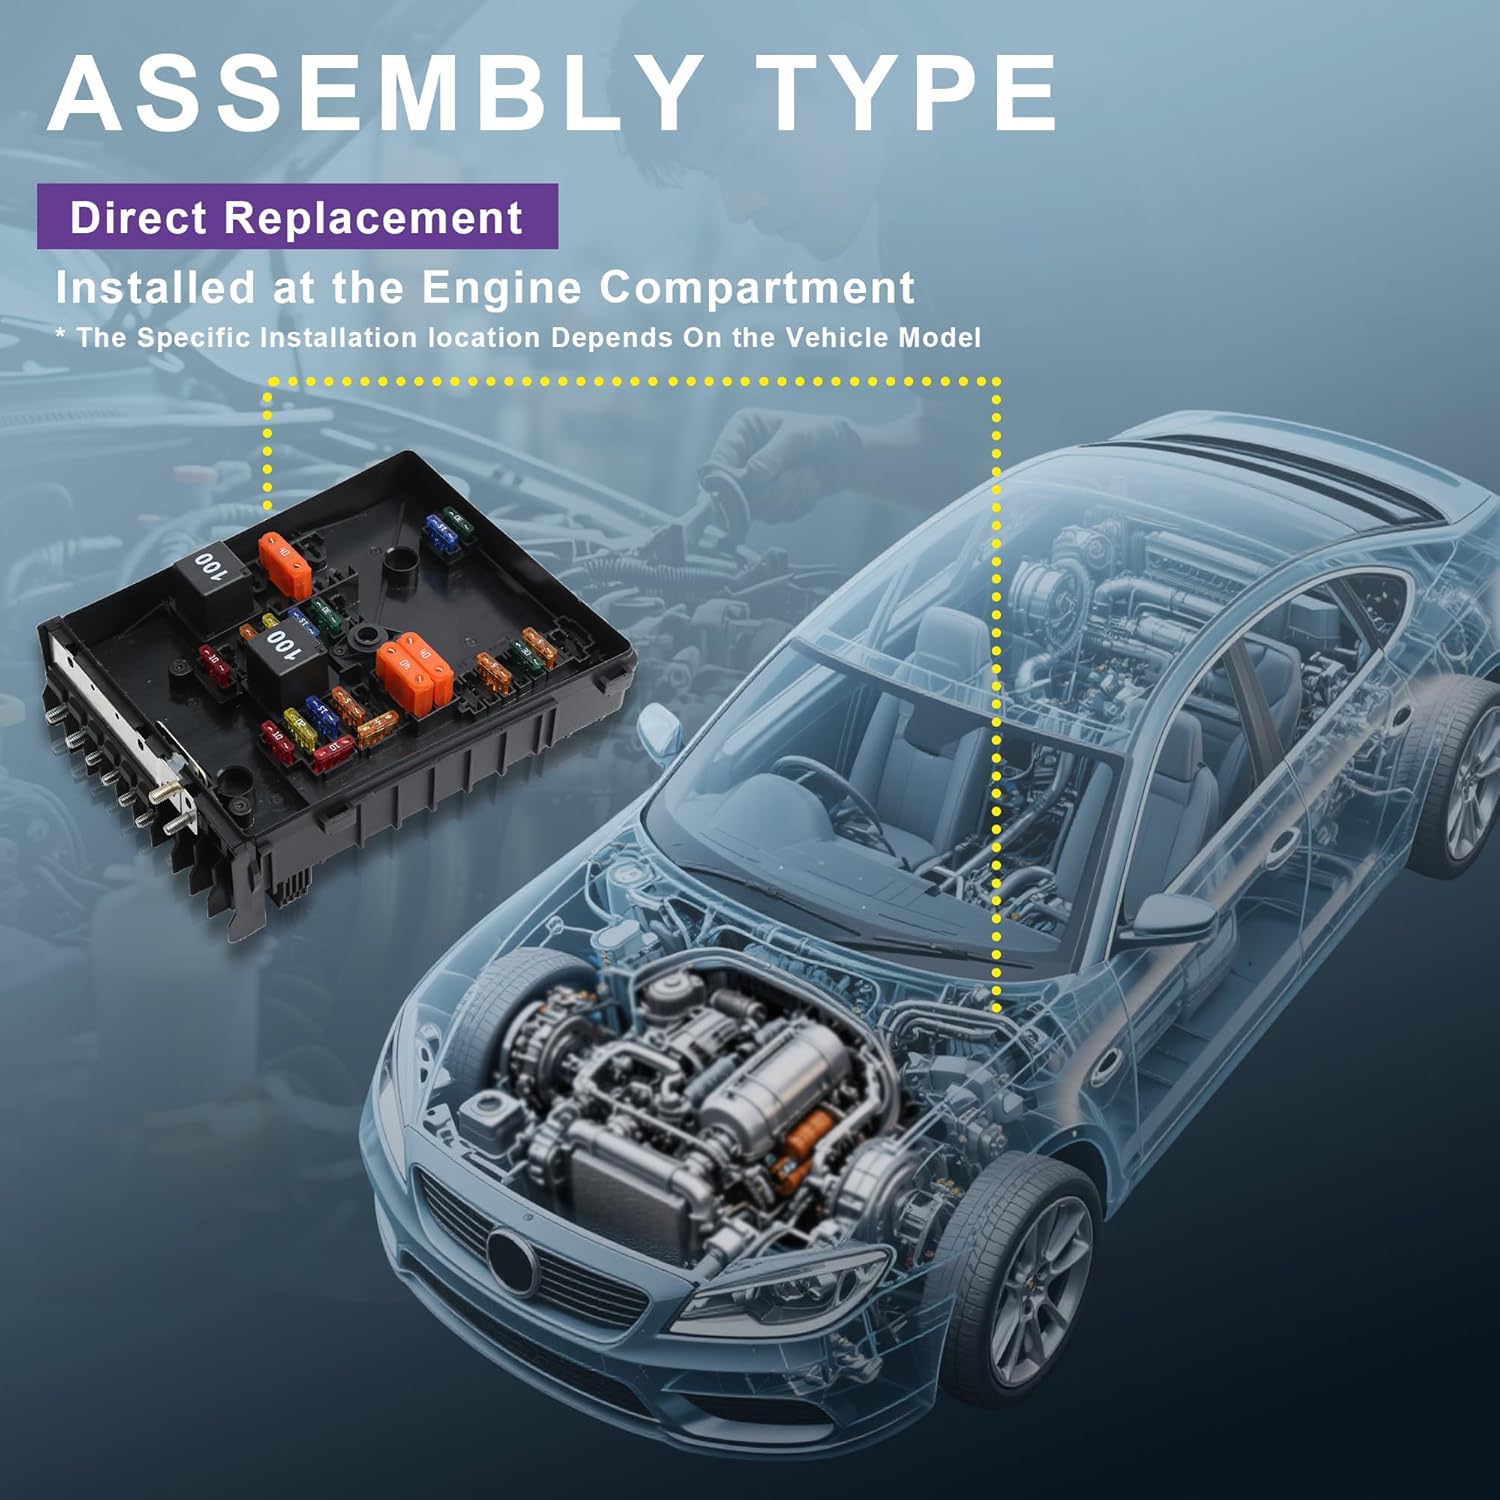
Figure 5: Visual representation of the assembly type and its general installation location within a vehicle's engine compartment.
Installation Overview Video:
Video 1: A brief overview of the Relay Fuse Box Block Panel, showing its components and general structure. This video provides a visual aid for understanding the physical aspects of the product before installation.
Operation
The Relay Fuse Box Block Panel Assembly is a passive electrical distribution and protection unit. It does not require active user operation beyond its initial installation. Its primary function is to house and organize the vehicle's fuses and relays, which automatically manage and protect various electrical circuits.
Fuses are designed to blow and break a circuit if an electrical overload occurs, protecting more sensitive components. Relays act as electrical switches, allowing a low-power signal to control a high-power circuit.
Maintenance
Regular maintenance of the fuse box assembly is generally not required. However, periodic visual inspection can help identify potential issues:
- Visual Inspection: Periodically check the fuse box for any signs of corrosion, loose connections, or burnt fuses. Ensure the cover is securely in place to protect components from moisture and debris.
- Fuse Replacement: If a fuse blows, replace it only with a fuse of the exact same amperage rating as specified by the vehicle manufacturer. Using a fuse with a higher rating can lead to severe electrical damage or fire.
- Cleaning: Keep the area around the fuse box clean and free of dirt, dust, and moisture. Use a dry, soft cloth for cleaning. Avoid using liquids directly on electrical components.
Troubleshooting
If you experience electrical issues after installing or while using the fuse box assembly, consider the following troubleshooting steps:
- No Power to a Component: Check the specific fuse associated with the non-functioning component. If the fuse is blown (broken filament), replace it. If the new fuse blows immediately, there may be a short circuit in the wiring or the component itself, requiring professional diagnosis.
- Intermittent Electrical Issues: Inspect all connections to the fuse box for looseness or corrosion. Ensure all relays are seated firmly.
- Burning Smell or Smoke: Immediately disconnect the vehicle's battery. This indicates a serious electrical fault that requires immediate professional attention. Do not attempt to operate the vehicle until the issue is resolved.
- Incorrect Part: Double-check that the installed fuse box assembly matches the correct part number for your vehicle. An incompatible part may cause various electrical malfunctions.
For complex electrical problems or if you are unsure about any step, it is highly recommended to consult a certified automotive technician.
Warranty and Support
For information regarding product warranty, returns, or technical support, please refer to the purchase documentation or contact the seller directly. Keep your proof of purchase for any warranty claims.
Manufacturer: Sprwinautummer
For further assistance, you may visit the official Sprwinautummer store on Amazon: Sprwinautummer Store
Ask a question about this manual
Ask about setup, troubleshooting, compatibility, parts, safety, or missing instructions. Manuals+ will review the question and use this page’s manual context to help answer it.