Introduction
Thank you for choosing the AZDOME M01 Pro Dashcam. This manual provides detailed instructions to help you install, operate, and maintain your device effectively. Please read this manual thoroughly before using the product to ensure proper functionality and safety.
Product Overview
The AZDOME M01 Pro is a high-definition dashcam designed to record your driving journey. It features a compact design, a 3-inch IPS screen, a 150-degree wide-angle lens, G-sensor, loop recording, and 24-hour parking monitoring capabilities. This bundle includes a 128GB Micro SD card for extended storage.

Image: The AZDOME M01 Pro dashcam, showing the main unit with its suction cup mount, a separate rear camera, and a Micro SD card.
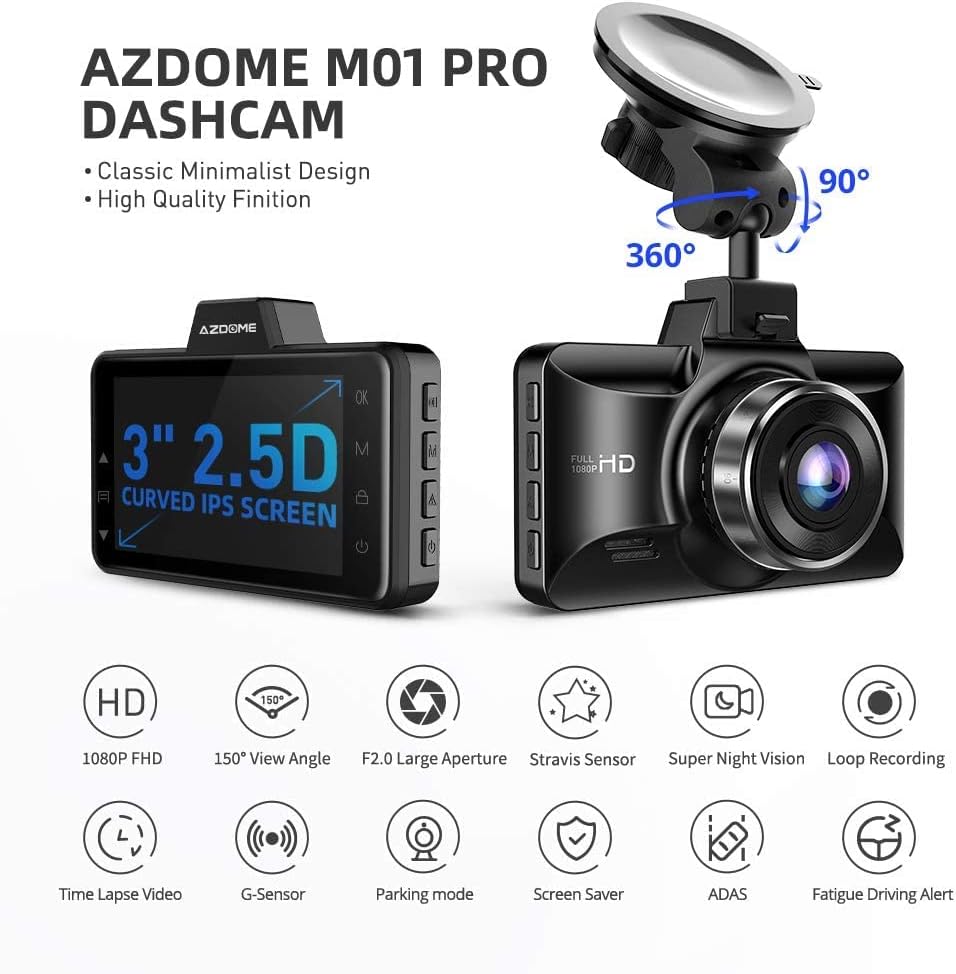
Image: Diagram highlighting key features of the AZDOME M01 Pro Dashcam, including 1080p FHD, 150° View Angle, F2.0 Large Aperture, Stravision Sensor, Super Night Vision, Loop Recording, Time Lapse Video, G-Sensor, Parking Mode, Screen Saver, ADAS, and Fatigue Driving Alert.
Setup and Installation
1. Inserting the Memory Card
The AZDOME M01 Pro supports Micro SD cards up to 128GB. A 128GB card is included with this bundle. Ensure the card is inserted correctly into the designated slot until it clicks into place. For optimal performance, it is recommended to format the memory card within the dashcam before first use and periodically thereafter.

Image: Features of the AZDOME 128GB Micro SD Card, emphasizing wide compatibility, ultra-fast speeds (up to 100MB/s read, 70MB/s write), and lasting reliability (shockproof, IPX6 waterproof, magnetic-proof, temperature-proof).
2. Mounting the Dashcam
- Clean the windshield area where you intend to mount the dashcam.
- Attach the suction cup mount to the dashcam.
- Press the suction cup firmly against the windshield and flip the lever to secure it.
- Adjust the camera angle to ensure a clear view of the road ahead, avoiding obstruction of your driving view.
3. Installing the Rear Camera
The rear camera is designed for convenient installation on the rear window glass. Connect the rear camera cable to the main dashcam unit. Route the cable neatly along the vehicle's interior trim to avoid interference with driving. Secure the rear camera to the rear window using its adhesive or mounting bracket, ensuring a clear view of the rear.
4. Power Connection
Connect the dashcam to your vehicle's power outlet (cigarette lighter socket) using the provided car charger. Route the power cable discreetly to avoid obstructing your view or interfering with vehicle controls. The dashcam will typically power on and begin recording automatically when the vehicle starts.
Operating Instructions
1. Basic Recording
Once powered on, the dashcam will automatically start recording. The recording indicator will typically flash on the screen. Videos are saved in segments to the Micro SD card.

Image: Examples of video footage captured by the dashcam, demonstrating clear recording quality during both daytime and nighttime driving conditions.
2. Loop Recording
The dashcam utilizes loop recording, which continuously records video. When the memory card reaches its capacity, the oldest unlocked footage will be overwritten by new recordings. This ensures continuous recording without manual intervention.
3. G-Sensor Functionality
The built-in G-sensor detects sudden impacts or collisions. When an event is detected, the current video segment is automatically locked and protected from being overwritten by loop recording. This preserves critical footage of accidents.
4. 24-Hour Parking Monitoring
For 24-hour parking monitoring, the dashcam requires a continuous external power source, typically provided by a hardwire kit (not included). If an impact is detected by the G-sensor while parked, the camera will automatically turn on, record a 1-minute video, lock it, and save it. This feature helps monitor your vehicle when it is unattended.
5. Night Vision
The AZDOME M01 Pro is equipped with a special feature for enhanced night vision, allowing for clearer video capture in low-light conditions.
Maintenance
1. Memory Card Care
- Formatting: Regularly format the Micro SD card (at least once a month) within the dashcam's settings to maintain optimal performance and prevent data corruption.
- Replacement: Memory cards have a limited lifespan due to continuous read/write cycles. If you experience recording errors or data loss, consider replacing the Micro SD card.
- Resistance: The included AZDOME 128GB Micro SD card is designed to be temperature resistant (-10°C to 80°C), water resistant (IPX6), shock resistant, and magnetic resistant, enhancing its durability.

Image: Diagram illustrating the high resistance features of the AZDOME 128GB Micro SD Card, including temperature resistance, water resistance (IPX6), shock resistance, and magnetic resistance.
2. Cleaning the Dashcam
Use a soft, dry cloth to clean the dashcam's lens and screen. Avoid using abrasive cleaners or solvents, which can damage the device. Ensure the suction cup mount is clean for secure attachment.
Troubleshooting
- Dashcam not powering on:
- Check the power connection to ensure it is securely plugged into both the dashcam and the vehicle's power outlet.
- Verify that the vehicle's power outlet is functioning.
- Recording not starting:
- Ensure a Micro SD card is inserted correctly and is not full.
- Format the Micro SD card within the dashcam's settings.
- Check if the loop recording function is enabled.
- Parking monitor not working:
- Confirm that the dashcam is connected to a continuous external power source (hardwire kit required).
- Adjust the G-sensor sensitivity settings.
- Video quality issues:
- Clean the camera lens.
- Ensure the protective film has been removed from the lens.
- Check the video resolution settings.
Specifications
| Brand | AZDOME |
| Model Name | M01 Pro |
| Connectivity Technology | USB, Wireless |
| Special Feature | Night Vision, G-Sensor, Loop Recording, Parking Monitor |
| Video Capture Resolution | 1080p |
| Included Components | Dashcam, Rear Camera, Suction Mount, Car Charger, 128GB Memory Card |
| Mounting Type | Suction Mount |
| Field Of View | 150 Degrees (Front Camera) |
| Color | Black |
| Memory Card Support | Up to 128GB (128GB included) |
| Memory Card Read Speed | Up to 100MB/s |
| Memory Card Write Speed | Up to 70MB/s |
Warranty and Support
For warranty information and technical support, please refer to the official AZDOME website or contact their customer service directly. You can also visit the AZDOME Store on Amazon for more product details and support resources.


