
1. Product Overview
This document provides essential information for the safe and effective use of your RDSJK 5800mAh Li-ion replacement battery. This high-capacity battery is designed to provide extended runtime for compatible iRobot Roomba robot vacuums, ensuring reliable performance.
2. Specifications

This image details the key specifications of the battery, including its model number VB-063237, Li-ion type, 14.4V voltage, and 5800mAh/83.52Wh capacity.
| Battery Type | Li-ion |
| Voltage | 14.4V |
| Capacity | 5800mAh / 83.52Wh |
| Color | Green |
| Model Number | 1800LI (VB-063237) |
| Replace Part Numbers | VB-063237, 1800LI, 4INR19/65, 4376392, 4INR19/65-2 |
| Dimensions | 6.5 x 3.86 x 2.4 inches |
| Item Weight | 1.41 pounds |
| Manufacturer | RDSJK |
| Battery Cell Composition | Lithium Ion |
| Recommended Uses | iRobot |
| Recharge Cycles | Up to 500 |
3. Compatibility

This image illustrates the battery's compatibility with iRobot Roomba R3 500, 600, 700, and 800 series models, shown alongside a robot vacuum and a pet in a home setting.
This replacement battery is compatible with iRobot Roomba R3 500, 600, 700, 800, and 900 Series robot vacuums. A detailed list of compatible models includes:
- Roomba 500 Series: 500, 510, 530, 531, 532, 535, 536, 540, 550, 552, 560, 570, 580, 595
- Roomba 600 Series: 600, 614, 615, 620, 640, 652, 660, 665, 670, 671, 675, 677, 680, 681, 685, 690, 691, 695, 696, R3 80501 4419696
- Roomba 700 Series: 700, 760, 761, 770, 780, 790
- Roomba 800 Series: 800, 801, 805, 850, 860, 870, 871, 877, 880, 890, 891, 895, 896
- Roomba 900 Series: 900, 940, 960, 965, 966, 980, 985
4. Setup and Installation

This image displays the green 5800mAh Li-ion replacement battery for iRobot Roomba, alongside a small screwdriver, indicating tools for installation.
Follow these general steps to replace the battery in your iRobot Roomba. Specific steps may vary slightly by Roomba model; refer to your Roomba's original manual for precise instructions.
- Power Off: Ensure your Roomba is turned off and disconnected from its charging base or power supply.
- Flip Over: Place the Roomba upside down on a clean, flat surface.
- Remove Screws: Locate the battery compartment cover, typically secured by screws. Use a screwdriver (often a Phillips head, a small screwdriver may be included with the battery) to remove these screws.
- Remove Cover: Carefully lift off the battery compartment cover.
- Remove Old Battery: Gently pull out the old battery. Note its orientation for correct installation of the new battery.
- Insert New Battery: Insert the new RDSJK battery into the compartment, ensuring it is correctly oriented and securely seated.
- Replace Cover: Place the battery compartment cover back on and secure it with the screws. Do not overtighten.
- Charge: Place your Roomba back on its charging base to initiate the first charge cycle.

This image highlights specific design elements of the battery, including its precise installation interface and construction from premium PC+ABS material, aiding in proper installation.
5. Operating Instructions
For optimal performance and longevity of your new battery, follow these initial charging and usage guidelines:
- First Use Cycle: Upon initial installation, discharge the battery to approximately 5% of its capacity (do not allow it to fully drain to 0%).
- Full Charge: After discharging, charge the battery fully to 95%.
- Repeat Cycle: Repeat this discharge-to-5% and charge-to-95% cycle 3-4 times. This process helps to calibrate the battery and optimize its performance.
The actual operation time of your Roomba will depend on factors such as the cleaning mode, floor type, and the amount of power required by the device during operation.
6. Maintenance

This graph demonstrates the battery's low self-discharge rate, indicating that it retains approximately 80% of its capacity after one year of non-use, contributing to longer shelf life.
Proper maintenance can extend the life of your battery:
- Regular Charging: Keep the Roomba on its charging base when not in use to ensure the battery remains charged and ready.
- Avoid Extreme Temperatures: Do not expose the battery or Roomba to extreme heat or cold, as this can degrade battery performance and lifespan.
- Storage: If storing the Roomba for an extended period, ensure the battery is partially charged (around 50%) and store it in a cool, dry place. Recharge every few months to prevent deep discharge.
- Cleaning: Periodically clean the charging contacts on both the Roomba and the charging base to ensure a good connection.
7. Safety Information
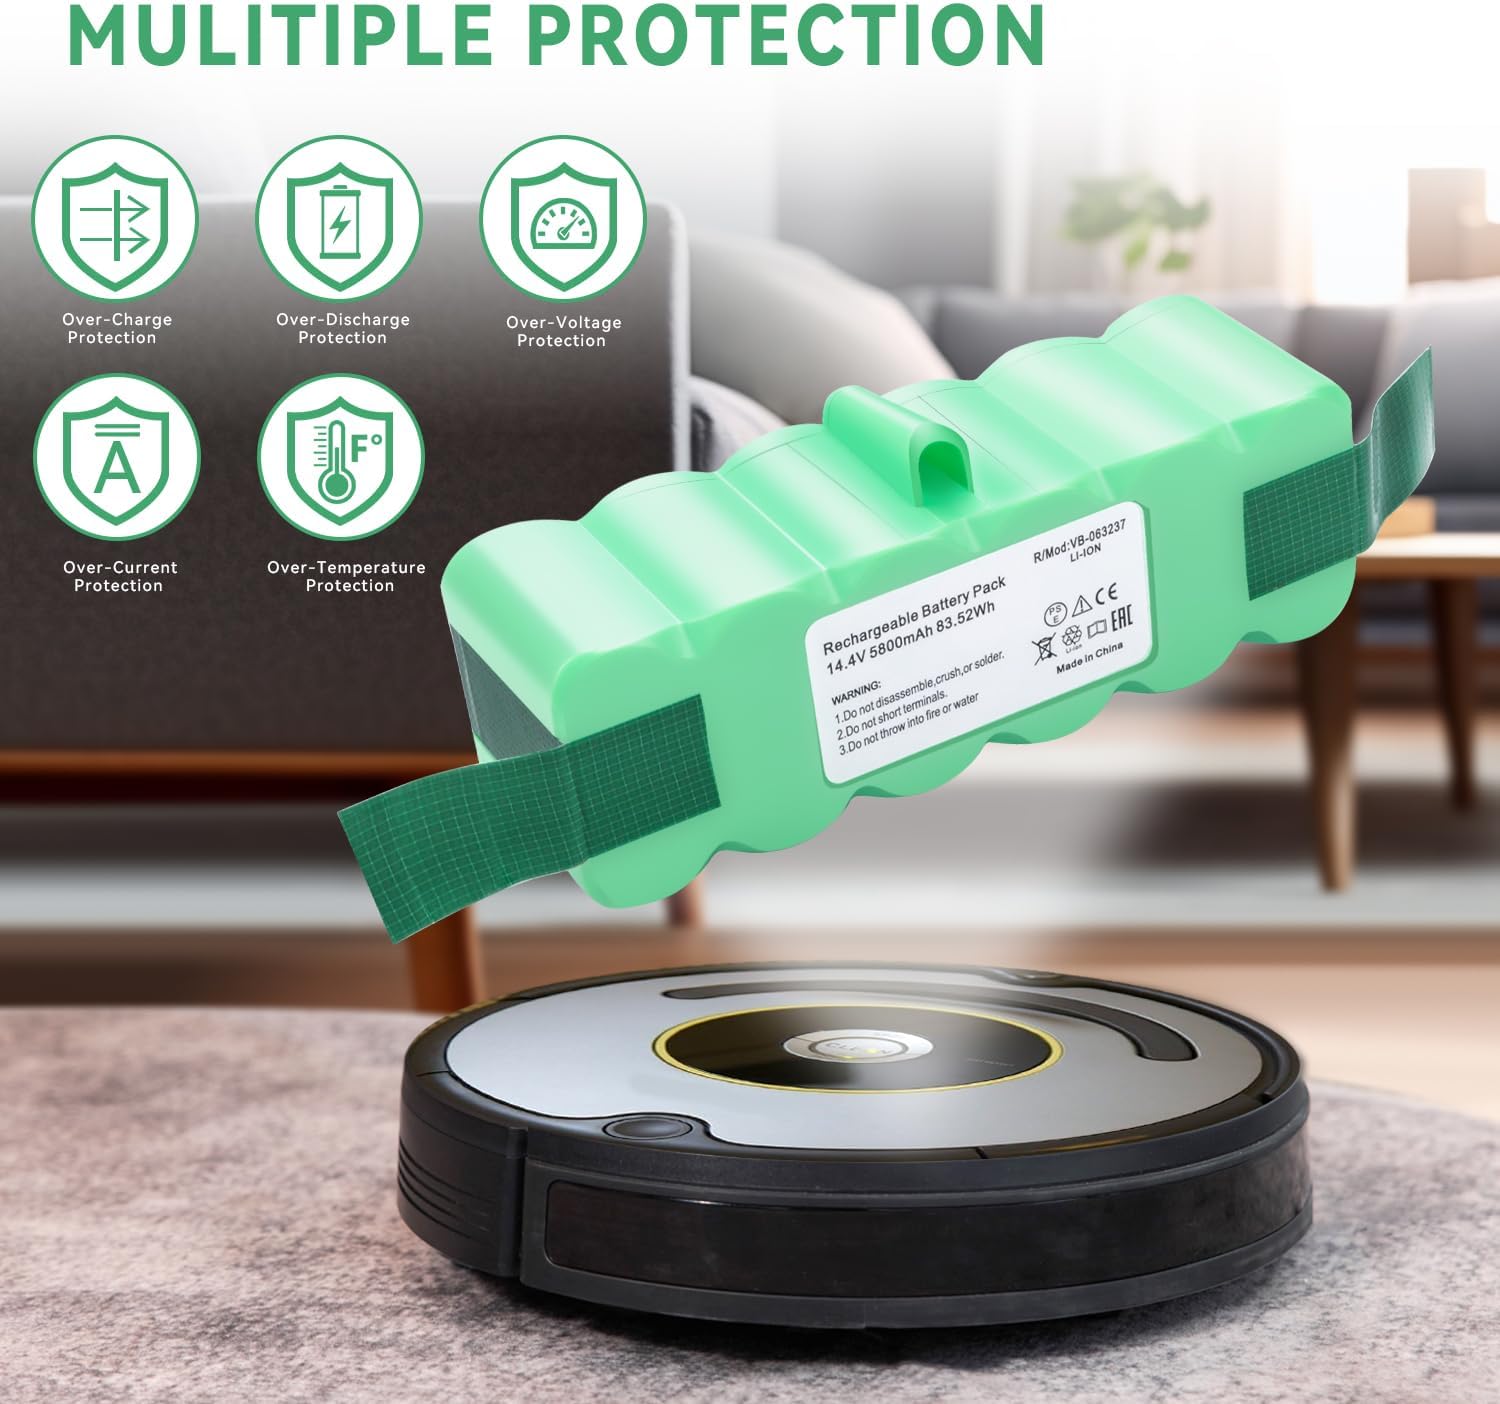
This image emphasizes the battery's integrated safety features, including protection against over-charge, over-discharge, over-voltage, over-current, and over-temperature, ensuring safe operation.
Observe the following warnings and safety precautions to prevent injury or damage:
- Do not disassemble, crush, or solder the battery.
- Do not short terminals of the battery.
- Do not throw into fire or water.
- Keep the battery out of reach of children and pets.
- If the battery shows signs of damage, swelling, or leakage, discontinue use immediately and dispose of it properly.
- Use only with compatible iRobot Roomba models as specified.
8. Troubleshooting
If you encounter issues with your new battery, consider the following common troubleshooting steps:
- Roomba Not Charging: Ensure the battery is correctly installed and the charging contacts on both the Roomba and the charging base are clean and free of debris. Try resetting the Roomba (refer to your Roomba's manual for specific reset procedures).
- Reduced Runtime: After initial installation, ensure you have completed the recommended 3-4 charge/discharge cycles to calibrate the battery. If runtime remains significantly low, verify that the Roomba's brushes and filters are clean, as excessive resistance can drain the battery faster.
- Battery Not Recognized: Double-check that the battery is fully seated in its compartment. If the issue persists, remove and reinsert the battery.
If problems persist after attempting these steps, contact customer support for further assistance.
9. Warranty and Support
This product is manufactured by RDSJK. For specific warranty information or technical support, please refer to the product packaging or contact the manufacturer directly through their official channels. Keep your purchase receipt as proof of purchase.