Ingco CIDLI20608-8
INGCO Brushless Impact Drill Set CIDLI20608-8 User Manual
Model: CIDLI20608-8
1. Introduction
Thank you for choosing the INGCO Brushless Impact Drill Set CIDLI20608-8. This manual provides essential information for the safe operation, setup, maintenance, and troubleshooting of your new power tool. Please read this manual thoroughly before use and retain it for future reference.
General Safety Warnings
Always observe basic safety precautions when using power tools to reduce the risk of fire, electric shock, and personal injury. Keep your work area clean and well-lit. Do not operate power tools in explosive atmospheres, such as in the presence of flammable liquids, gases, or dust. Keep children and bystanders away while operating a power tool.
- Wear appropriate personal protective equipment, including eye protection, hearing protection, and gloves.
- Ensure the tool is switched off before making any adjustments, changing accessories, or storing it.
- Do not force the power tool; use the correct tool for your application.
- Maintain power tools with care. Check for misalignment or binding of moving parts, breakage of parts, and any other condition that may affect the power tool’s operation.
- Keep handles and gripping surfaces dry, clean, and free from oil and grease.
2. Package Contents
Your INGCO Brushless Impact Drill Set CIDLI20608-8 includes the following items:
- 1 x Brushless Impact Drill
- 2 x 20V 2.0Ah Lithium-Ion Batteries
- 1 x Fast Charger
- 1 x Canvas Bag

Image 2.1: Complete INGCO Brushless Impact Drill Set including the drill, two batteries, a charger, and a canvas carrying bag.
3. Product Overview
Familiarize yourself with the components of your INGCO Brushless Impact Drill:

Image 3.1: Diagram illustrating the key components of the INGCO Brushless Impact Drill, including the chuck, torque ring, speed selector, trigger, LED light, and battery interface.
- Chuck: Holds drill bits and screwdriver bits securely.
- Torque Adjustment Ring: Selects the desired torque setting for driving screws or the drill mode for drilling.
- Speed Selector Switch: Changes between low-speed (1) and high-speed (2) gears.
- Forward/Reverse Switch: Controls the direction of rotation and locks the trigger.
- Trigger Switch: Activates the drill and controls variable speed.
- LED Work Light: Illuminates the work area when the trigger is pressed.
- Battery Pack: Provides power to the drill.
- Battery Release Buttons: Used to detach the battery from the drill.
- Ventilation Holes: Ensure proper cooling of the motor.
- Charge Display: Indicates the remaining battery charge level.
4. Specifications
Technical specifications for the INGCO Brushless Impact Drill Set CIDLI20608-8:
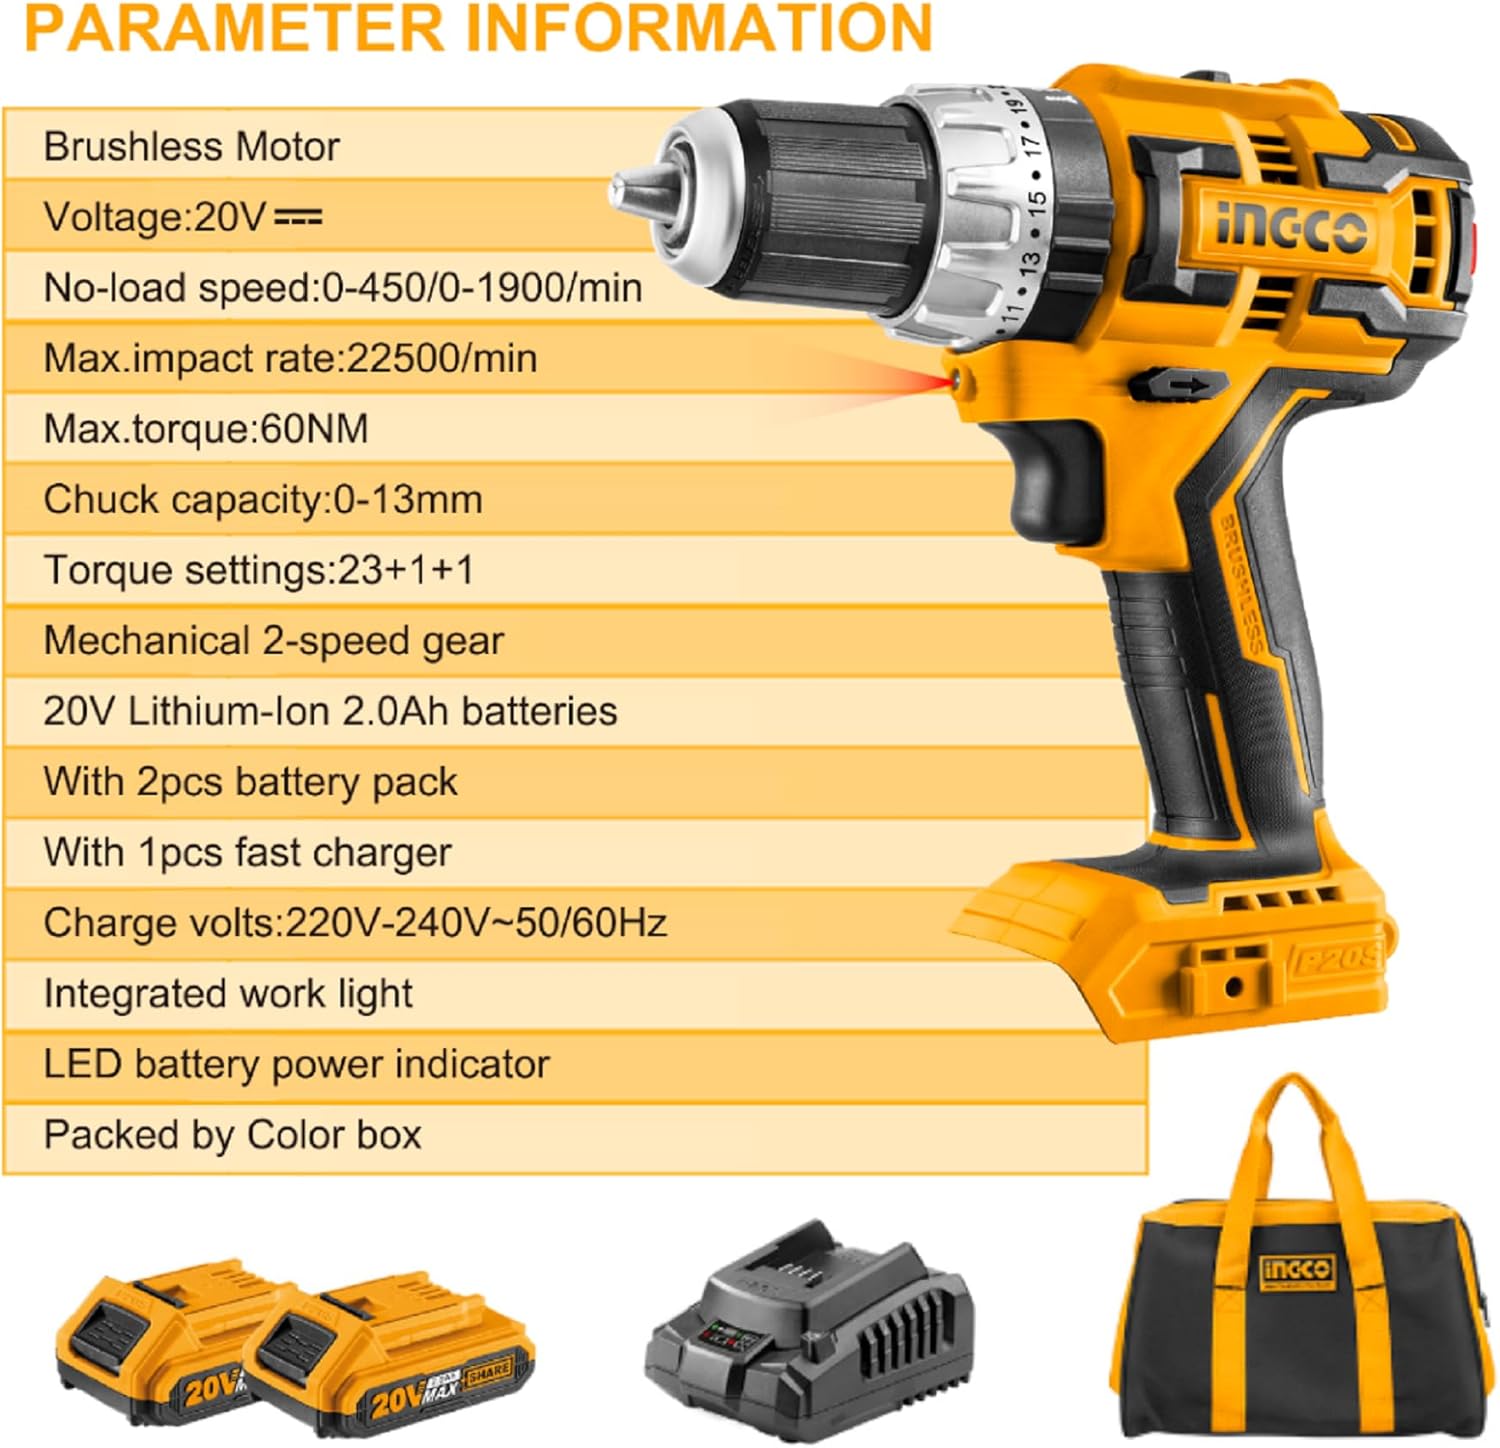
Image 4.1: Visual representation of the drill's key technical parameters and included components.
| Feature | Specification |
|---|---|
| Motor Type | Brushless |
| Voltage | 20V |
| No-load Speed | 0-450 / 0-1900 RPM |
| Max. Impact Rate | 22500/min |
| Max. Torque | 60 N.m (531 in-lbs) |
| Chuck Capacity | 0-13mm (1/2 inch) |
| Torque Settings | 23+1+1 |
| Gear System | Mechanical 2-speed |
| Battery Type | 20V Lithium-Ion 2.0Ah |
| Charger Input | 220V-240V~50/60Hz |
| Item Weight | 209 g (tool only, approximate) |
| Product Dimensions | 10 x 20 x 37 cm |
5. Setup
5.1 Charging the Battery
Before first use, fully charge the battery pack. Connect the fast charger to a suitable power outlet (220V-240V~50/60Hz). Insert the battery pack into the charger. The charger indicator light will show the charging status. Once fully charged, remove the battery from the charger.
5.2 Installing and Removing the Battery
- To Install: Align the battery pack with the base of the drill handle. Slide the battery into place until it clicks securely.
- To Remove: Press the battery release buttons on both sides of the battery pack and slide the battery out of the drill handle.
5.3 Installing and Removing Drill Bits
- To Install: Rotate the chuck counter-clockwise until the jaws are open wide enough to insert the drill bit. Insert the bit fully and then rotate the chuck clockwise to tighten it securely. Ensure the bit is centered and firmly gripped.
- To Remove: Rotate the chuck counter-clockwise to loosen the jaws and remove the drill bit.
6. Operating Instructions
6.1 Powering On/Off and Variable Speed
The drill is activated by pressing the trigger switch. The speed of the drill is variable and controlled by the amount of pressure applied to the trigger. Pressing the trigger lightly results in lower speed, while pressing it fully results in maximum speed.
6.2 Forward/Reverse Rotation
The forward/reverse switch is located above the trigger. Push the switch to the left for forward rotation (for drilling and driving screws). Push it to the right for reverse rotation (for removing screws). When the switch is in the center position, the trigger is locked, preventing accidental activation.
6.3 Torque Settings and Modes
The torque adjustment ring allows you to select the appropriate torque for your task. Rotate the ring to align the desired setting with the arrow on the drill body.
- Torque Settings (1-23): Use these settings for driving screws. Lower numbers are for smaller screws and softer materials, while higher numbers are for larger screws and harder materials. The drill will stop rotating once the set torque is reached, preventing overtightening or damage to the screw head.
- Drill Mode (Drill Bit Symbol): Use this mode for drilling into wood, metal, or plastic. This mode provides maximum torque without the clutch engaging.
- Impact Drill Mode (Hammer Symbol): Use this mode for drilling into masonry or concrete. This mode combines rotation with a hammering action.
6.4 Speed Selection (Gearbox)
The 2-speed selector switch is located on top of the drill. Use:
- Speed 1 (Low Speed): For high-torque applications like driving large screws or drilling large holes.
- Speed 2 (High Speed): For faster drilling of smaller holes or when less torque is required.
6.5 LED Work Light
The integrated LED work light automatically illuminates the work area when the trigger is pressed, improving visibility in dimly lit conditions.

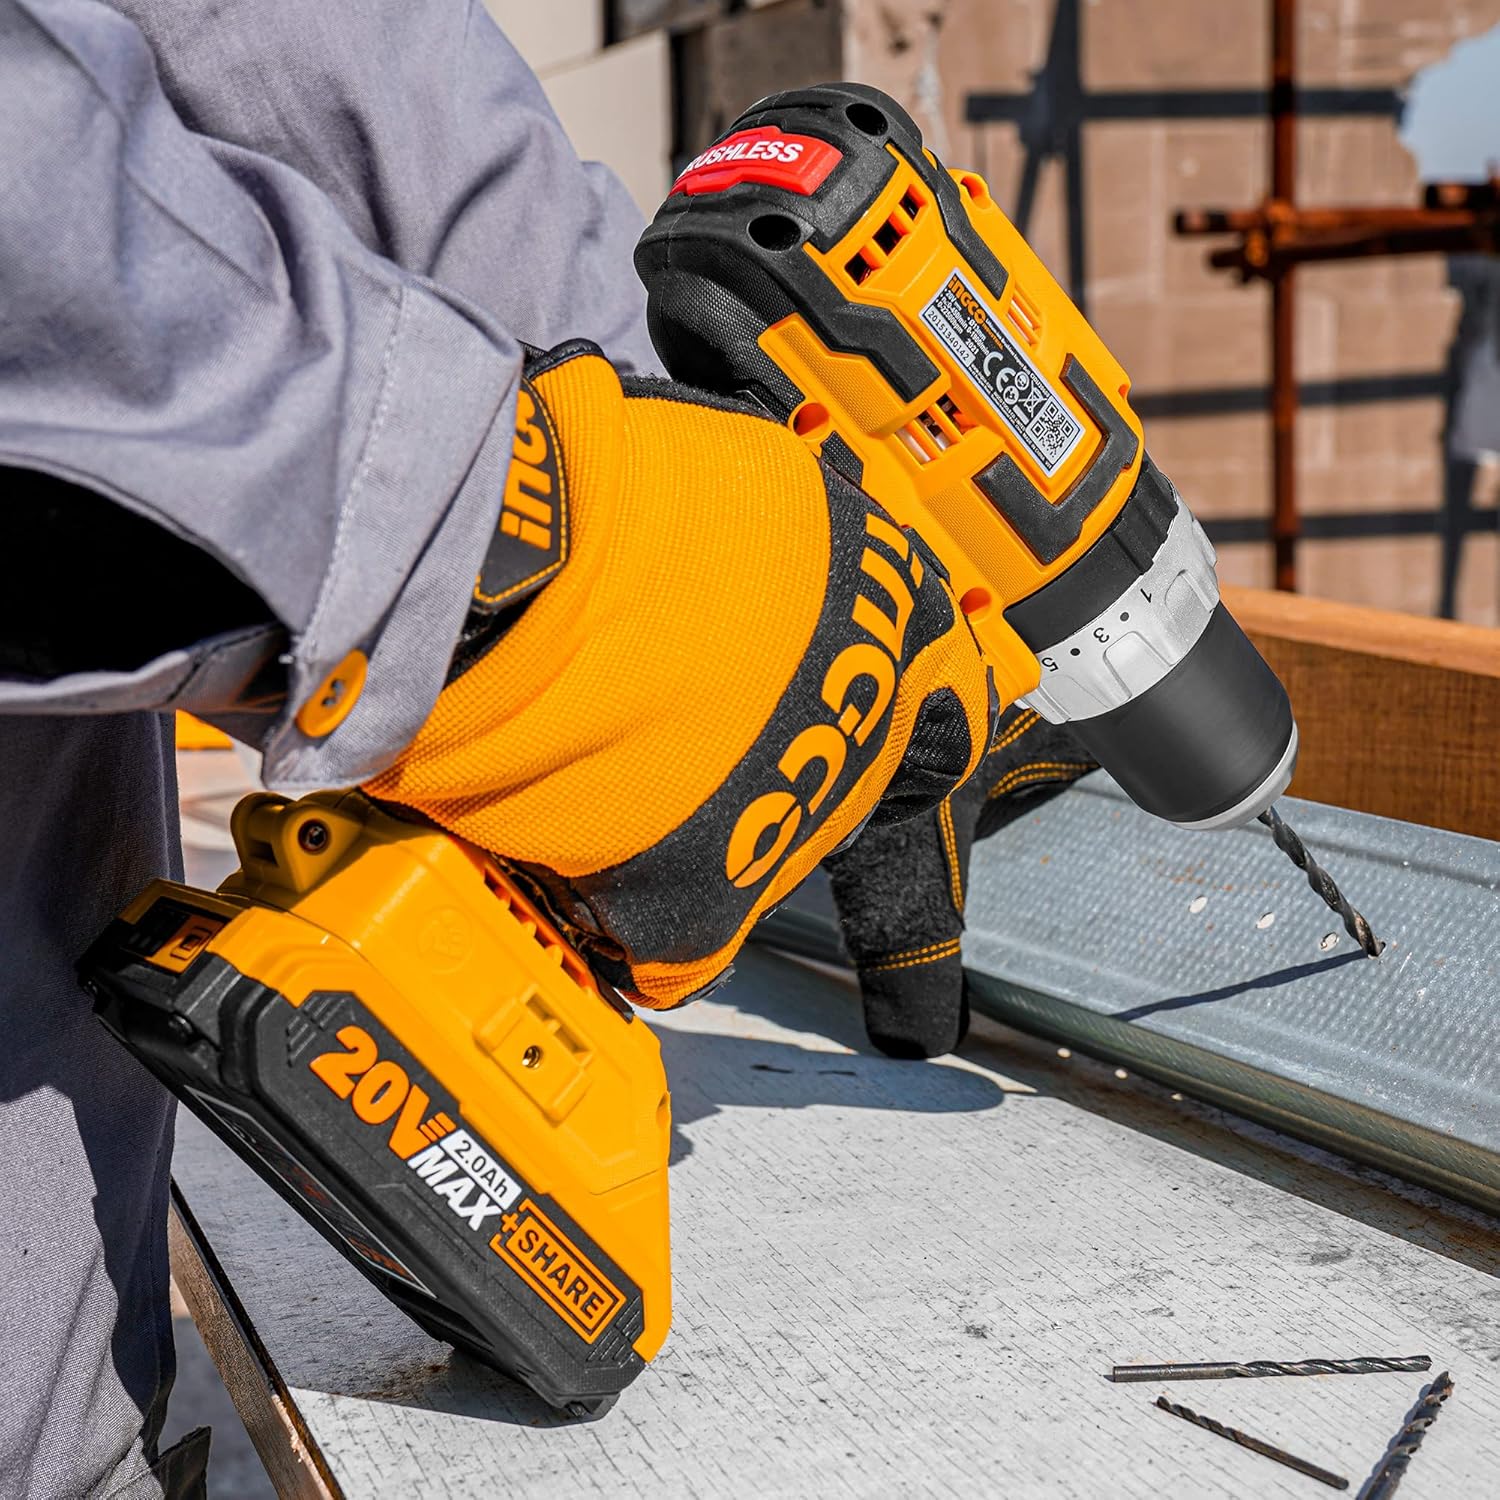
Image 6.1: The INGCO drill being used for drilling into wood (left) and metal (right), demonstrating its versatility.

Image 6.2: The INGCO drill in use for drilling into a concrete surface, highlighting its impact drilling capability.
7. Maintenance
7.1 Cleaning
Regularly clean the ventilation slots of the drill to prevent overheating. Use a soft brush or compressed air to remove dust and debris. Do not use water or chemical cleaning agents. Wipe the tool housing with a soft, damp cloth.
7.2 Battery Care and Storage
- Store batteries in a cool, dry place, away from direct sunlight and extreme temperatures.
- Do not store batteries in a discharged state for extended periods. Charge them periodically if not in use.
- Protect batteries from impact and moisture.
7.3 General Inspection
Periodically inspect the power tool for any signs of damage, loose screws, or worn parts. If any damage is found, do not use the tool and contact customer support for repair.
8. Troubleshooting
If you encounter issues with your INGCO Brushless Impact Drill, refer to the following common problems and solutions:
| Problem | Possible Cause | Solution |
|---|---|---|
| Drill does not start | Battery not installed correctly Battery discharged Forward/Reverse switch in center (locked) position | Reinstall battery securely Charge battery Move switch to forward or reverse position |
| Reduced power or speed | Battery low on charge Incorrect speed setting for task Overload protection activated | Recharge battery Switch to a higher speed setting (Speed 2) or lower torque Reduce pressure, allow tool to cool |
| Battery not charging | Charger not plugged in Faulty battery or charger Battery too hot/cold | Check power connection Contact customer support Allow battery to reach room temperature |
| Chuck not holding bit | Bit not inserted fully Chuck not tightened sufficiently | Ensure bit is fully seated Tighten chuck firmly by hand |
If the problem persists after attempting these solutions, please contact customer support.
9. Warranty and Support
For warranty information, please refer to the warranty card included with your product or contact your point of purchase. For technical support, spare parts, or service, please contact INGCO customer service through their official website or authorized service centers. Always provide the model number (CIDLI20608-8) when seeking support.
Ask a question about this manual
Ask about setup, troubleshooting, compatibility, parts, safety, or missing instructions. Manuals+ will review the question and use this page’s manual context to help answer it.