1. Introduction
This manual provides detailed instructions for the safe and efficient operation of your CREWORKS 8582D 2-in-1 Soldering Station. This unit combines a hot air gun and a soldering iron, designed for various electronic repair tasks, including soldering and desoldering of surface-mount components (SMD).
Please read this manual thoroughly before initial use and retain it for future reference.

Image 1.1: The CREWORKS 8582D 2-in-1 Soldering Station, showcasing both the soldering iron and hot air gun components.
2. Safety Instructions
Always observe the following safety precautions to prevent injury or damage to the equipment:
- Electrical Safety: Ensure the power supply matches the voltage requirements (220V). Do not operate with wet hands or in damp environments. Disconnect power before cleaning or maintenance.
- Heat Hazard: The soldering iron tip and hot air gun nozzle reach very high temperatures. Avoid direct contact with skin or flammable materials. Use heat-resistant surfaces and wear appropriate personal protective equipment (PPE), such as heat-resistant gloves and safety glasses.
- Fumes: Soldering produces fumes that can be harmful. Always work in a well-ventilated area or use a fume extractor.
- Proper Use: Use the station only for its intended purpose. Do not modify the unit. Keep children and unauthorized personnel away from the workstation.
- Cool Down: Allow the tools to cool completely before storing. Place the hot air gun in its holder and the soldering iron in its stand when not in use.
3. Package Contents
Verify that all items listed below are included in your package:
- 1 x Soldering Station Main Unit
- 1 x Soldering Iron
- 1 x Hot Air Gun
- 1 x Soldering Iron Stand
- 5 x Soldering Tips
- 4 x Hot Air Nozzles
- 1 x Tweezers
- 1 x Cleaning Sponge
- 1 x Power Cable (EU standard plug)
- 1 x User Manual (English/German)
4. Product Features
The CREWORKS 8582D Soldering Station offers advanced features for precision work:
- Rapid Heating and PID Temperature Control: The 750W hot air gun heats up to 480°C in 5 seconds, and the 70W soldering iron reaches 200°C in 7 seconds, maintaining stable temperatures with PID technology.
- High Airflow: The hot air gun provides up to 120 L/min airflow for efficient desoldering.
- Automatic Sleep Function: The hot air gun automatically reduces temperature when placed in its holder for 10 minutes, enhancing safety and extending component life. It reheats quickly upon removal.
- Dual LED Digital Display: Separate LED screens show real-time temperatures for both the soldering iron and hot air gun, allowing for precise monitoring.
- Independent Controls: Dedicated interfaces for the soldering iron and hot air gun allow for simultaneous or independent operation, improving workflow efficiency.
- Versatile Application: Suitable for soldering and desoldering SOIC, CHIP, QFP, PLCC, BGA, and other temperature-sensitive components, making it ideal for mobile phone, laptop, and PCB repairs.

Image 4.1: The dual LED display provides clear, real-time temperature readings for both the soldering iron and hot air gun.
5. Setup
- Unpack: Carefully remove all components from the packaging.
- Position: Place the main soldering station unit on a stable, heat-resistant surface in a well-ventilated area.
- Connect Soldering Iron: Plug the soldering iron connector into the designated port on the front panel (labeled 'SOLDERING'). Place the soldering iron in its stand.
- Connect Hot Air Gun: Plug the hot air gun connector into the designated port on the front panel (labeled 'HOTAIR'). Place the hot air gun securely in its side holder.
- Power Connection: Connect the power cable to the station and then to a standard 220V AC power outlet.

Image 5.1: Overview of the CREWORKS 8582D station with all accessories connected and ready for use.

Image 5.2: Detailed diagram of the control panel, showing connections for the soldering iron and hot air gun, power switches, and temperature/airflow adjustment knobs.
6. Operating Instructions
6.1 General Operation
- Power On: Flip the main power switch on the front panel to the 'ON' position. The LED displays will illuminate.
- Adjust Temperature: Use the 'CAL' buttons (up/down arrows) next to each LED display to set the desired temperature for the soldering iron and hot air gun.
- Adjust Airflow (Hot Air Gun): Use the 'AIR' knob to adjust the airflow rate for the hot air gun.
- Power Off: After use, turn off the individual switches for the soldering iron and hot air gun, then flip the main power switch to 'OFF'. Allow tools to cool before storing.
6.2 Soldering Iron Operation
- Select Tip: Choose an appropriate soldering tip for your task. Ensure it is securely fastened.
- Set Temperature: Turn on the soldering iron switch and set the desired temperature using the 'CAL' buttons. The temperature range is 200-480°C.
- Tinning the Tip: Once the iron reaches temperature, clean the tip on the wet sponge and apply a small amount of solder to 'tin' it. This helps with heat transfer and prevents oxidation.
- Soldering: Apply the heated tip to the joint to be soldered, then feed solder onto the joint, not directly onto the tip. Allow the solder to flow evenly.
- Cleaning: Regularly clean the soldering tip on the wet sponge to remove excess solder and flux residue.
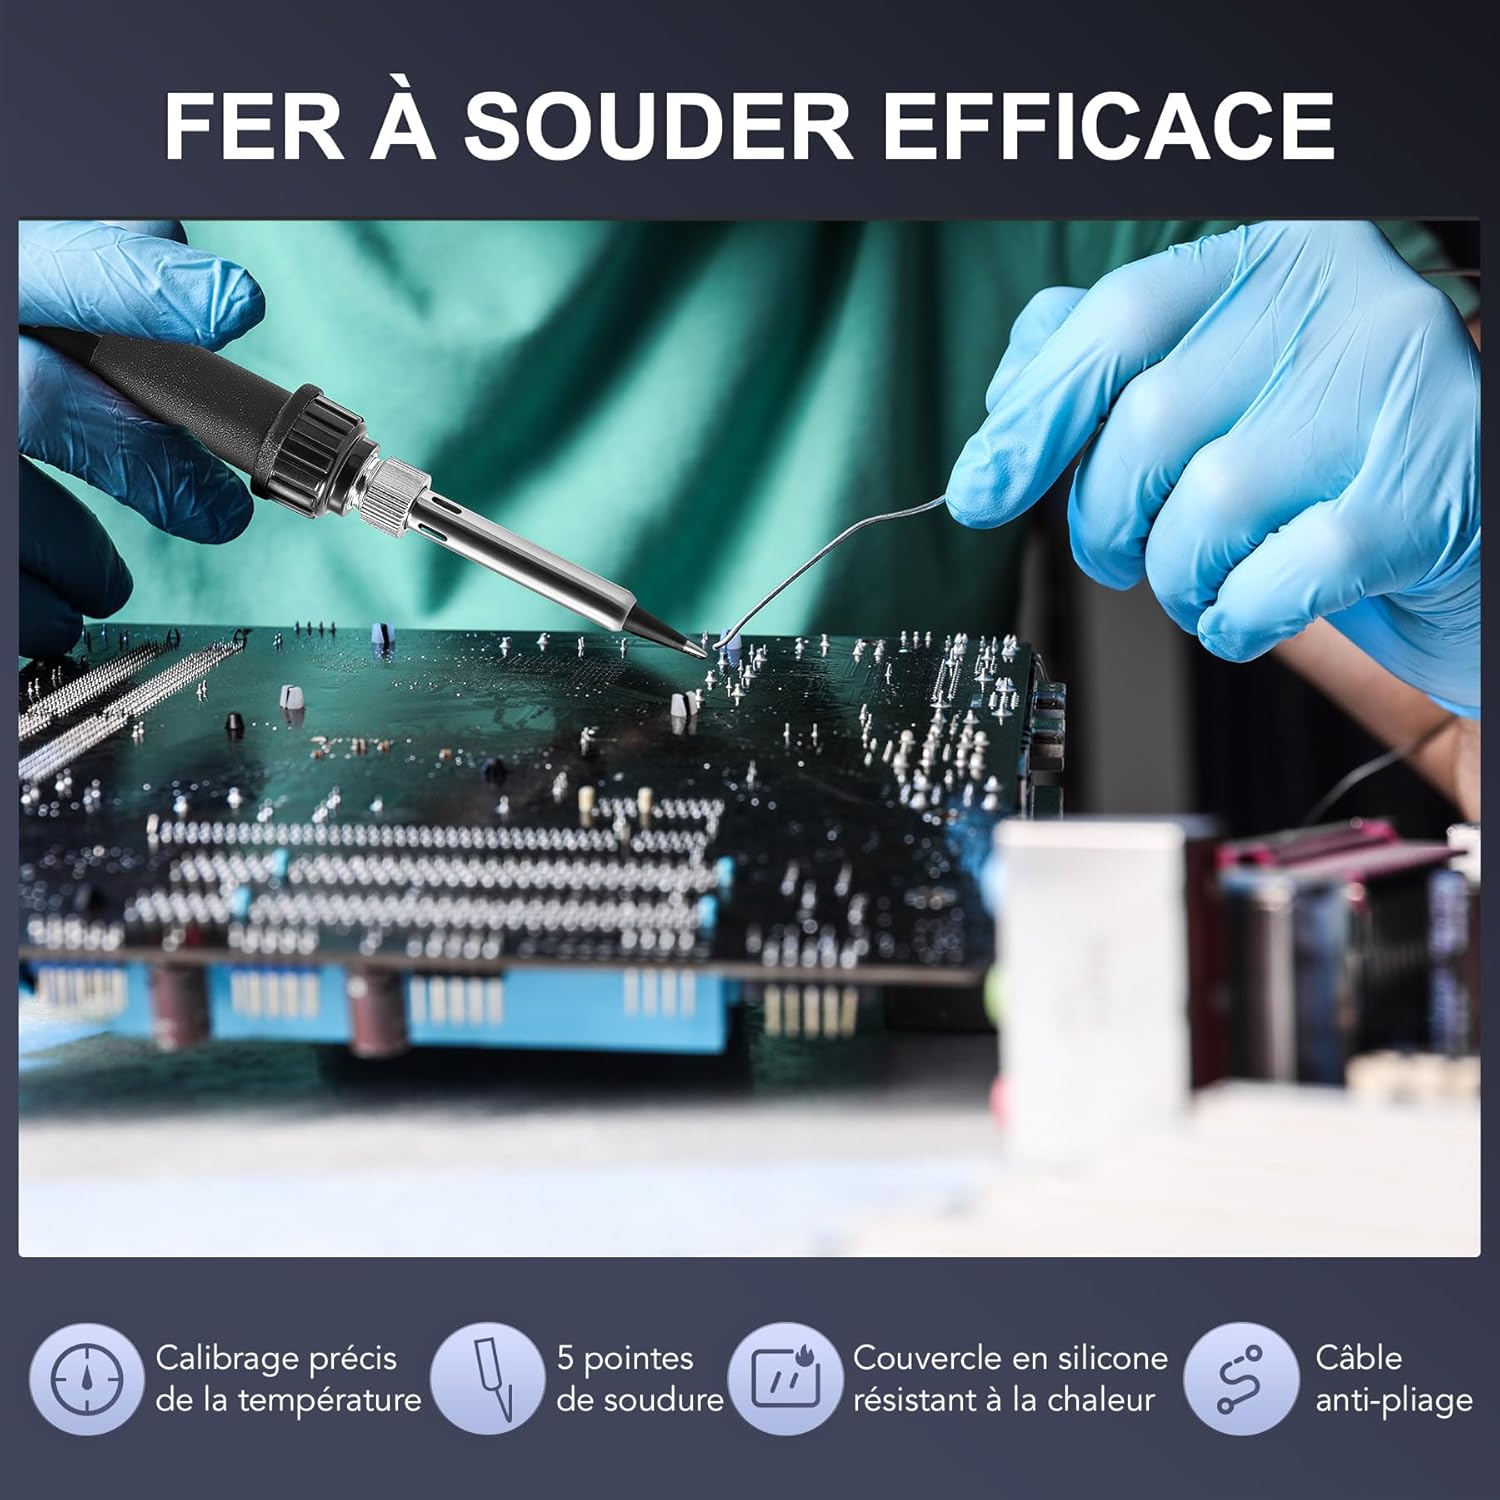
Image 6.1: The soldering iron in use, demonstrating precision work on a circuit board.
6.3 Hot Air Gun Operation
- Select Nozzle: Choose a hot air nozzle suitable for the component size and type. Attach it securely to the hot air gun.
- Set Temperature and Airflow: Turn on the hot air gun switch. Set the desired temperature (100-480°C) and airflow rate using the 'CAL' buttons and 'AIR' knob.
- Desoldering: Hold the hot air gun a few centimeters above the component. Move it in a circular motion to heat the component and surrounding pads evenly. Once the solder melts, carefully remove the component using tweezers.
- Automatic Cooling: When finished, place the hot air gun back into its holder. The unit will automatically enter a cooling cycle, reducing the temperature before entering sleep mode. Do not switch off the main power during the cooling cycle.

Image 6.2: The hot air gun with a selection of nozzles, allowing for versatile desoldering and heat applications.
Video 6.1: An official product video demonstrating the features and operation of the CREWORKS 8582D 2-in-1 Soldering Station, including its dual display, temperature control, and application in electronic repair.
7. Maintenance
- Soldering Tip Cleaning: Always clean the soldering tip with the wet sponge before and after use. For stubborn oxidation, use a tip cleaner or brass wool.
- Tip Replacement: Replace soldering tips when they become excessively worn or corroded to ensure optimal performance. Ensure the unit is cool and unplugged before changing tips.
- Nozzle Cleaning: Clean hot air nozzles regularly to prevent blockages. Ensure the hot air gun is cool before handling nozzles.
- Unit Cleaning: Wipe the main unit with a soft, dry cloth. Do not use abrasive cleaners or solvents.
- Fuse Replacement: The unit has a built-in fuse for protection. If the unit fails to power on, check and replace the fuse if necessary. Refer to the specifications for the correct fuse type. Ensure the unit is unplugged before attempting fuse replacement.
8. Troubleshooting
| Problem | Possible Cause | Solution |
|---|---|---|
| Unit does not power on | No power from outlet; Power cable loose; Blown fuse | Check power outlet; Ensure power cable is securely connected; Replace fuse (unplug unit first) |
| Soldering iron not heating | Temperature set too low; Iron not connected properly; Heating element failure; Worn tip | Increase temperature; Reconnect iron; Contact support; Replace tip |
| Hot air gun not blowing air or heating | Airflow set too low; Temperature set too low; Gun not connected properly; Heating element/fan failure | Increase airflow/temperature; Reconnect gun; Contact support |
| Temperature display is erratic | Sensor issue; Loose connection | Check connections; Contact support |
9. Specifications
| Feature | Specification |
|---|---|
| Model Number | 8582D |
| Voltage | 220 Volts |
| Total Power | 749.99 Watts |
| Display Type | LED |
| Dimensions (L x W x H) | 14.5 x 17.5 x 9.5 cm |
| Item Weight | 2.32 Kilograms |
| Number of Channels | 2 |
| Country of Origin | China |
| Hot Air Gun | |
| Power | 750W |
| Temperature Range | 100-480°C |
| Max Airflow | 120 L/min |
| Cord Length | 120 cm |
| Soldering Iron | |
| Power | 75W |
| Temperature Range | 200-480°C |
| Temperature Stability | ±1°C |
| Cord Length | 120 cm |

Image 9.1: Visual representation of the technical specifications for the hot air gun and soldering iron.
10. Warranty and Support
For warranty information, technical support, or service inquiries, please contact CREWORKS customer service through the retailer where the product was purchased or visit the official CREWORKS website. Please have your model number (8582D) and purchase date available when contacting support.


