1. Introduction
This manual provides essential information for the safe and efficient operation of your ALFFAA 1500W Pure Sine Wave Inverter. This device converts 12V DC battery power into 110V AC household power, suitable for various applications in homes, RVs, and trucks. Please read these instructions thoroughly before installation and use.
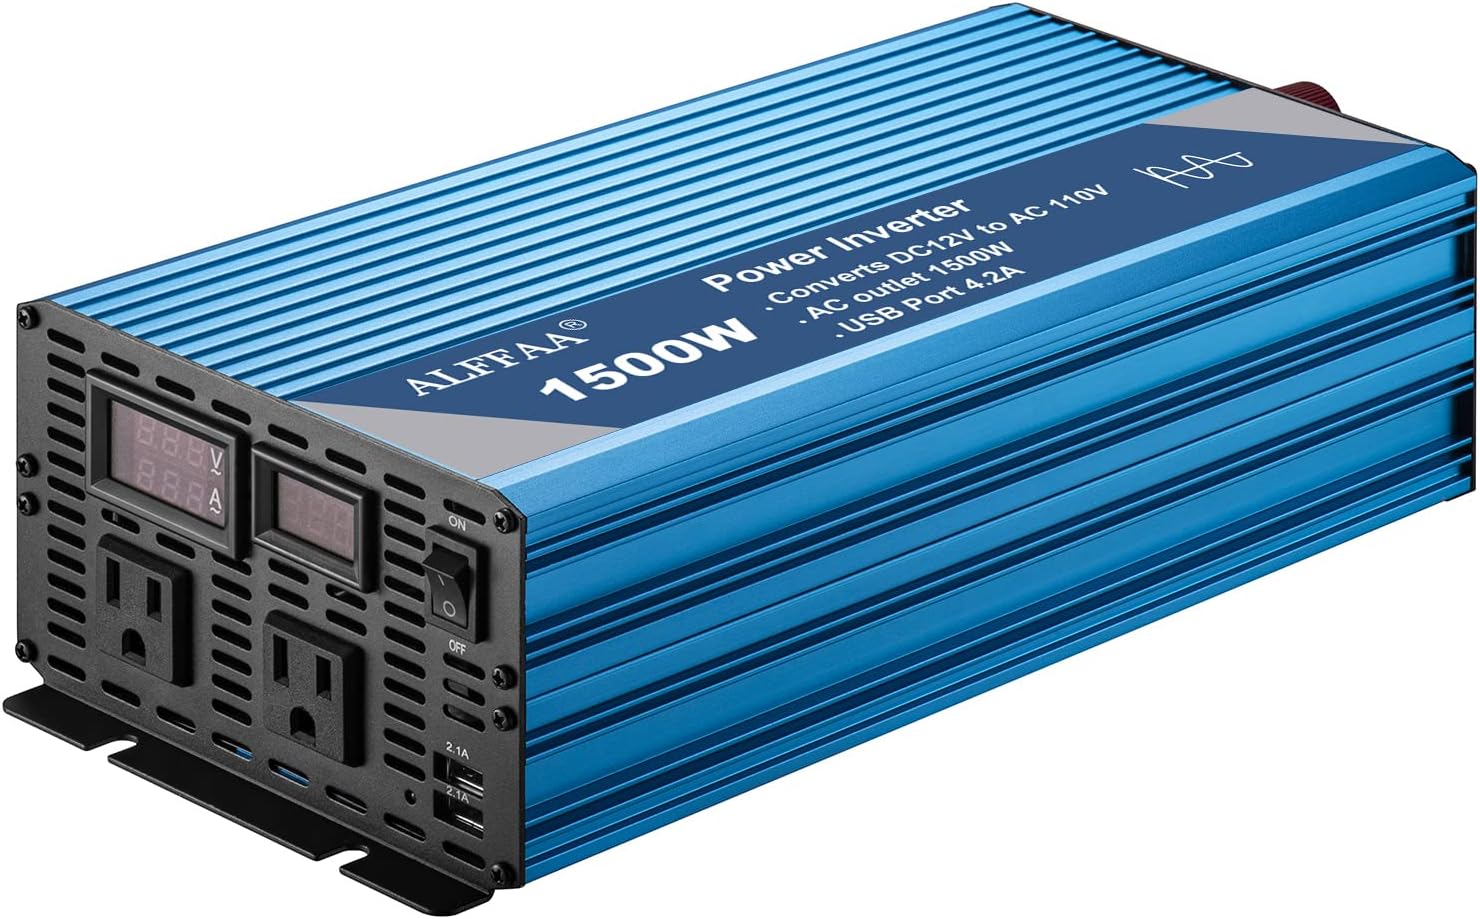
Image 1.1: Front view of the ALFFAA 1500W Pure Sine Wave Inverter, showcasing its blue aluminum casing, front panel with AC outlets, USB ports, and digital displays.
2. Product Features
- Pure Sine Wave Output: Provides stable and clean AC power, identical to grid power, ensuring compatibility with sensitive electronics.
- High Conversion Efficiency: Greater than 90% conversion efficiency reduces power loss.
- Integrated Ports: Two 110V AC outlets, two 5V/2.1A USB ports, and one AC terminal block for versatile connectivity.
- Digital LCD Display: Monitors battery voltage and AC output.
- Robust Construction: Durable aluminum alloy shell for enhanced heat dissipation and longevity.
- Quiet Operation: Features silent cooling fans that activate only when necessary, minimizing noise.

Image 2.1: Diagram illustrating the advanced pure sine wave technology and internal components, highlighting smooth, continuous power, quiet operation, and handling of high inductive loads.

Image 2.2: Close-up views detailing the aluminum alloy shell for durability, silent cooling fans for efficient heat management, and quick USB charging ports for convenience.
3. Safety Information
Adhering to safety guidelines is crucial to prevent injury and damage to the inverter or connected devices.
3.1 General Safety Precautions
- Ventilation: Ensure adequate ventilation around the inverter. Do not block cooling fan vents.
- Environment: Operate the inverter in a dry, well-ventilated area, away from direct sunlight, heat sources, and flammable materials.
- Moisture: Do not expose the inverter to water or excessive moisture.
- Children: Keep the inverter out of reach of children.
- Maintenance: Only qualified personnel should perform maintenance or repairs.
3.2 Electrical Safety
- Battery Voltage Match: Ensure the battery voltage (12V) matches the inverter's input voltage. Connecting to an incorrect voltage source can cause severe damage.
- No Grid Connection: Never connect the inverter directly to an AC utility power grid. This can cause electrocution and damage the inverter.
- Proper Cabling: Use appropriate gauge cables (recommended 2 AWG for 1500W) to connect the inverter to the battery. Undersized cables can lead to overheating, power loss, and fire hazards.
- Fusing: Install a fuse (recommended 150A for 2 AWG cables) on the positive battery cable as close to the battery terminal as possible to protect against overcurrent.
- Polarity: Always connect the positive (+) terminal of the inverter to the positive (+) terminal of the battery, and the negative (-) terminal of the inverter to the negative (-) terminal of the battery. Incorrect polarity will damage the inverter.
- Spark Prevention: When connecting the battery cables, a small spark may occur. To minimize this, use a pre-charge resistor to slowly bridge the connection between the inverter and battery for 10-15 seconds before making the final connection.
3.3 Built-in Protections
The ALFFAA 1500W Inverter includes multiple safety features:
- Under-voltage and Over-voltage Protection
- Over-temperature Protection
- Over-load Protection
- Short-circuit Protection
- Ground-Fault Circuit Interrupter (GFCI) Protection
- Reverse Connection Protection
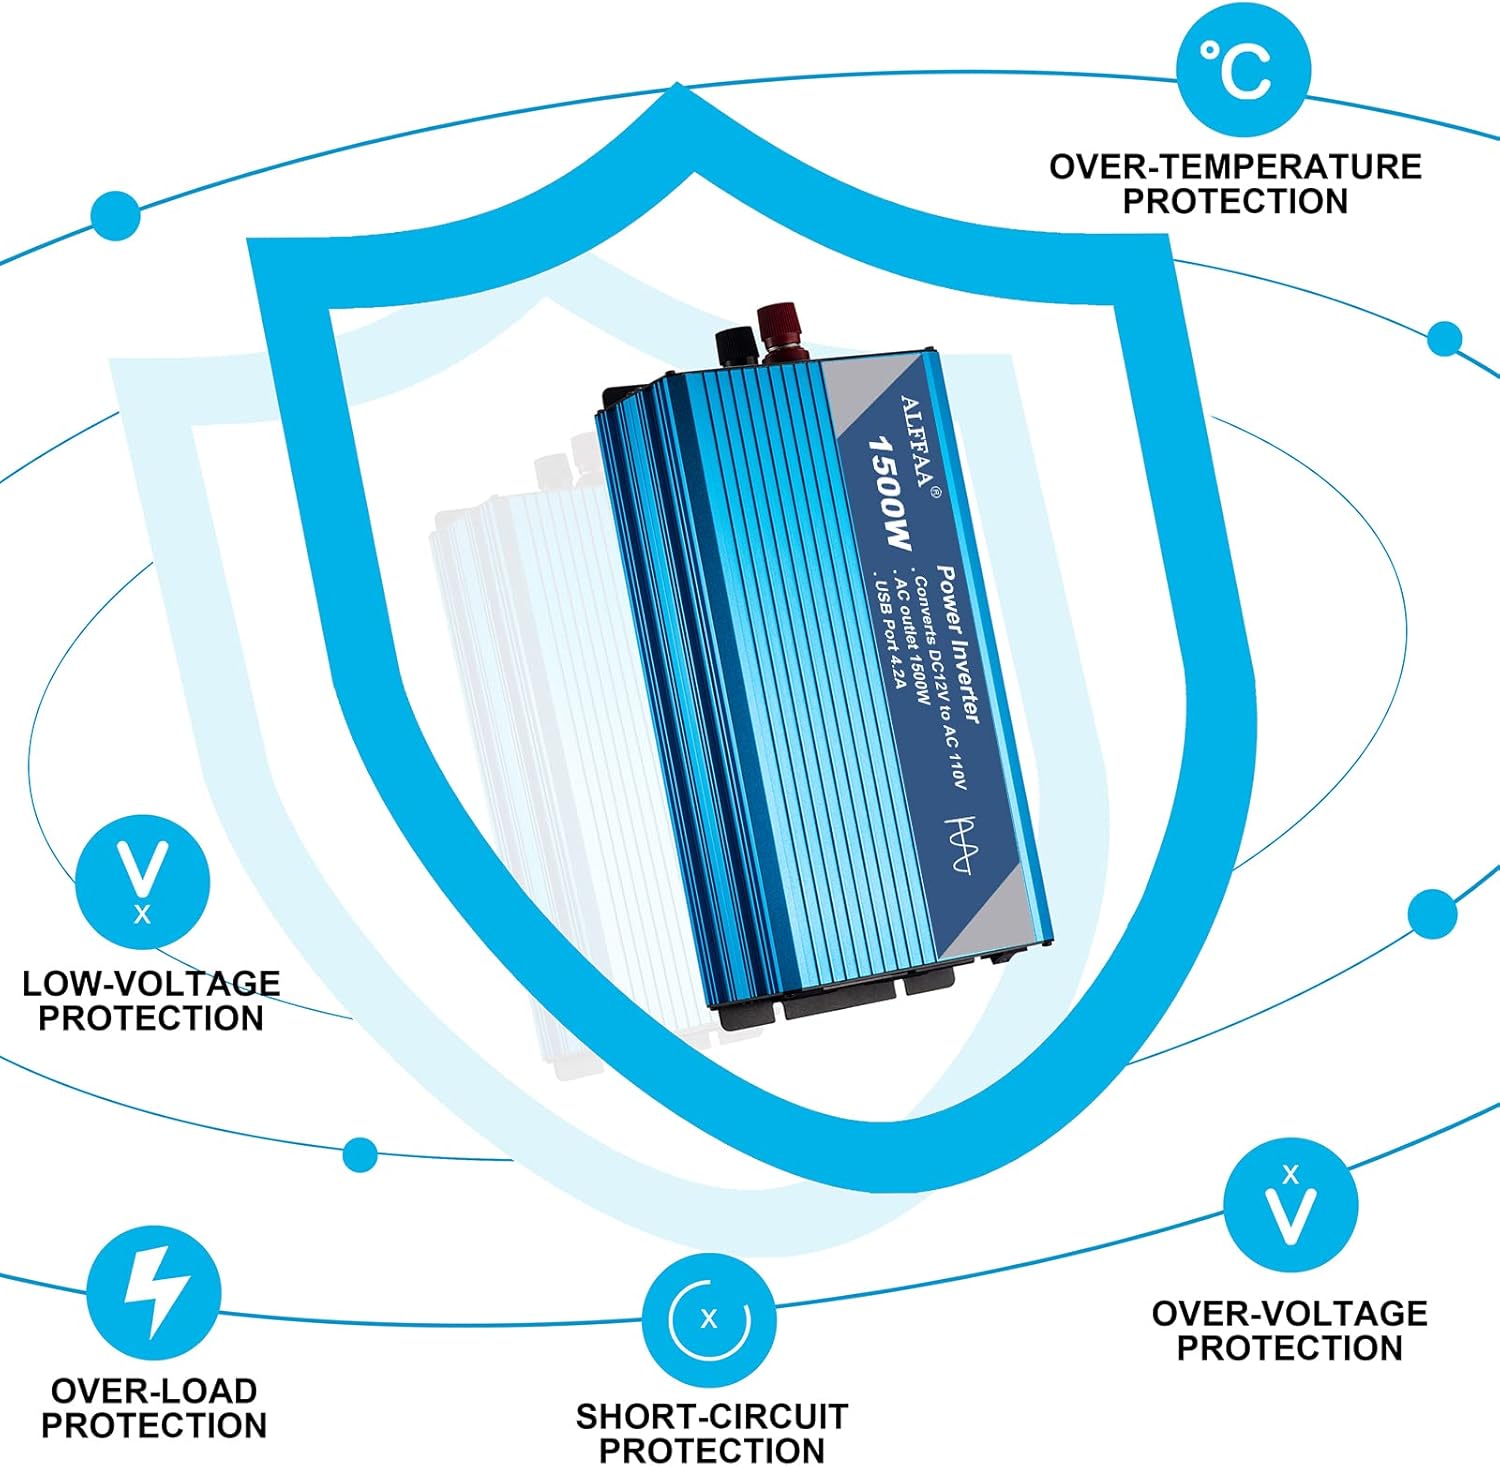
Image 3.1: Visual representation of the inverter's comprehensive protection mechanisms, including low-voltage, over-voltage, over-load, short-circuit, and over-temperature safeguards.
4. Setup and Installation
4.1 Unpacking and Inspection
Upon receiving your inverter, carefully unpack it and inspect for any signs of damage. Report any damage to the seller immediately.
4.2 Recommended Battery Configuration
- For optimal performance with a 1500W inverter, a 12V battery with a capacity larger than 100AH is recommended.
- Ensure your battery's Battery Management System (BMS), if present, can support a continuous discharge of at least 120A to handle the inverter's maximum load.
4.3 Connecting the Inverter to a Battery
- Prepare Cables: Use 2 AWG (American Wire Gauge) cables for both positive and negative connections. Keep cable lengths as short as possible, ideally no more than 2 feet for each terminal, to minimize voltage drop and maximize efficiency.
- Install Fuse: Connect a 150A fuse holder with a fuse to the positive (+) cable, near the battery's positive terminal.
- Initial Connection: Connect the positive (+) cable (with fuse) to the inverter's red (+) terminal and the negative (-) cable to the inverter's black (-) terminal.
- Battery Connection: Carefully connect the positive (+) cable to the battery's positive (+) terminal. Then, connect the negative (-) cable to the battery's negative (-) terminal. A small spark is normal during the final connection. To reduce this, briefly touch the negative cable to the battery terminal, then hold it firmly for the final connection.
- Secure Connections: Ensure all connections are tight and secure to prevent arcing and overheating.
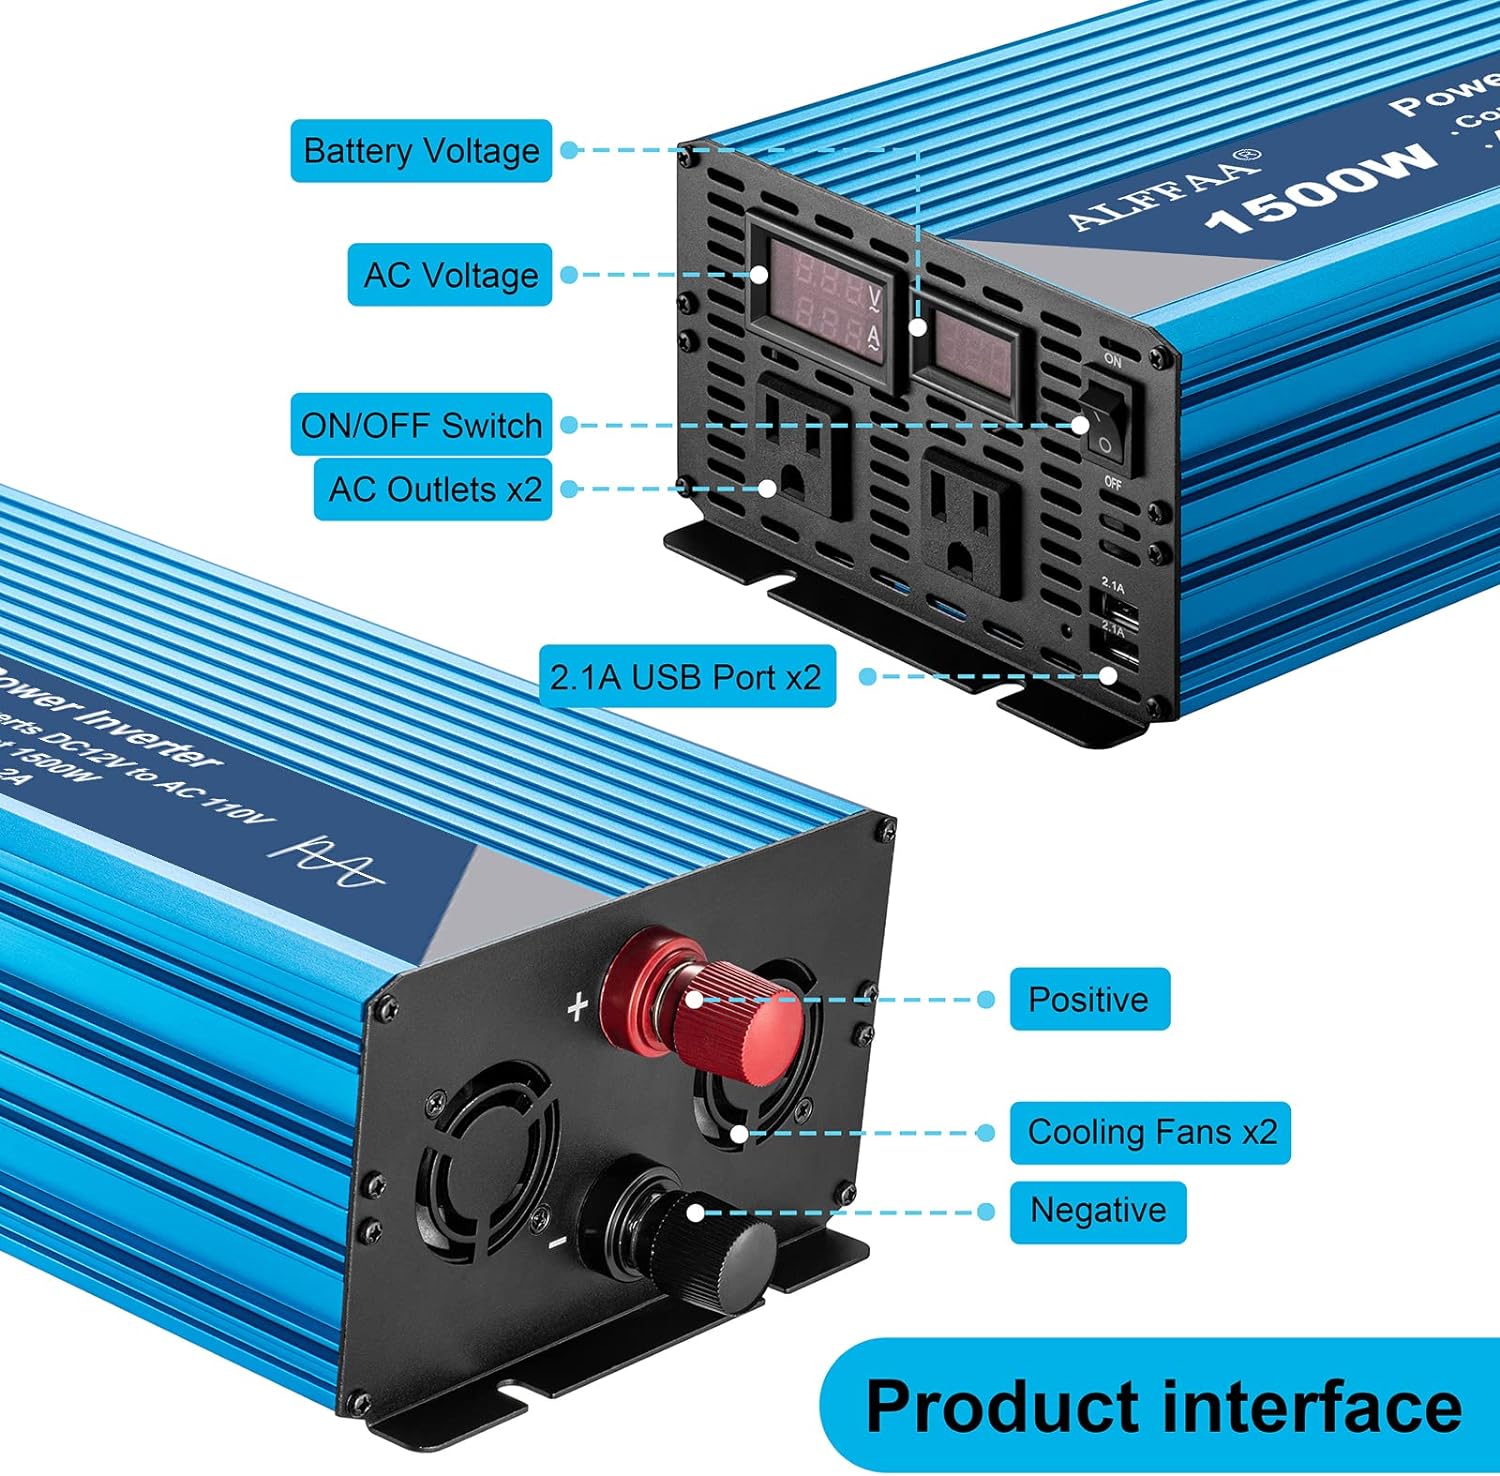
Image 4.1: Detailed view of the inverter's front and rear panels, labeling the battery voltage display, AC voltage display, ON/OFF switch, AC outlets, USB ports, positive and negative terminals, and cooling fans.

Image 4.2: Two connection options: Option 1 shows installation with a solar panel, charge controller, battery, and inverter. Option 2 illustrates a simple installation directly connecting the inverter to a battery to power household appliances.
5. Operating Instructions
5.1 Powering On/Off
- To power on the inverter, ensure all connections are secure, then flip the ON/OFF switch to the 'ON' position. The LCD display will illuminate, showing battery voltage and AC output.
- To power off, disconnect all loads, then flip the ON/OFF switch to the 'OFF' position.
- It is recommended to turn off the inverter when not in use to conserve battery power, as it consumes a small amount of power even at idle.
5.2 Connecting Devices
- Plug your 110V AC devices into the AC outlets on the front panel.
- Connect USB-powered devices to the 5V/2.1A USB ports for charging.
- For hardwired applications, use the AC terminal block.
5.3 Load Management
- The inverter provides 1500W of continuous power and can handle peak surges up to 3000W during load startup.
- Avoid continuously operating devices that exceed 1500W to ensure the longevity of the inverter.
- Inductive loads (e.g., motors, compressors, refrigerators) may have a high startup surge. Ensure the inverter's peak power capacity can handle these surges.
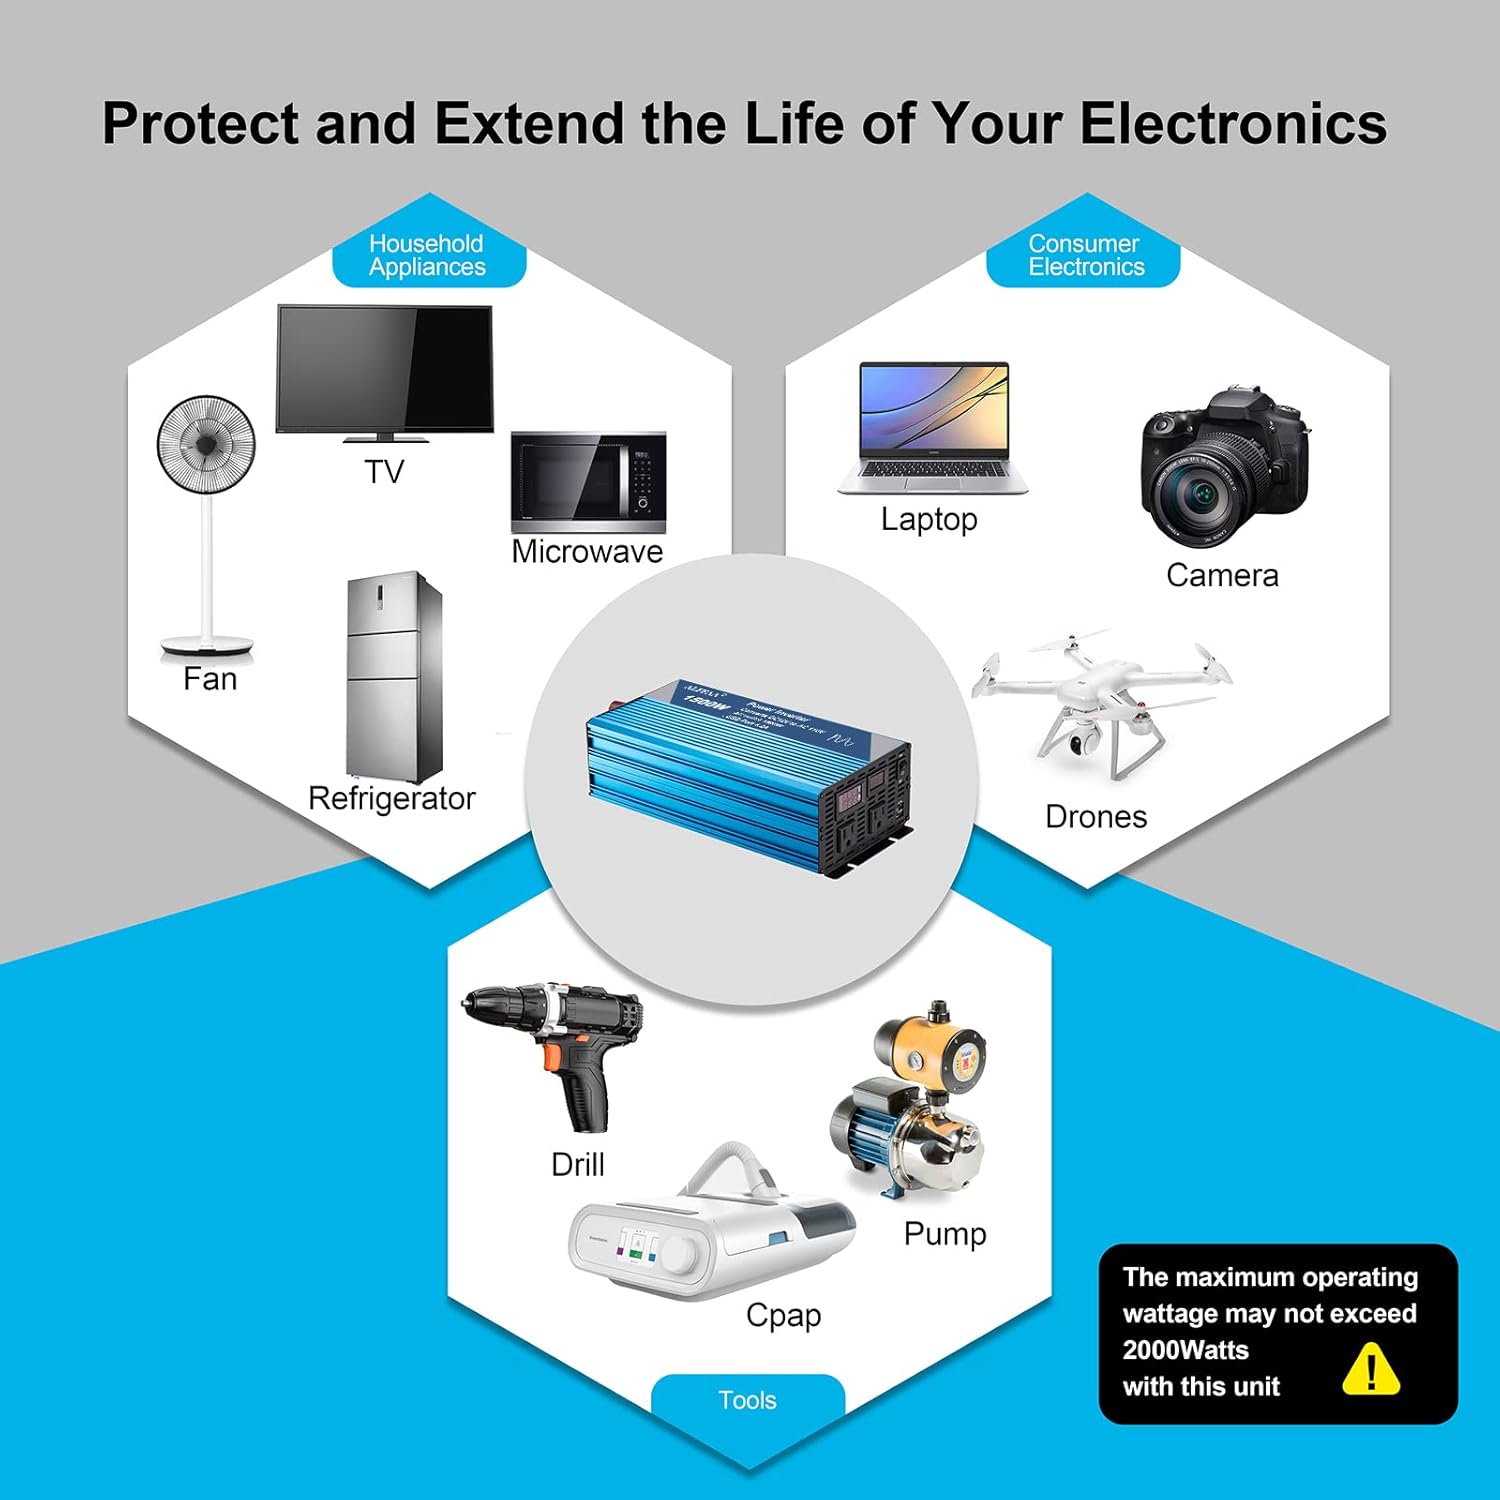
Image 5.1: Illustrates various applications for the inverter, including household appliances (fan, TV, microwave, refrigerator), consumer electronics (laptop, camera, drones), and tools (drill, pump, CPAP machine).
6. Maintenance
- Cleaning: Periodically clean the exterior of the inverter with a dry, soft cloth. Do not use liquid cleaners.
- Fan Vents: Ensure the cooling fan vents are free from dust and debris to maintain proper airflow and prevent overheating.
- Connections: Regularly check all electrical connections (battery terminals, AC outlets) for tightness and corrosion. Loose connections can lead to power loss and heat buildup.
- Storage: When storing the inverter for extended periods, disconnect it from the battery and store it in a cool, dry place.
7. Troubleshooting
| Problem | Possible Cause | Solution |
|---|---|---|
| Inverter does not turn on | Loose battery connections, low battery voltage, faulty fuse, ON/OFF switch in 'OFF' position. | Check and tighten battery connections. Charge battery if voltage is low. Replace fuse if blown. Ensure switch is 'ON'. |
| No AC output | Overload protection activated, low battery voltage, over-temperature protection. | Reduce connected load. Charge battery. Allow inverter to cool down. |
| Inverter goes into protection mode | Overload, under-voltage, over-voltage, over-temperature, short-circuit. | Identify and resolve the specific fault (e.g., reduce load, check battery, ensure proper ventilation). The inverter will typically reset once the fault is cleared. |
| Inaccurate display readings (e.g., Amp readout) | Minor calibration differences or display interpretation. | The inverter's display provides an indication. For precise measurements, use external calibrated meters. Note that a decimal point in the Amp readout might be misleading; interpret '5.5A' as '55A' if context suggests. |
| Fan runs constantly or loudly | High internal temperature due to heavy load or poor ventilation. | Reduce load or improve ventilation around the inverter. Ensure fan vents are clear. |
8. Specifications
| Feature | Specification |
|---|---|
| Model Number | CP-1101-1500W |
| Continuous Power | 1500W |
| Peak Power | 3000W |
| Input Voltage | 12V DC |
| Output Voltage | 110V AC |
| Output Waveform | Pure Sine Wave |
| USB Output | 2 x 5V/2.1A ports |
| Product Dimensions | 11 x 6 x 3 inches |
| Item Weight | 6.3 pounds |
| Recommended Battery Capacity | 100 Amp Hours (minimum) |
| Recommended Cable Gauge | 2 AWG |
| Recommended Fuse Size | 150A |
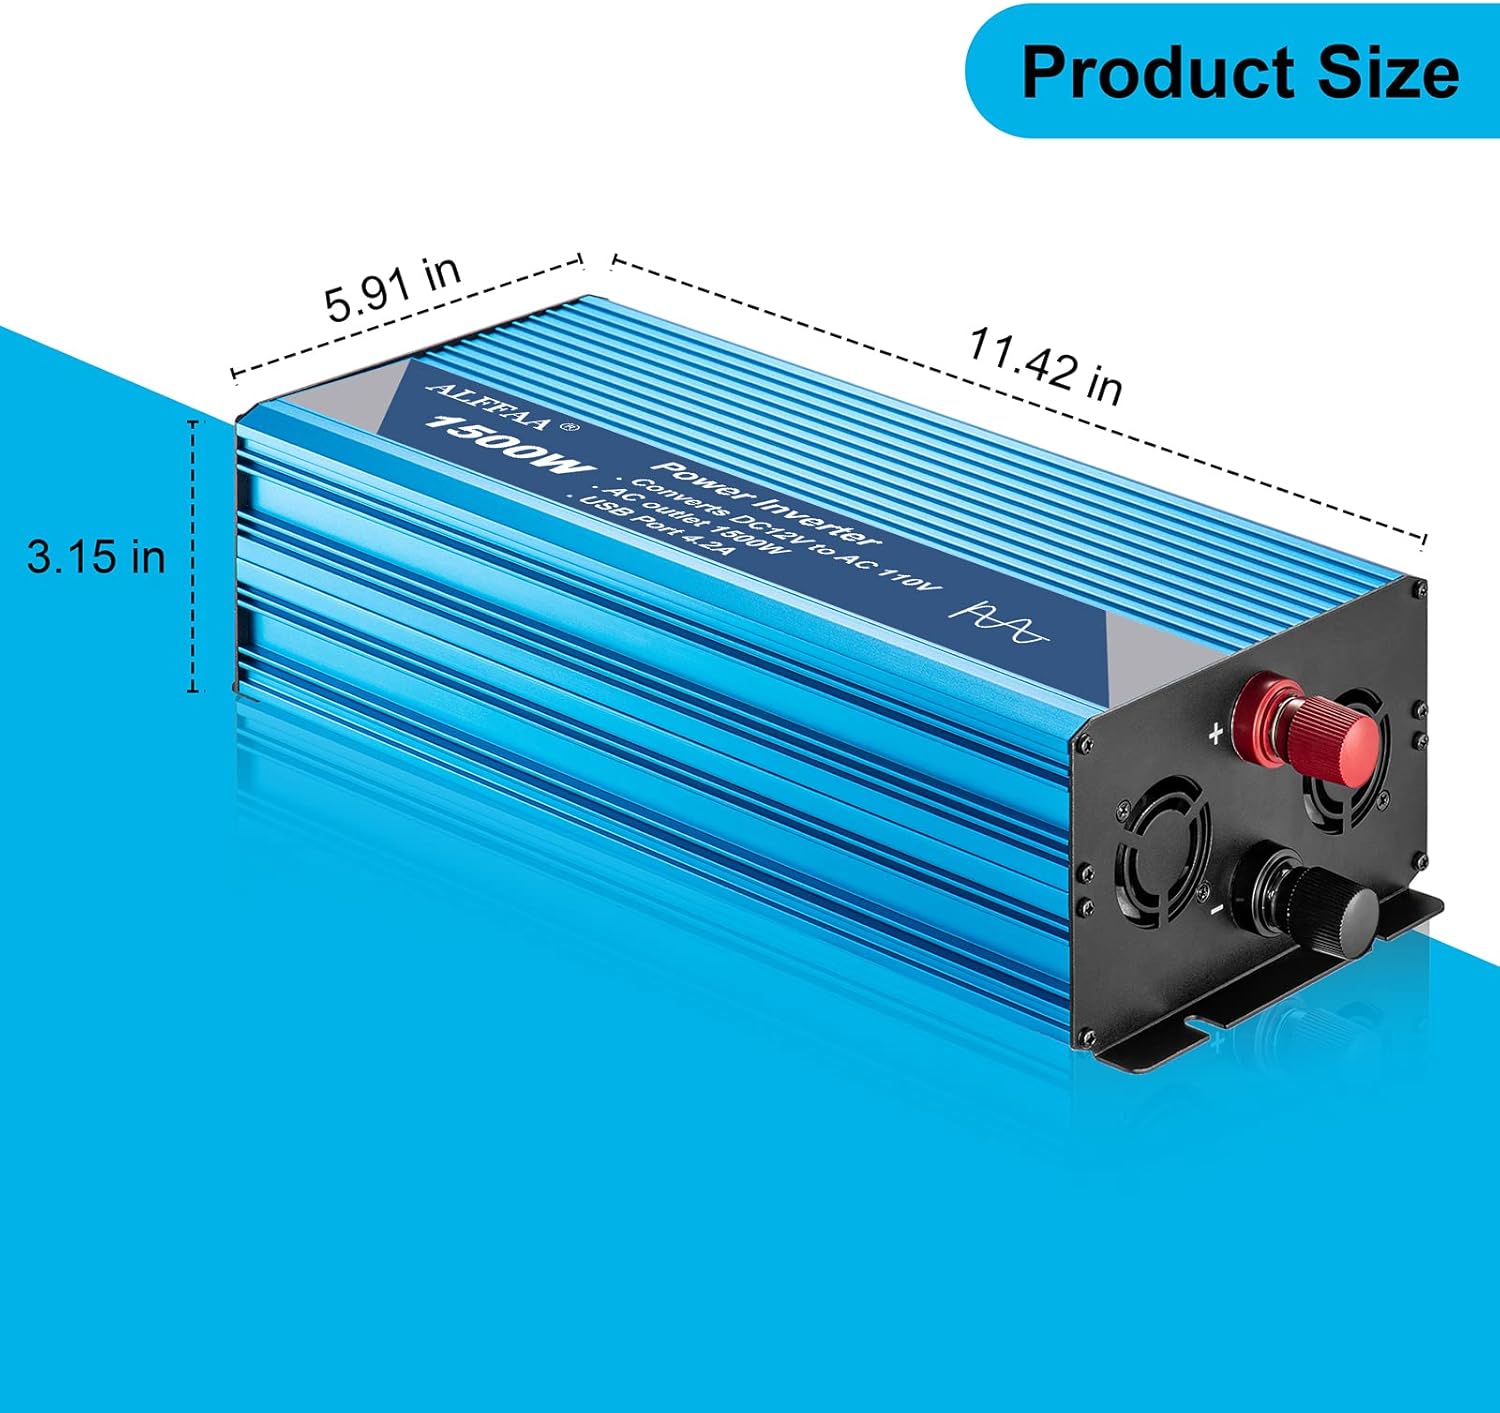
Image 8.1: Diagram showing the physical dimensions of the inverter: 11.42 inches (length), 5.91 inches (width), and 3.15 inches (height).
9. Warranty and Support
The ALFFAA 1500W Pure Sine Wave Inverter comes with a 60-month warranty from the date of purchase. This warranty covers manufacturing defects and ensures reliable performance under normal use conditions.
For technical assistance, troubleshooting, or warranty claims, please contact ALFFAA customer service. Provide your product model number (CP-1101-1500W) and purchase details for efficient support.
Note: There are no official product videos available from the seller for embedding in this manual.