DYRABREST B09P8C1SBW
DYRABREST 24V DC 800N Side Mount Roll-Up Garage Door Opener Instruction Manual
Model: B09P8C1SBW
1. Introduction
This manual provides detailed instructions for the installation, operation, and maintenance of your DYRABREST 24V DC 800N Side Mount Roll-Up Garage Door Opener. Please read this manual thoroughly before installation and use to ensure safe and efficient operation of the product. Keep this manual for future reference.
2. Safety Information
WARNING: Failure to follow these safety instructions may result in serious injury or property damage.
- Ensure all electrical connections are performed by a qualified electrician and comply with local codes.
- Disconnect power before performing any maintenance or repairs.
- Keep hands and clothing clear of the door and opener mechanism during operation.
- Do not allow children to operate the garage door opener or play near the door.
- Regularly inspect the garage door system for signs of wear or damage.
- The opener is designed for roll-up metal garage doors only. Do not use with other door types.
- This product does not include an infrared sensor. Ensure the area is clear before operating the door.
- In case of power outage, use the manual override feature to operate the door.
3. Package Contents
Verify that all components are present in the package:
- 24V DC Side Mount Roll-Up Garage Door Opener Unit
- 2 Remote Transmitters
- Mounting Hardware (U-bolt, saddle gasket, bracket, fixing plate, spring washer, nuts)
- Power Cable
- Instruction Manual (this document)
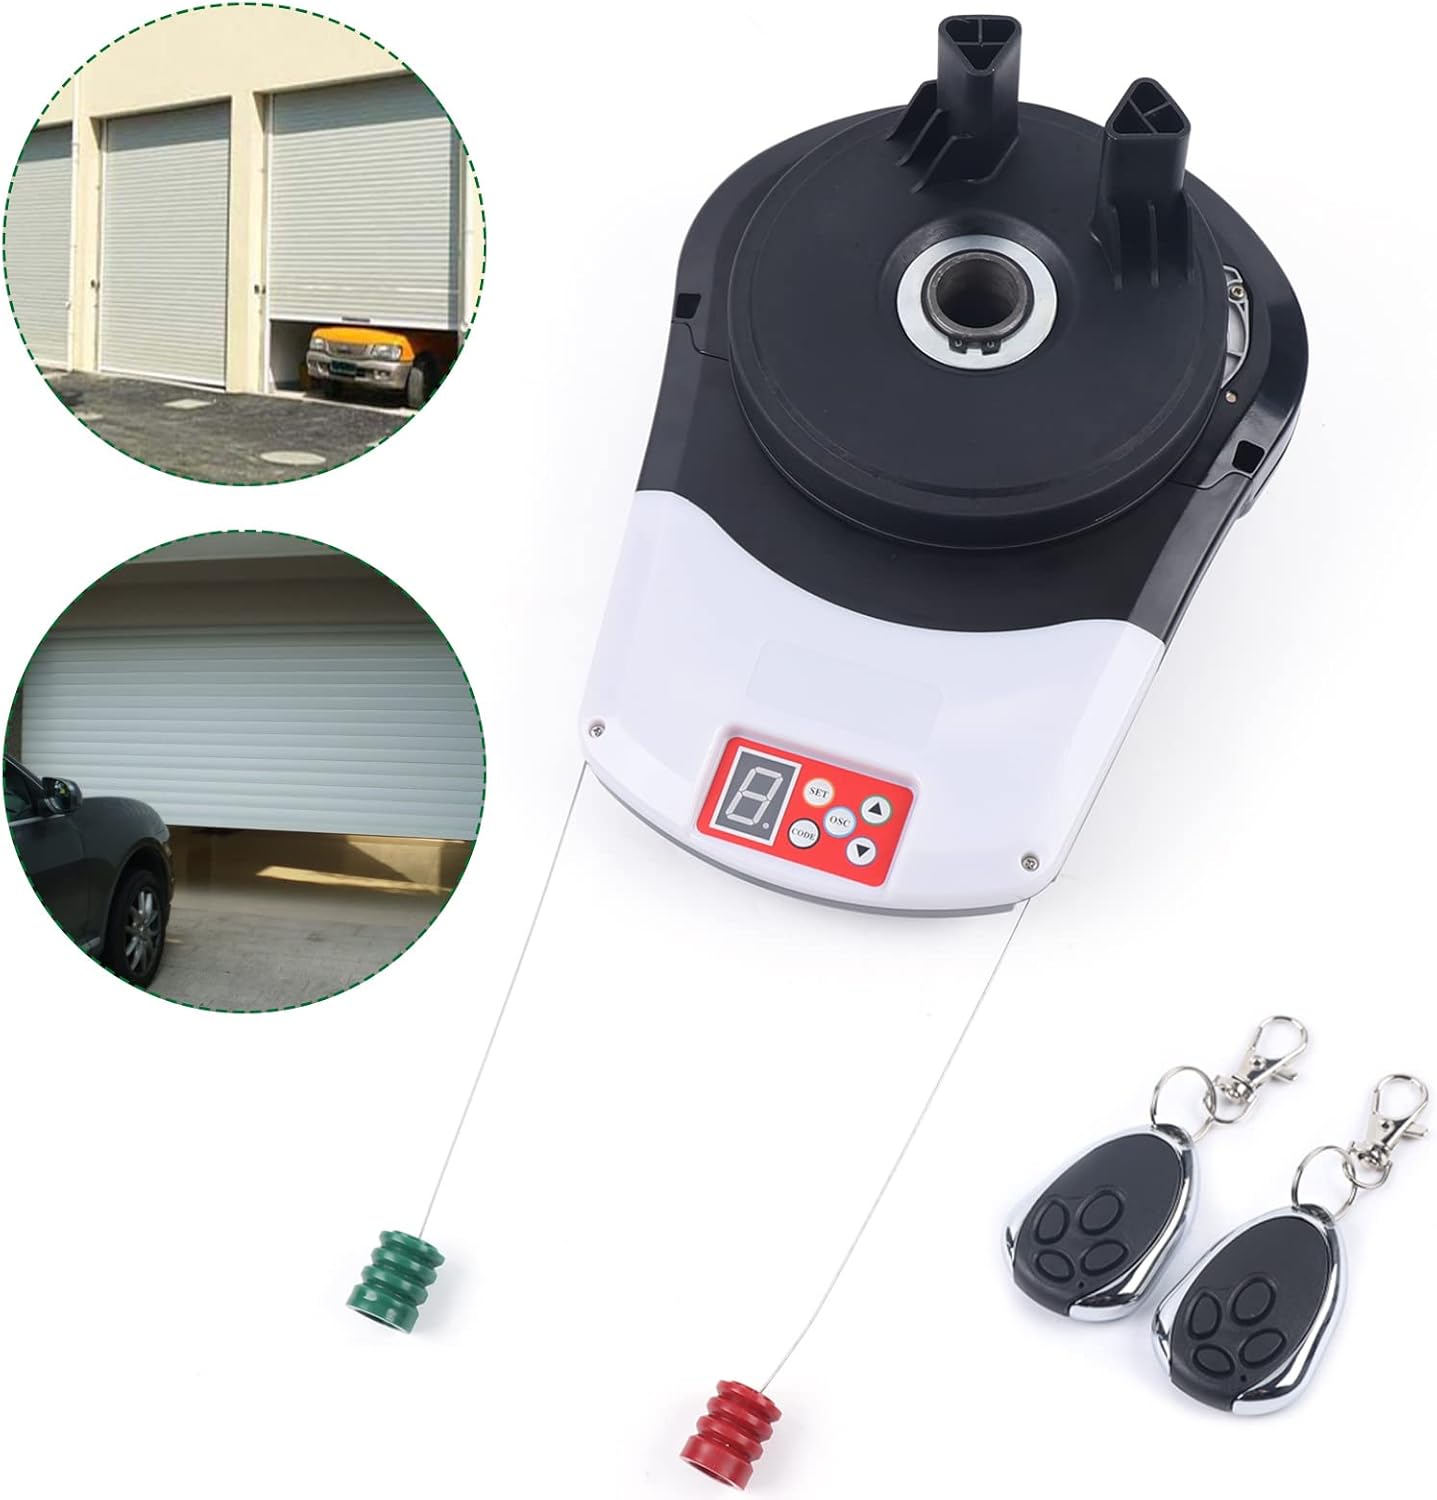
Image: Main components of the DYRABREST garage door opener, including the motor unit and two remote controls.
4. Specifications
| Feature | Specification |
|---|---|
| Input Voltage | 110V AC, 100W |
| Control Board Voltage | 24V DC / 5V DC |
| Motor Type | 24V DC Permanent Magnet |
| Max. Lift Force | 800 N |
| Max. Door Opening Area | 242 Sq.Ft / 22.5 m² |
| Max. Door Height | 14.8 Ft / 4.5 m |
| Max. Control Distance (Remote) | 164 Ft / 50 m |
| Coding Type | Rolling Code (Over 4.29 Billion Combinations) |
| Dimensions (Unit) | 40 x 30 x 18 cm (15.75 x 11.81 x 7.09 in) |
| Weight | 6 kg (13.2 lbs) |
| Noise Level | 55 dB (Ultra Quiet) |

Image: Visual representation of the opener's key specifications, including pulling force, maximum door area, height, and noise level.
5. Installation Requirements
Before proceeding with installation, ensure your garage door and installation environment meet the following criteria:
- Door Type: Compatible only with roll-up metal garage doors or rolling shutter garage doors. Not suitable for flap garage doors or duplicate garage doors.
- Clearance (Inside Bracket): The distance between the edge of the door curtain and the inside of the bracket must be at least 85mm.
- Clearance (Outside Bracket): The distance between the edge of the door curtain and the outside of the bracket must be at least 135mm.
- Door Size: The door must be within the motor's bearing capacity (Max. 242 Sq.Ft / 22.5 m² area, Max. 14.8 Ft / 4.5 m height).
- Power Supply: Ensure a stable 110V AC 50Hz power supply is available.
- Shaft Length: The central shaft length should be sufficient for mounting, typically around 11.81 inches (30 cm).

Image: Diagram showing the required central shaft length for installation and the safety feature where the door reverses upon obstruction.
6. Setup and Installation
This section outlines the general steps for installing your garage door opener. Professional installation is recommended.
- Prepare the Door: Ensure the roll-up door operates smoothly manually. Lubricate moving parts if necessary.
- Mount the Opener:
- Attach the mounting bracket to the wall or ceiling structure near the door's shaft.
- Secure the opener unit to the door's central shaft. The unit is designed for easy mounting directly to most standard roll-up shafts.
- Use the U-bolt, saddle gasket, fixing plate, spring washer, and nuts to firmly secure the opener.
- Electrical Connection: Connect the opener to a 110V AC power outlet. Ensure the power is off during connection.
- Limit Switch Adjustment: Adjust the limit switches to set the desired open and close positions of the door. Refer to the specific instructions on the control panel for precise adjustment.
- Remote Programming: Program the remote transmitters to the opener unit.

Image: Step-by-step diagram illustrating the installation process, from attaching the opener to the rolling door to securing the bracket.

Image: Detailed view of the opener's control panel, power plug, and included remote controls, showing the compact design.
7. Operating Instructions
7.1 Control Methods
The opener can be operated using three methods:
- Remote Control: Use the handheld transmitters to open or close the door from a distance of up to 164 feet (50 meters). Press the designated button for two seconds to activate.
- Wall-Mounted Switch (Panel Control): Operate the door directly from the control panel on the opener unit.
- Manual Control: In case of power failure, pull the manual release cord (red and green cords) to disengage the motor and operate the door manually.

Image: Illustration of the three ways to control the garage door opener: manual pull, remote, and direct panel buttons.
7.2 Automatic Shutdown Mode
The opener features an automatic shutdown mode for convenience and energy saving. You can program the auto-shutdown or select a delayed shutdown time. This feature is particularly useful for installations in narrow spaces above the garage.

Image: Diagram detailing the automatic shutdown mode options and the compact dimensions of the opener unit, suitable for tight installations.
7.3 Safety Protection
The opener is equipped with built-in safety features:
- Obstruction Detection: If the door encounters an obstacle during closing, it will automatically reverse to prevent damage or injury.
- Thermal Overload Protection: Prevents motor burnout during extended or heavy use.
8. Maintenance
Regular maintenance ensures the longevity and safe operation of your garage door opener.
- Monthly Inspection: Check the door's balance and movement. Ensure all mounting hardware is secure.
- Lubrication: Lubricate the door's moving parts (rollers, hinges, springs) annually with a garage door lubricant. Do not lubricate the opener unit itself unless specified.
- Remote Batteries: Replace remote control batteries as needed.
- Cleanliness: Keep the opener unit clean and free from dust and debris.
9. Troubleshooting
| Problem | Possible Cause | Solution |
|---|---|---|
| Opener does not respond to remote/panel. | No power; remote battery dead; remote not programmed. | Check power supply; replace remote battery; re-program remote. |
| Door reverses unexpectedly. | Obstruction in door path; limit switch misadjustment. | Clear obstruction; re-adjust limit switches. |
| Motor runs but door does not move. | Manual release engaged; motor coupling issue. | Disengage manual release; inspect motor-to-shaft coupling. |
| Door opens/closes partially. | Limit switches incorrectly set. | Re-adjust open/close limit switches. |
10. Warranty and Support
For warranty information or technical support, please refer to the purchase documentation or contact DYRABREST customer service. Keep your proof of purchase for warranty claims.
Manufacturer: KOUGER
11. Applications
This garage door opener is suitable for various roll-up door applications, including:
- Residential Garages
- Commercial Rolling Shutters
- Industrial Partitions
- Barns
- Warehouses
- Stores

Image: Examples of suitable applications for the roll-up door opener, including garages, stores, barns, and warehouses.
Ask a question about this manual
Ask about setup, troubleshooting, compatibility, parts, safety, or missing instructions. Manuals+ will review the question and use this page’s manual context to help answer it.