1. Introduction
Thank you for choosing the SHA CERLIN Queen Metal Bed Frame. This manual provides detailed instructions for the safe assembly, proper use, and maintenance of your new bed frame. Please read all instructions carefully before beginning assembly and retain this manual for future reference.
2. Safety Information
- Keep all parts and packaging materials away from children.
- Ensure all bolts and screws are securely tightened before use. Periodically check and re-tighten as necessary.
- Do not stand on the bed frame or use it as a ladder.
- Do not exceed the maximum weight capacity of 800 lbs.
- Assemble the bed frame on a soft, clean surface to prevent damage to the product or your floor.
- Two people are recommended for assembly to ensure safety and ease.
3. Package Contents
Please verify that all components are present before assembly. If any parts are missing or damaged, contact customer support.
| Part | Description | Quantity |
|---|---|---|
| A | Headboard | 1 |
| B | Footboard | 1 |
| C | Side Rails | 2 |
| D | Center Support Beam | 1 |
| E | Support Legs for Center Beam | 3 |
| F | Metal Slats | 12-14 (approx.) |
| G | Hardware Pack (bolts, washers, Allen wrench) | 1 |
| H | Rubber Slat Locks / EVA Sponge Strips | Included |
4. Assembly Instructions
Follow these steps carefully for proper assembly. An Allen wrench is typically included in the hardware pack.
Step 1: Unpack and Identify Parts
Carefully unpack all components and lay them out on a clean, soft surface. Compare them with the package contents list to ensure everything is present.

Image: Exploded view of the bed frame components with key dimensions.
Step 2: Attach Side Rails to Headboard and Footboard
- Align the side rails (C) with the pre-drilled holes on the headboard (A) and footboard (B).
- Insert the appropriate bolts from the hardware pack (G) through the holes and loosely secure them with washers and nuts. Do not fully tighten yet.
Step 3: Install Center Support Beam
- Attach the center support beam (D) to the designated brackets on the headboard and footboard.
- Secure the support beam with bolts, washers, and nuts, but do not fully tighten.
- Screw the support legs (E) into the bottom of the center support beam. Adjust their height so they firmly touch the floor when the frame is level.
Step 4: Install Metal Slats
The bed frame features a unique rubber lock design and EVA sponge for noise reduction.

Image: Detail of the noise-reducing features, including rubber slat locks and EVA sponge.
- Place the EVA sponge strips (H) along the side rails where the slats will rest to reduce friction and noise.
- Insert each metal slat (F) into the designated slots on the side rails. Ensure the slats are pushed all the way into one side.
- Once one end of the slat is fully seated, lower the other end into its corresponding slot.
- Secure the slats using the rubber slat locks (H) by pushing them into the slots alongside the slats. This will hold the slats firmly in place and prevent movement.
Step 5: Final Tightening
Once all components are in place, go back and securely tighten all bolts and screws using the provided Allen wrench. Ensure the frame is stable and level.

Image: Fully assembled SHA CERLIN Queen Metal Bed Frame.
5. Operating and Usage
Mattress Placement
Place your Queen-sized mattress directly onto the assembled metal slats. No box spring is required for this platform bed frame. The non-slip rails are designed to enclose the mattress, preventing it from sliding or wobbling.
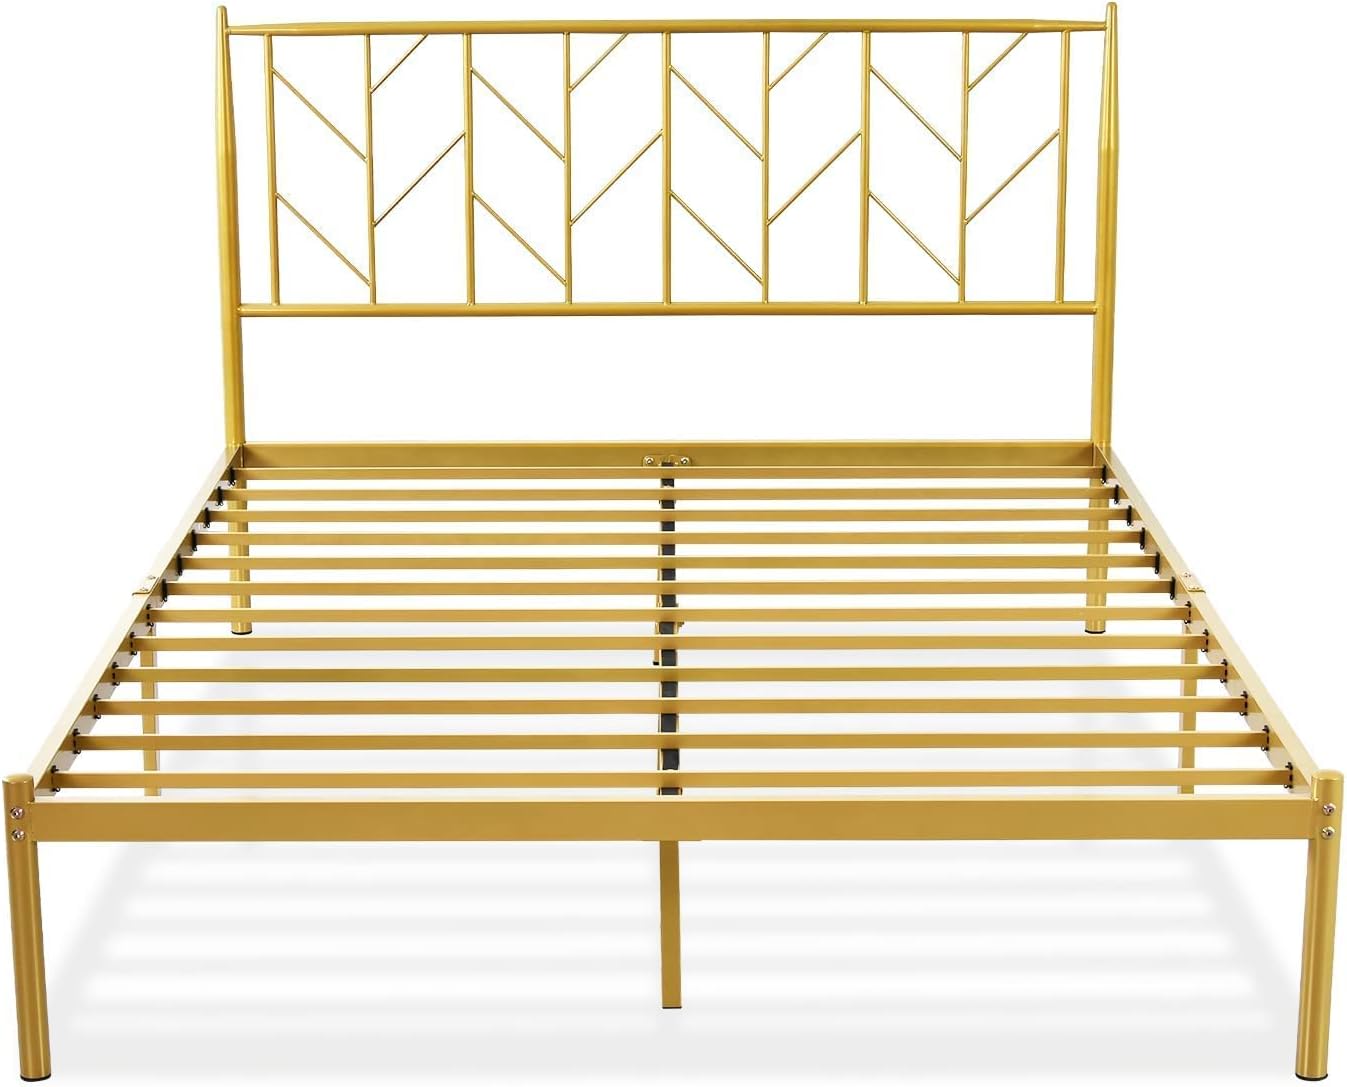
Image: Detail illustrating the non-slip rail design that secures the mattress.
Under-Bed Storage
The bed frame provides 12 inches of under-bed clearance, offering convenient storage space for various items. Utilize storage bins or containers to keep your bedroom organized.
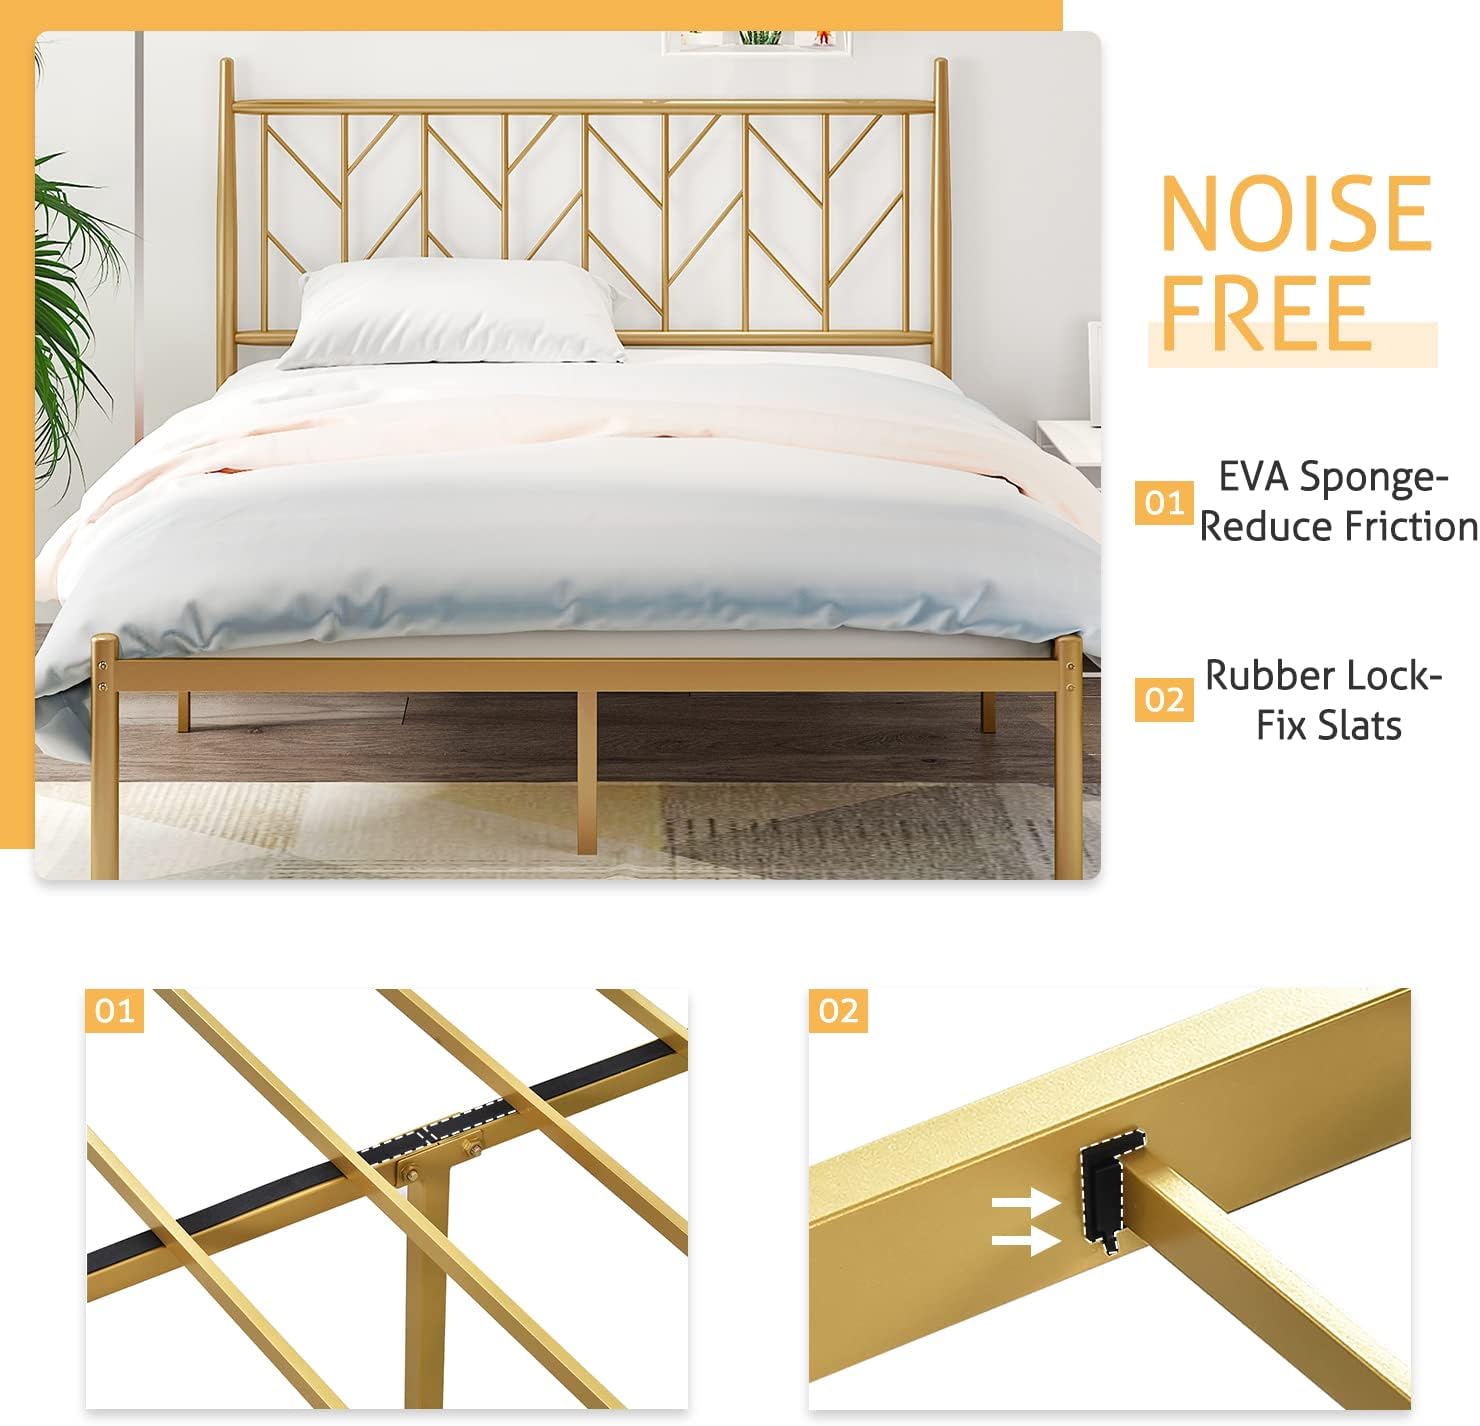
Image: Example of under-bed storage space.
6. Maintenance
Cleaning
Wipe the metal frame with a damp cloth to remove dust and dirt. Avoid using harsh chemicals or abrasive cleaners, as these may damage the finish.
Regular Inspection
Periodically inspect all bolts, screws, and connections to ensure they remain tight. Re-tighten any loose fasteners to maintain the frame's stability and prevent squeaking.
7. Troubleshooting
- Squeaking Noise: Ensure all bolts are tightened. Check that the EVA sponge strips are properly placed and that the rubber slat locks are securely holding the slats. Loose connections are the most common cause of squeaking.
- Unstable Frame: Verify that all support legs, especially those on the center beam, are firmly touching the floor and are adjusted to the correct height. Re-tighten all connection points.
- Slats Sliding Out: Confirm that the rubber slat locks are fully inserted and securing each slat. Ensure slats are properly seated in their respective slots.
8. Specifications
| Feature | Detail |
|---|---|
| Size | Queen |
| Product Dimensions | 83"L x 63.4"W x 44.6"H |
| Special Feature | Squeak Resistant |
| Color | Gold |
| Finish Type | Varnished |
| Included Components | Bed Frame, Headboard, Slats |
| Compatible Mattress Size | Queen |
| Frame Material | Metal |
| Assembly Required | Yes |
| Product Care Instructions | Wipe with Damp Cloth |
| Item Weight | 63 pounds |
| Weight Capacity | 800 lbs |
9. Customer Support
For assistance with assembly, missing parts, or any other inquiries, please contact SHA CERLIN customer service. Refer to your purchase documentation for specific contact details or visit the official SHA CERLIN website.