
1. General Information
Thank you for choosing the Klea Ahdet Thermostatic Shower Panel. This manual provides essential instructions for the safe installation, operation, and maintenance of your new shower system. Please read this manual thoroughly before installation and keep it for future reference.
- Product Name: Klea Ahdet Thermostatic Shower Panel
- Model Number: 5430002645469
- Brand: Klea
- Material: Stainless Steel
- Finish: Matte Chrome
- Color: Silver
- Mounting Type: Wall Mounting
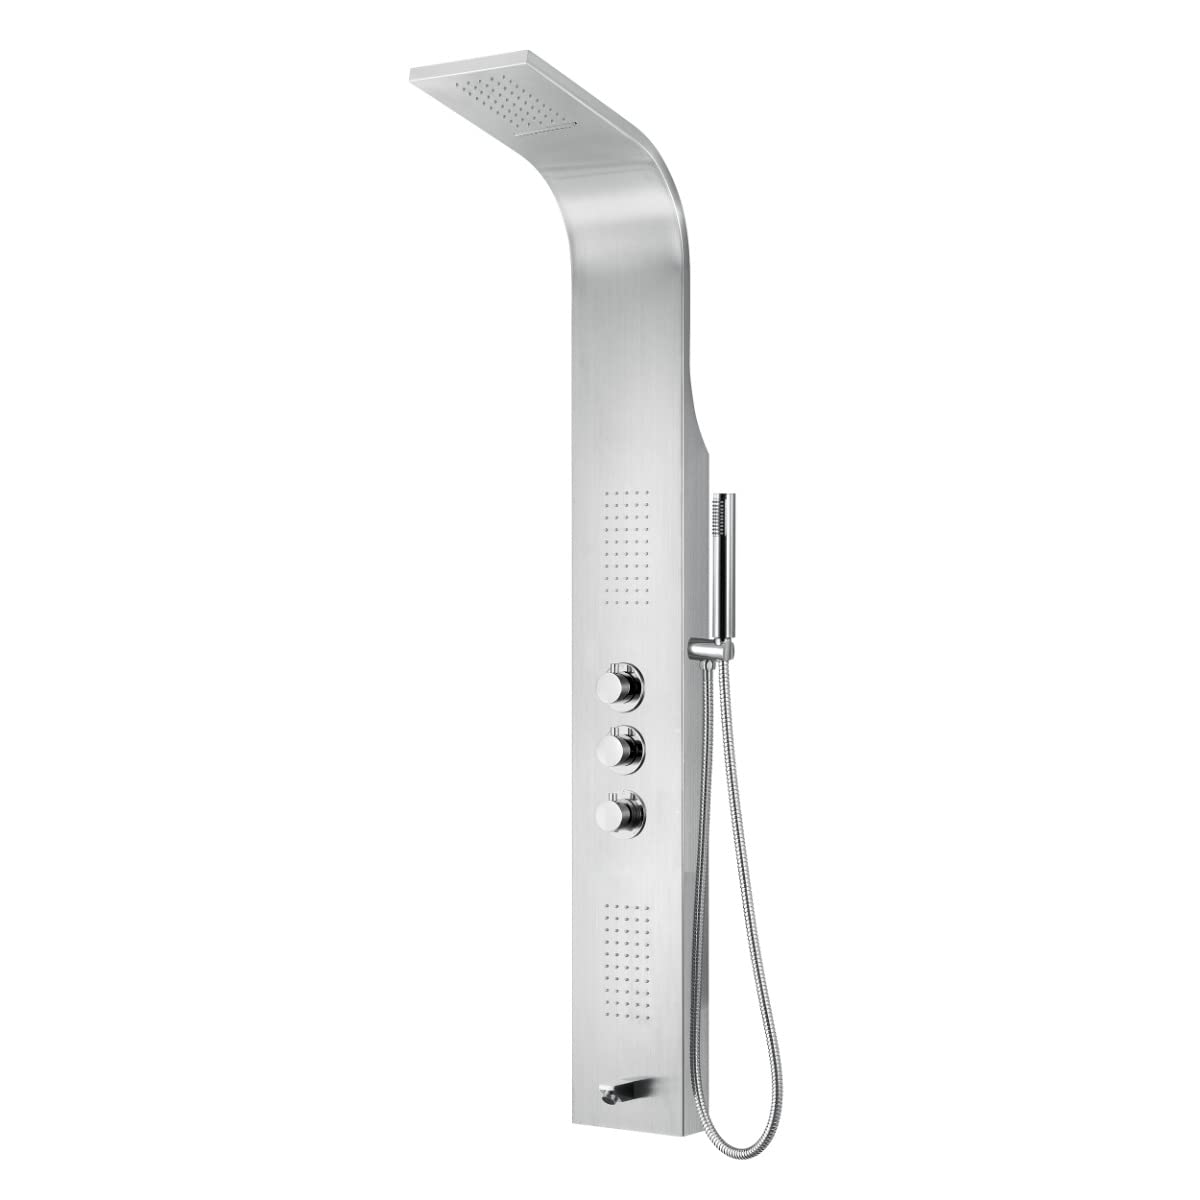
Figure 1: Klea Ahdet Thermostatic Shower Panel. This image displays the complete shower panel unit, featuring a large overhead shower, a flexible handheld shower, and multiple integrated body jets. The panel has a sleek, modern design with a matte chrome finish, indicating its stainless steel construction.
2. Safety Instructions
Always observe the following safety precautions to prevent injury or damage to the product.
- Professional Installation: Installation should be performed by a qualified plumber in accordance with local plumbing and building codes.
- Water Temperature: The thermostatic mixer is designed to maintain a consistent water temperature. However, always test the water temperature with your hand before stepping into the shower, especially for children or elderly users, to prevent scalding.
- Water Pressure: Ensure your home's water pressure is within the recommended range for optimal performance. Consult a plumber if unsure.
- Hot Water Supply: Ensure the hot water supply is connected to the left inlet and cold water to the right inlet. Incorrect connection can lead to malfunction and potential scalding.
- Cleaning: Use only mild, non-abrasive cleaners. Harsh chemicals can damage the finish.
- Maintenance: Regularly check for leaks and wear. Do not attempt to repair internal components unless you are qualified.
3. Setup and Installation
This section outlines the steps for installing your Klea Ahdet Thermostatic Shower Panel. Ensure all necessary tools and components are available before beginning.
3.1. Pre-Installation Checks
- Verify that all parts listed in the packaging are present and undamaged.
- Ensure hot and cold water supply lines are accessible and correctly marked.
- Turn off the main water supply to the installation area.
- Gather necessary tools: drill, level, measuring tape, wrench, screwdriver, sealant tape.
3.2. Mounting the Shower Panel
- Marking: Position the shower panel against the wall at the desired height. Use a level to ensure it is straight. Mark the drilling points for the mounting brackets.
- Drilling: Drill holes at the marked points. Insert wall plugs (if required for your wall type).
- Securing Brackets: Attach the mounting brackets to the wall using screws. Ensure they are firmly secured.
- Panel Placement: Carefully hang the shower panel onto the mounting brackets.
3.3. Connecting Water Lines
- Hot Water: Connect the hot water supply line to the designated hot water inlet on the back of the shower panel (usually marked with red or 'H'). Use sealant tape on threads.
- Cold Water: Connect the cold water supply line to the designated cold water inlet (usually marked with blue or 'C'). Use sealant tape on threads.
- Tighten Connections: Hand-tighten all connections, then use a wrench to tighten an additional quarter turn. Do not overtighten.
3.4. Testing for Leaks
- Slowly turn on the main water supply.
- Inspect all connections for any signs of leaks. If leaks are detected, turn off the water supply, tighten the connection, and re-test.
- Once no leaks are present, the installation is complete.
4. Operating Instructions
Your Klea Ahdet Thermostatic Shower Panel offers multiple functions for a customized showering experience.
4.1. Temperature Control
- The lower knob controls the water temperature. Turn it clockwise for colder water and counter-clockwise for warmer water.
- A safety stop button (usually at 38°C / 100°F) prevents accidental scalding. To exceed this temperature, press and hold the safety stop button while turning the knob further.
4.2. Water Flow and Diverter
- The upper knob controls the water flow and diverts water between the different shower functions.
- Rotate the knob to select your desired water outlet:
- Overhead Shower: For a wide, drenching spray.
- Handheld Shower: For targeted rinsing and cleaning.
- Body Jets: For a massaging spray from the integrated jets.
- Turn the knob to the 'OFF' position to stop the water flow.
5. Maintenance
Regular maintenance will ensure the longevity and optimal performance of your shower panel.
5.1. Cleaning the Surface
- Clean the matte chrome finish regularly with a soft cloth and mild soap or a non-abrasive cleaner specifically designed for stainless steel or chrome.
- Do not use abrasive sponges, scouring pads, or cleaners containing harsh chemicals, acids, or ammonia, as these can damage the finish.
- Rinse thoroughly with clean water and dry with a soft cloth to prevent water spots.
5.2. Cleaning Nozzles and Jets
- The nozzles on the overhead shower, handheld shower, and body jets are often made of silicone for easy cleaning.
- To remove limescale buildup, gently rub the silicone nozzles with your finger or a soft brush.
- For stubborn deposits, a mild descaling solution (e.g., diluted vinegar) can be applied, but ensure it does not come into prolonged contact with the metal finish. Rinse thoroughly.
6. Troubleshooting
Refer to this section for common issues and their solutions. If the problem persists, contact a qualified plumber or customer support.
| Problem | Possible Cause | Solution |
|---|---|---|
| No water flow or very low pressure. |
|
|
| Water temperature is incorrect or fluctuates. |
|
|
| Leaks from connections. |
|
|
| No water from specific outlet (e.g., body jets). |
|
|
7. Specifications
| Feature | Detail |
|---|---|
| Brand | Klea |
| Model Number | 5430002645469 |
| Part Number | SZKL-960103 |
| ASIN | B09P43954S |
| Material | Steel (Stainless Steel) |
| Color | Silver |
| Finish Type | Matte Chrome |
| Handle Material | Steel |
| Mounting Type | Wall Mounting |
| Country of Origin | Germany |
8. Warranty and Support
For warranty information, technical support, or to purchase replacement parts, please contact your retailer or the manufacturer directly. Keep your proof of purchase for warranty claims.
Manufacturer: Klea
For further assistance, please refer to the contact information provided with your purchase or visit the official Klea website.