
Walfront Walfront-unknown
Walfront Infrared Thermometer Gun User Manual
Model: Walfront-unknown
1. Introduction
This manual provides instructions for the safe and effective operation of your Walfront Infrared Thermometer Gun. Please read this manual thoroughly before use and retain it for future reference.
The Walfront Infrared Thermometer is a non-contact temperature measuring device designed for industrial applications. It offers high precision, high repeatability, and a wide temperature measurement range.
2. Safety Information
WARNING: Laser Radiation. Do not stare into beam. Class II laser product.
- Do not point the laser directly at eyes or reflective surfaces.
- Do not use the device for medical purposes or human temperature measurement.
- Keep out of reach of children.
- Do not attempt to disassemble or modify the device.
- Ensure the device is used within its specified operating conditions.
3. Key Features
- High Performance: High precision, high energy level, and high repeatability.
- Adjustable Emissivity: Emissivity can be adjusted from 0.1 to 1.0 (default 0.95) for accurate measurements on various surfaces.
- Wide Temperature Range: Measures from -50°C to 550°C (-58°F to 1022°F).
- LCD Display: Clear digital display for easy reading.
- Non-Contact Measurement: Safe and convenient for measuring hot, hazardous, or hard-to-reach objects.
4. Product Components
Familiarize yourself with the main parts of your infrared thermometer.

Image 4.1: The Walfront Infrared Thermometer Gun held in a user's hand, showing the display, trigger, and control buttons.

Image 4.2: Top view of the thermometer, highlighting the LCD display with a temperature reading of 32.0°C and an emissivity setting of 0.95.

Image 4.3: Front view of the thermometer, showing the infrared sensor and laser aperture, along with a diagram illustrating the distance-to-spot ratio (D:S=12:1).
5. Setup and Battery Installation
The device requires batteries for operation. Please follow these steps:
- Locate the battery compartment, usually at the base of the handle.
- Open the battery compartment cover.
- Insert the required batteries (typically 9V, not specified in data, assuming standard) according to the polarity indicators (+/-).
- Close the battery compartment cover securely.
The device is now ready for use.
6. Operating Instructions
6.1 Taking a Measurement
- Point the thermometer at the target object.
- Press and hold the trigger to activate the laser pointer and begin measurement. The temperature reading will appear on the LCD display.
- Release the trigger to hold the measurement on the display.

Image 6.1: The infrared thermometer in use, pointing at a hot industrial material, demonstrating its non-contact measurement capability.
6.2 Adjusting Emissivity
Emissivity (ε) is crucial for accurate temperature readings. Different materials have different emissivities. The default setting is 0.95, suitable for most organic materials and painted surfaces.
- Press the "SET" button to enter emissivity adjustment mode.
- Use the Up/Down arrows (often combined with the laser button or separate buttons) to adjust the emissivity value from 0.1 to 1.0.
- Press "SET" again or wait a few seconds for the setting to be saved.
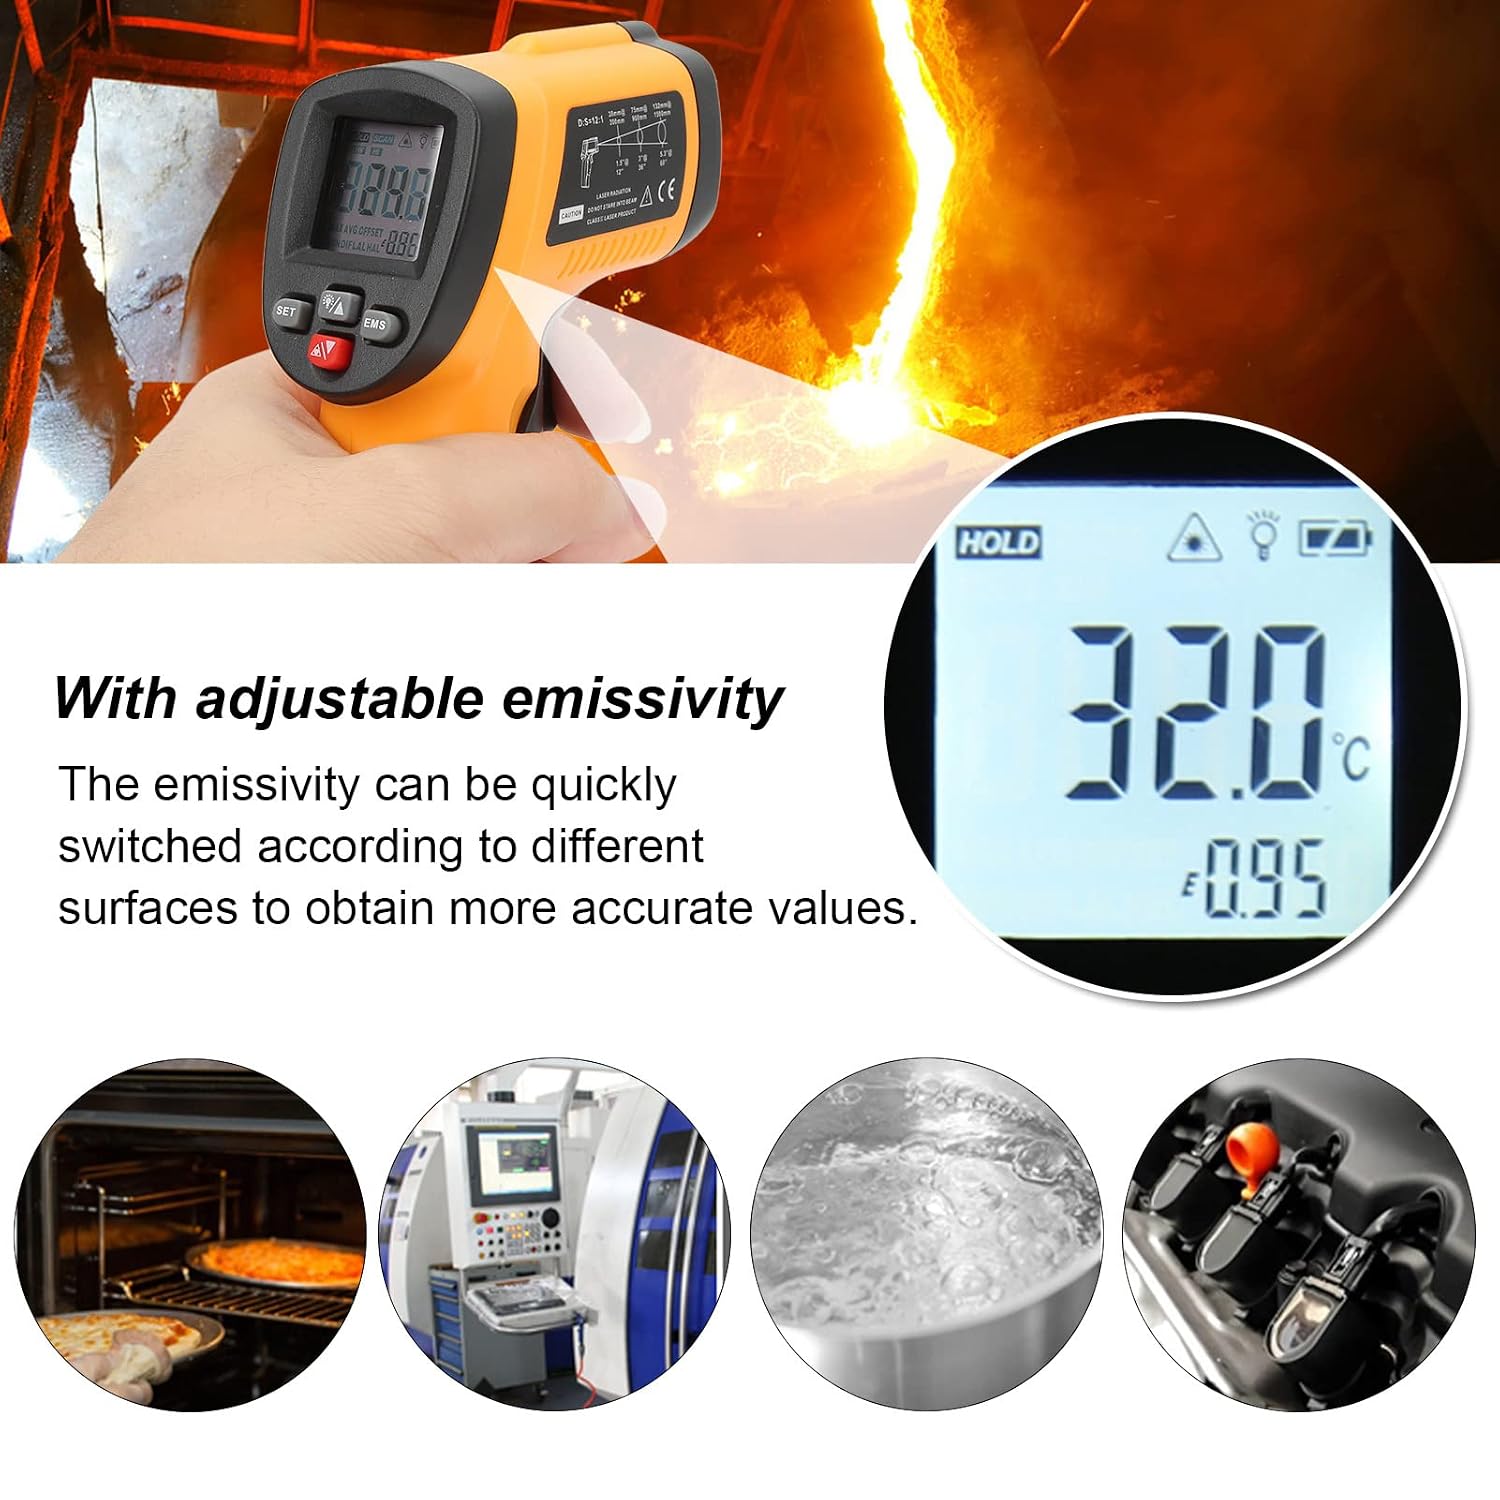
Image 6.2: The thermometer's display showing an adjustable emissivity setting. Surrounding images depict various applications like measuring oven temperature, industrial machinery, boiling water, and engine components.
6.3 Distance to Spot Ratio (D:S)
The D:S ratio indicates the size of the area being measured relative to the distance from the object. This model has a D:S ratio of 12:1, meaning that at 12 inches from the target, the measurement spot diameter is 1 inch.
- To ensure accurate readings, make sure the target area is larger than the spot size at your measurement distance.
- Measuring closer to the object will result in a smaller spot size and more precise measurement of a specific area.

Image 6.3: A diagram on the side of the thermometer illustrating the distance-to-spot ratio (D:S=12:1), showing how the measurement spot size increases with distance.
6.4 Unit Conversion (°C/°F)
The device supports both Celsius and Fahrenheit temperature units. Refer to the device buttons (often labeled "°C/°F" or similar) to switch between units.
7. Maintenance
- Cleaning: Use a soft, damp cloth to clean the device casing. Do not use abrasive cleaners or solvents.
- Lens Care: The infrared lens is the most delicate part. Clean it gently with a soft cloth or cotton swab and rubbing alcohol, or lens cleaner. Avoid touching the lens directly.
- Storage: Store the thermometer in a dry, cool place, away from direct sunlight and extreme temperatures.
- Battery Replacement: Replace batteries when the low battery indicator appears on the display to ensure accurate readings.
8. Troubleshooting
| Problem | Possible Cause | Solution |
|---|---|---|
| No display/Device won't turn on | Dead or incorrectly installed batteries | Check battery polarity; replace batteries. |
| Inaccurate readings | Incorrect emissivity setting; lens obstruction; target too small or too far | Adjust emissivity; clean lens; ensure target is within D:S ratio. |
| Laser not working | Laser function disabled; device malfunction | Check if laser can be toggled on/off (if applicable); contact support if persistent. |
9. Specifications
| Feature | Detail |
|---|---|
| Model Number | Walfront-unknown |
| Temperature Range | -50°C to 550°C (-58°F to 1022°F) |
| Emissivity | Adjustable 0.1 to 1.0 (Default 0.95) |
| Distance to Spot Ratio (D:S) | 12:1 |
| Response Time | 500 milliseconds |
| Resolution | 0.1°C |
| Display Type | LCD |
| Special Features | High precision, Touch control, LCD display |
| Material | Plastic |
| Power Source | Battery (typically 9V) |
| Connectivity Technology | Infrared |
| Usage Environment | Outdoor (also suitable for indoor industrial use) |
| Manufacturer | Walfront |
| Country of Origin | China |
10. Warranty and Support
For warranty information or technical support, please refer to the documentation included with your purchase or contact Walfront customer service. Specific warranty details are not provided in this manual.
You can often find support information on the manufacturer's official website or through your retailer.
Ask a question about this manual
Ask about setup, troubleshooting, compatibility, parts, safety, or missing instructions. Manuals+ will review the question and use this page’s manual context to help answer it.