1. Important Safety Information
Please read this manual thoroughly before installing, operating, or performing maintenance on this appliance. Failure to follow these instructions may result in property damage, personal injury, or death. Keep this manual for future reference.
- Professional Installation: This appliance must be installed by a qualified professional in accordance with all local codes and ordinances.
- Gas Safety: Ensure proper gas supply and ventilation. Do not store or use gasoline or other flammable vapors and liquids in the vicinity of this or any other appliance.
- Hot Oil Hazard: Hot oil can cause severe burns. Exercise extreme caution when operating the fryer. Never move the fryer when oil is hot.
- Electrical Safety: Although this is a gas appliance, ensure any electrical connections (if applicable for controls) are properly grounded.
- Ventilation: Adequate ventilation is crucial to prevent the accumulation of combustion byproducts. Operate only under an approved exhaust hood.
- ETL Listed: This fryer is ETL approved for gas and sanitation, meeting USA requirements for food service use.
2. Product Overview
The Iron Range IRF-40 LPG is a commercial free-standing liquid propane gas fryer designed for demanding food service environments. It features a durable stainless steel construction and a 40-pound oil capacity, suitable for frying a variety of items.

Figure 2.1: Angled front view of the Iron Range IRF-40 LPG Commercial Fryer, showcasing its stainless steel exterior and included fry baskets.
Key Features:
- 40-Pound Capacity: Ideal for restaurants, bars, and pizzerias.
- Stainless Steel Construction: Resilient stainless steel front, sides, and flue riser for durability and easy cleaning.
- Millivolt Controls: Easy-to-use thermostat with a temperature range of 200°F to 400°F.
- Safety Features: Auto-reset high-limit control to prevent overheating.
- Included Accessories: Two nickel chrome wire mesh fry baskets with red plastic-coated handles and a double rod stainless steel basket hanger.
- Cool Zone: Integrated cool zone in the fry tank to extend oil life.
- Drain Valve: 1 ¼” ball-type, full-port drain for efficient oil management.
3. Setup and Installation
Proper installation is critical for safe and efficient operation. This appliance must be installed by a licensed gas technician.
3.1 Unpacking and Inspection
- Carefully remove the fryer from its packaging.
- Inspect the unit for any shipping damage. Report any damage to the carrier immediately.
- Ensure all components listed in the packing slip are present.
3.2 Caster Installation
The fryer includes a 5-inch caster kit (two with locks, two without). Attach the casters to the bottom of the fryer base. Place locking casters at the front for stability during operation.
3.3 Gas Connection
A licensed gas technician must connect the fryer to the liquid propane gas supply. Ensure the gas pressure is within the specified range for the appliance. A manual shut-off valve must be installed upstream of the appliance for safety.
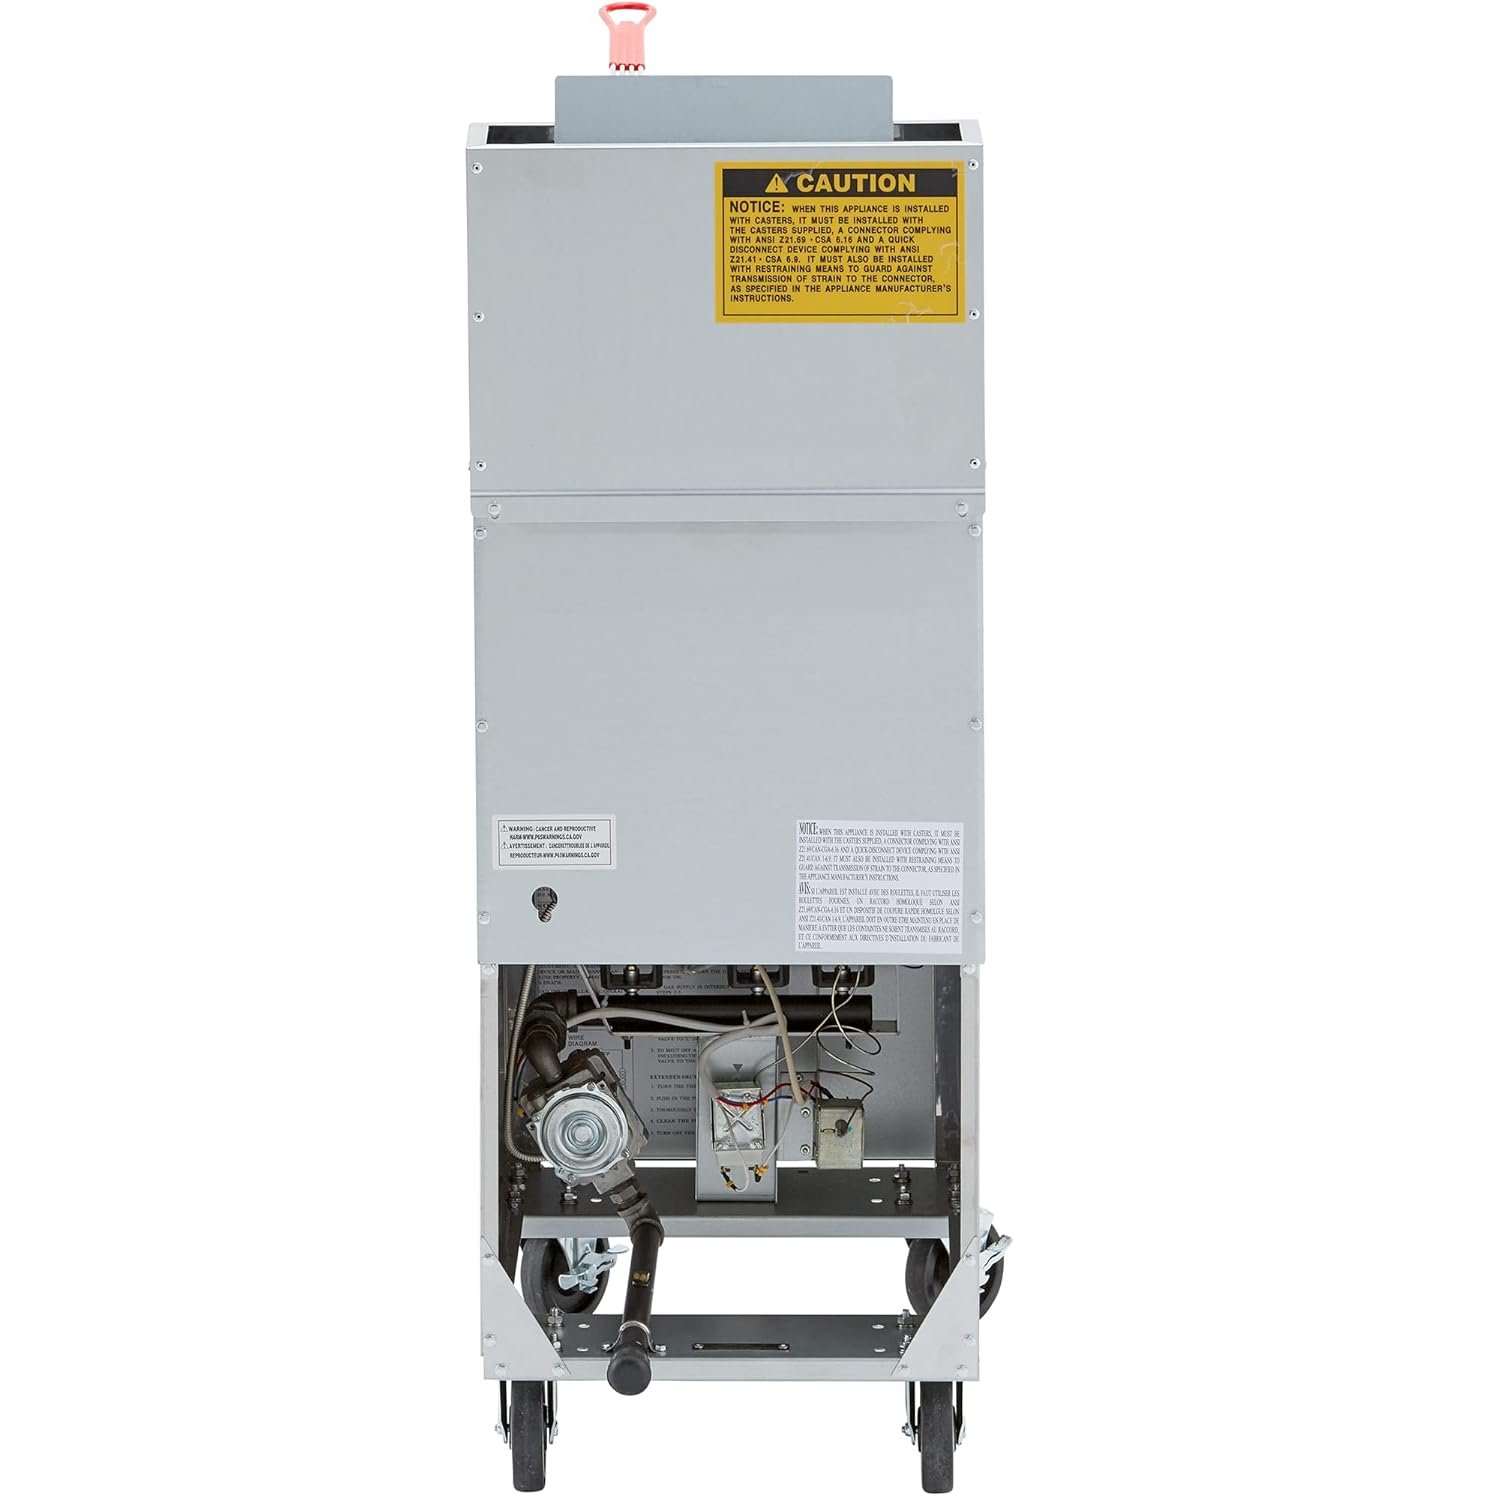
Figure 3.1: Rear view of the fryer, illustrating the location of gas connections and important warning labels regarding installation and operation.
3.4 Ventilation
Install the fryer under an adequate commercial exhaust hood system to remove heat, smoke, and grease-laden vapors.
3.5 Initial Cleaning
Before first use, clean the fry tank and all accessories with warm, soapy water. Rinse thoroughly and dry completely.
4. Operating Instructions
Follow these steps for safe and effective operation of your fryer.
4.1 Filling the Fry Tank
- Ensure the drain valve is closed.
- Fill the fry tank with cooking oil or shortening to the 'MIN' fill line, but not exceeding the 'MAX' fill line. The capacity is 40 pounds.
4.2 Ignition Procedure
- Open the gas supply valve to the fryer.
- Locate the pilot light assembly and ignition button/knob (typically behind the front access door).
- Follow the specific ignition instructions printed on the fryer's data plate or inside the access door. This usually involves pressing and holding a button while lighting the pilot, then turning a knob to the 'ON' position once the pilot is established.
- Once the pilot is lit, turn the main thermostat knob to the desired temperature setting (200°F - 400°F). The main burners will ignite.

Figure 4.1: Front access door opened, revealing the gas control valve, thermostat, and pilot light assembly for ignition and temperature adjustment.
4.3 Frying
- Allow the oil to reach the set temperature before adding food.
- Place food items into the fry baskets. Do not overload baskets, as this can lower oil temperature and result in soggy food.
- Carefully lower the baskets into the hot oil.
- Once food is cooked, raise the baskets and hang them on the integrated basket hanger to drain excess oil.
4.4 Shutdown Procedure
- Turn the thermostat knob to the 'OFF' position.
- Close the main gas supply valve to the fryer.
5. Maintenance
Regular maintenance ensures optimal performance and extends the life of your fryer.
5.1 Daily Cleaning
- Oil Filtration/Replacement: After each day of use, or as needed, filter the cooking oil to remove food particles. For best results, replace oil regularly.
- Draining the Tank: Ensure oil is cooled to a safe temperature (below 100°F / 38°C). Open the 1 ¼” full-port drain valve to empty the tank.
- Tank Cleaning: Once drained, scrape any residue from the tank walls and bottom. Clean with a non-abrasive cleaner and warm water. Rinse thoroughly and dry. Pay attention to the cool zone area.
- Exterior Cleaning: Wipe down all stainless steel surfaces with a damp cloth and mild detergent. Dry immediately to prevent water spots.
5.2 Regular Inspection
- Periodically check gas connections for leaks (use a soapy water solution, never an open flame).
- Inspect the condition of the fry baskets and handles.
- Ensure casters are clean and roll freely, and locking casters function correctly.
6. Troubleshooting
This section addresses common issues you might encounter with your fryer.
| Problem | Possible Cause | Solution |
|---|---|---|
| Fryer not heating | No gas supply; Pilot light out; Thermostat setting too low; High-limit tripped | Check gas valve; Relight pilot; Adjust thermostat; Reset high-limit (allow to cool first) |
| Uneven heating | Improper oil level; Burner issues | Ensure oil is between MIN/MAX lines; Contact a qualified technician for burner inspection |
| Oil smoking excessively | Oil too old/contaminated; Temperature too high | Filter or replace oil; Reduce thermostat setting |
| Pilot light won't stay lit | Thermocouple issue; Gas pressure problem | Contact a qualified gas technician |
For issues not listed or if solutions do not resolve the problem, contact a qualified service technician.
7. Specifications
| Feature | Detail |
|---|---|
| Model Name | IRF-40 LPG |
| Brand | Iron Range |
| Product Dimensions | 30 x 15.5 x 45.5 inches |
| Item Weight | 169 Pounds |
| Oil Capacity | 40 Pounds |
| BTU | 90,000 BTU (3 x 30,000 BTU tubes) |
| Material | Stainless Steel |
| Temperature Range | 200°F - 400°F |
| Controls | 1 Millivolt Thermostat, Auto Reset High Limit |
| Certification | ETL Listed (Gas and Sanitation) |
| UPC | 768558340305 |
8. Warranty and Support
For warranty information, please refer to the documentation provided with your purchase or contact Iron Range Company directly. Ensure you retain your proof of purchase for any warranty claims.
For technical support or service inquiries, please contact the manufacturer or your authorized dealer.